GitLab Integration Introduction
Follow the instructions below to configure GitLab's integration with PractiTest.
Configuration
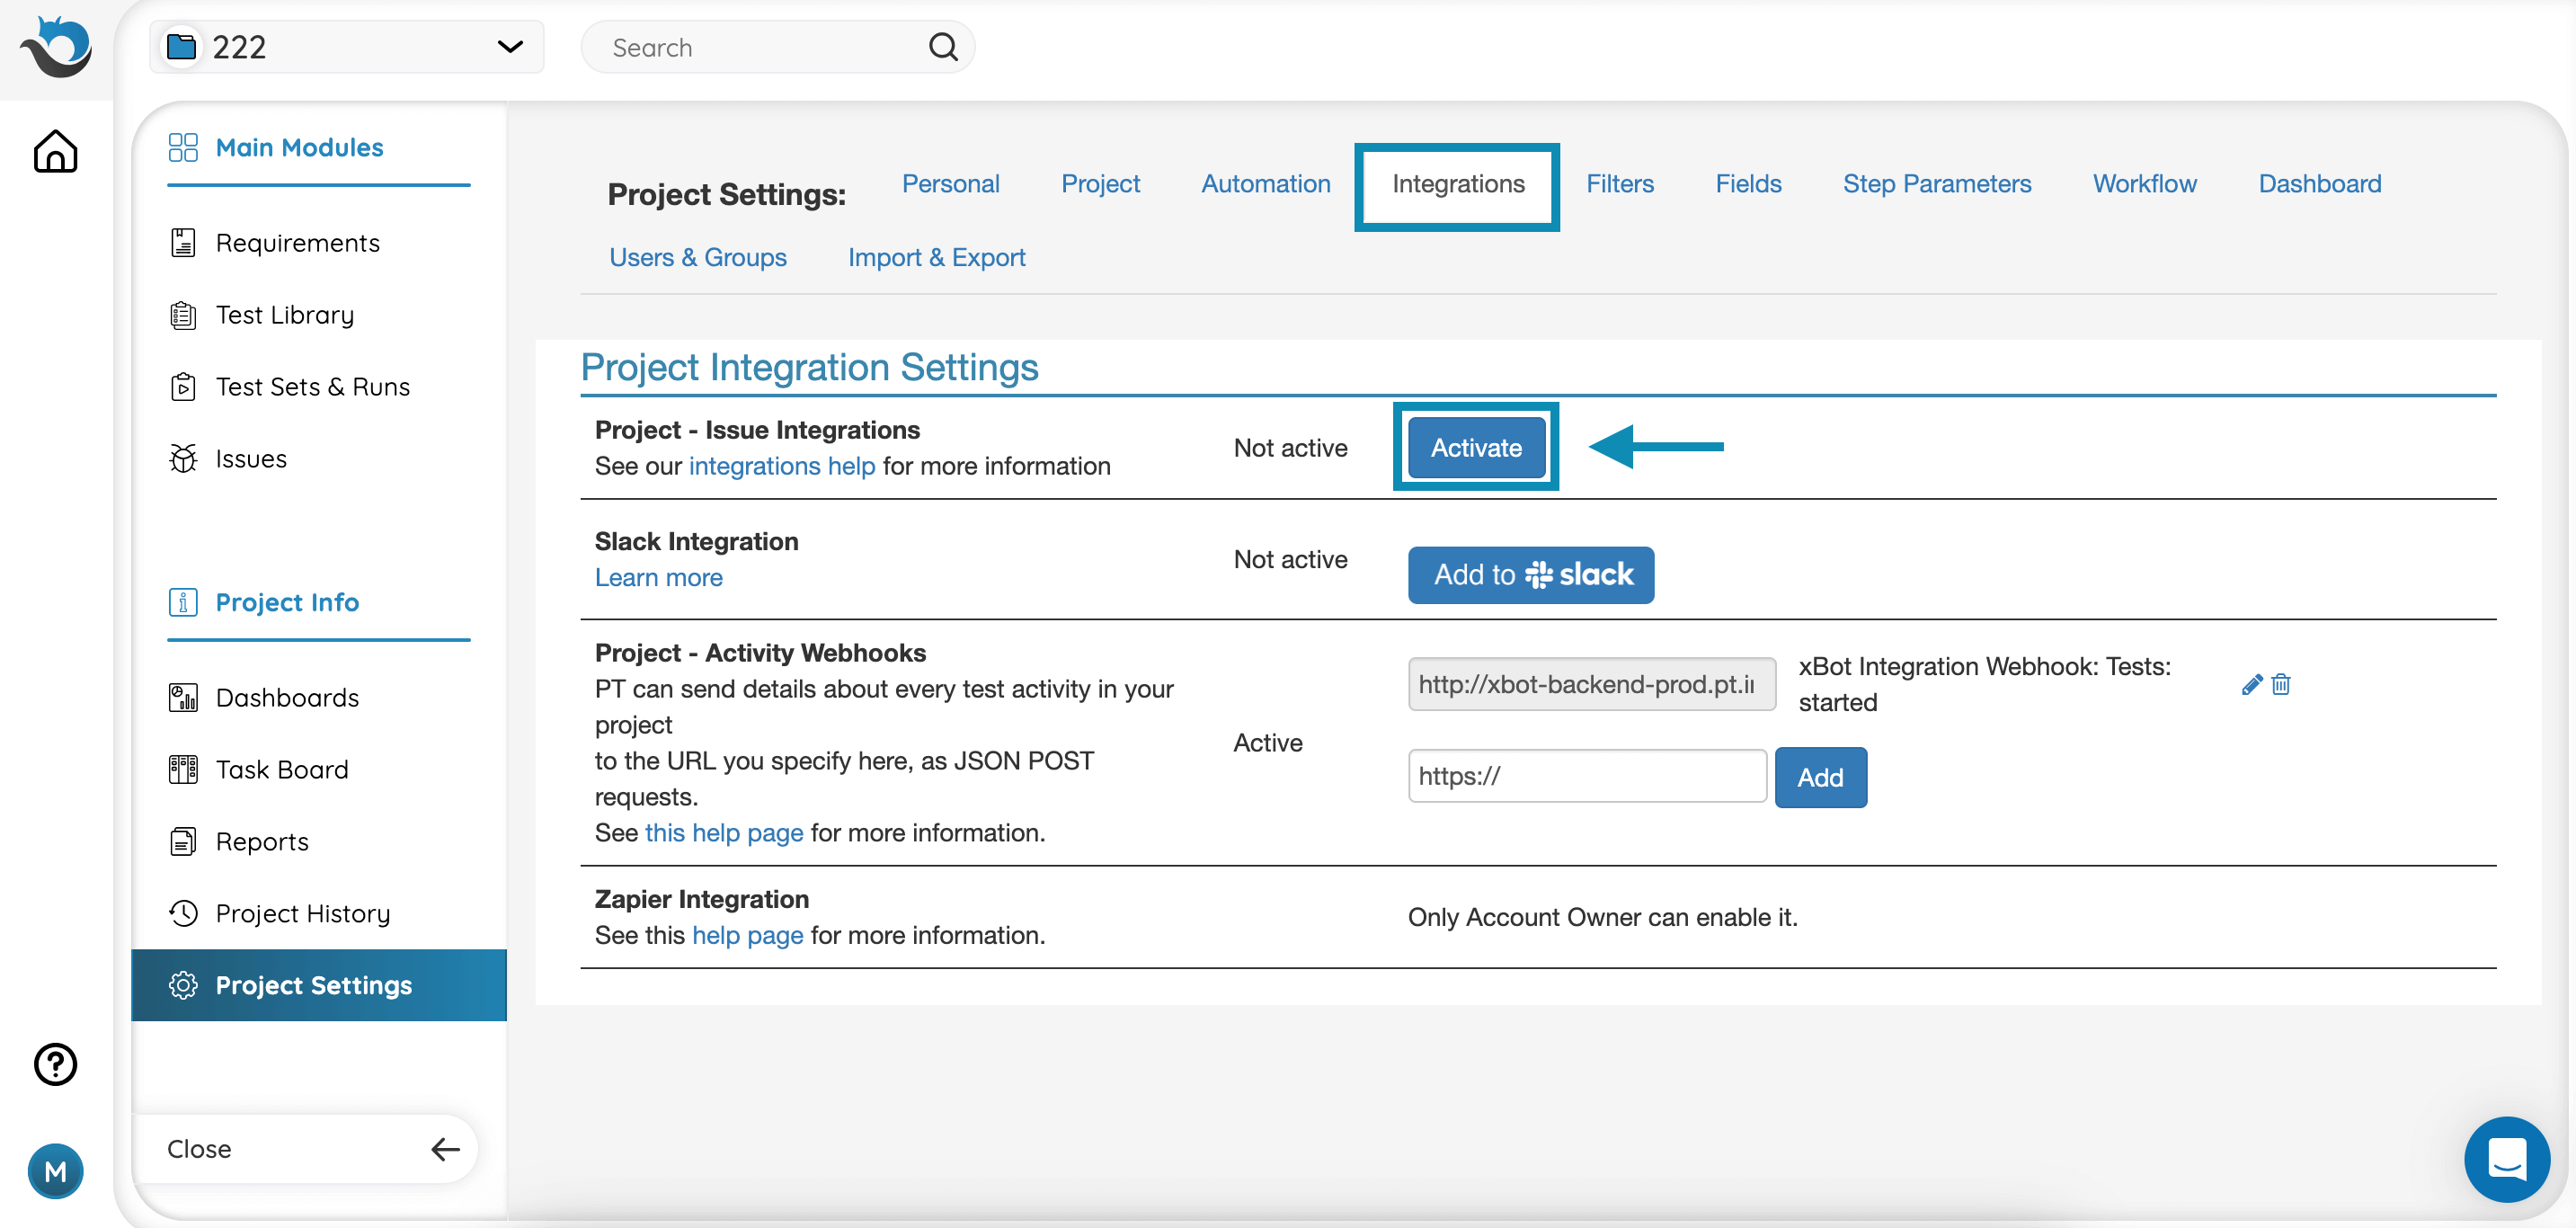
- In PractiTest, go to Project Settings > Integrations, and activate the Issue Integration by clicking the “activate” link.
2. Select “GitLab” from the Bugtracker dropdown list.

3. Once you’ve chosen GitLab, enter the URL Prefix that will be used by PractiTest to connect to your GitLab.
Note! This URL should have access to create bugs in GitLab.
The URL Prefix will probably have the following structure (which can differ sometimes): https://gitlab.com/user_name/projectName/
For example https://gitlab.com/practitest/gitlab_integration
Click the “Update issue integration” button to activate the changes.
Working with GitLab Integration:
- Run your tests normally.
When you encounter an issue enter press the Fail & Issue Icon.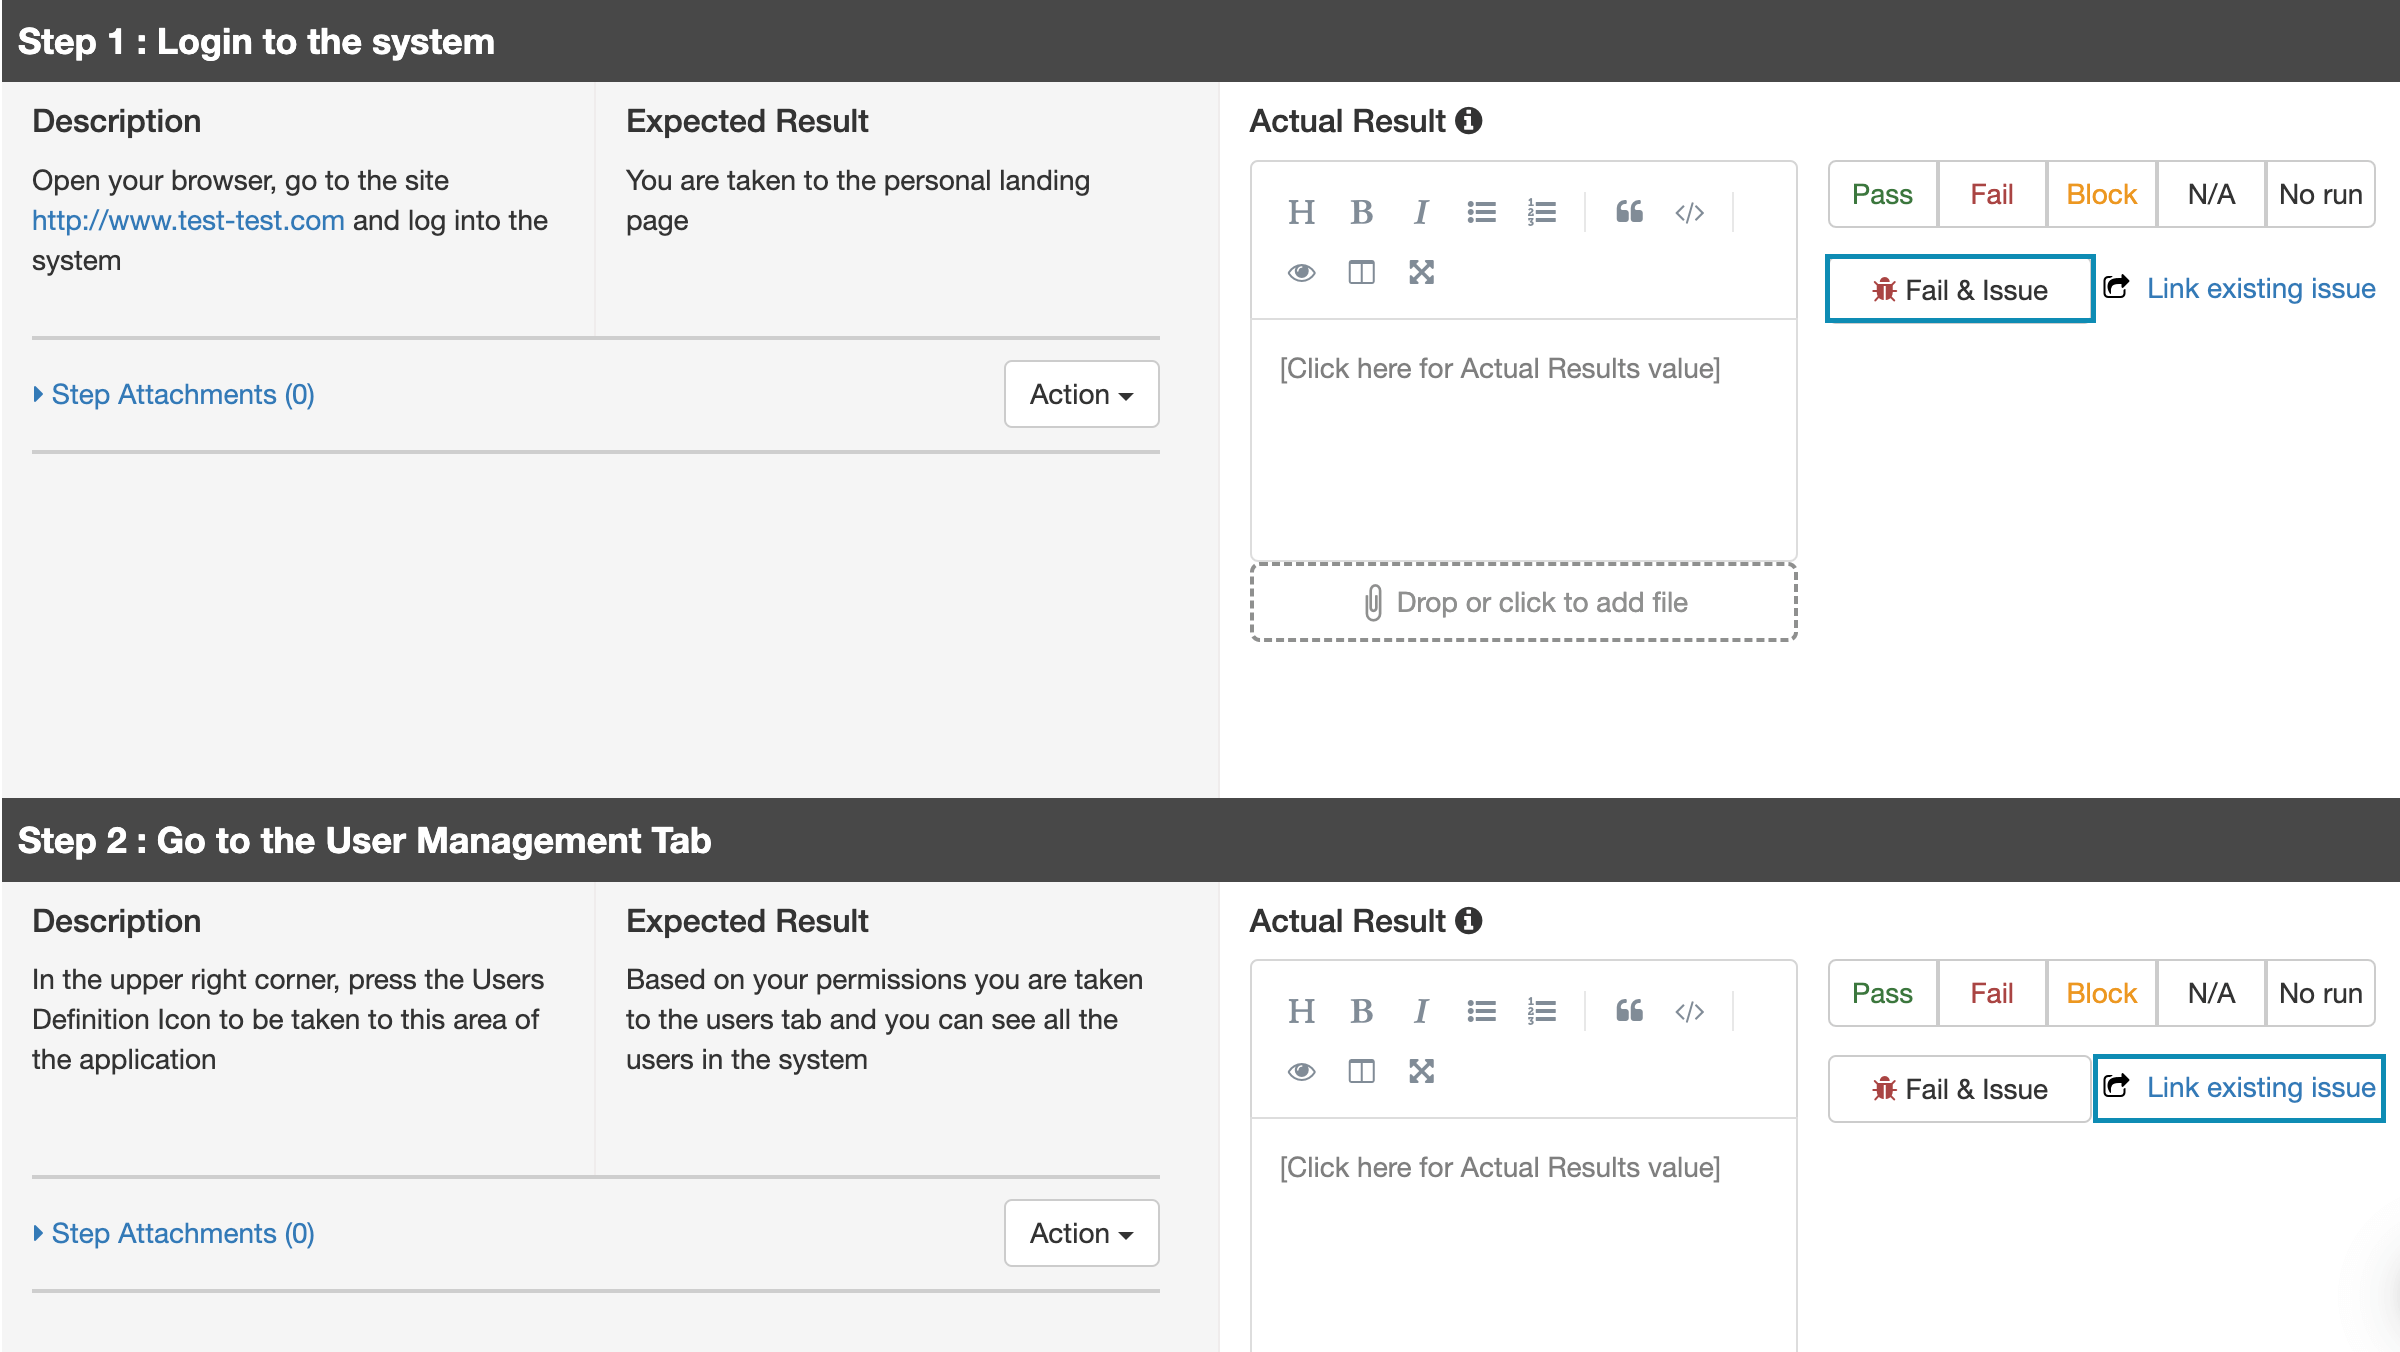
- A new browser tab or window (based on the configuration of your browser) will launch, opening your GitLab New Bug page. If you configured your browser to remember your username and password, it will even log directly into the screen where you report your issue.
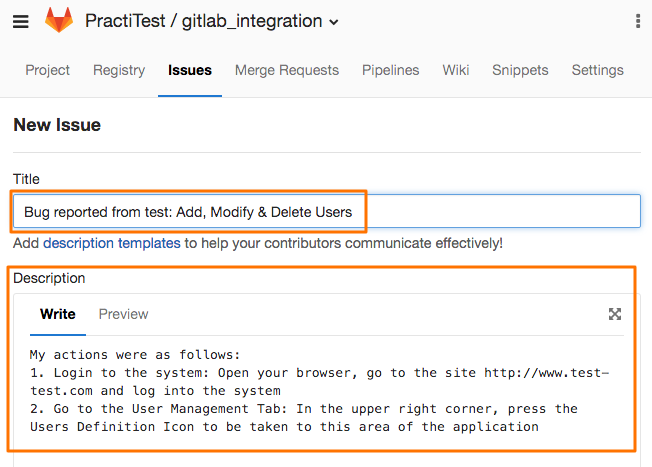
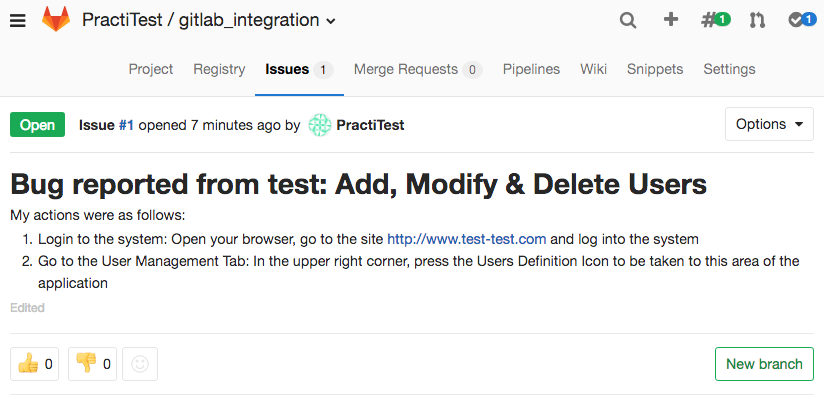
- After reporting the issue take note of the new Gitlab ID (#1 in this example) and go back to PractiTest, where you should enter this ID on the Issue ID field and press the Link existing issue button. You can enter multiple issues at once by separating them using comas or spaces.

- The GitLab Issue will be linked to the test step, and pressing the issue ID will open it in a new window on your Gitlab Instance.
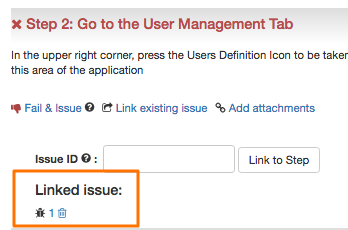
Click Linked Issue in TestRun to view and update Issue in Gitlab.
If you have any questions, errors, or issues, please contact PractiTest Support for assistance.