Milestones is the project management module in PractiTest enabling you to define high-level testing objectives with defined timeframes. It provides a quick and simple way to understand the overall status of your project and track its execution progress.
Good examples of Milestones could be:
- New release of different versions of your software
- Organize your testing efforts around agile sprints or iterations
- Different set of products you need to test
You can link to a specific Milestone all relevant testing artifacts that are part of its scope including Requirements, Test Sets, and Issues. This ensures that all components within the milestone’s scope are easily accessible and manageable.
Milestones
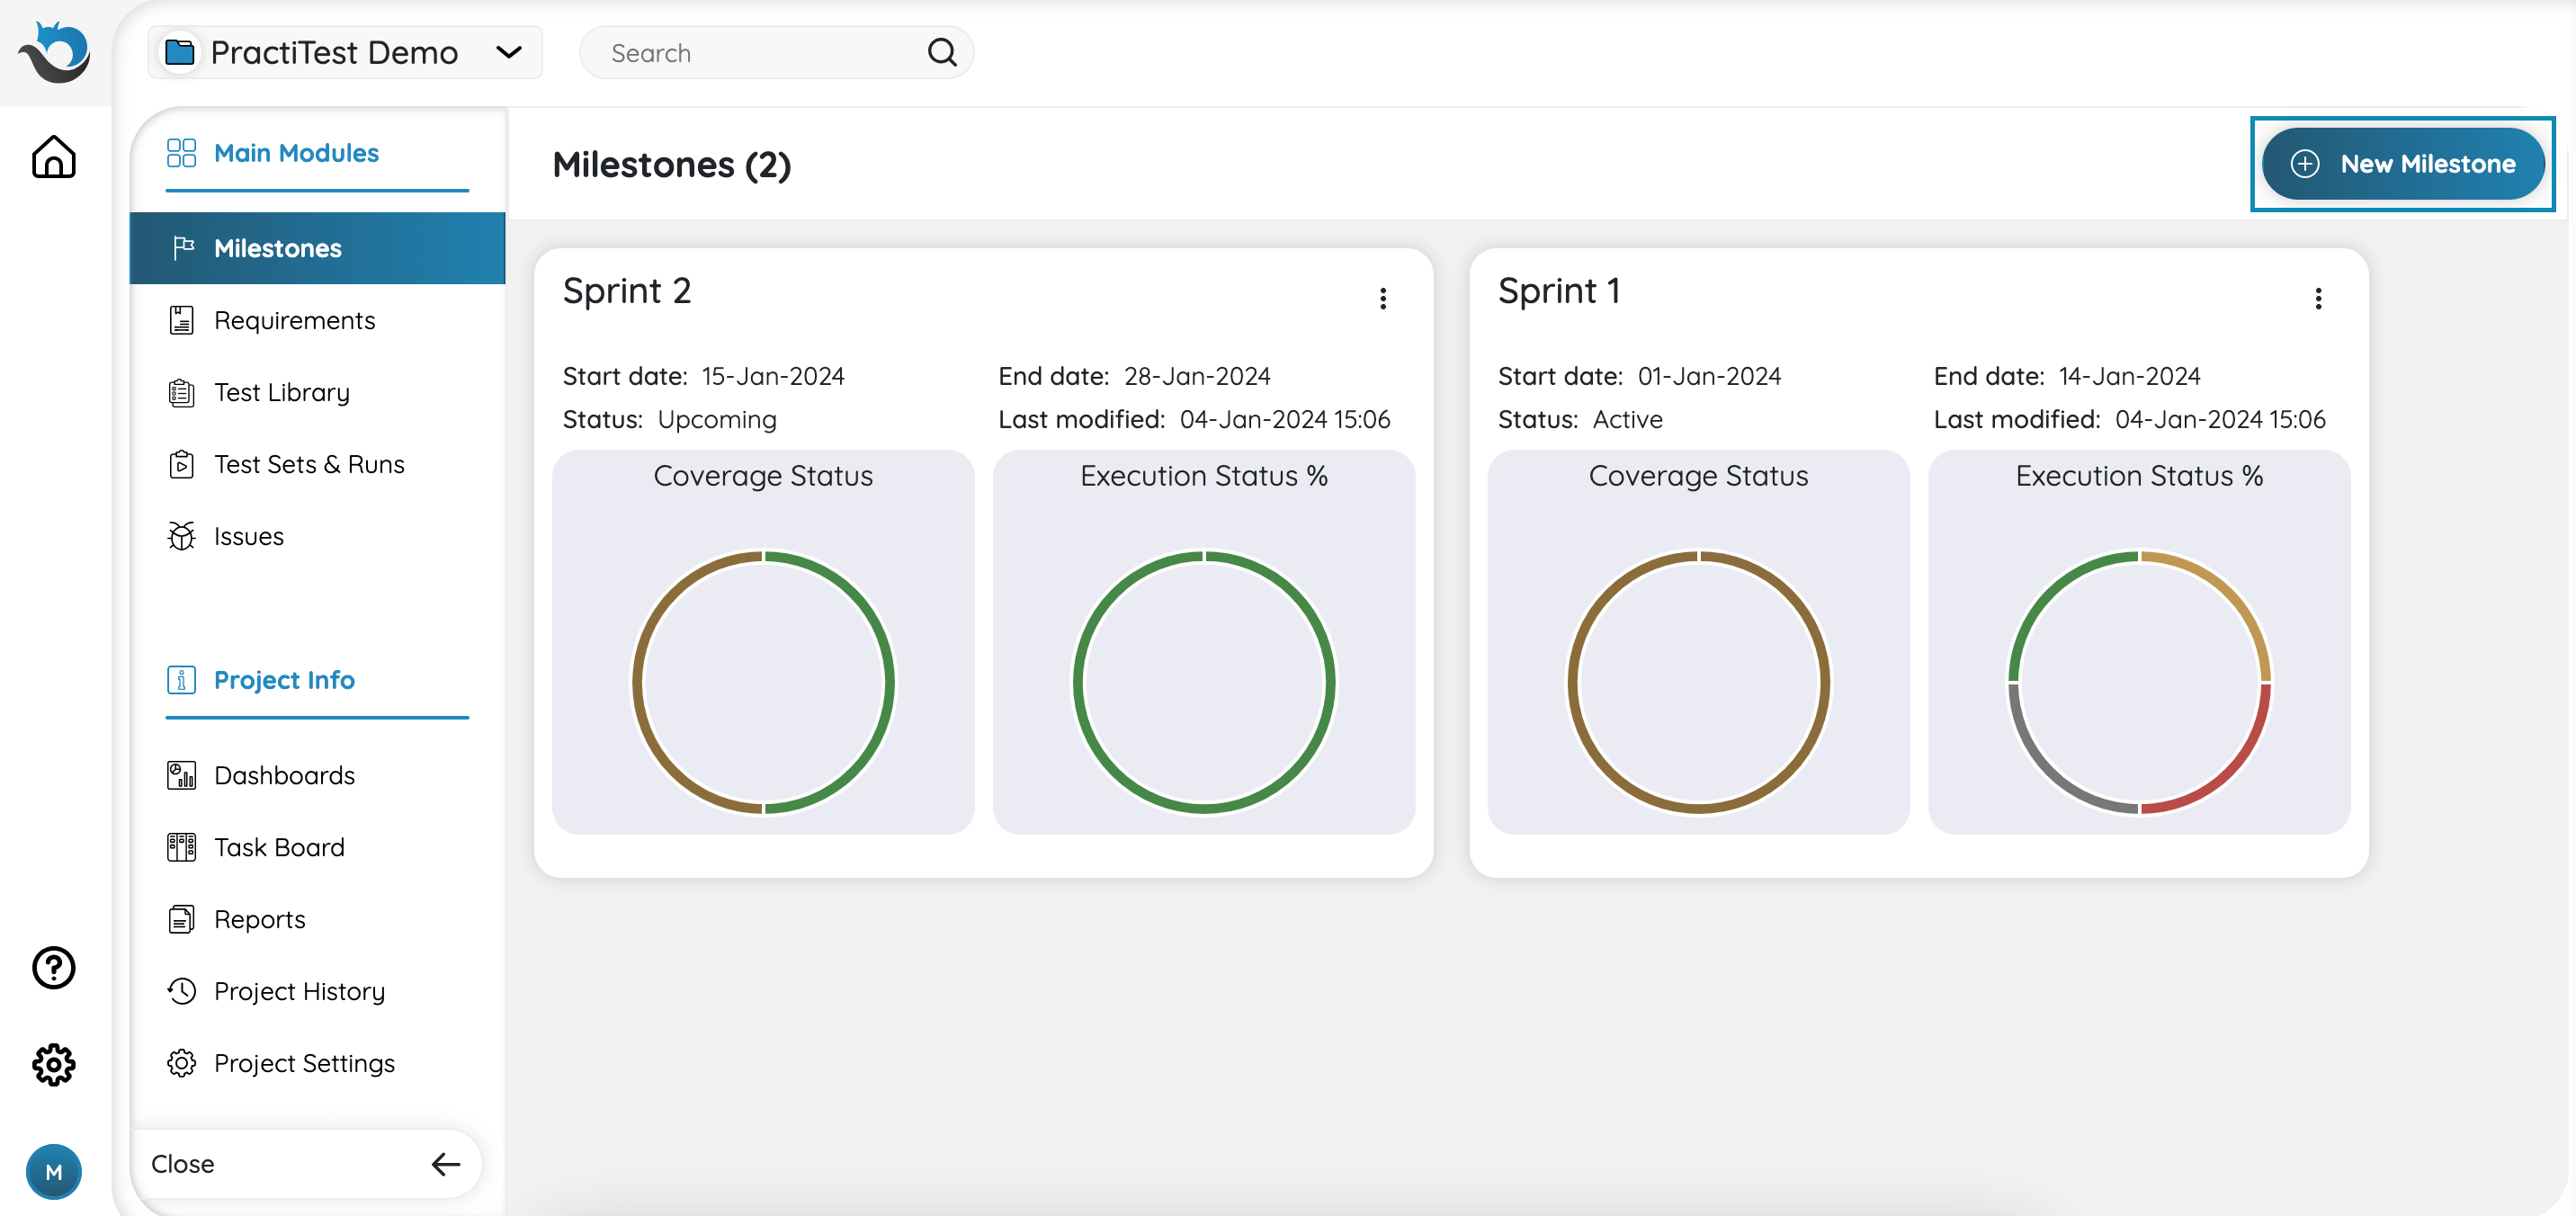
The Milestones Module is located at the top of the left-side navigation bar. When entering the module, you’ll find the main screen displaying all your existing Milestones. Each Milestone is displayed in its own card with a brief overview of key information including Milestone name, Start and End date, Status, and Last modified date.
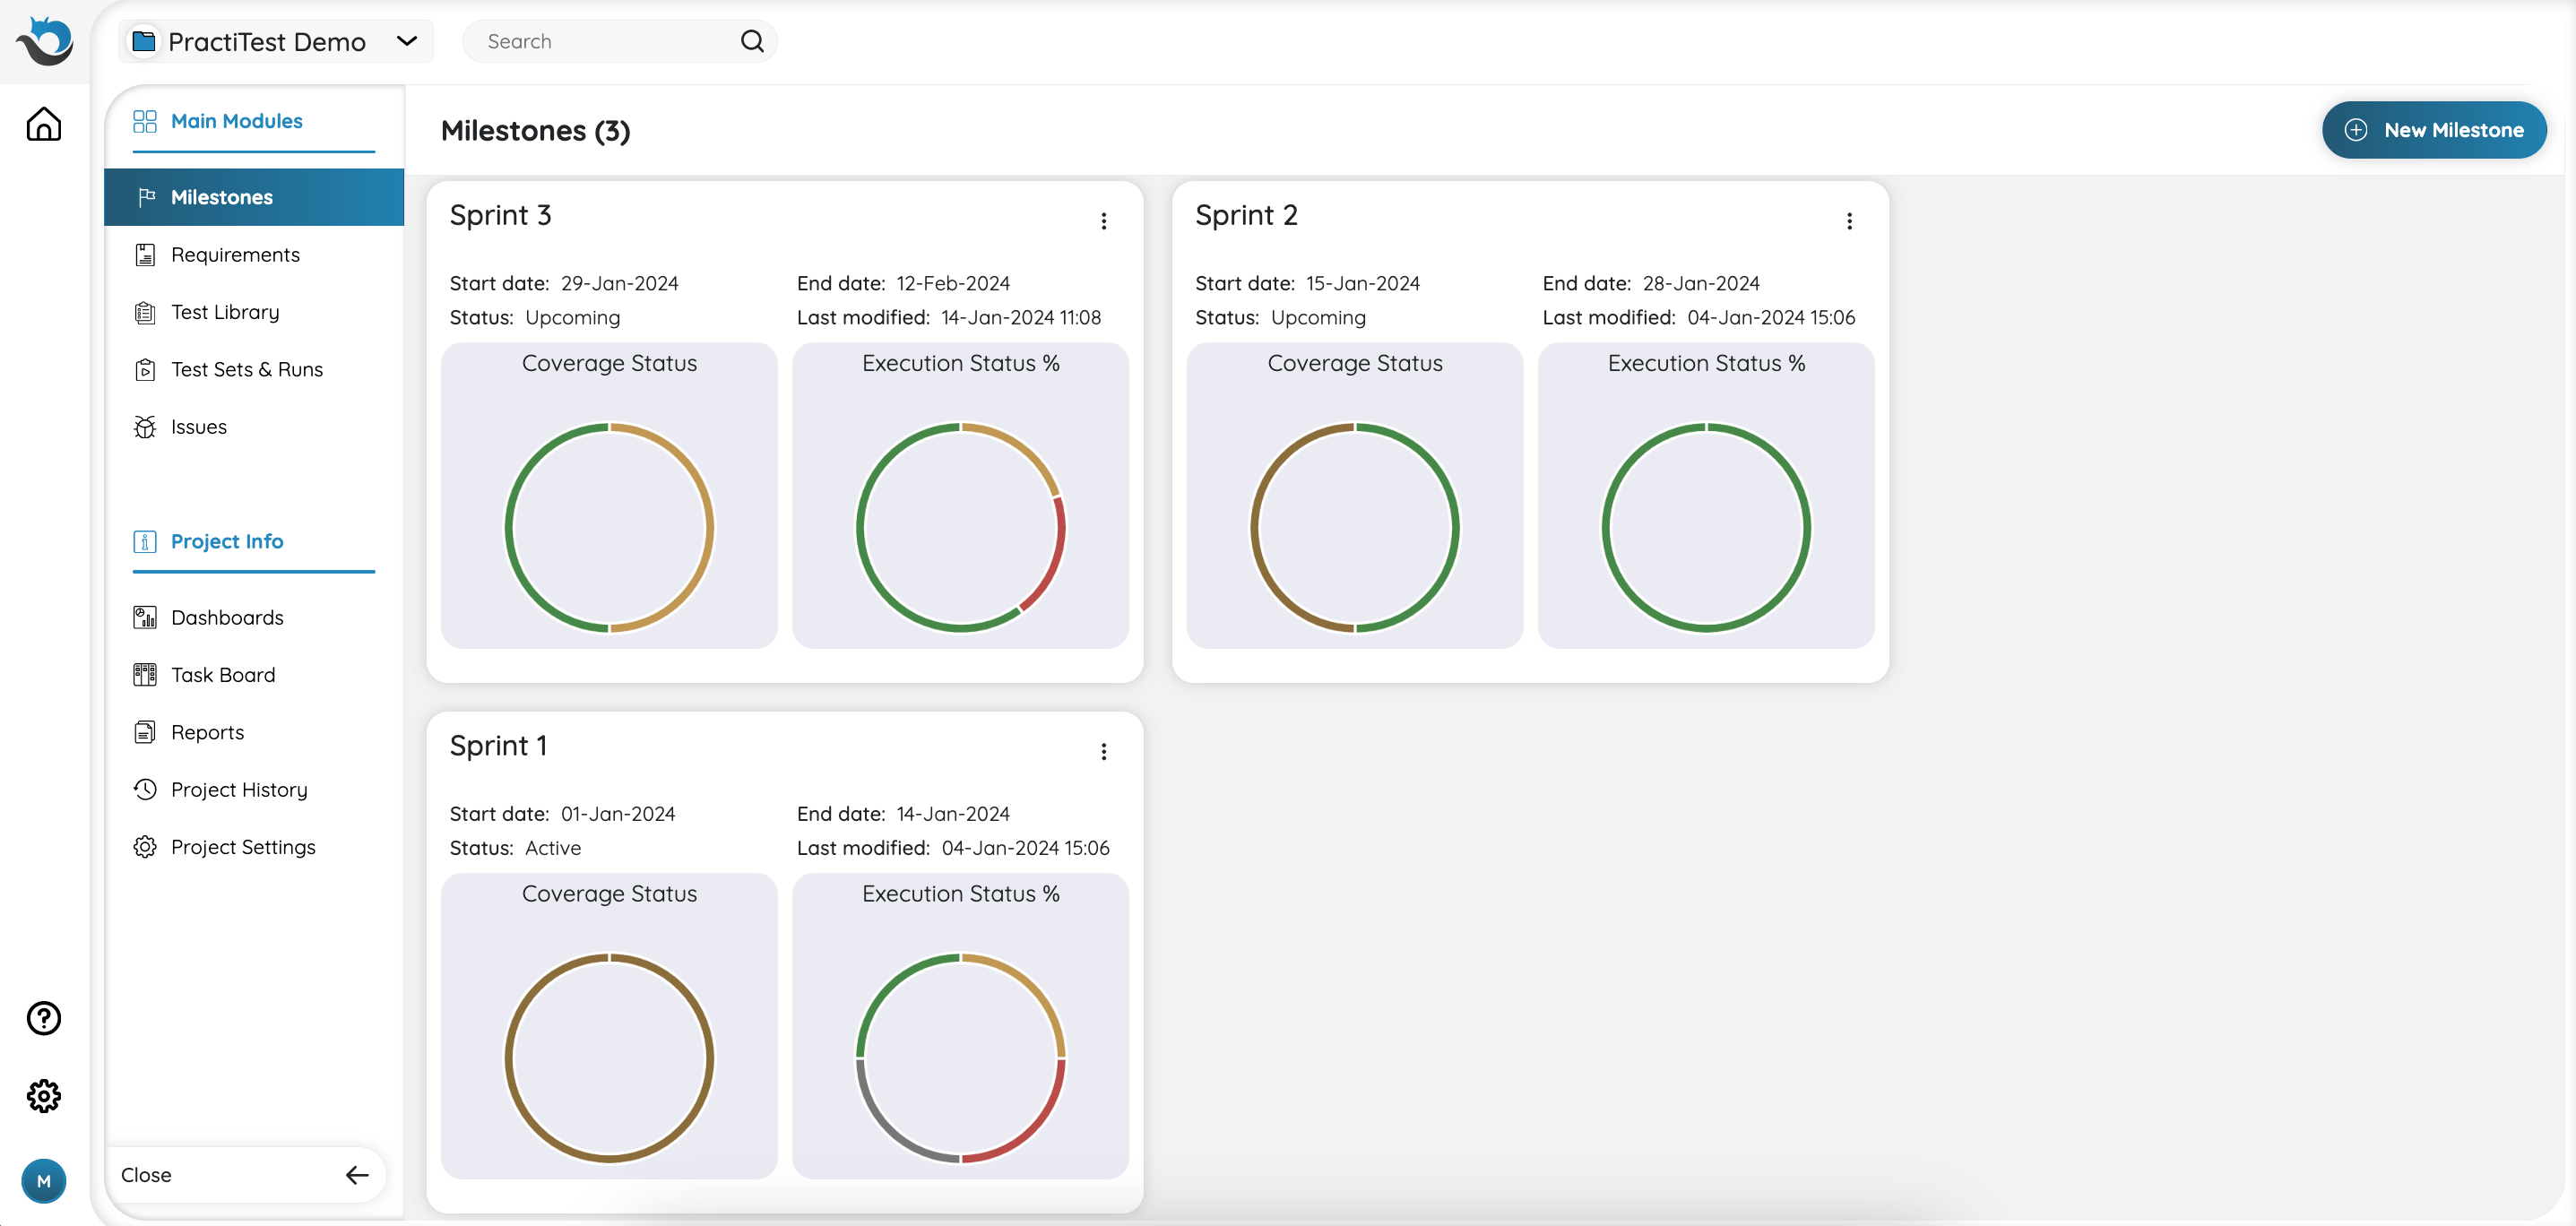
In every Milestone card there are 2 main graphs that aim to help you keep track of the Milestone’s progression:
-
Coverage Status - Indicates the coverage status of Requirements. When a Requirement is covered by at least one test, then its status is changed based on the linked test result. If the Requirement isn’t covered by any test, then the Requirement status is set to ‘NOT COVERED’.
-
Execution Status % - Displays the execution status of Test Runs that are associated with this specific Milestone.
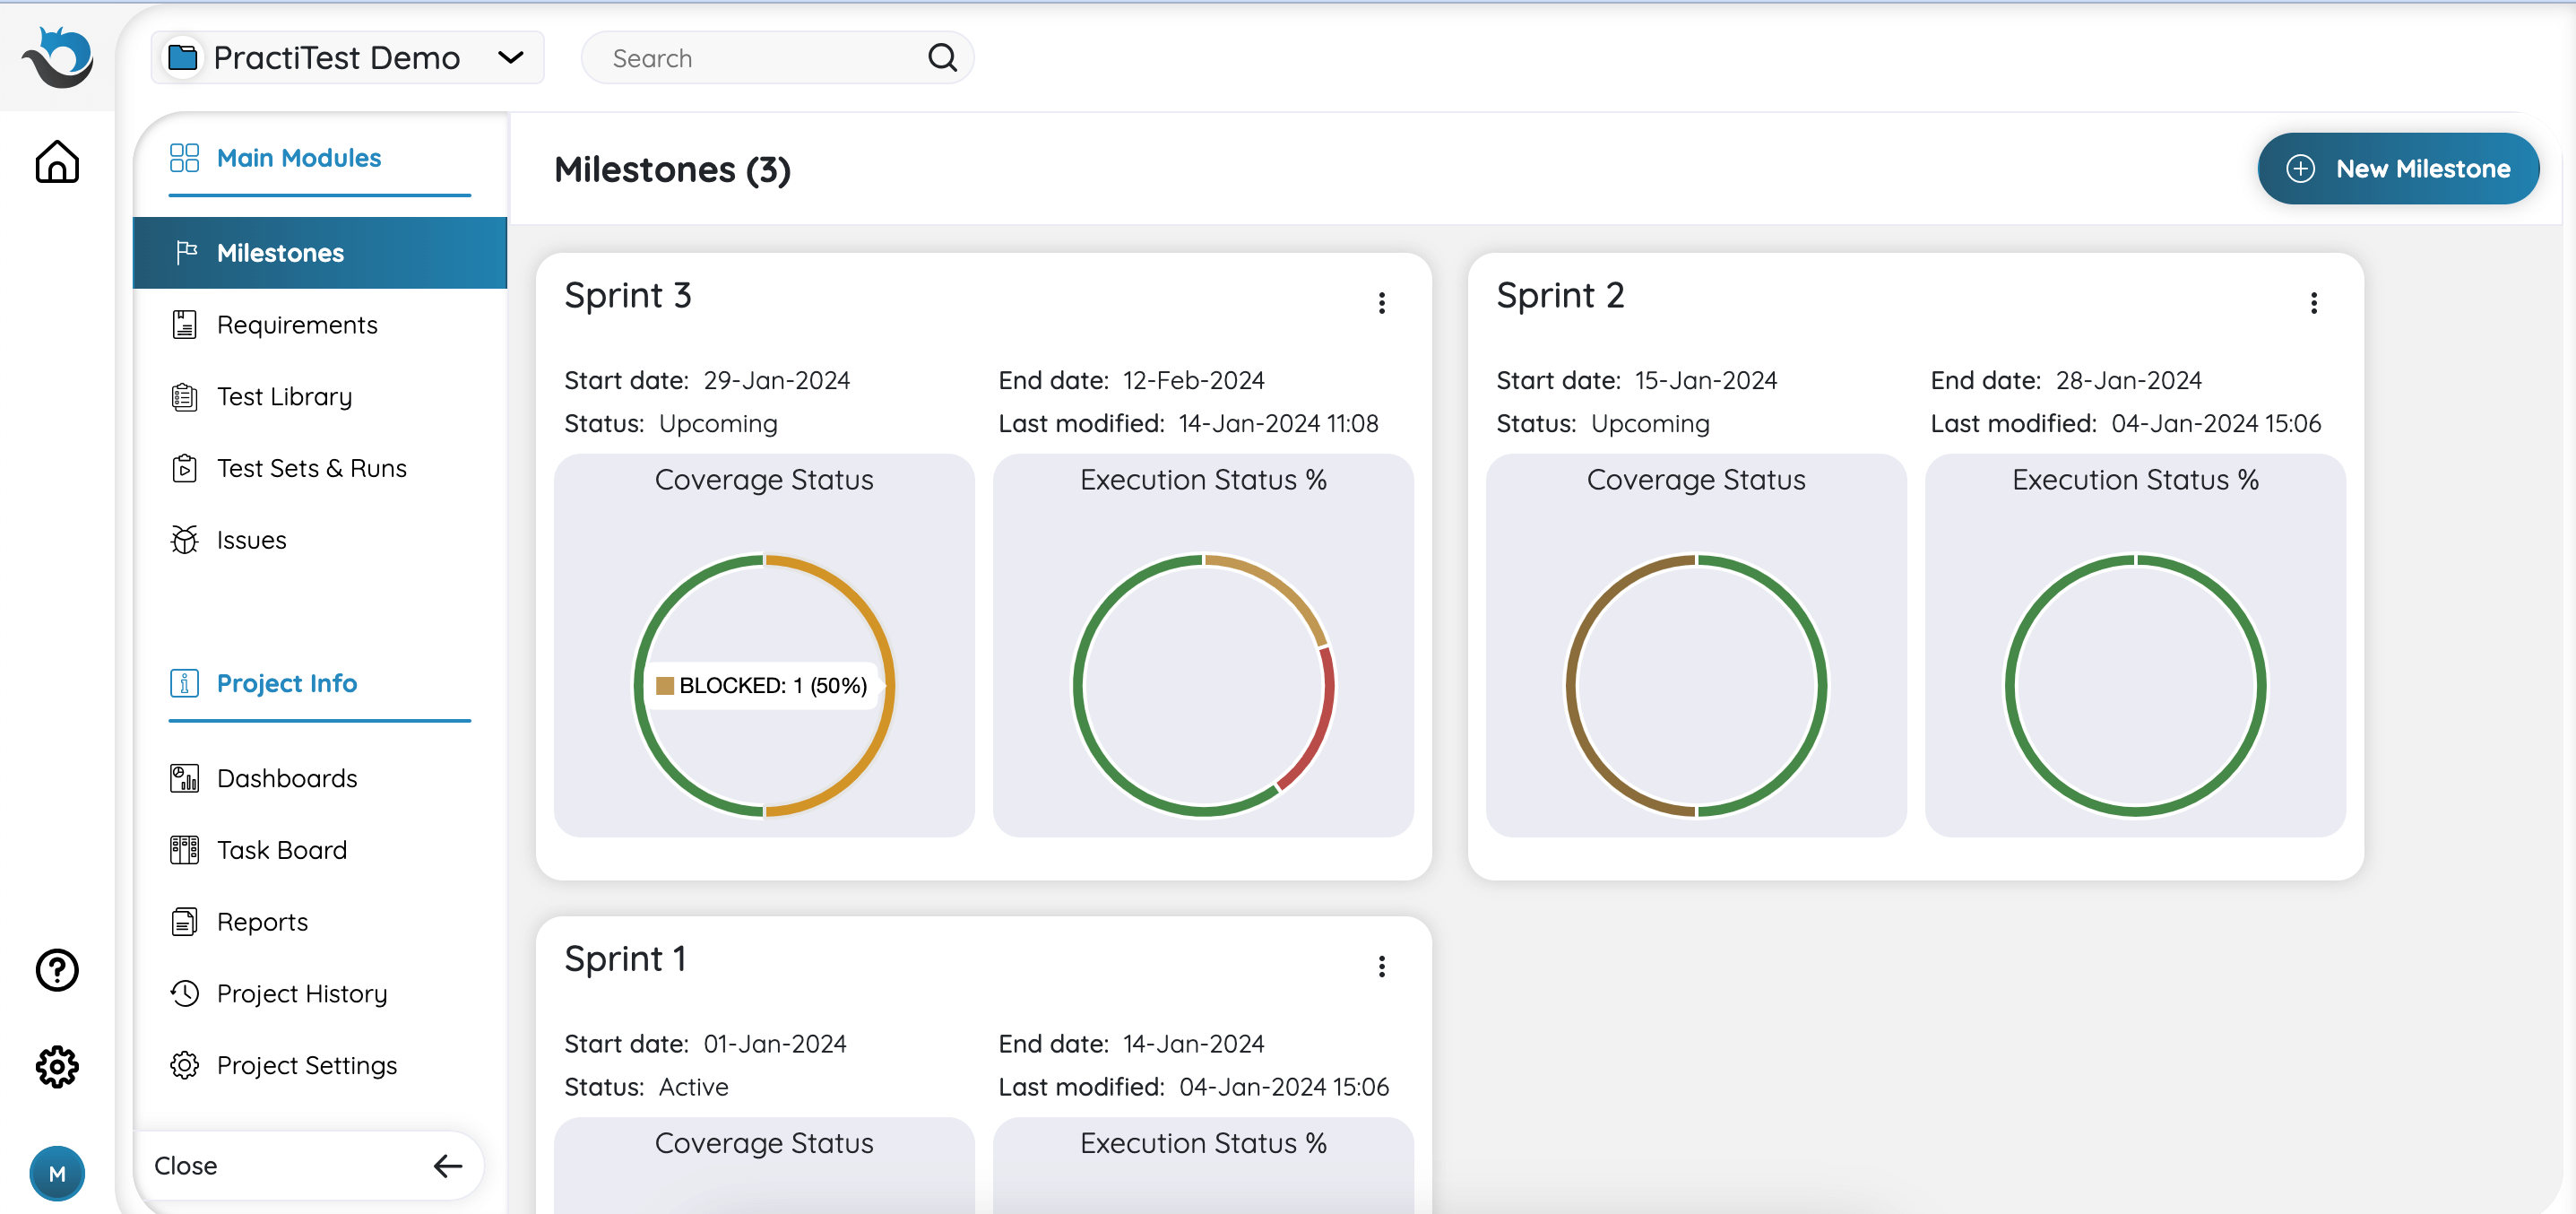
Hover over the statuses in the pie charts to view detailed information. In the Coverage Status graph, you’ll find the Requirements count associated with each status. Clicking on this graph will lead you to the ‘Requirements tab’ within the Milestone.
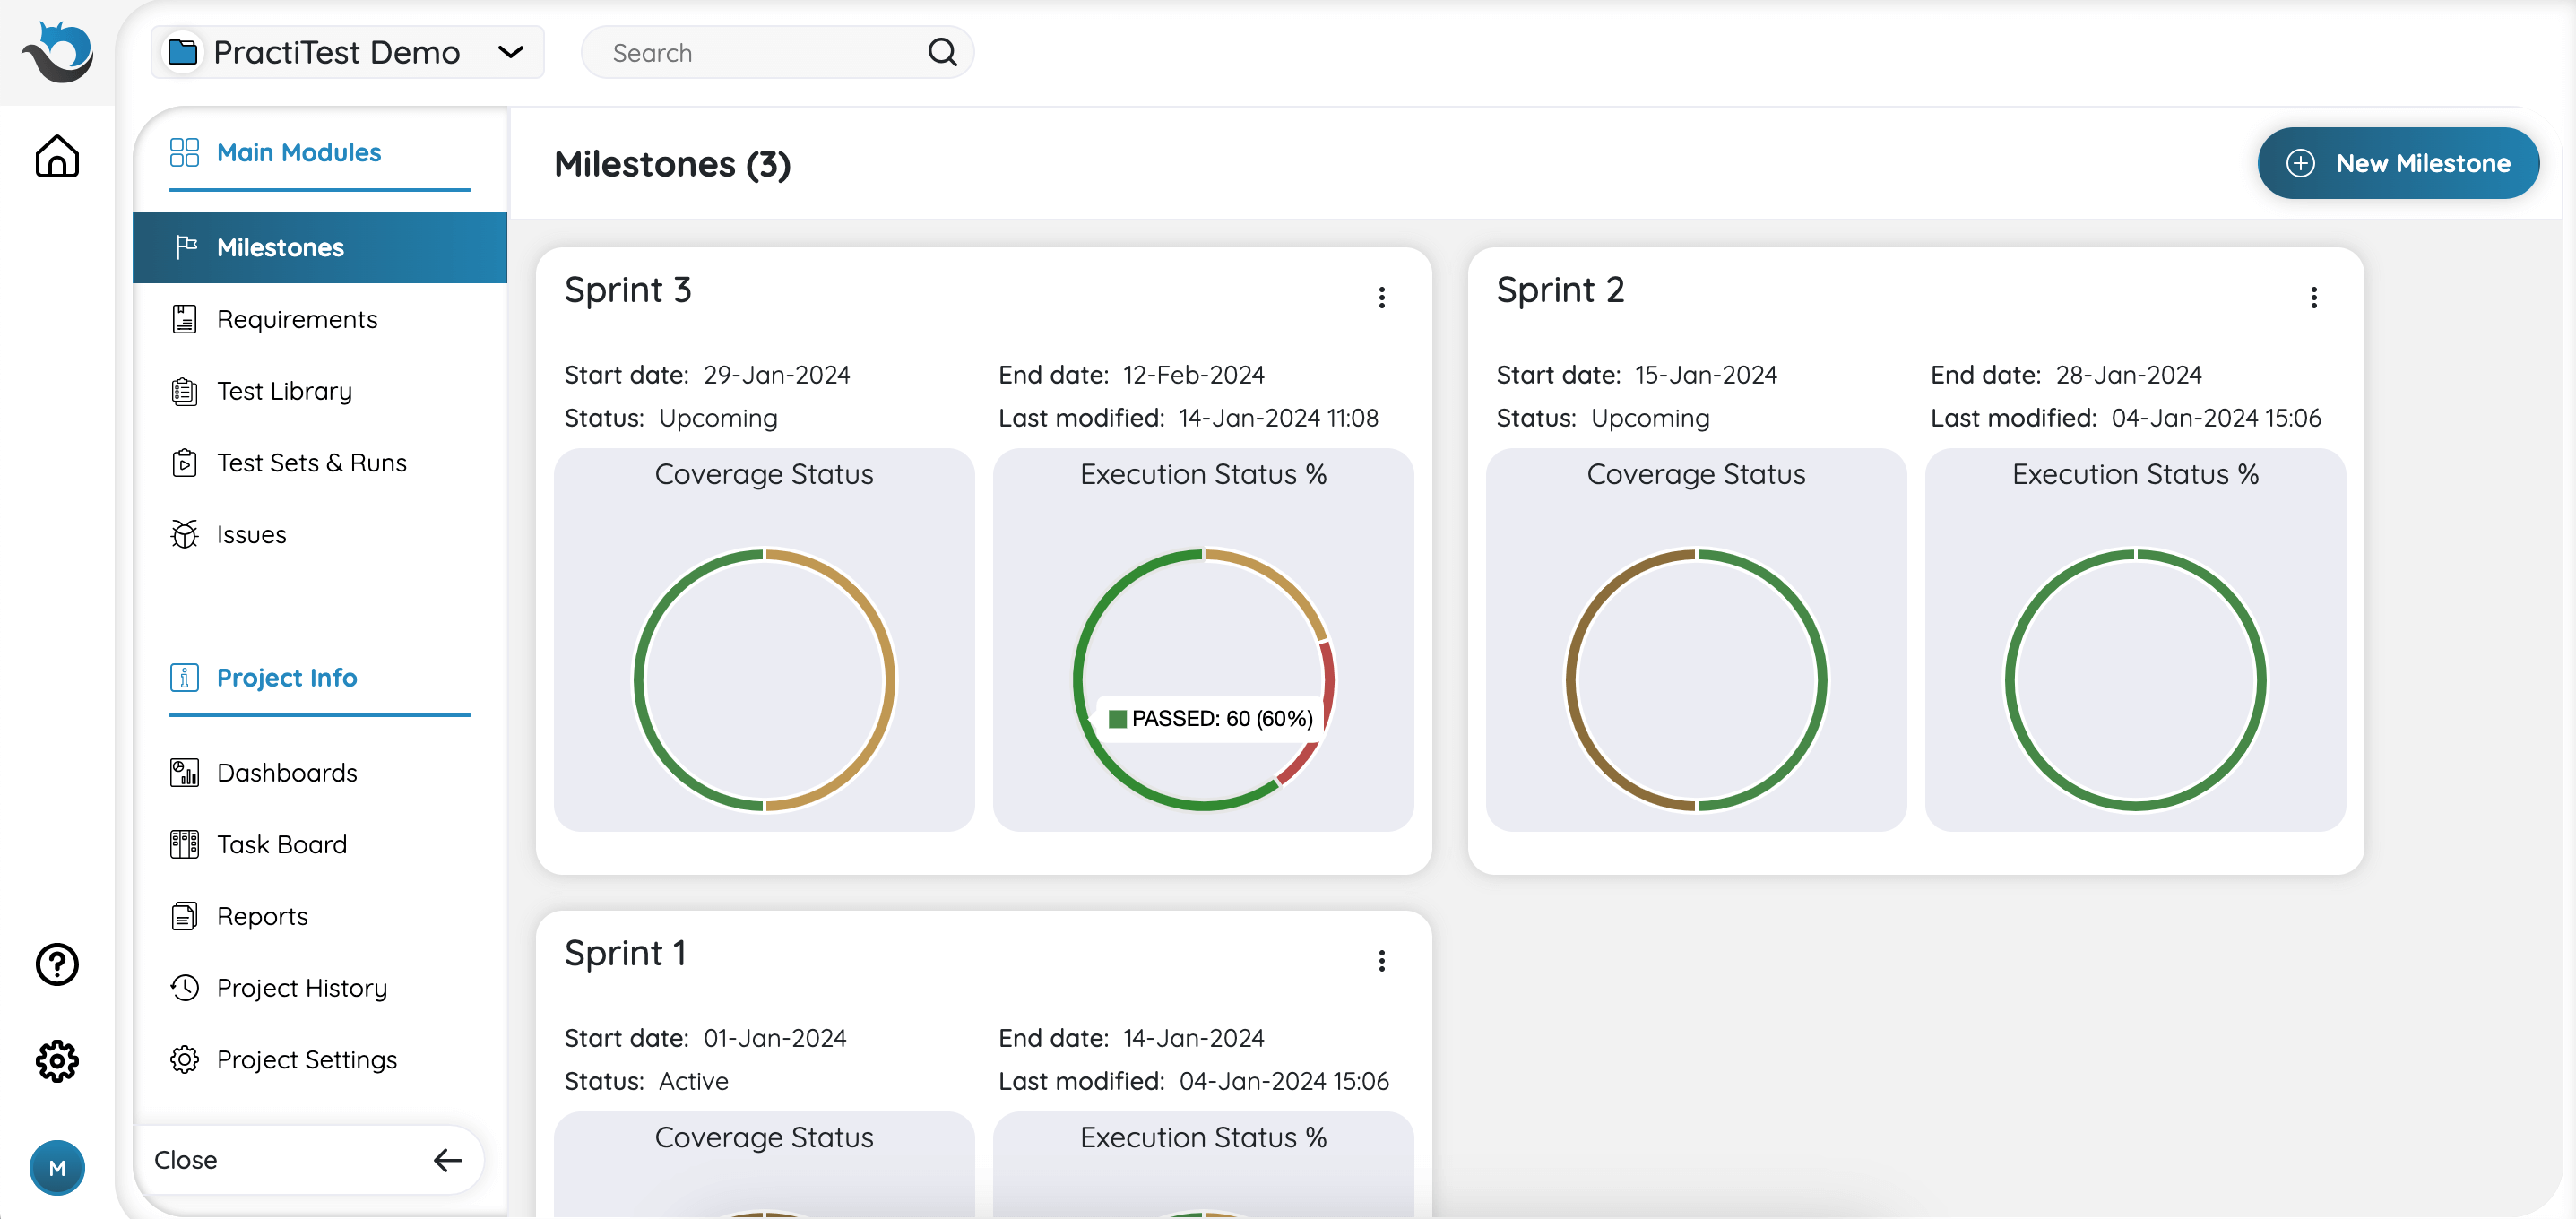
When hovering the Execution Status graph percentage you will see the percentage of Test Instances related to this specific status. Clicking on the Execution Status graph, will take you to the ‘Test Sets’ tab within the Milestone.
Create a New Milestone
To create a new Milestone, head to the Milestones module from the navigation bar. Then, click on the ‘New Milestone’ button at the top right-hand corner.
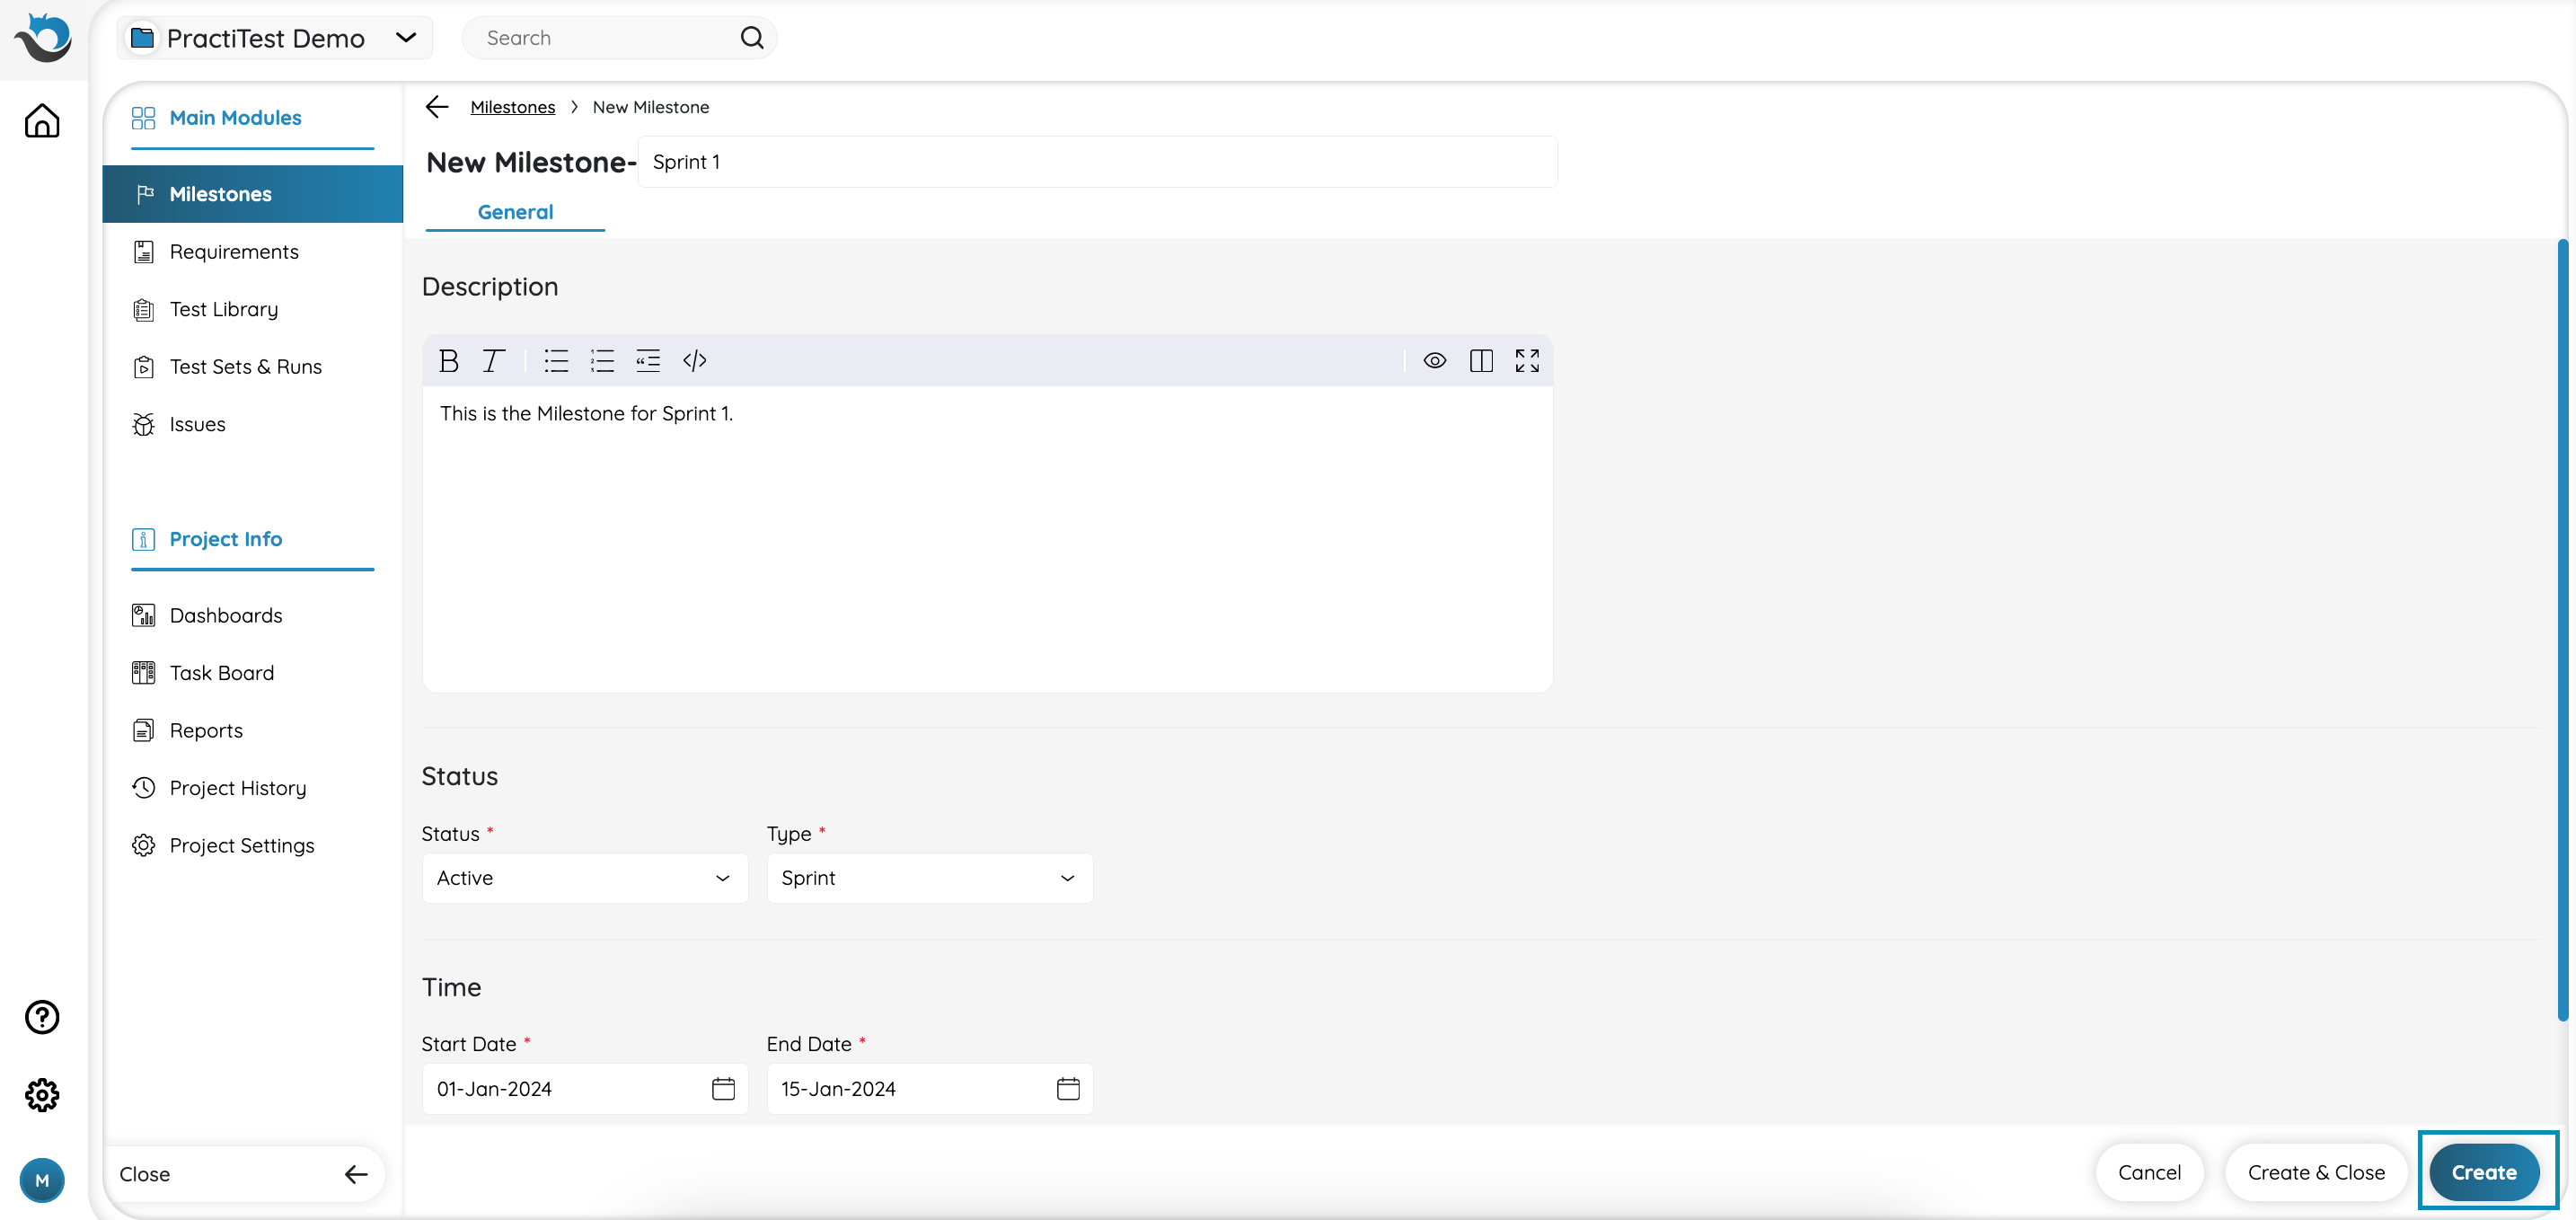
Within every Milestone, there are 8 different tabs: General, Dashboard, Requirements, Test Set, Issues, Attachments, Comments, and History. Once you click on the ‘New Milestone’ button you can only see the General tab. After you finish defining the required fields for the new Milestone (name, status, and time) and click ‘Create’ at the bottom right corner, the Milestone will be created, and the other tabs will appear.
Managing Milestones
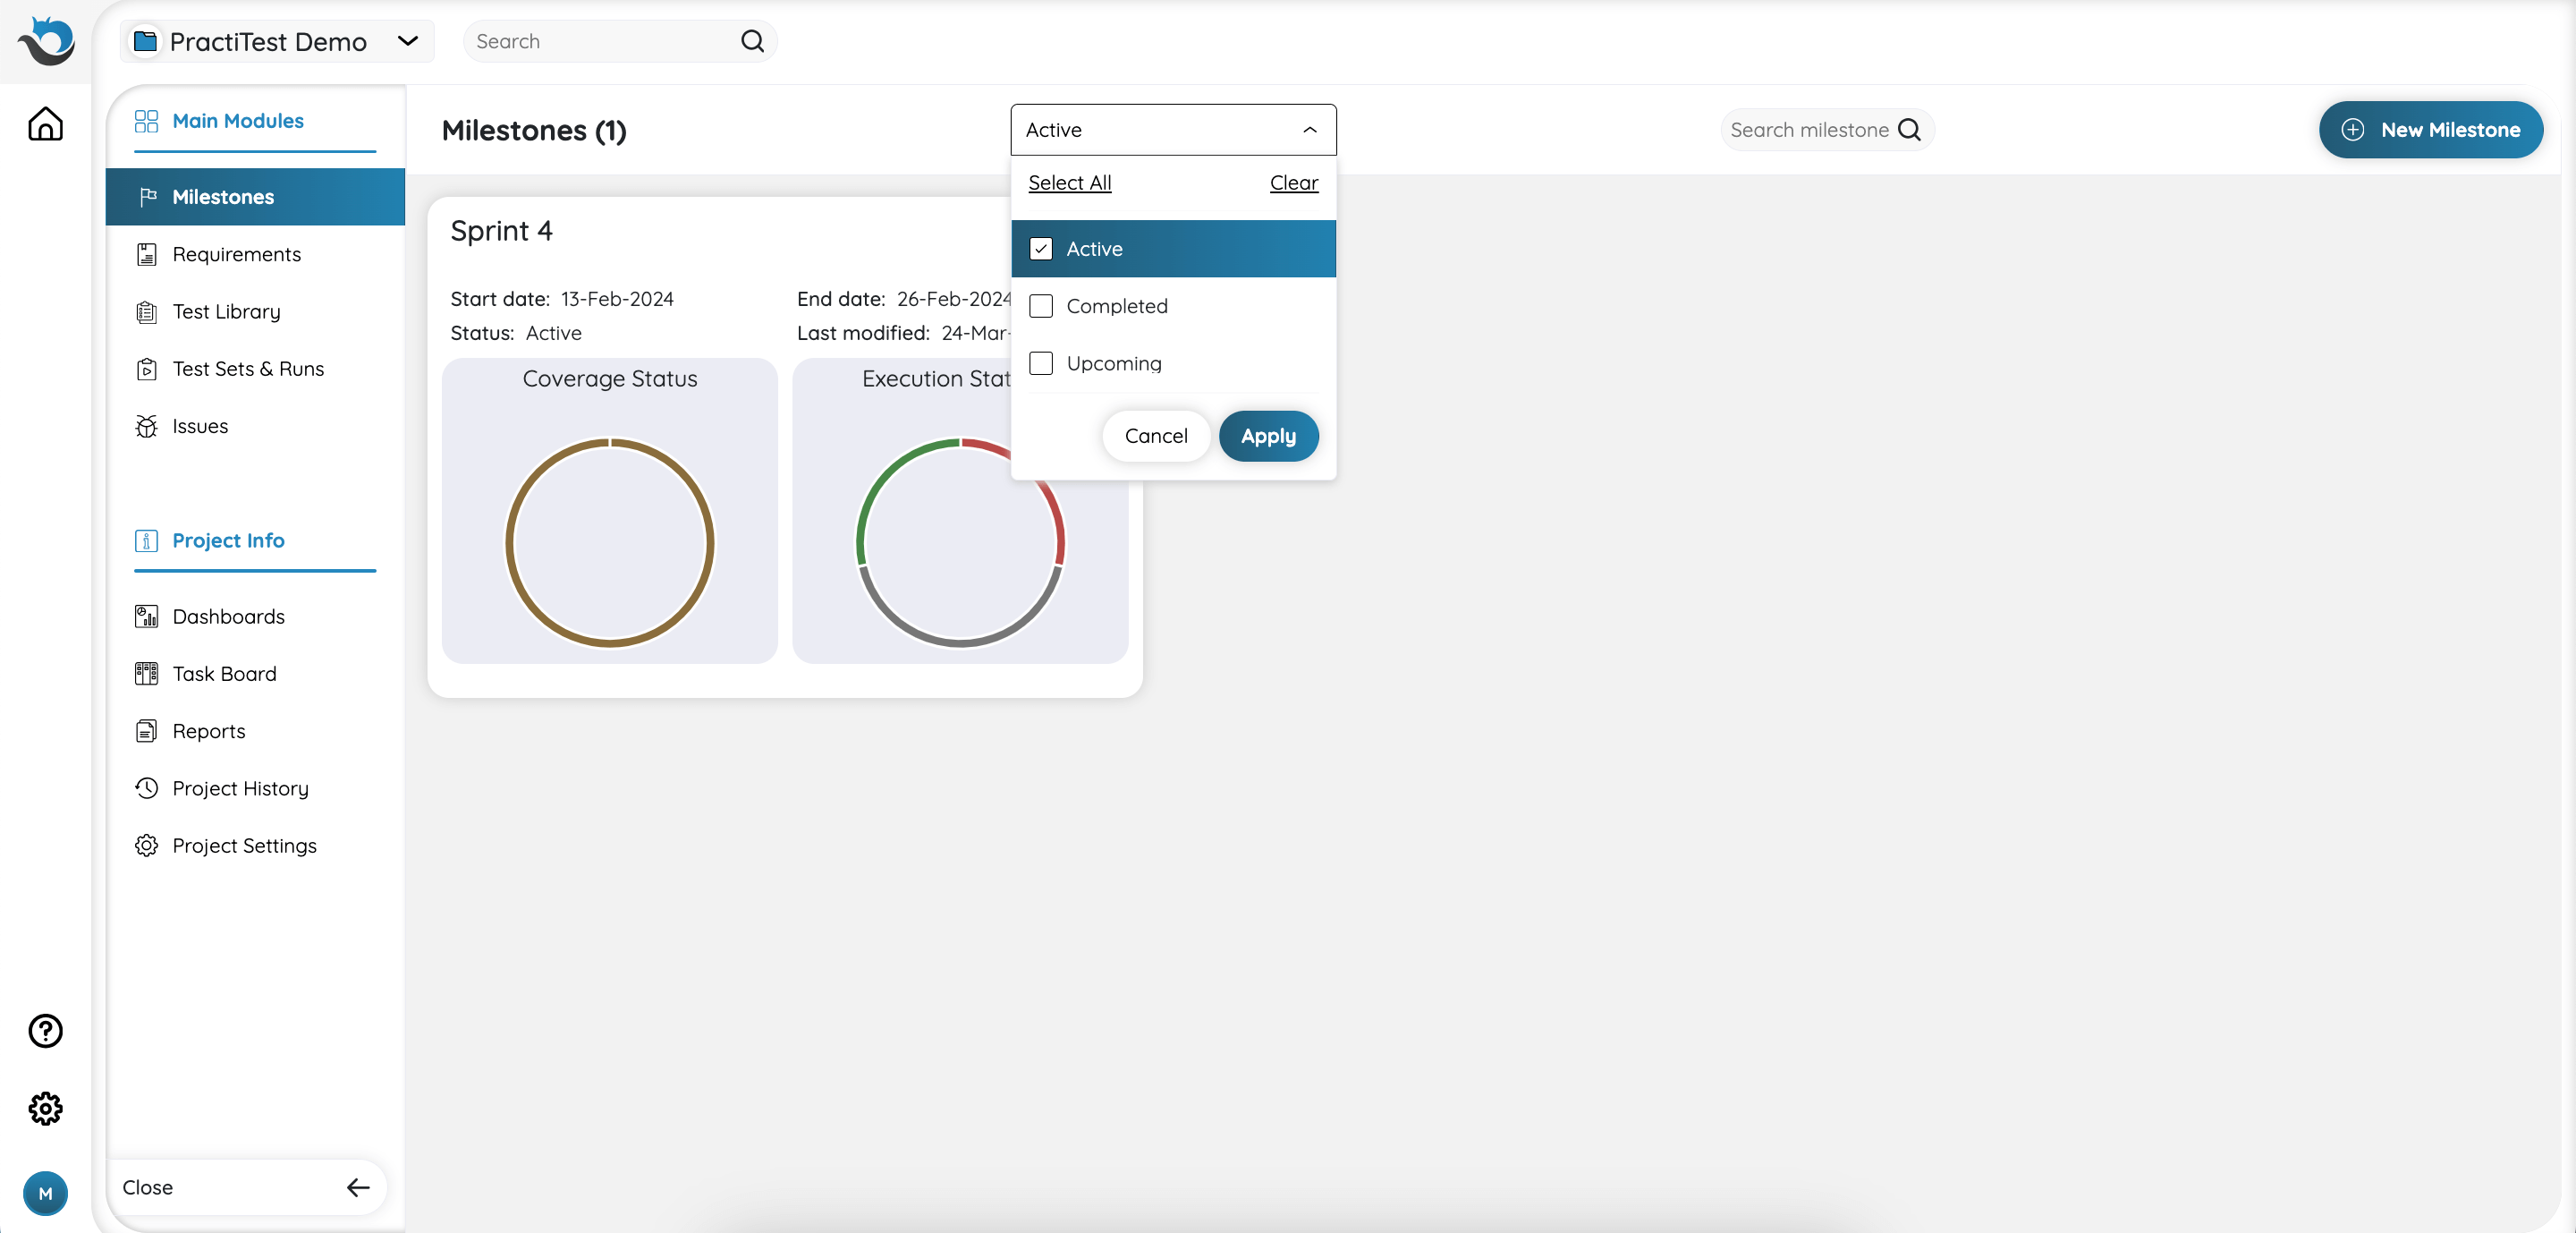
Existing Milestones will appear on the main module screen. You can filter Milestones based on their status, allowing you to display only those associated with specific statuses (only active Milestones for example). Additionally, you can find a particular Milestone by its name using the search.
Existing Milestones will appear on the main module screen. To view and edit a Milestone, either click on its name or the three-dot button and choose ‘Edit’.
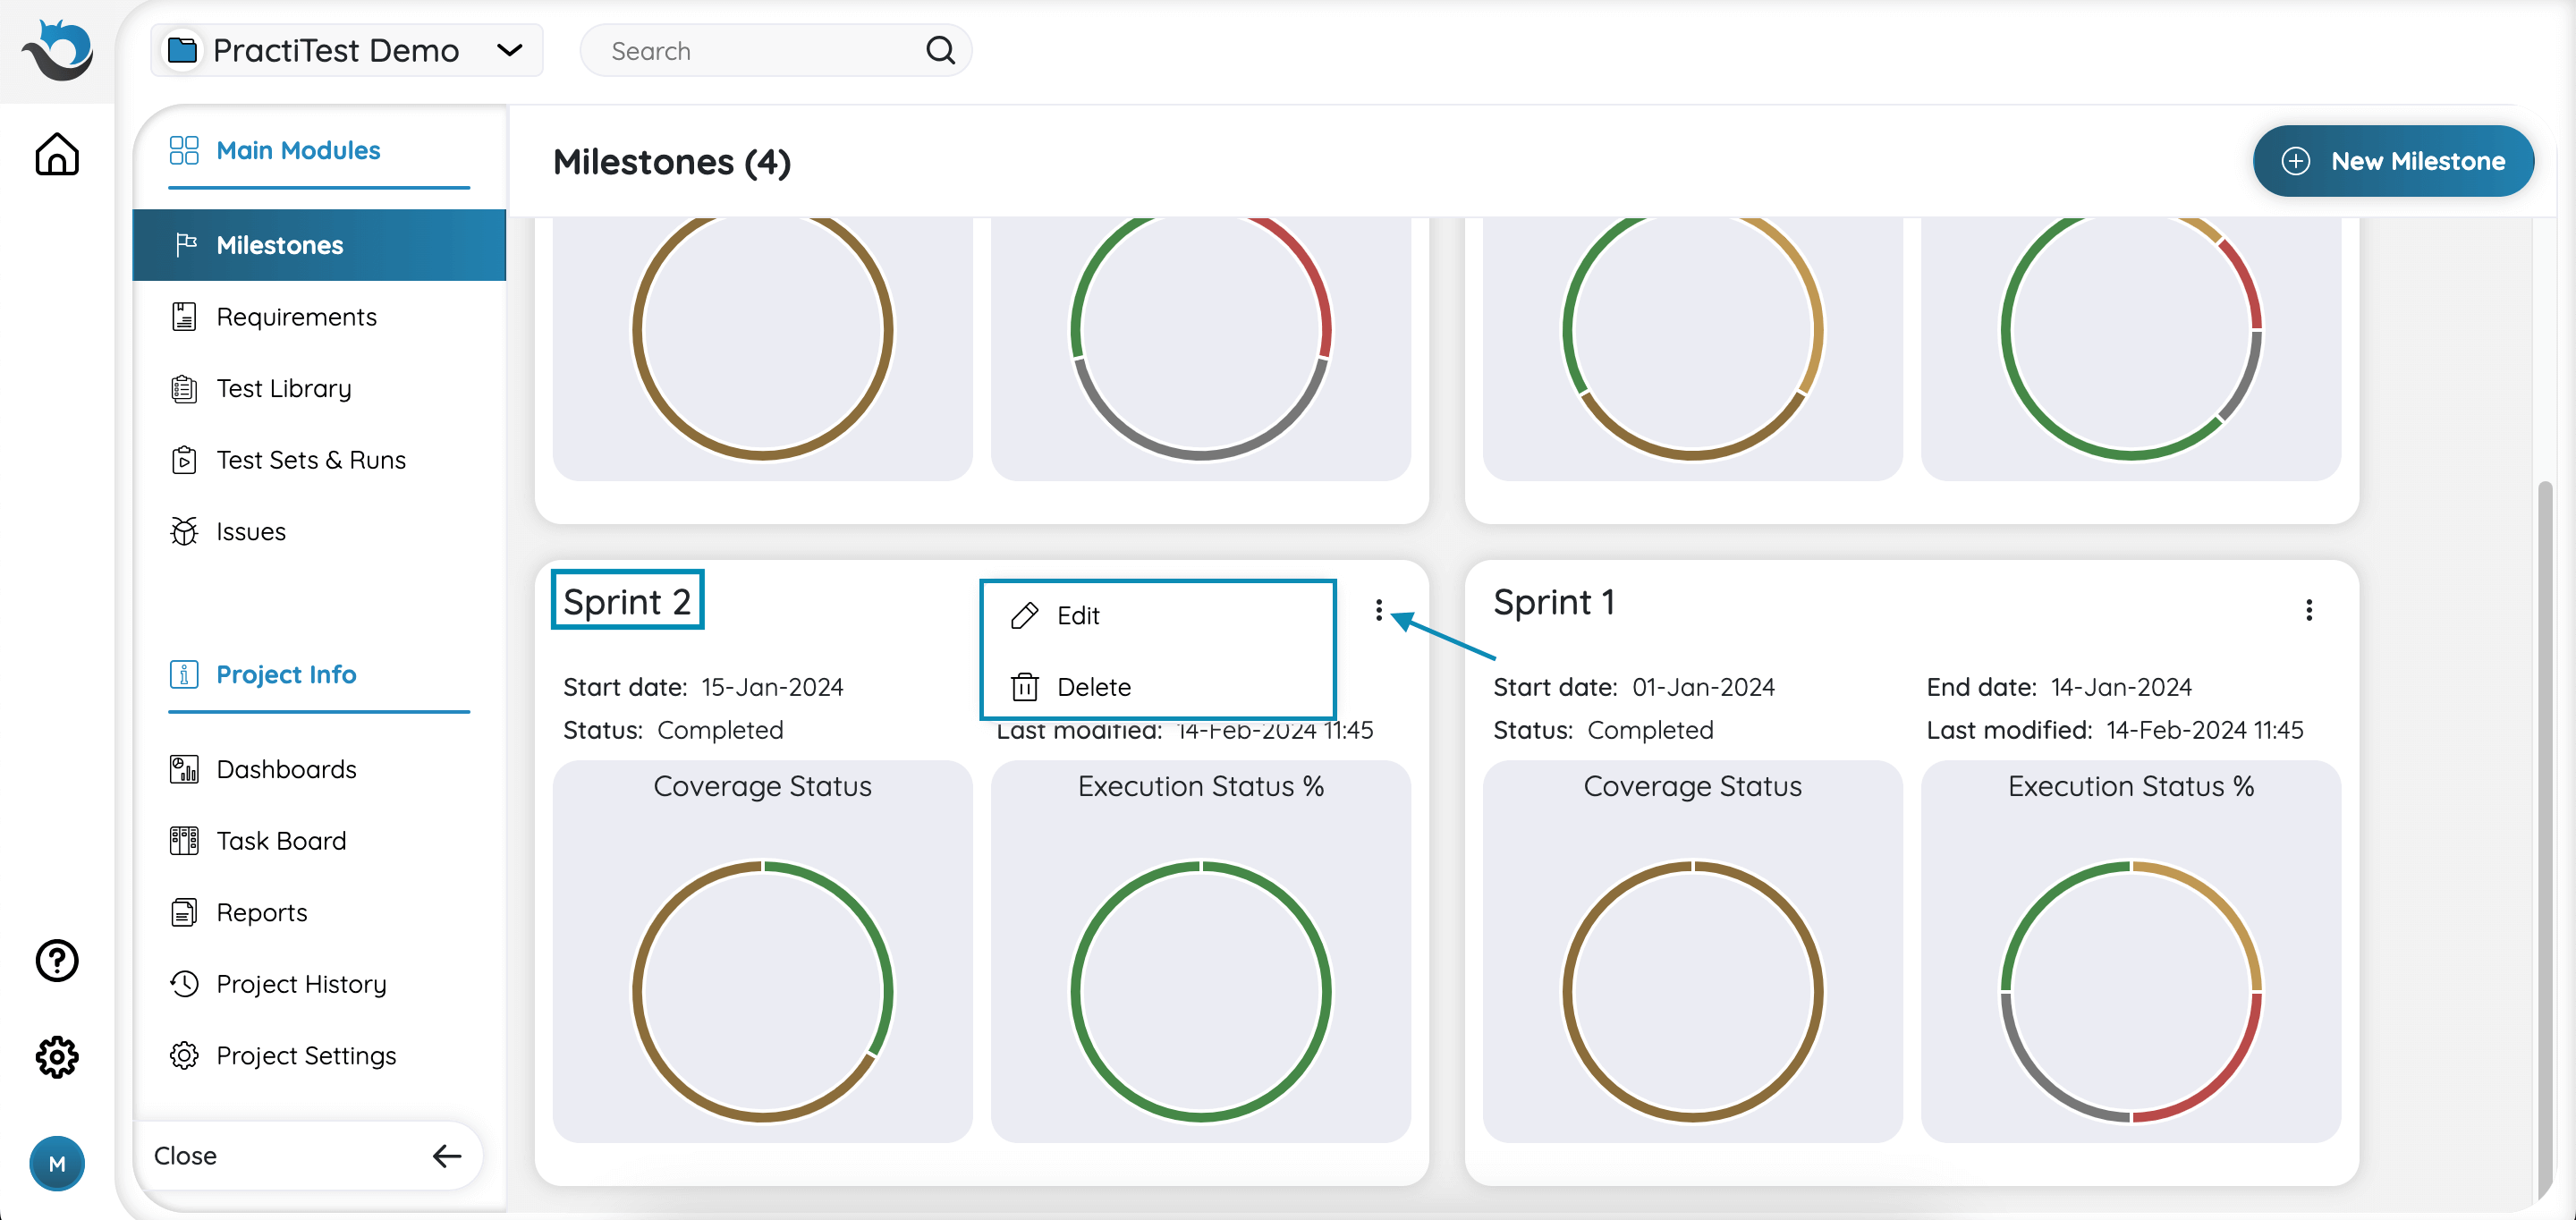
If you wish to permanently delete a Milestone choose ‘Delete’.
Note: Deleting a Milestone will affect only the Milestone itself and its references but won’t affect any other entities associated with it.
General Tab
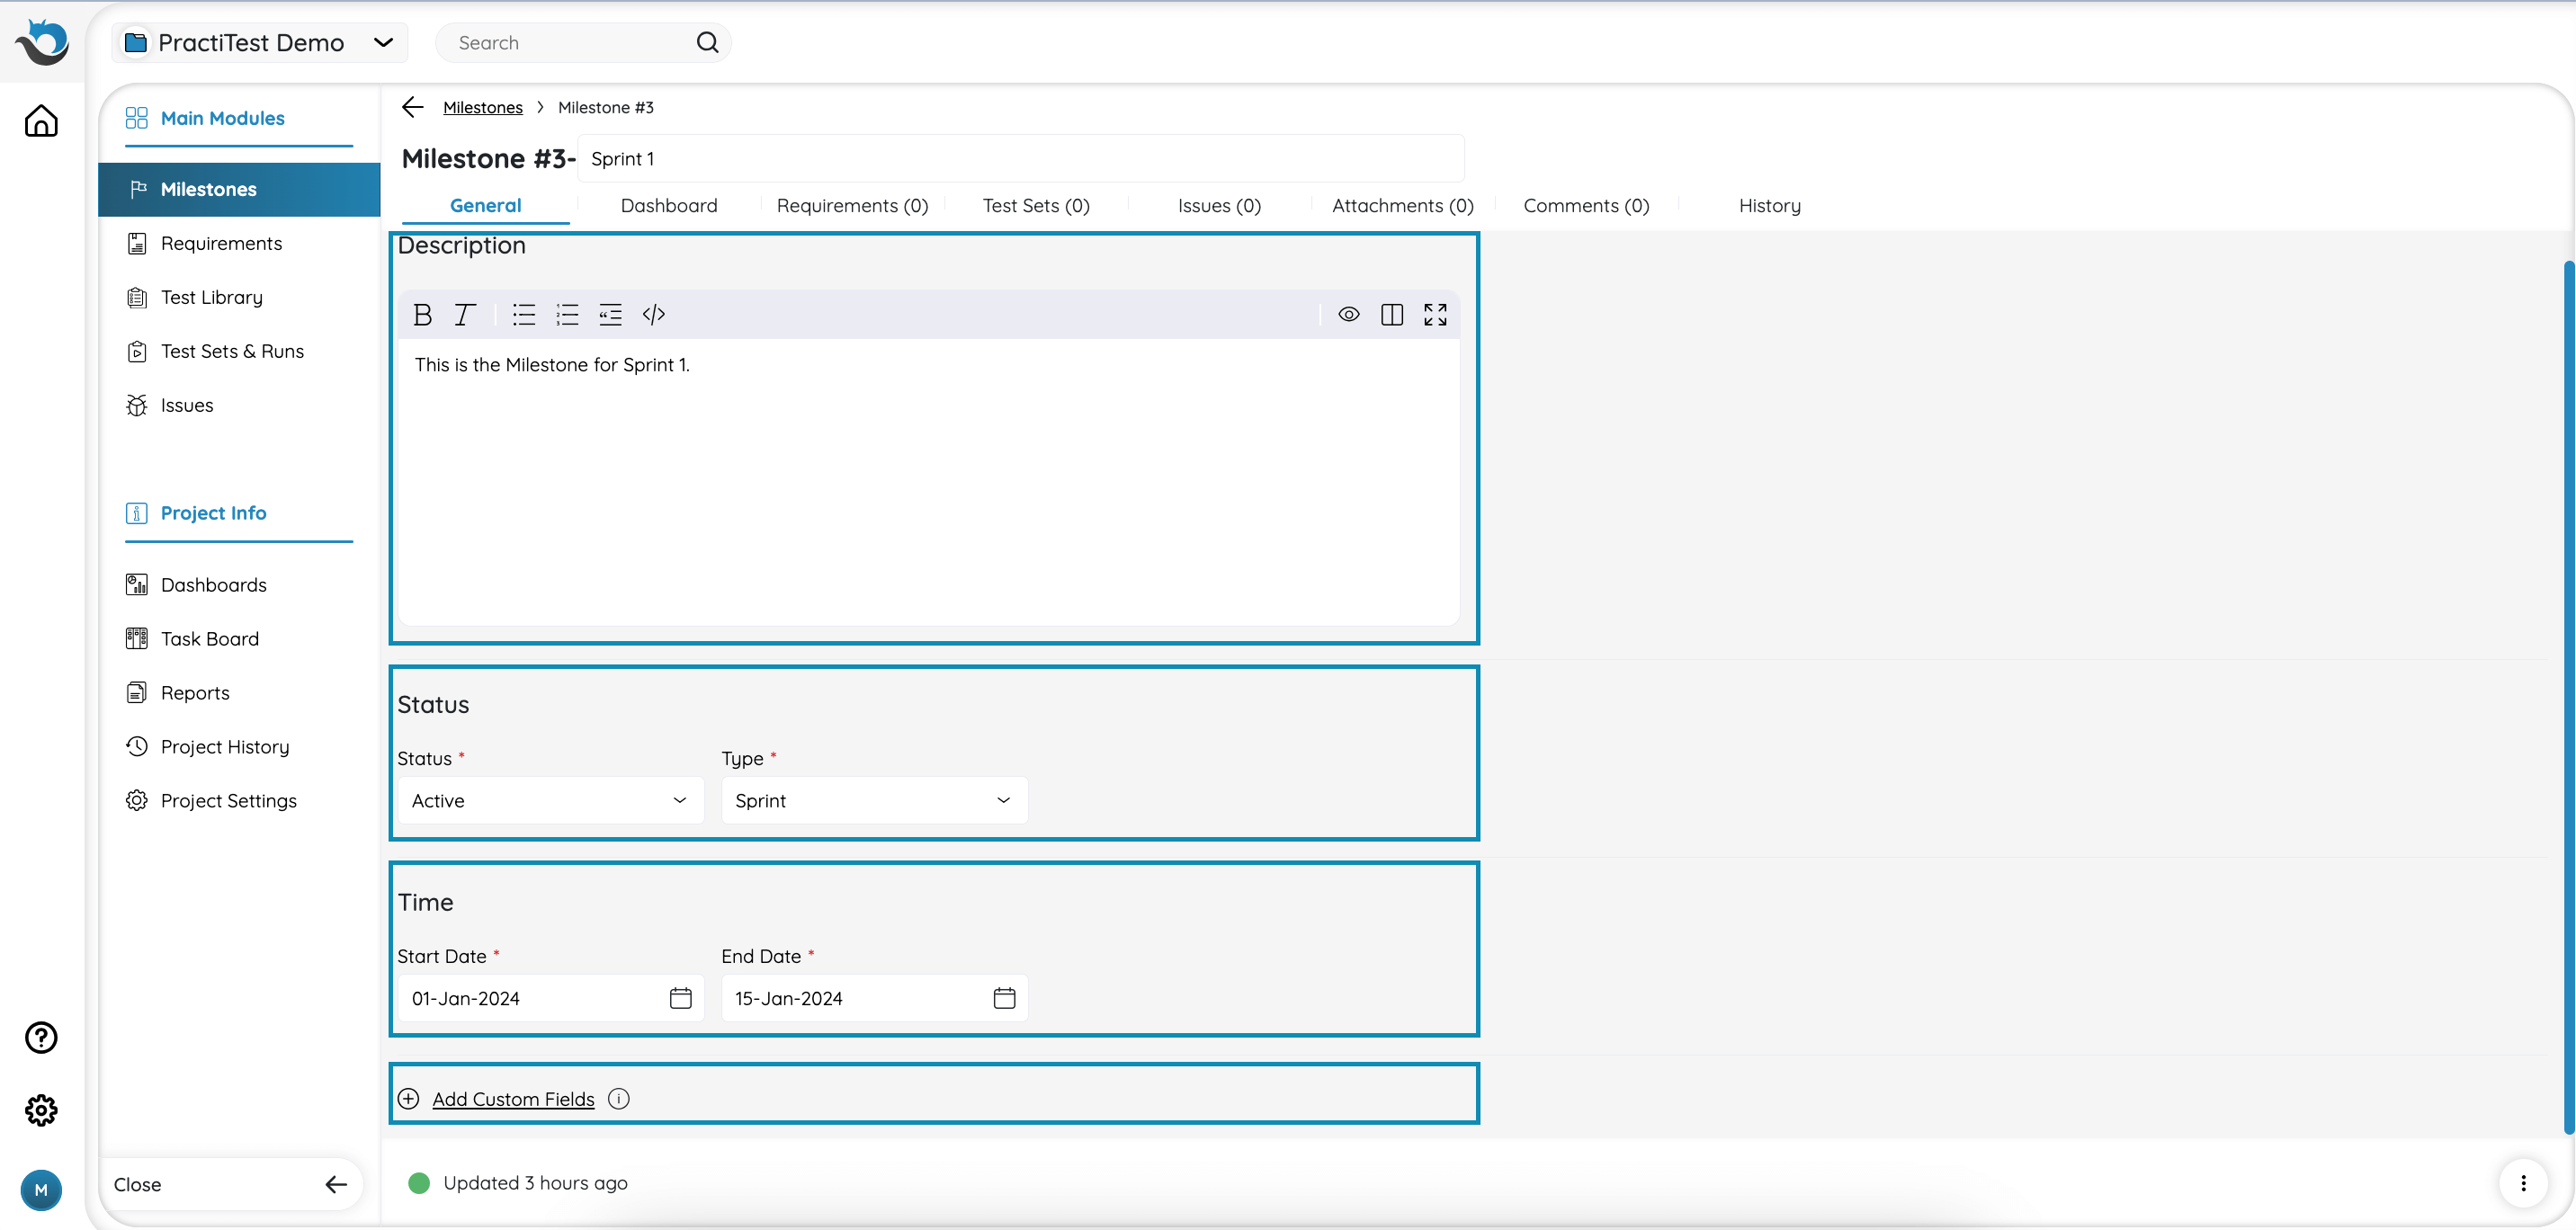
From the General tab, you can add a description and values to your Milestone fields. Each field is organized by its type and there are two types of system fields in a Milestone: Status and Time.
You can set the status of your Milestone to one of the following:
- Upcoming
- Active
- Completed
The ‘Type’ field represents the nature of this milestone. You can choose ‘Sprint’ or ‘Version’ from the picklist or add any other value relevant to your needs.
In the ‘Time’ section, you define the timeframe of this Milestone by selecting a start date and an end date.
If you want to add custom fields to your Milestone, simply click on the ‘Add Custom Fields’ link at the bottom of this tab.
Dashboard Tab
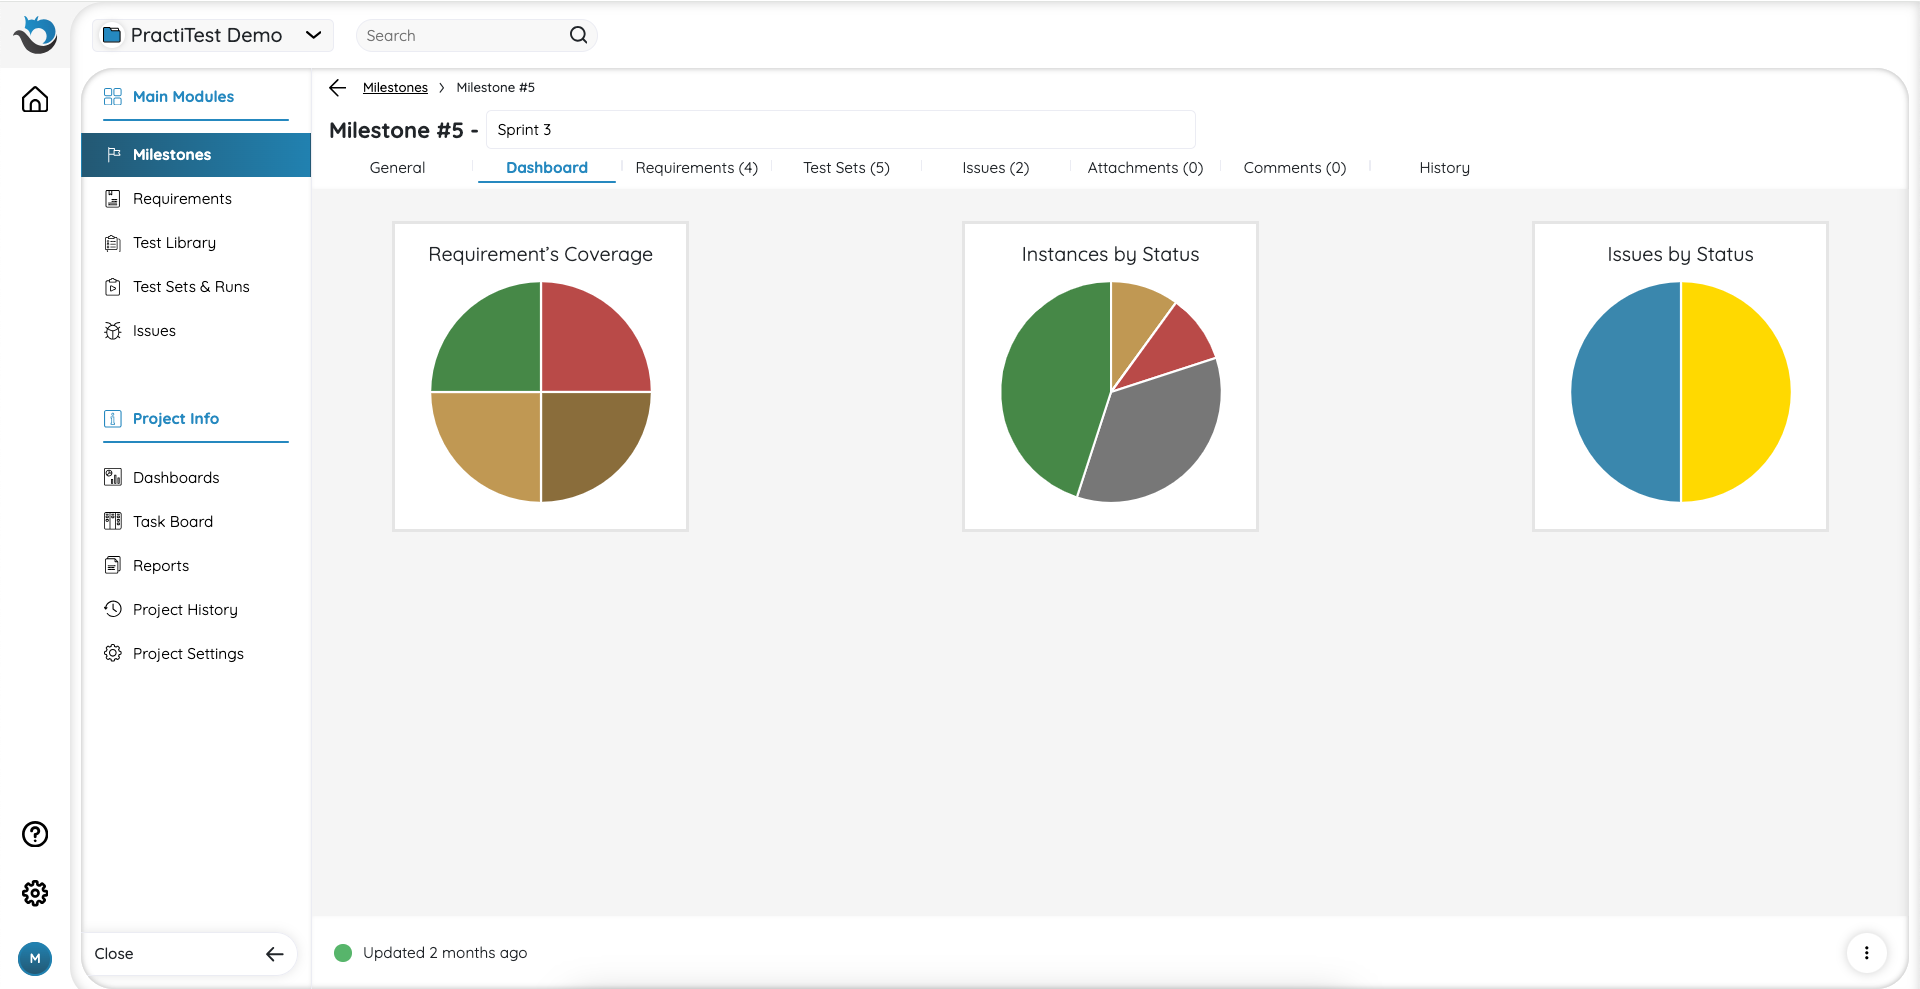
The Dashboards tab is where you track the progress and get insights of your testing work within a specific Milestone. This tab includes 3 different graphs and charts:
- Requirements Coverage - showing the Testing Status based on tests executed within the scope of the Milestone
- Instances By Status - showing the Last Run Status of linked Test Instances
- Issues By Status - showing the status of Issues discovered within the Milestone scope
Requirements Tab
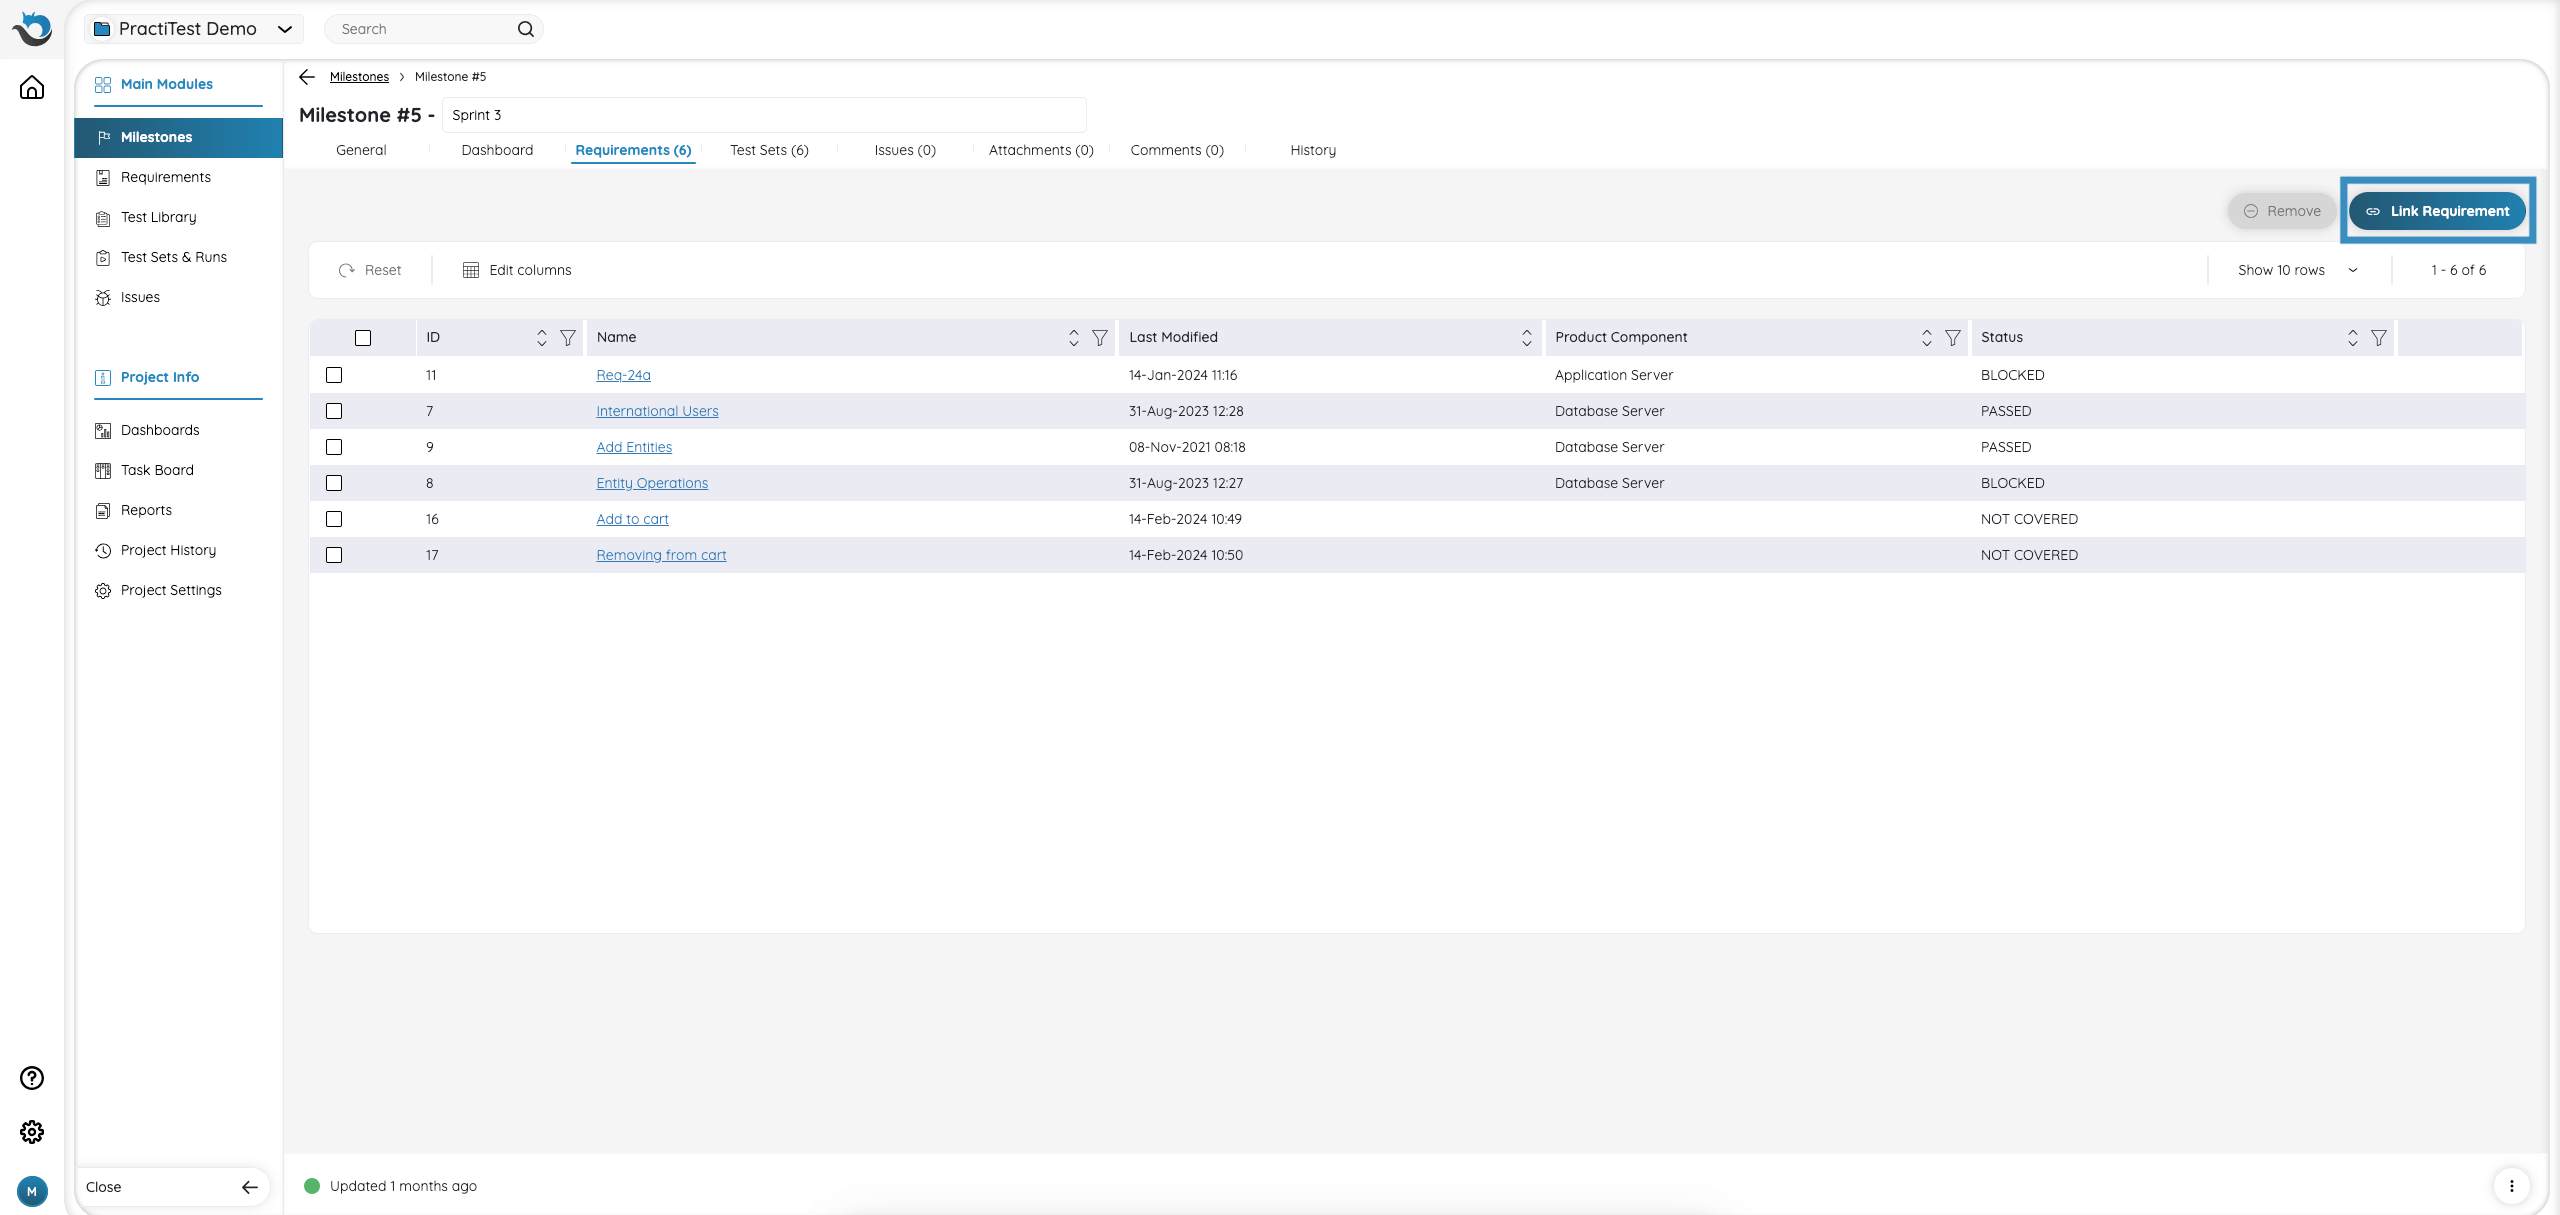
From the Requirements tab, you link relevant Requirements to your Milestone. You can link every Requirement to more than one Milestone (in case you need to test the same Requirement in different versions for example).
To link a Requirement to a Milestone, click on the ‘Link Requirement’ button on the top right-hand side of the grid. A pop-up window will appear with a list of requirements to link, choose the relevant requirement and click ‘Link Requirements’. You can also link directly from within the Requirement itself from the traceability tab.
Test Sets Tab
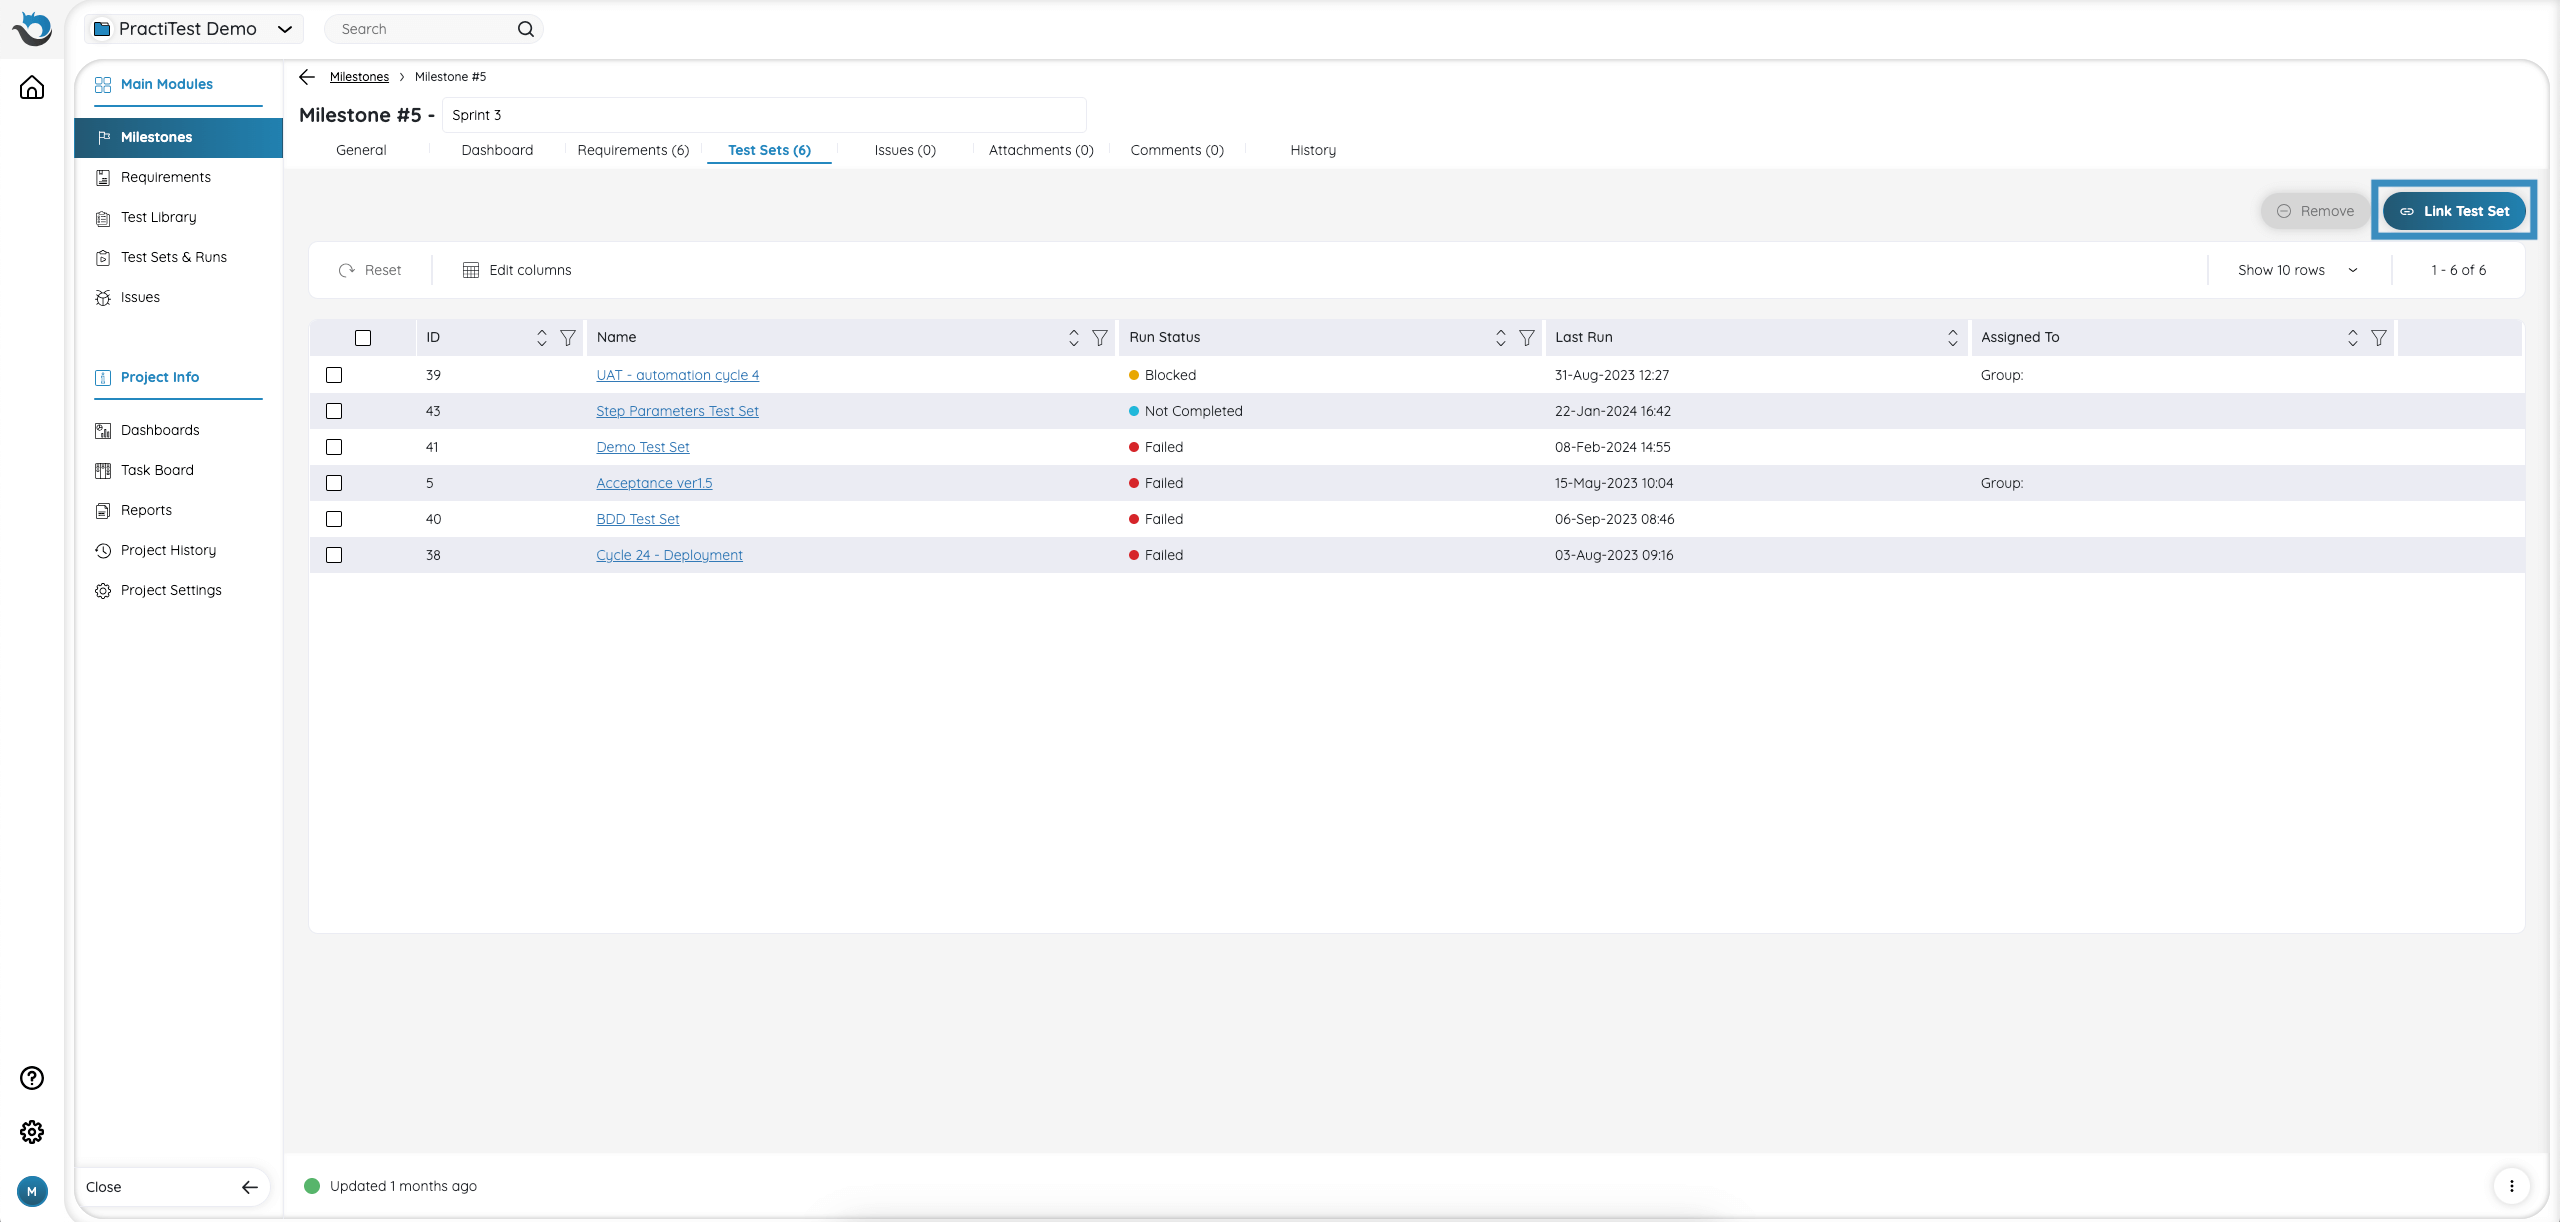
Once you have created tests that cover Requirements relevant to your Milestone and added them to a Test Set, you can link these Test Sets to your Milestone. Each Milestone can have multiple Test Sets linked to it, but each Test Set can only be linked to one Milestone.
In order to link a Test Set to a Milestone, head to the Test Set Tab and click the ‘Link Test Set’ button on the top right-hand side of the grid. A pop-up window will appear with a list of Test Sets to link, choose the relevant Test Set and click ‘Link Test Set’. Alternatively, You can also link directly from within the Test Set itself from the General tab by using the ‘Milestone’ field.
In case you have an existing Test Set associated with a previous Milestone and you wish to reuse tests for a new Milestone, it’s recommended to clone the Test Set and link the cloned one to the new Milestone. For instance, if a certain Milestone included a Test Set with failed tests you want to re-run in the upcoming Milestone, simply clone the Test Set with only failed instances and associate it with the new Milestone.
The Test Set can include any type of Test, even if they are not directly linked to Requirements associated with that particular Milestone. When you associate a Test Set with a specific Milestone, running its Test Instances ensures that the Test Runs are also related to the same Milestone.
Issues Tab
Since Issues could be found and fixed in different testing cycles, every Issue can be associated with more than one Milestone. Issues that were created during a test run which is part of a Test Set that is associated with a Milestone, will be automatically linked to the same Milestone by default.
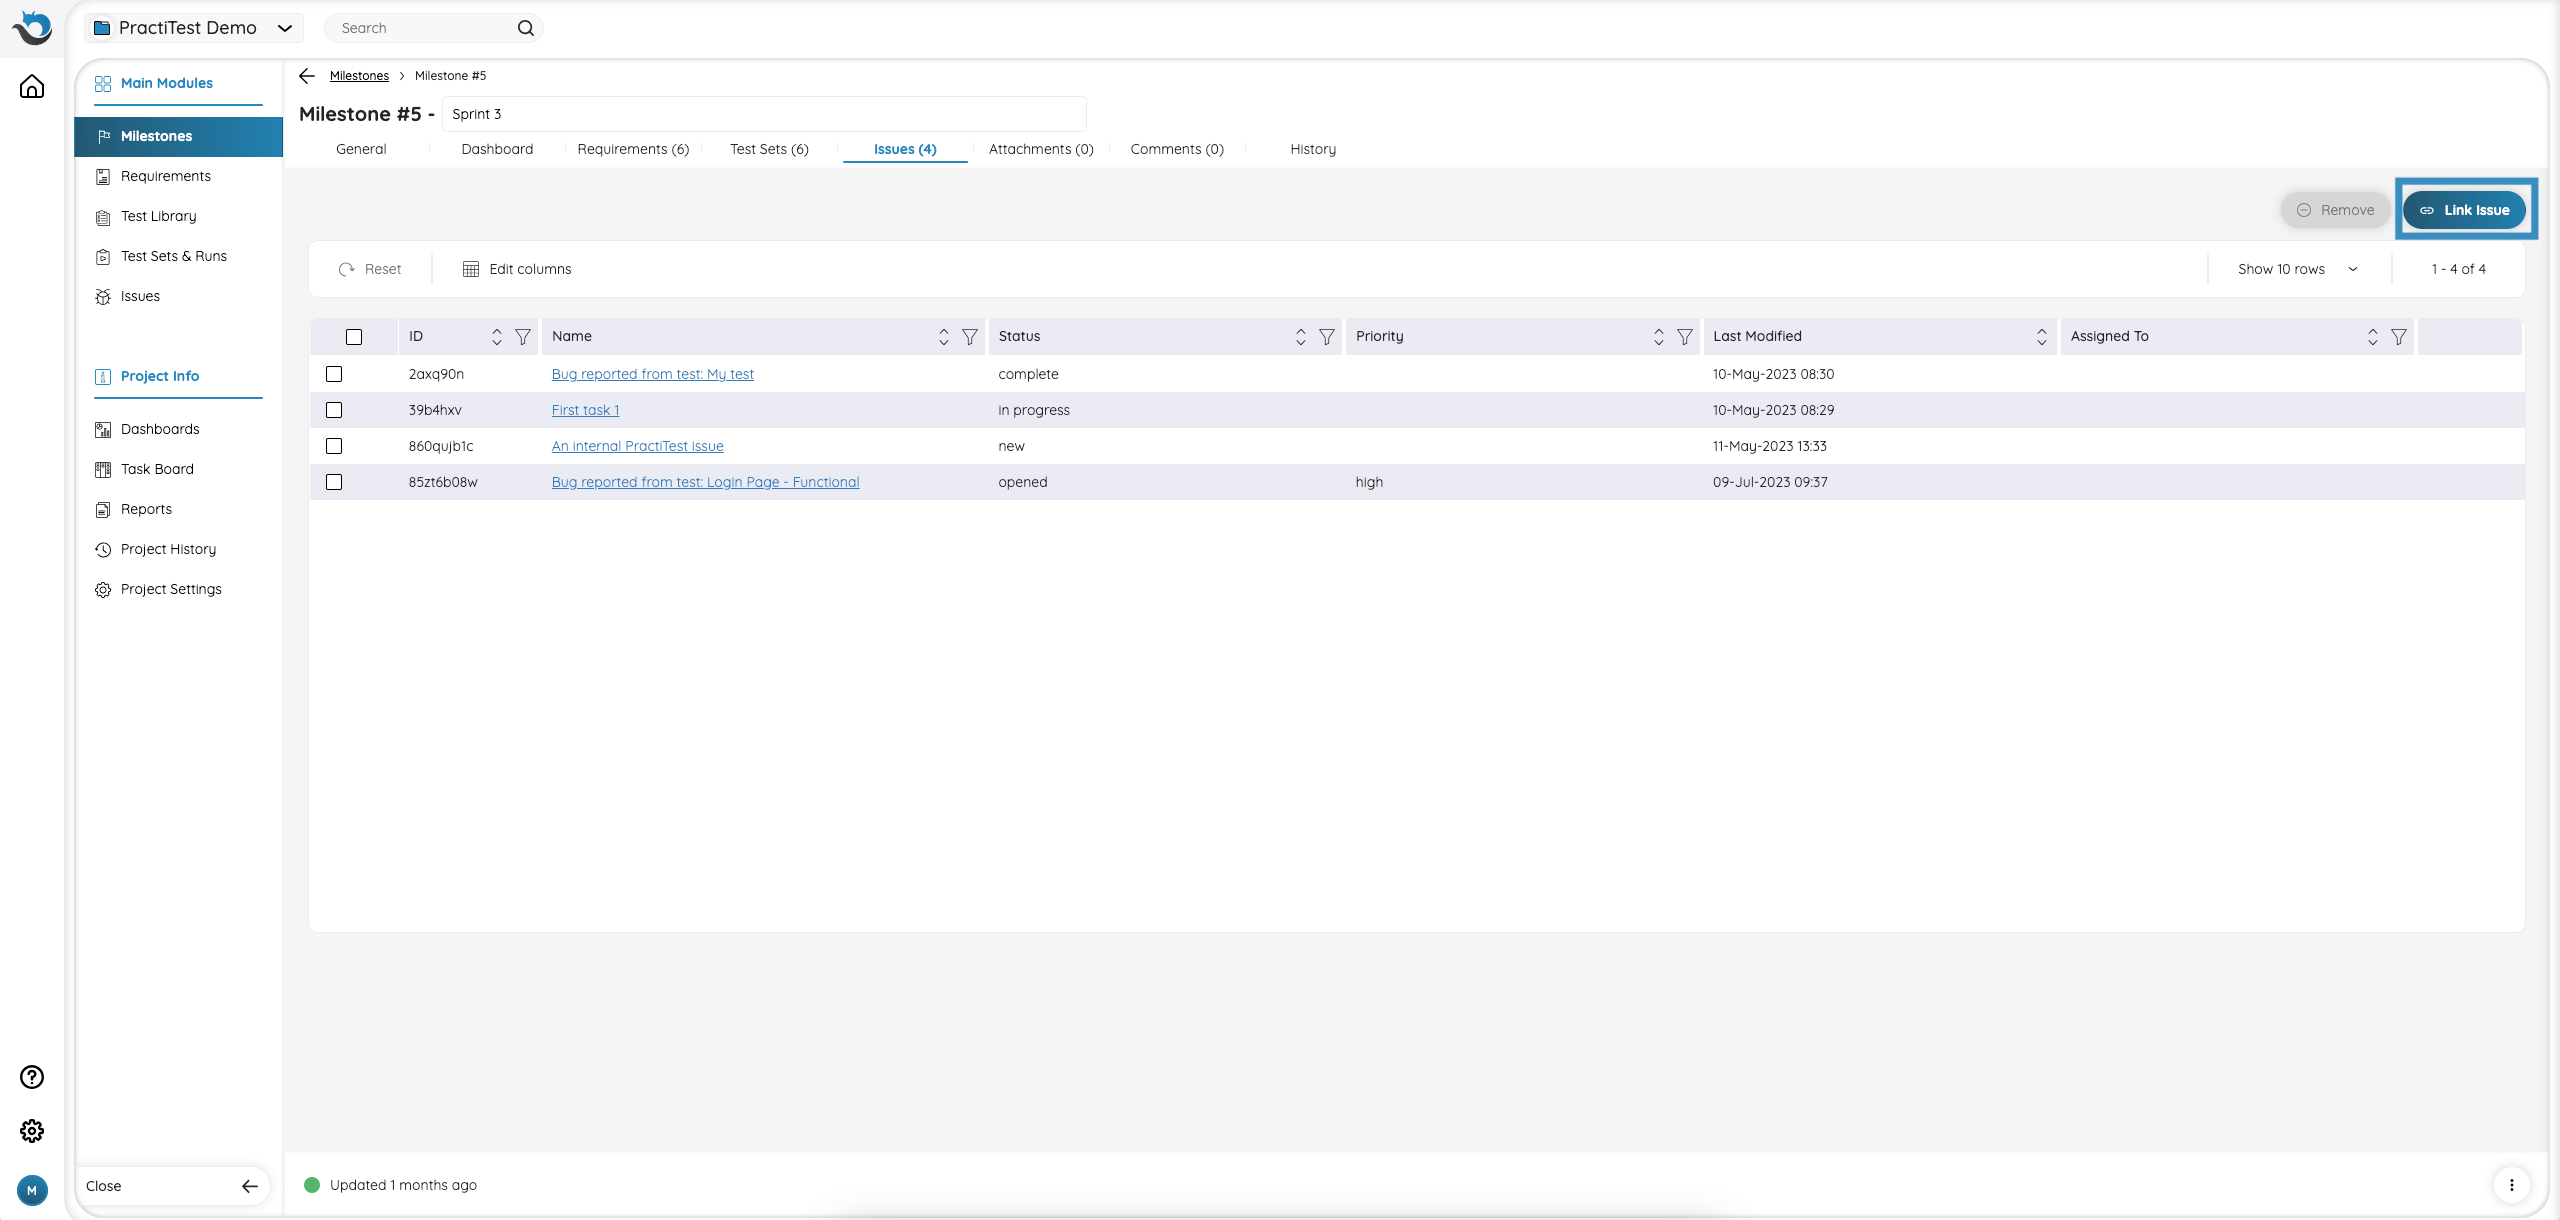
To link a new Issue to a Milestone, navigate to the Issues tab and click the ‘Link Issue’ button at the top right of the grid. A pop-up window will appear, displaying a list of issues. Select the relevant Issue and click ‘Link Issue’. You can also associate an issue with a Milestone directly from the Issue itself through the Traceability tab.
Grid Display Actions
Note: Grid display actions refer to Requirements, Test Sets, and Issues tabs.
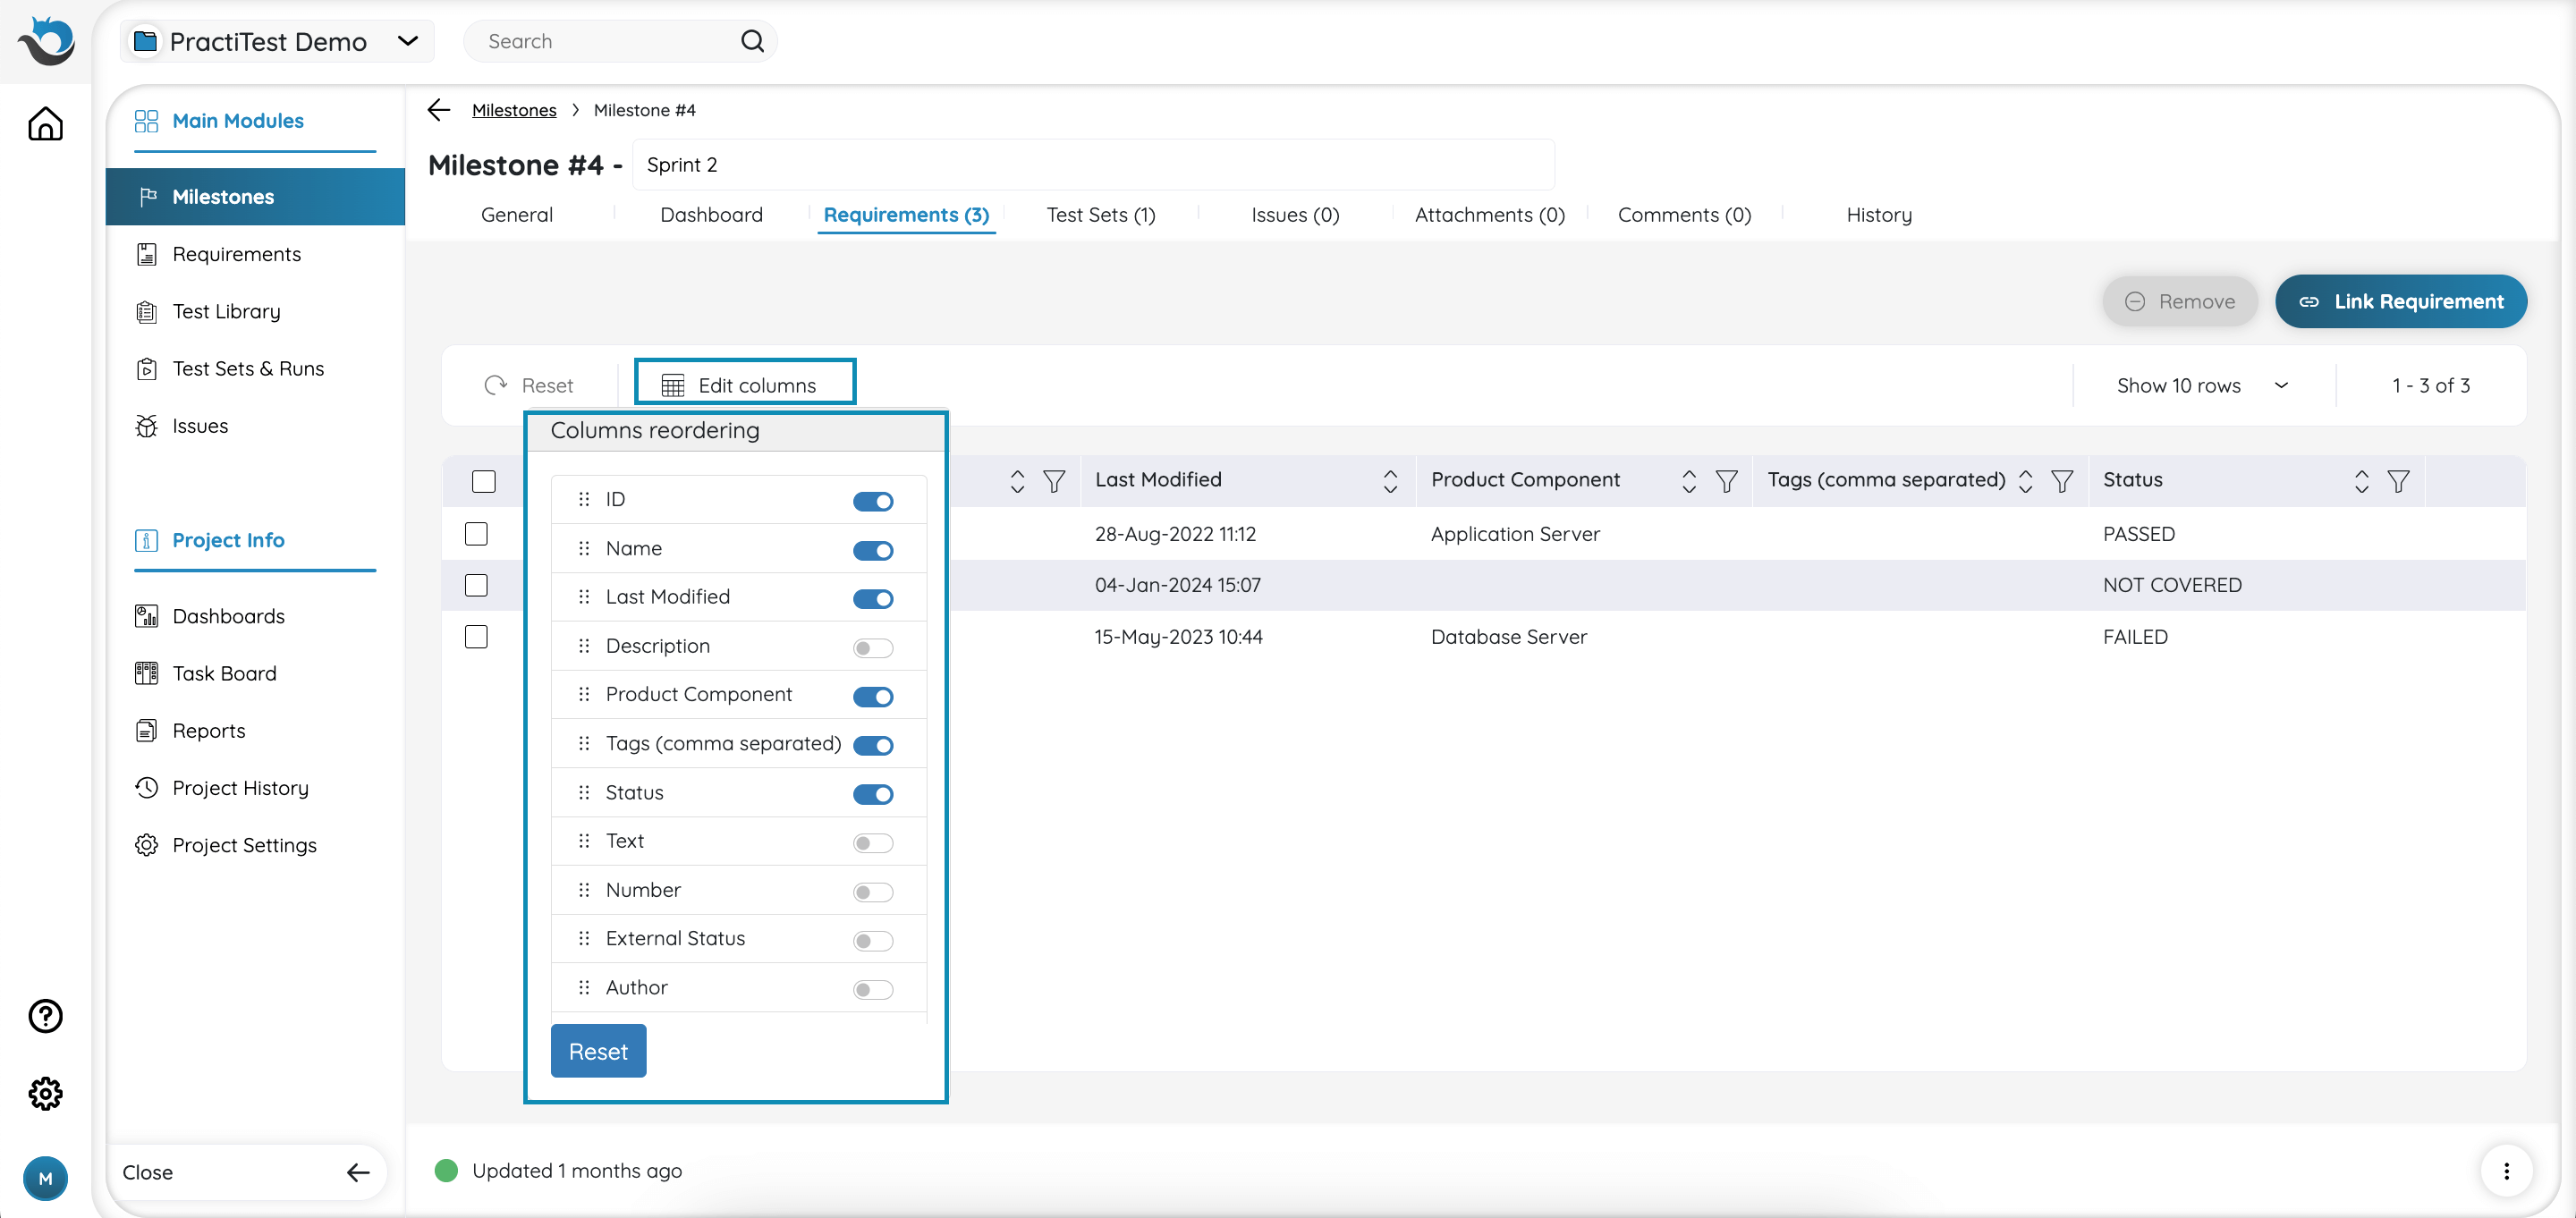
Once adding relevant entities to your Milestone (Requirements, Test Sets, and Issues) you can easily control the grid display order. To define the displayed columns in the grid, click the ‘Edit columns’ button on the left side. A pop-up window will appear, showing a list of all available fields to display. Each field has a toggle next to it, simply toggle it on in the fields you want to display.
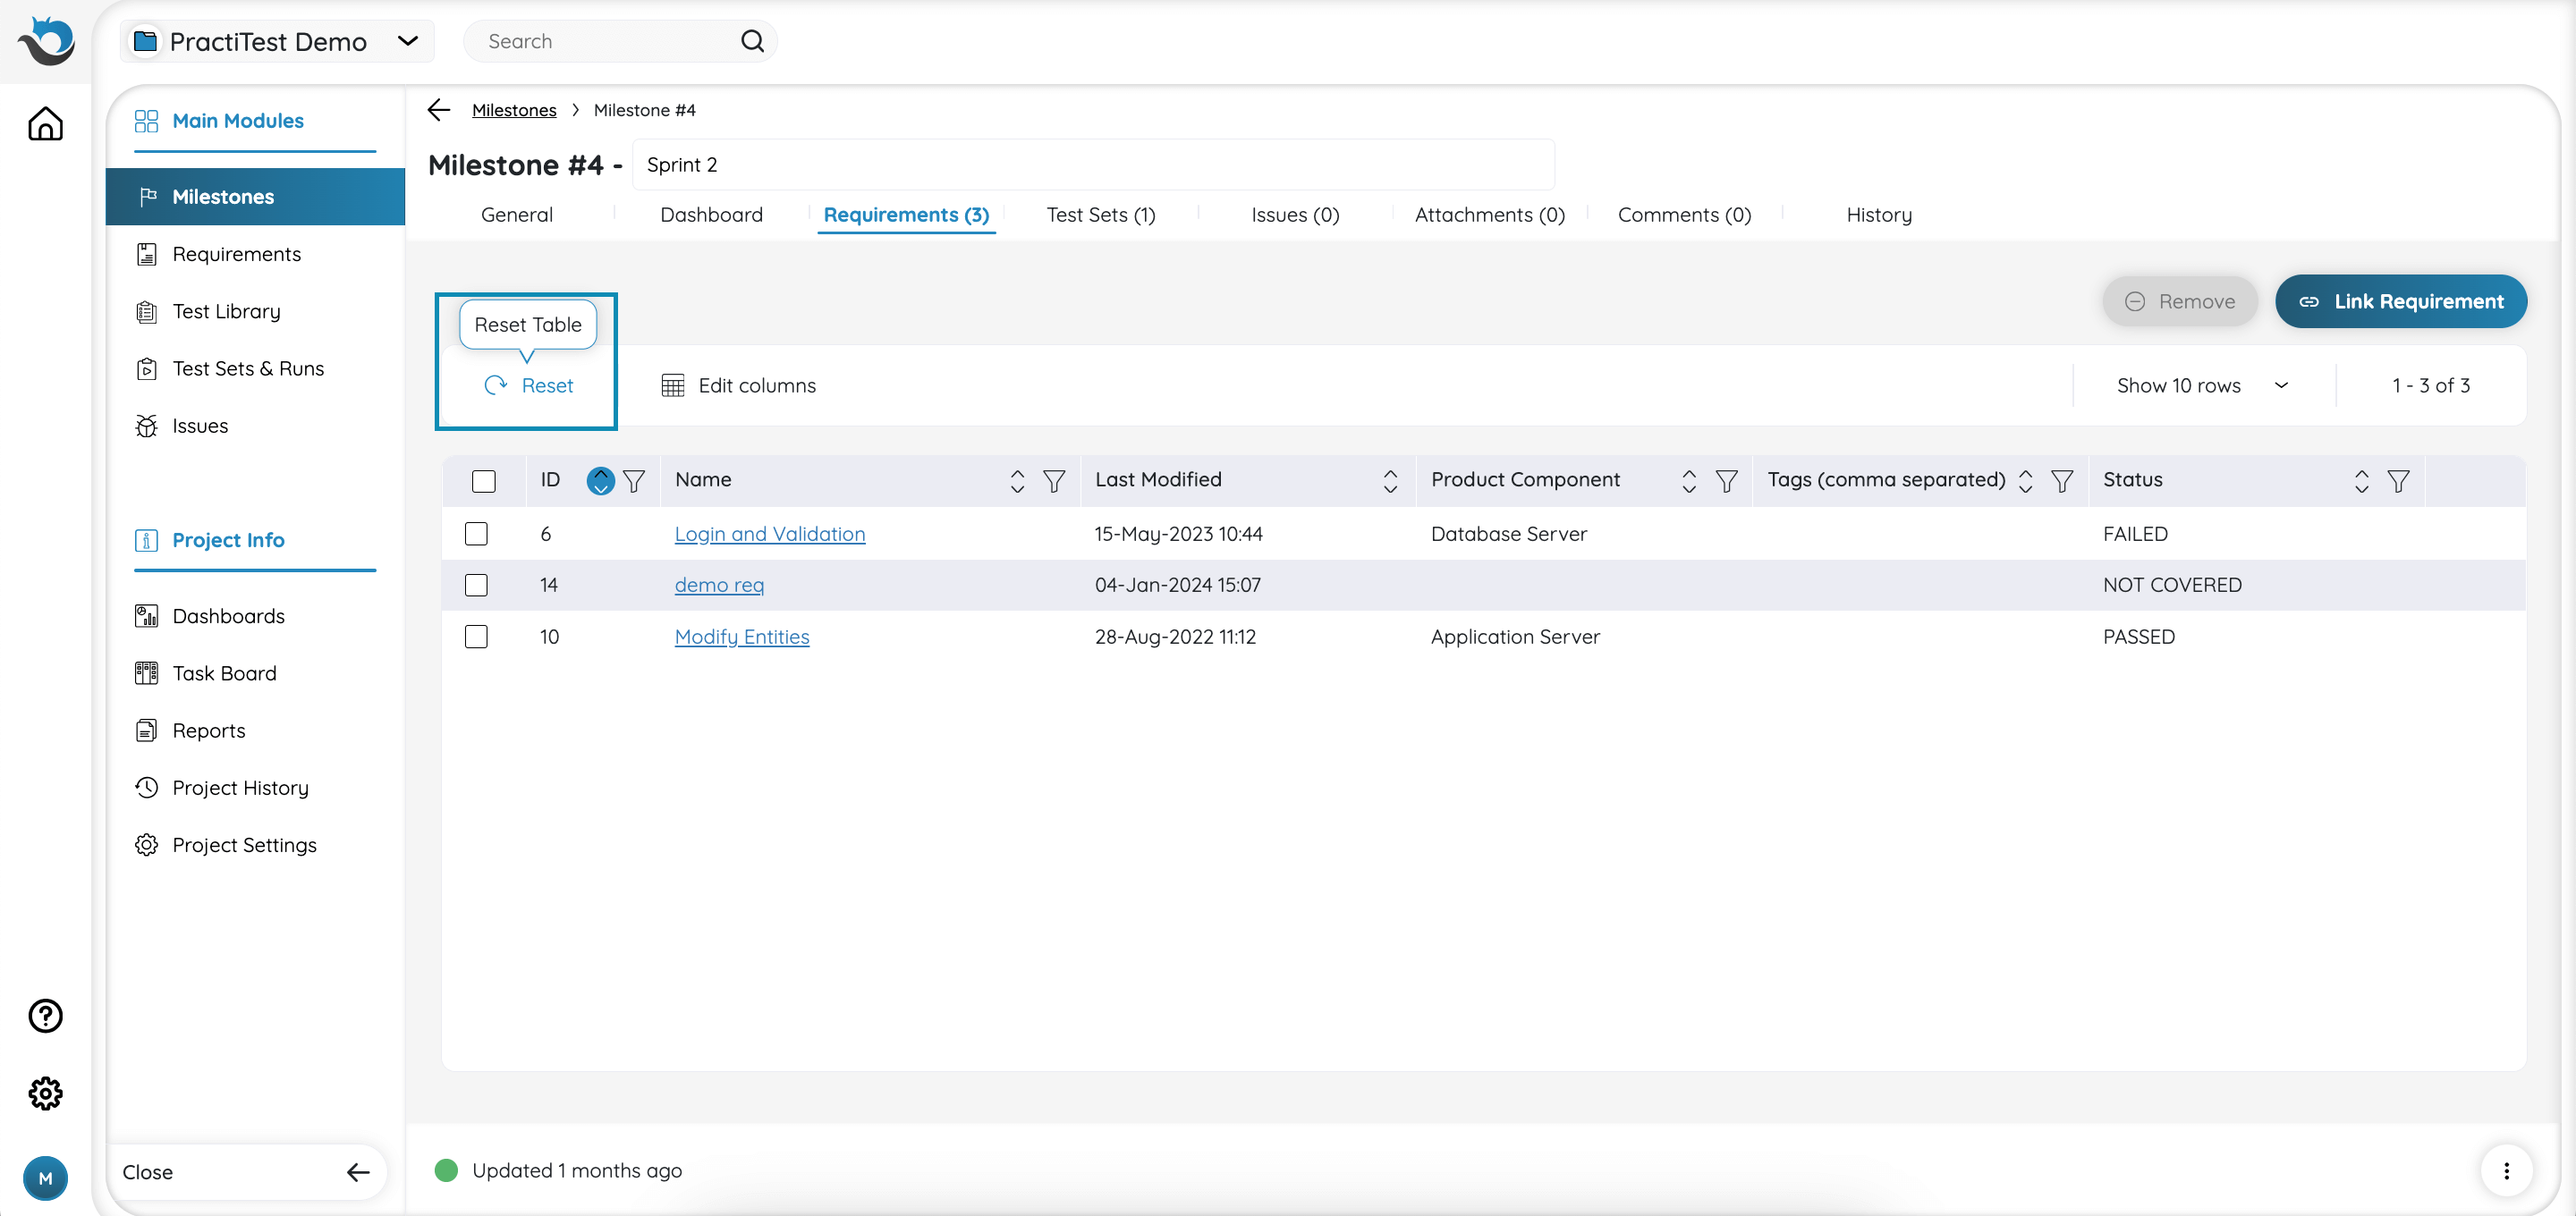
You can sort or filter linked entities based on different columns like name or ID for example. You can return to the default order view by clicking the ‘Reset’ button at the top left-hand side of the grid.
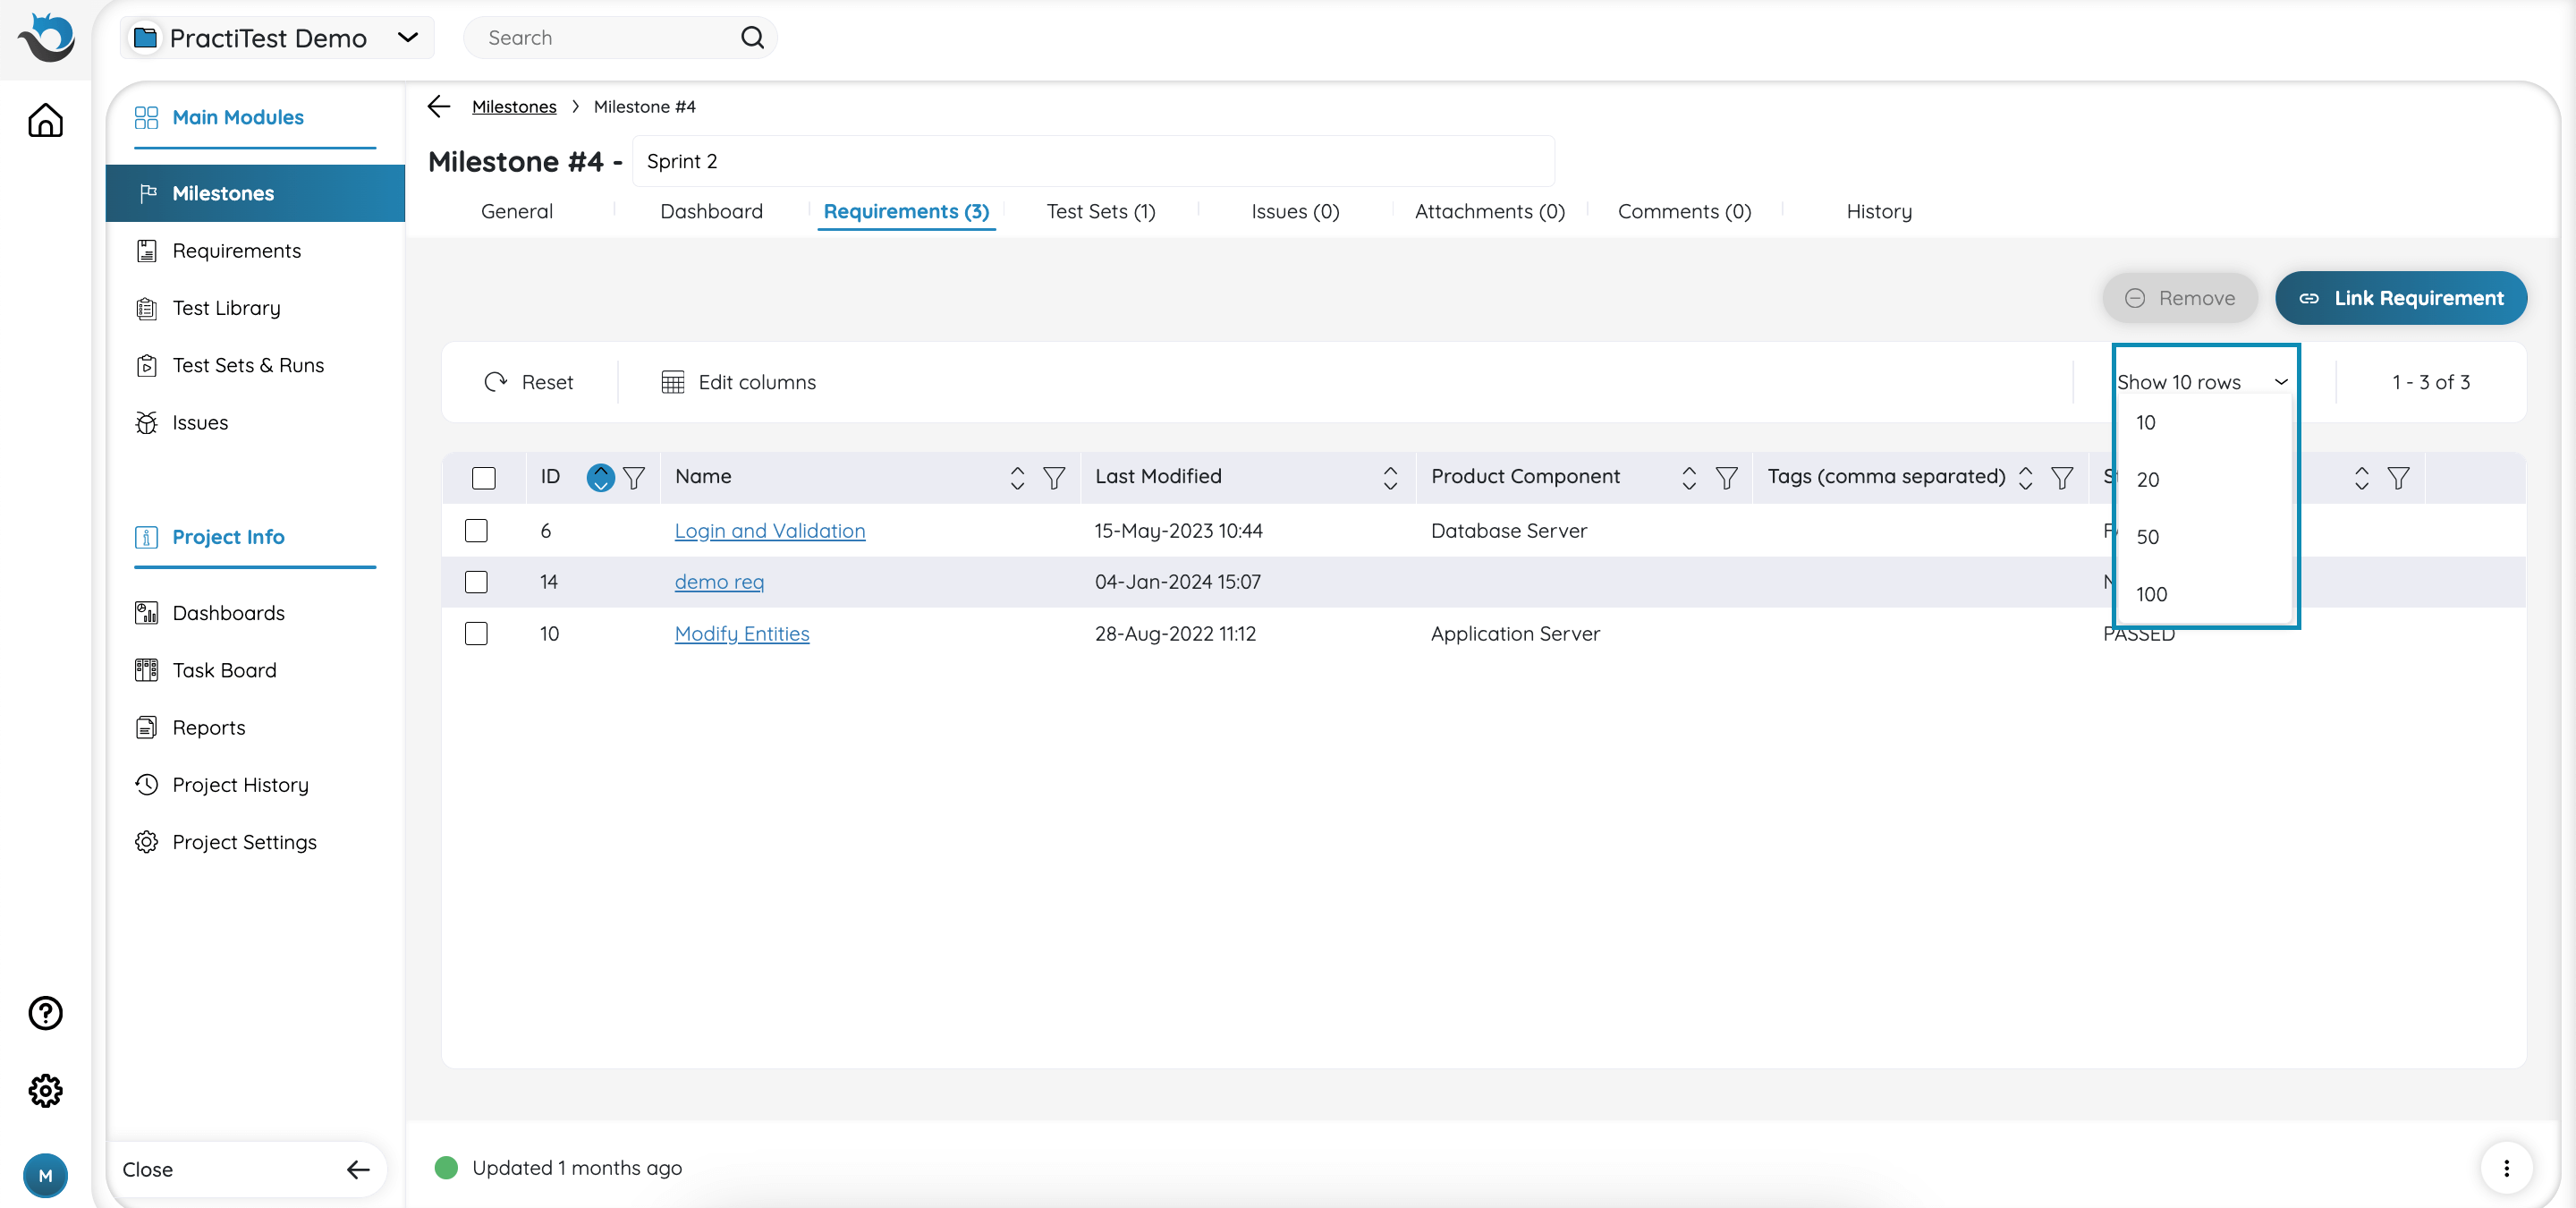
By default, the grid displays up to 10 entities in each tab. If you have more entities associated with your Milestone, you can manage the display density by clicking on ‘Show 10 rows’ and choosing your preferred option.
Attachments
Use this tab to add, preview, download, rename, delete, and copy the links of your attachments and paste them into the description in the General tab. Additionally, you have the option to drag and drop attachments into the description field. The attachment will then be automatically added to the entity and will be visible in the Attachments tab.
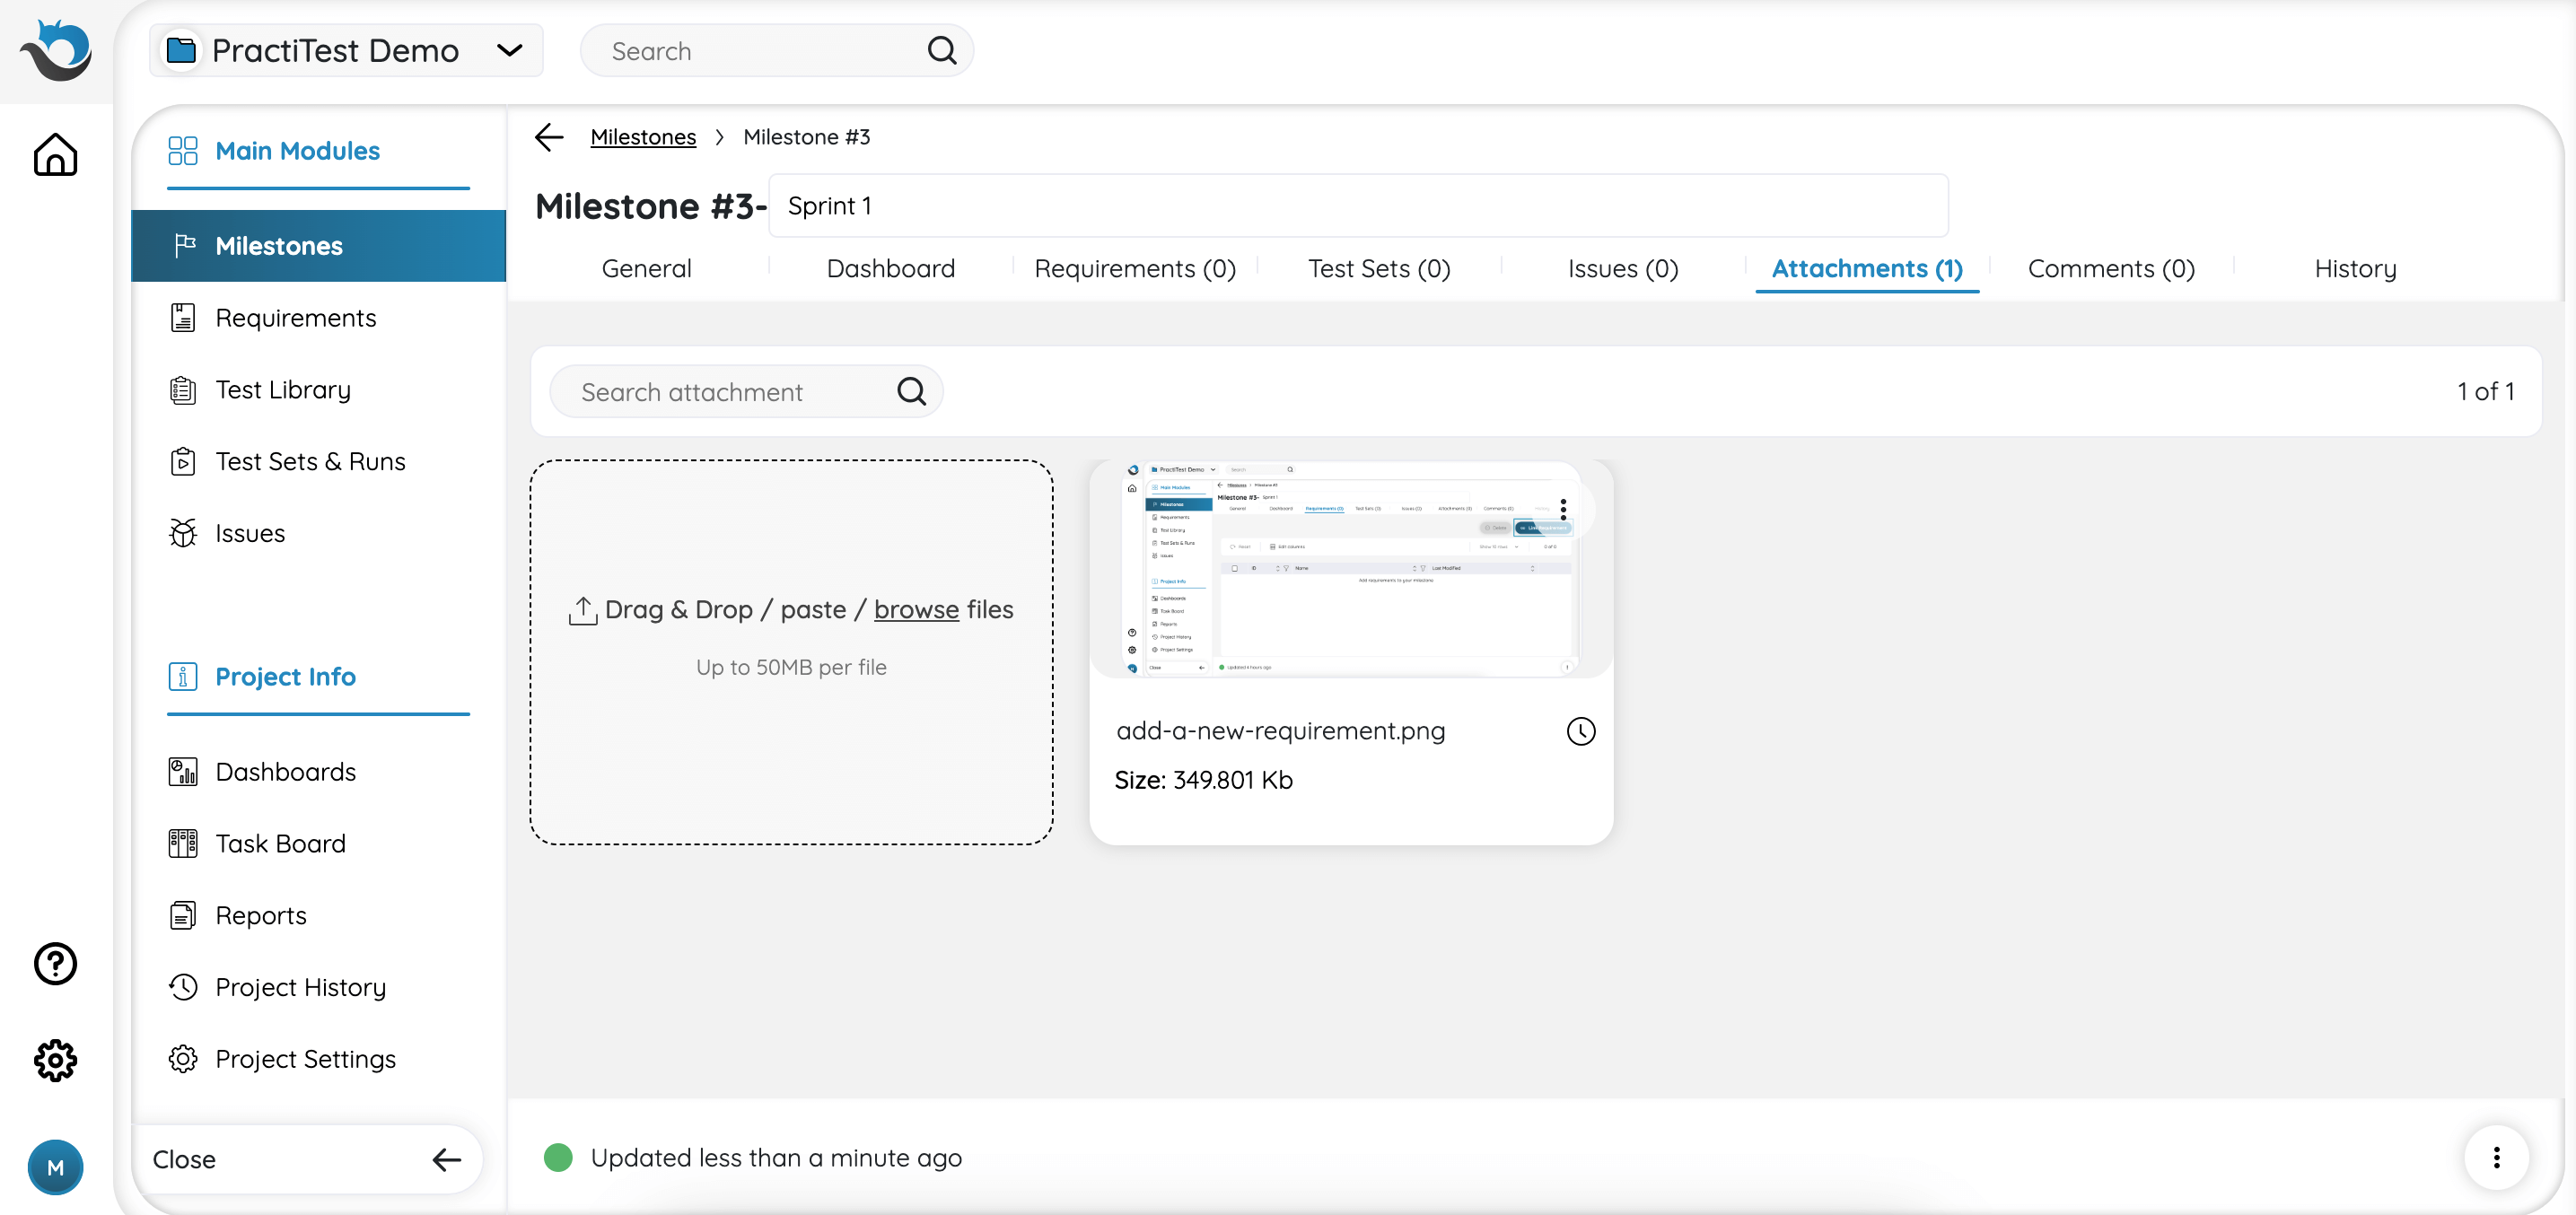
Note: Adding attachments in this tab refers to the entire Milestone as a whole. If you want to add attachments to a particular entity such as Requirement or Test Set, you can do it directly from the entity itself.
Comments
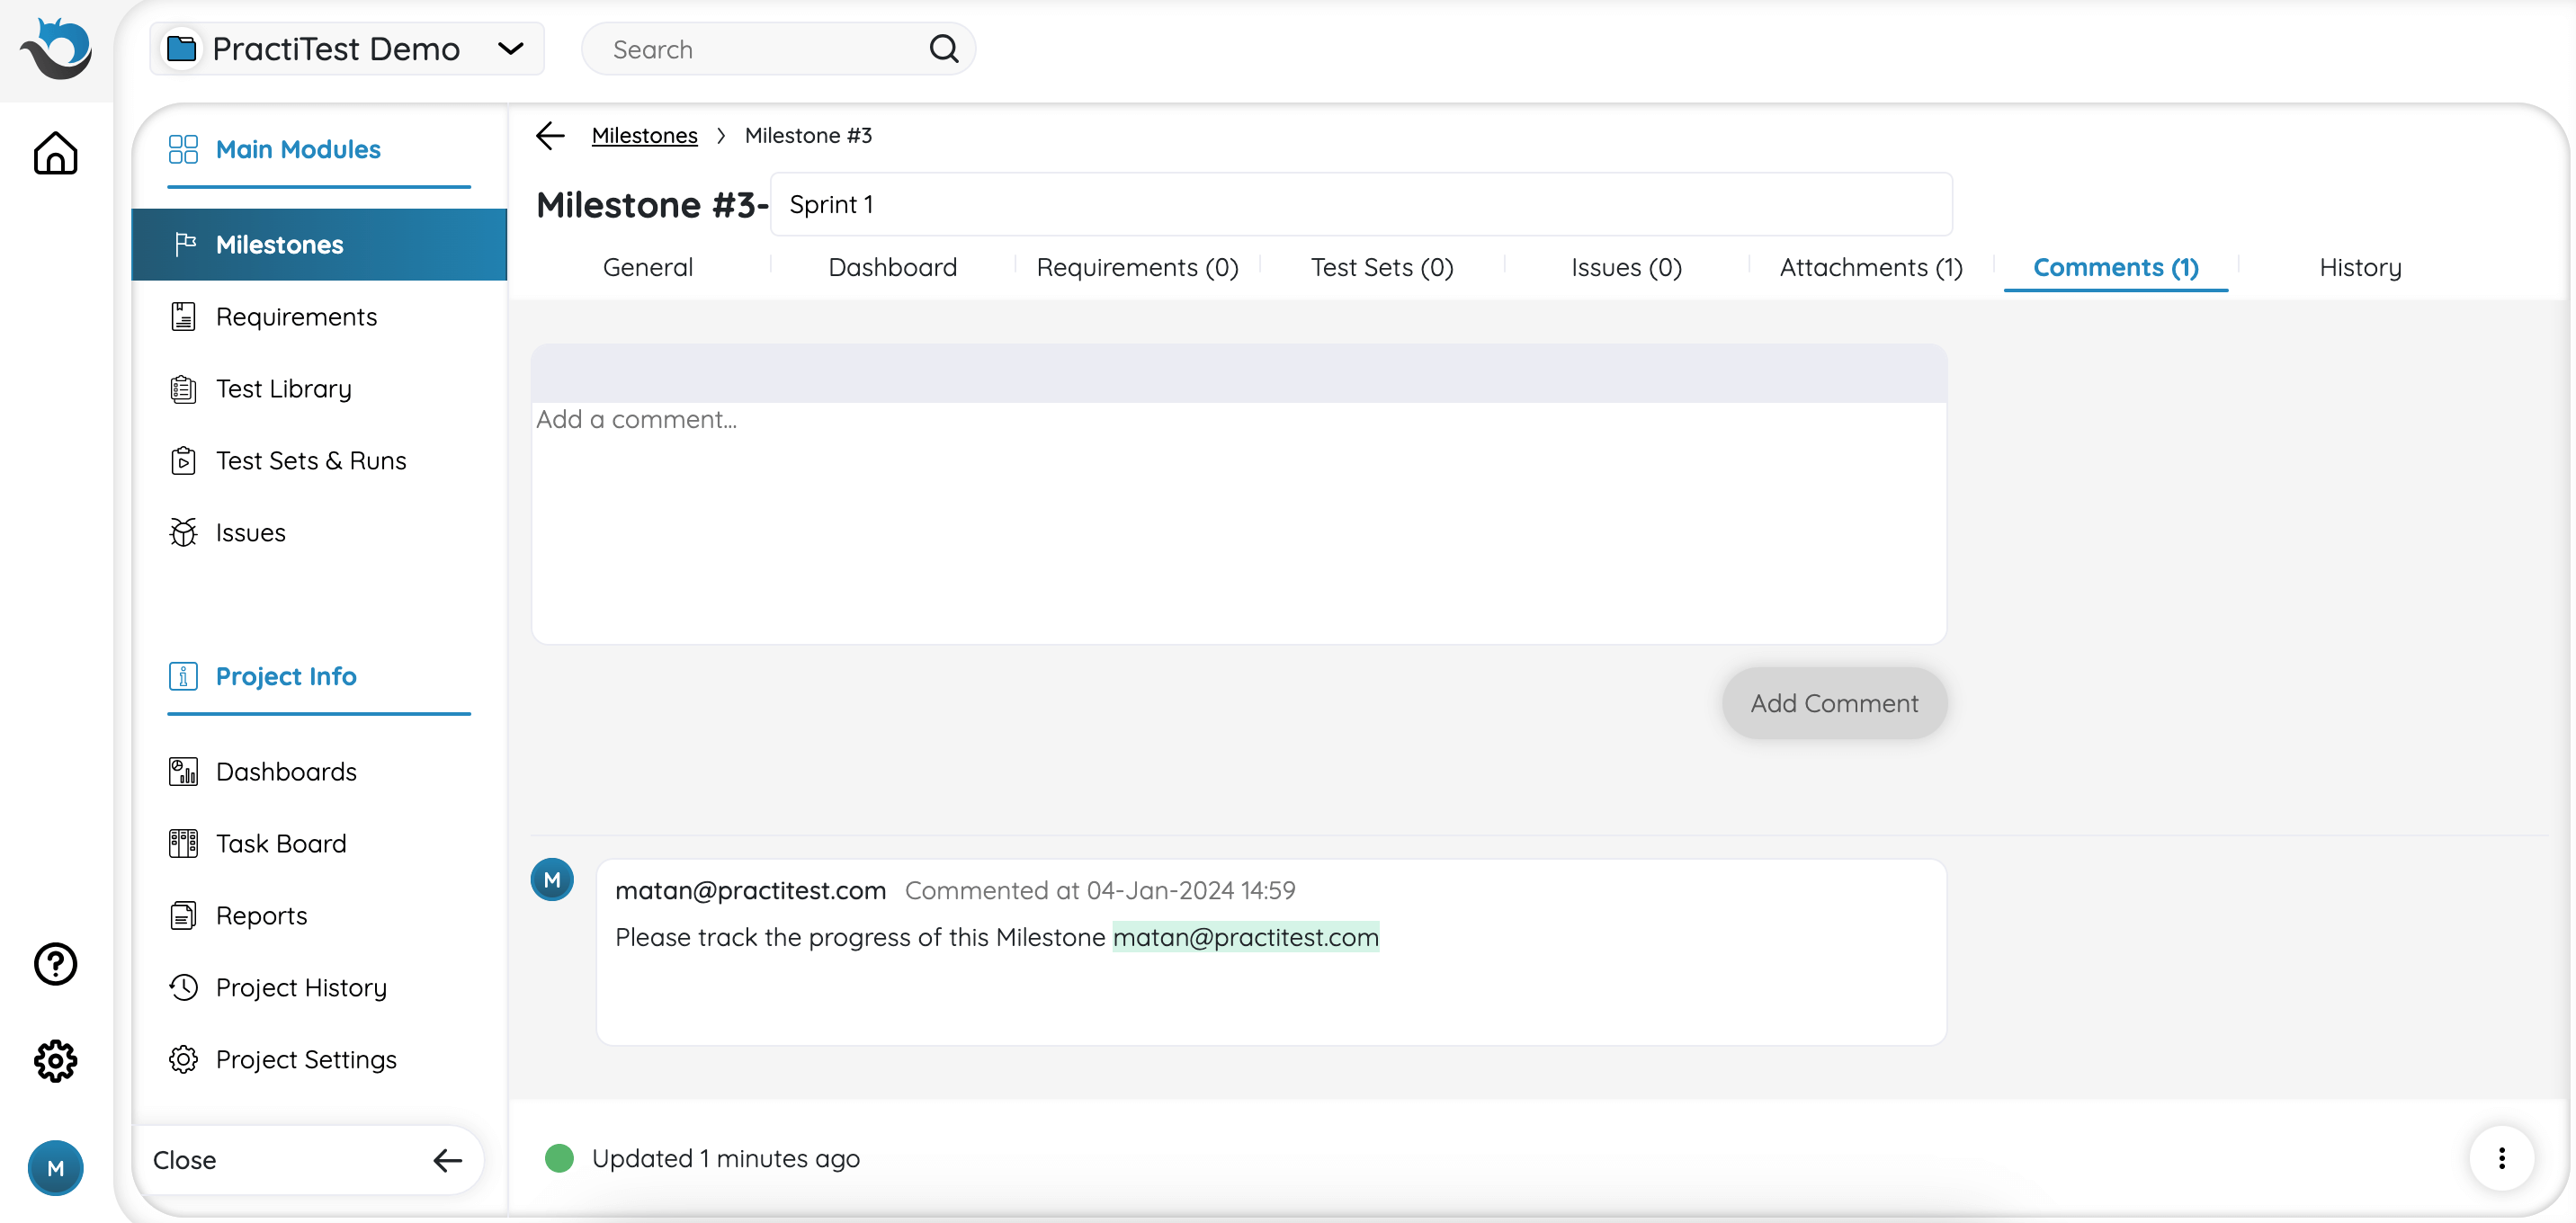
Add and edit comments regarding the Milestone in this tab. You can also tag other users using the ‘@’ tag and then typing their username.
History
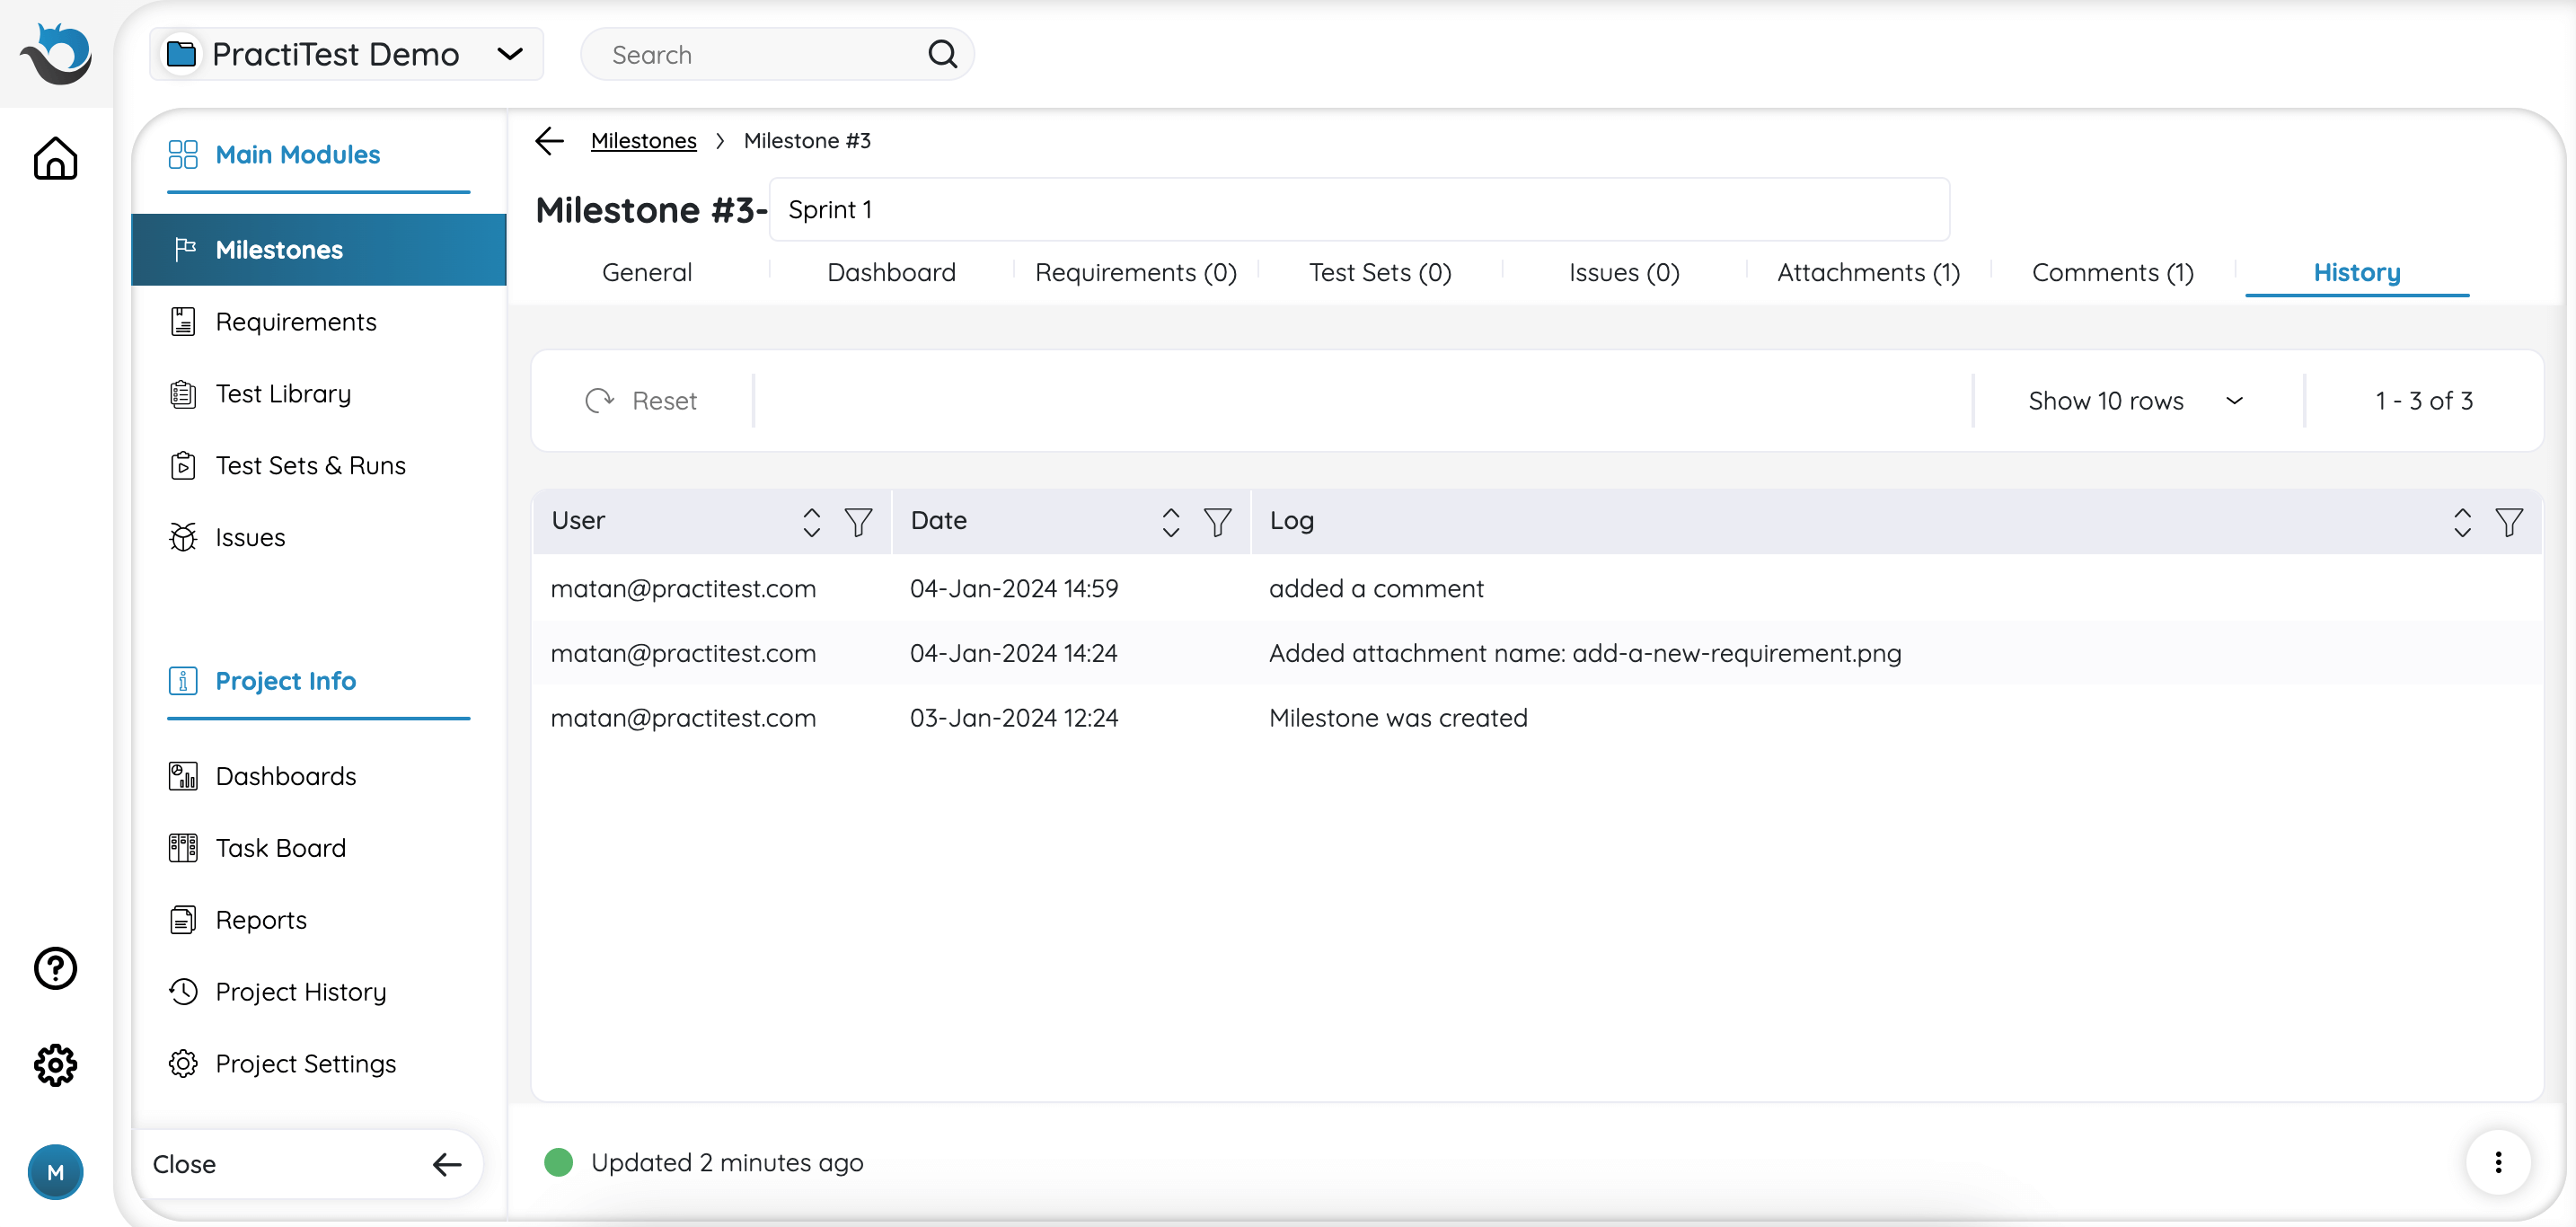
View the activity history log of your Milestone.