Requirements
The Requirements module is where your process should begin. Even though you can always add requirements later, if you want to work by the book, the application lifecycle management process will start with the definition of requirements. Only then should you proceed to write and execute the tests and report any issues. Each requirement may be linked to Tests and/or Issues in order to create traceability links.
The requirements should list the items that need to be part of your product. They can also list the non-functional attributes of your UAT such as scalability, reliability, portability, and so on.
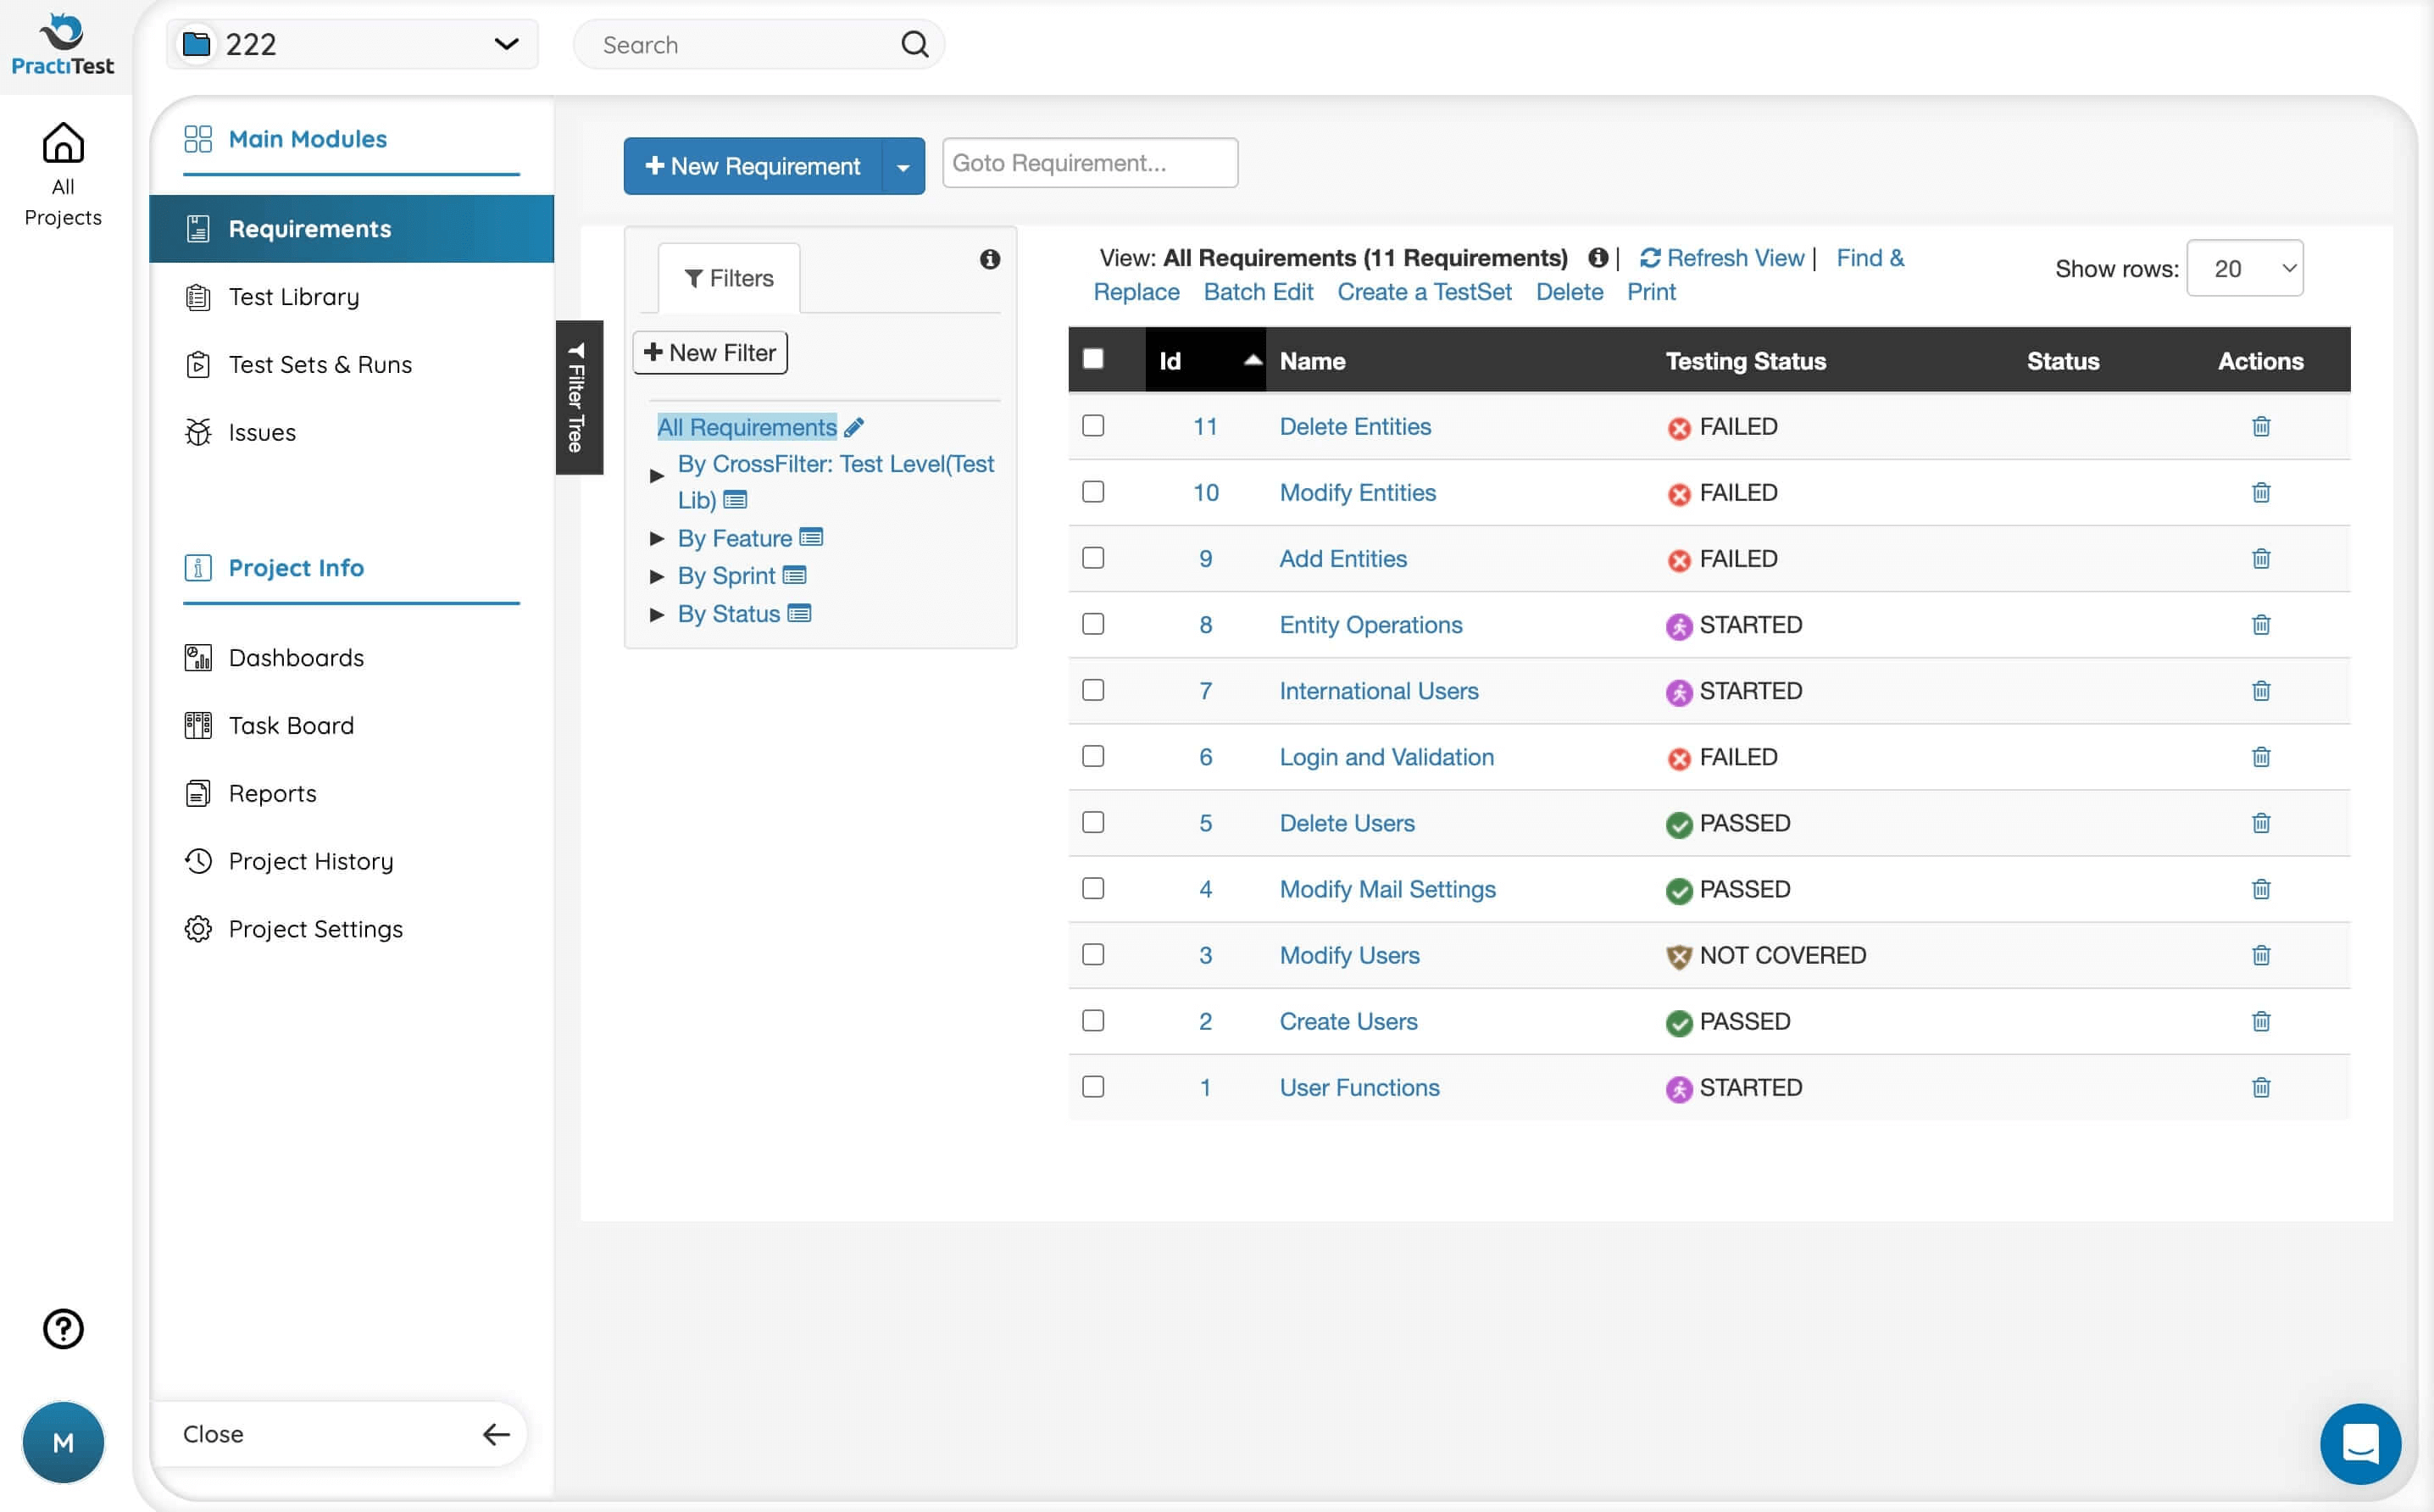
Importing Requirements & Traceability
To import Requirements, go to Project Settings > Import & Export tab > Import Requirements.
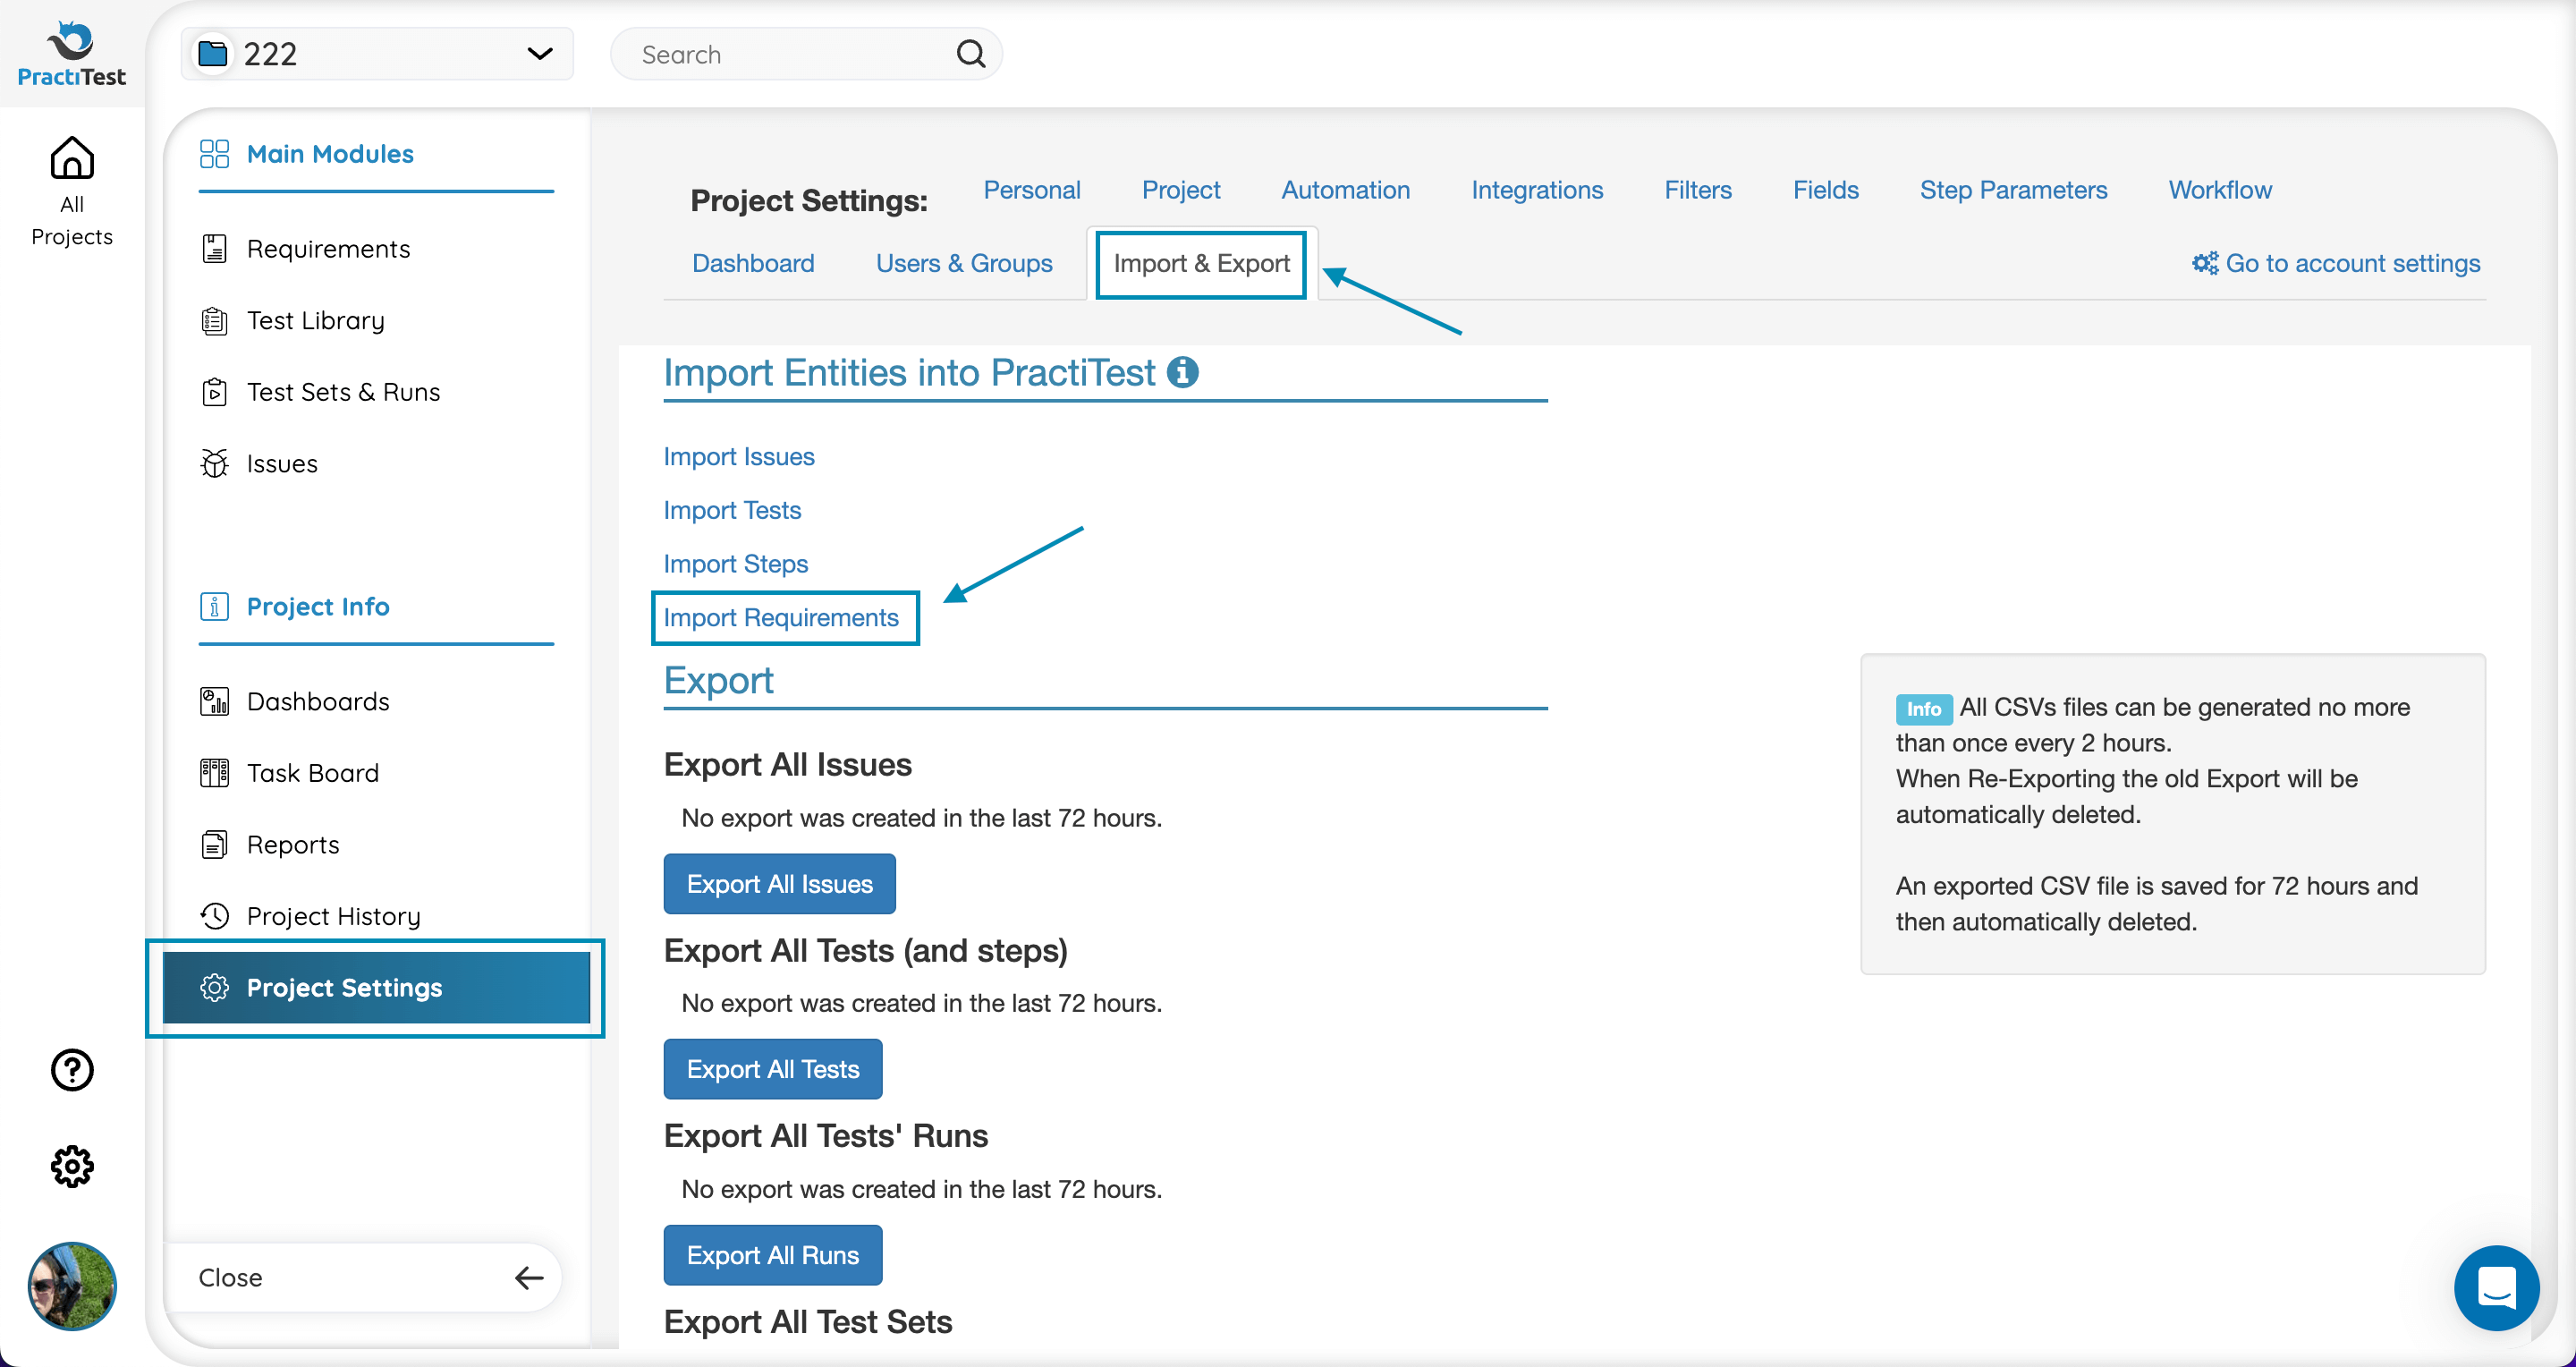
Upload an XLSX-type file from your computer or open a Google Sheet from your Drive. (When uploading a CSV file into PractiTest, please make sure the CSV file is saved with the current encoding (UTF-8). For more information, please read here.)
Next, you will have to map your system and custom fields.
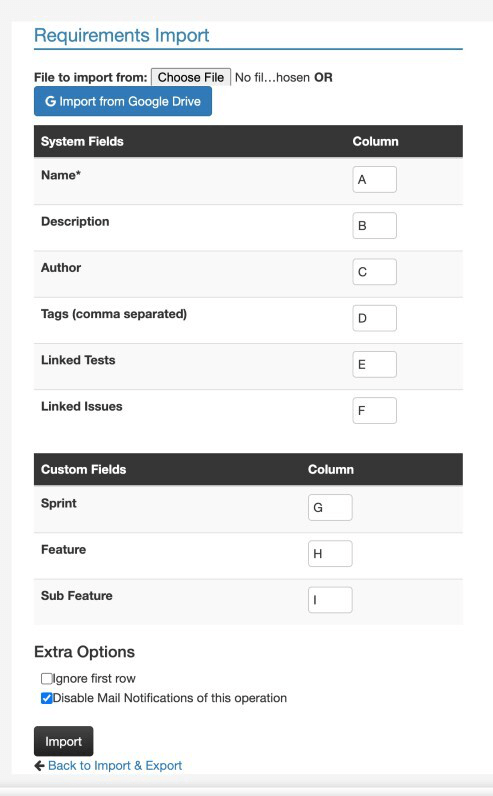
For each field in PractiTest - including Custom Fields - specify (or map) a column in the Excel file.
Please pay close attention to these special fields:
- User Fields – Includes Author, Assigned-to, or User custom fields. The import engine requires the user’s >exact email or display name. The users must be part of the project.
- Mandatory fields – There are mandatory system fields such as tests or requirement titles. A Custom Field can also be defined as mandatory. All mandatory fields are marked with an asterisk (*) and must be mapped during the import procedure or the import will fail.
- Linked Tests and Linked Issues - If you want to import the traceability and coverage of your imported requirements, add the linked tests and issue IDs, separated by commas, to a mapped column. For example, see column E for Linked Tests and column F for Linked Issues in the above screenshot.
After mapping the columns in your file to the fields in PractiTest and choosing the file to import, scroll down to Extra Options. If the first row is intended for column titles, select the box “ignore the first row”. You can also enable or disable email notifications of the imported entities to your users during the import process.
Note: When leaving the author column empty, the user that imports the file will be set as the author of the imported entities. If you want to change the author value, state an email address or display name of one of the account’s users.
For more useful tips on importing, please visit this page.
Adding a New Requirement
To add a requirement in PractiTest, follow these simple steps:
- Go to the Requirements tab.
- Click the New Requirement.
- Fill out the fields for your Requirements.
- Link the Requirements to the relevant tests/issues (optional).
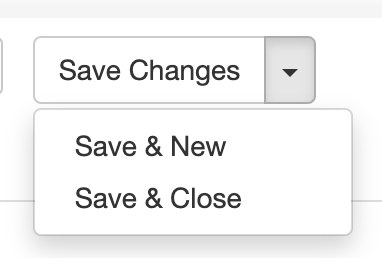
- Click ‘Save Changes’, then choose either ‘Save & New’ to save and automatically create a new Requirement or ‘Save & Close’ to return to the Requirement Grid.
Link Tests and Issues for Traceability
You can link multiple Tests and Issues to each Requirement.
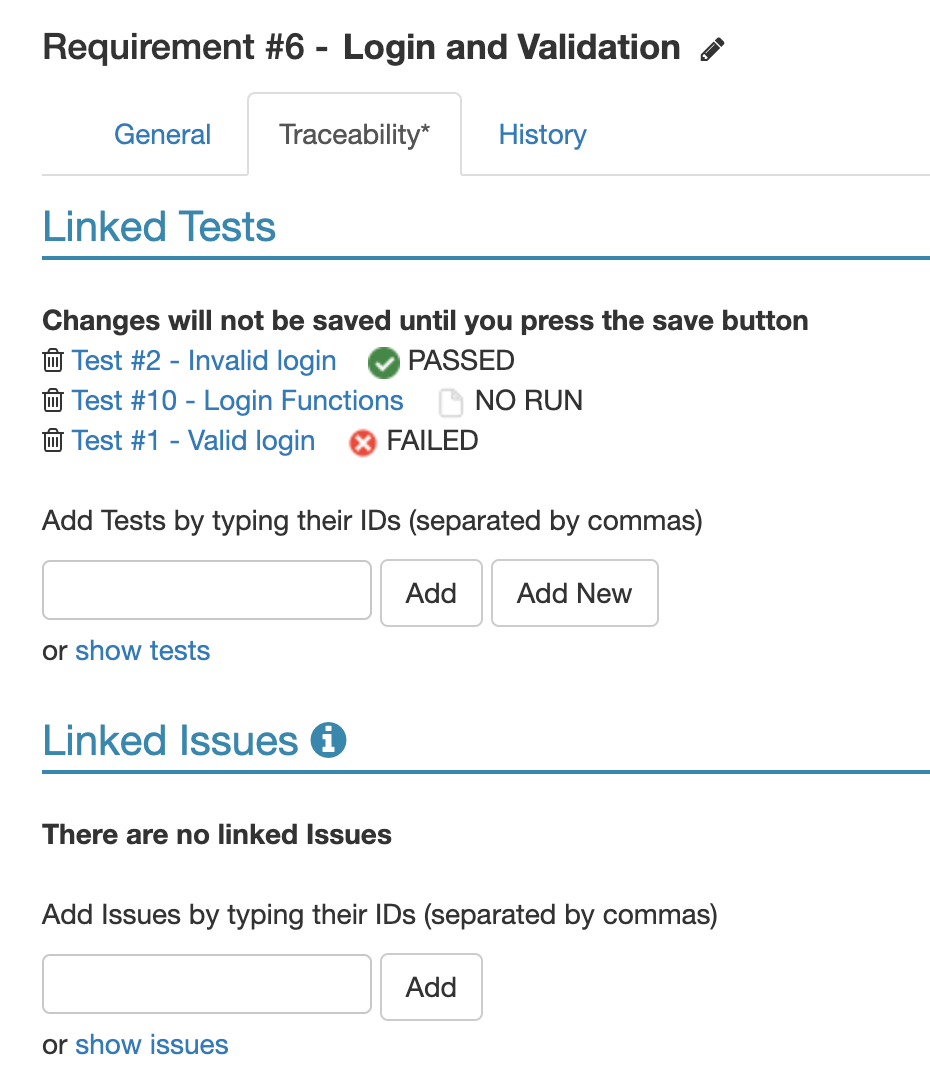
Requirement Status Field for Full Traceability
The Requirement’s status is derived from the Tests which are linked to it, and it’s essential for full traceability. Requirement statuses are automatically set by PractiTest according to the following cases:
- NOT COVERED – There are no tests linked to this requirement.
- NO RUN – There is at least one test linked to the requirement. None of the linked tests ran.
- STARTED – There is at least one test linked to the requirement that started running. None of them failed or were set to blocked.
- PASSED – All linked tests ran and passed.
- BLOCKED – At least one of the linked tests was set as blocked. None of the linked tests failed.
- FAILED – At least one of the linked tests failed.
- N/A – All tests linked to this requirement are marked as N/A.
Managing Requirements
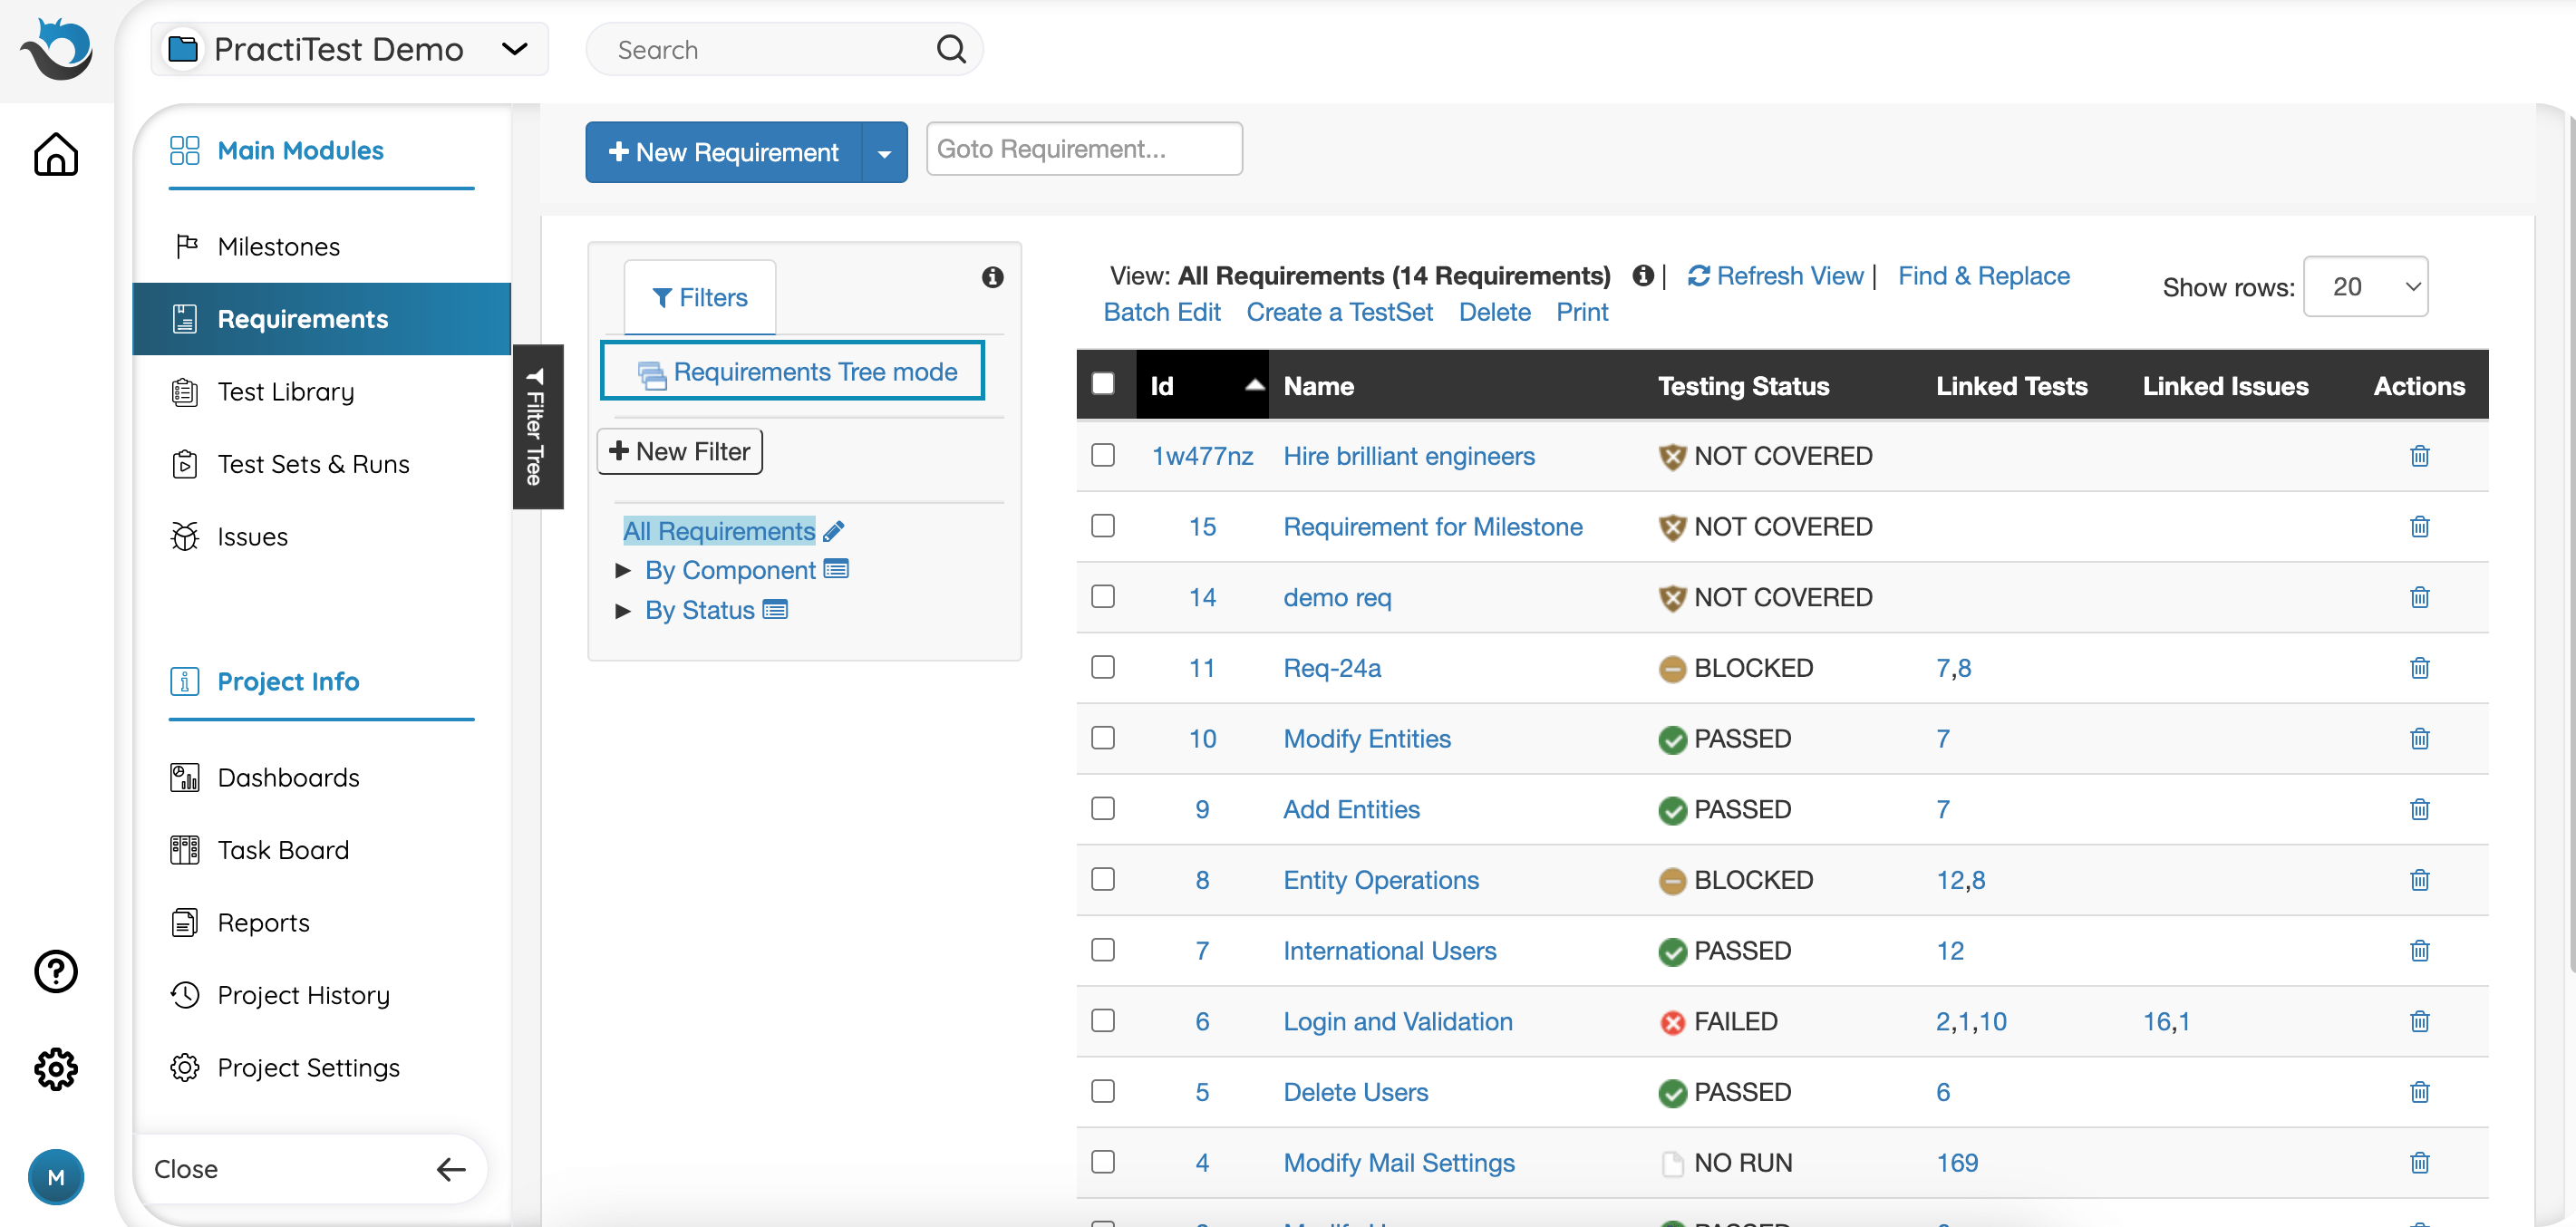
We recommend that you use the Requirements Filters Mode, which is fully customizable. Similar to the other modules (issues, tests, etc.), the filters mode allows you to organize your requirements using dynamic and cascading filters (hierarchical tree structure). You can organize your requirements by any criterion (field) assigned to requirements. For example, you can create a filter to display all the requirements that belong to a certain product component, a certain version, etc. Click here to learn more about Custom Filters.
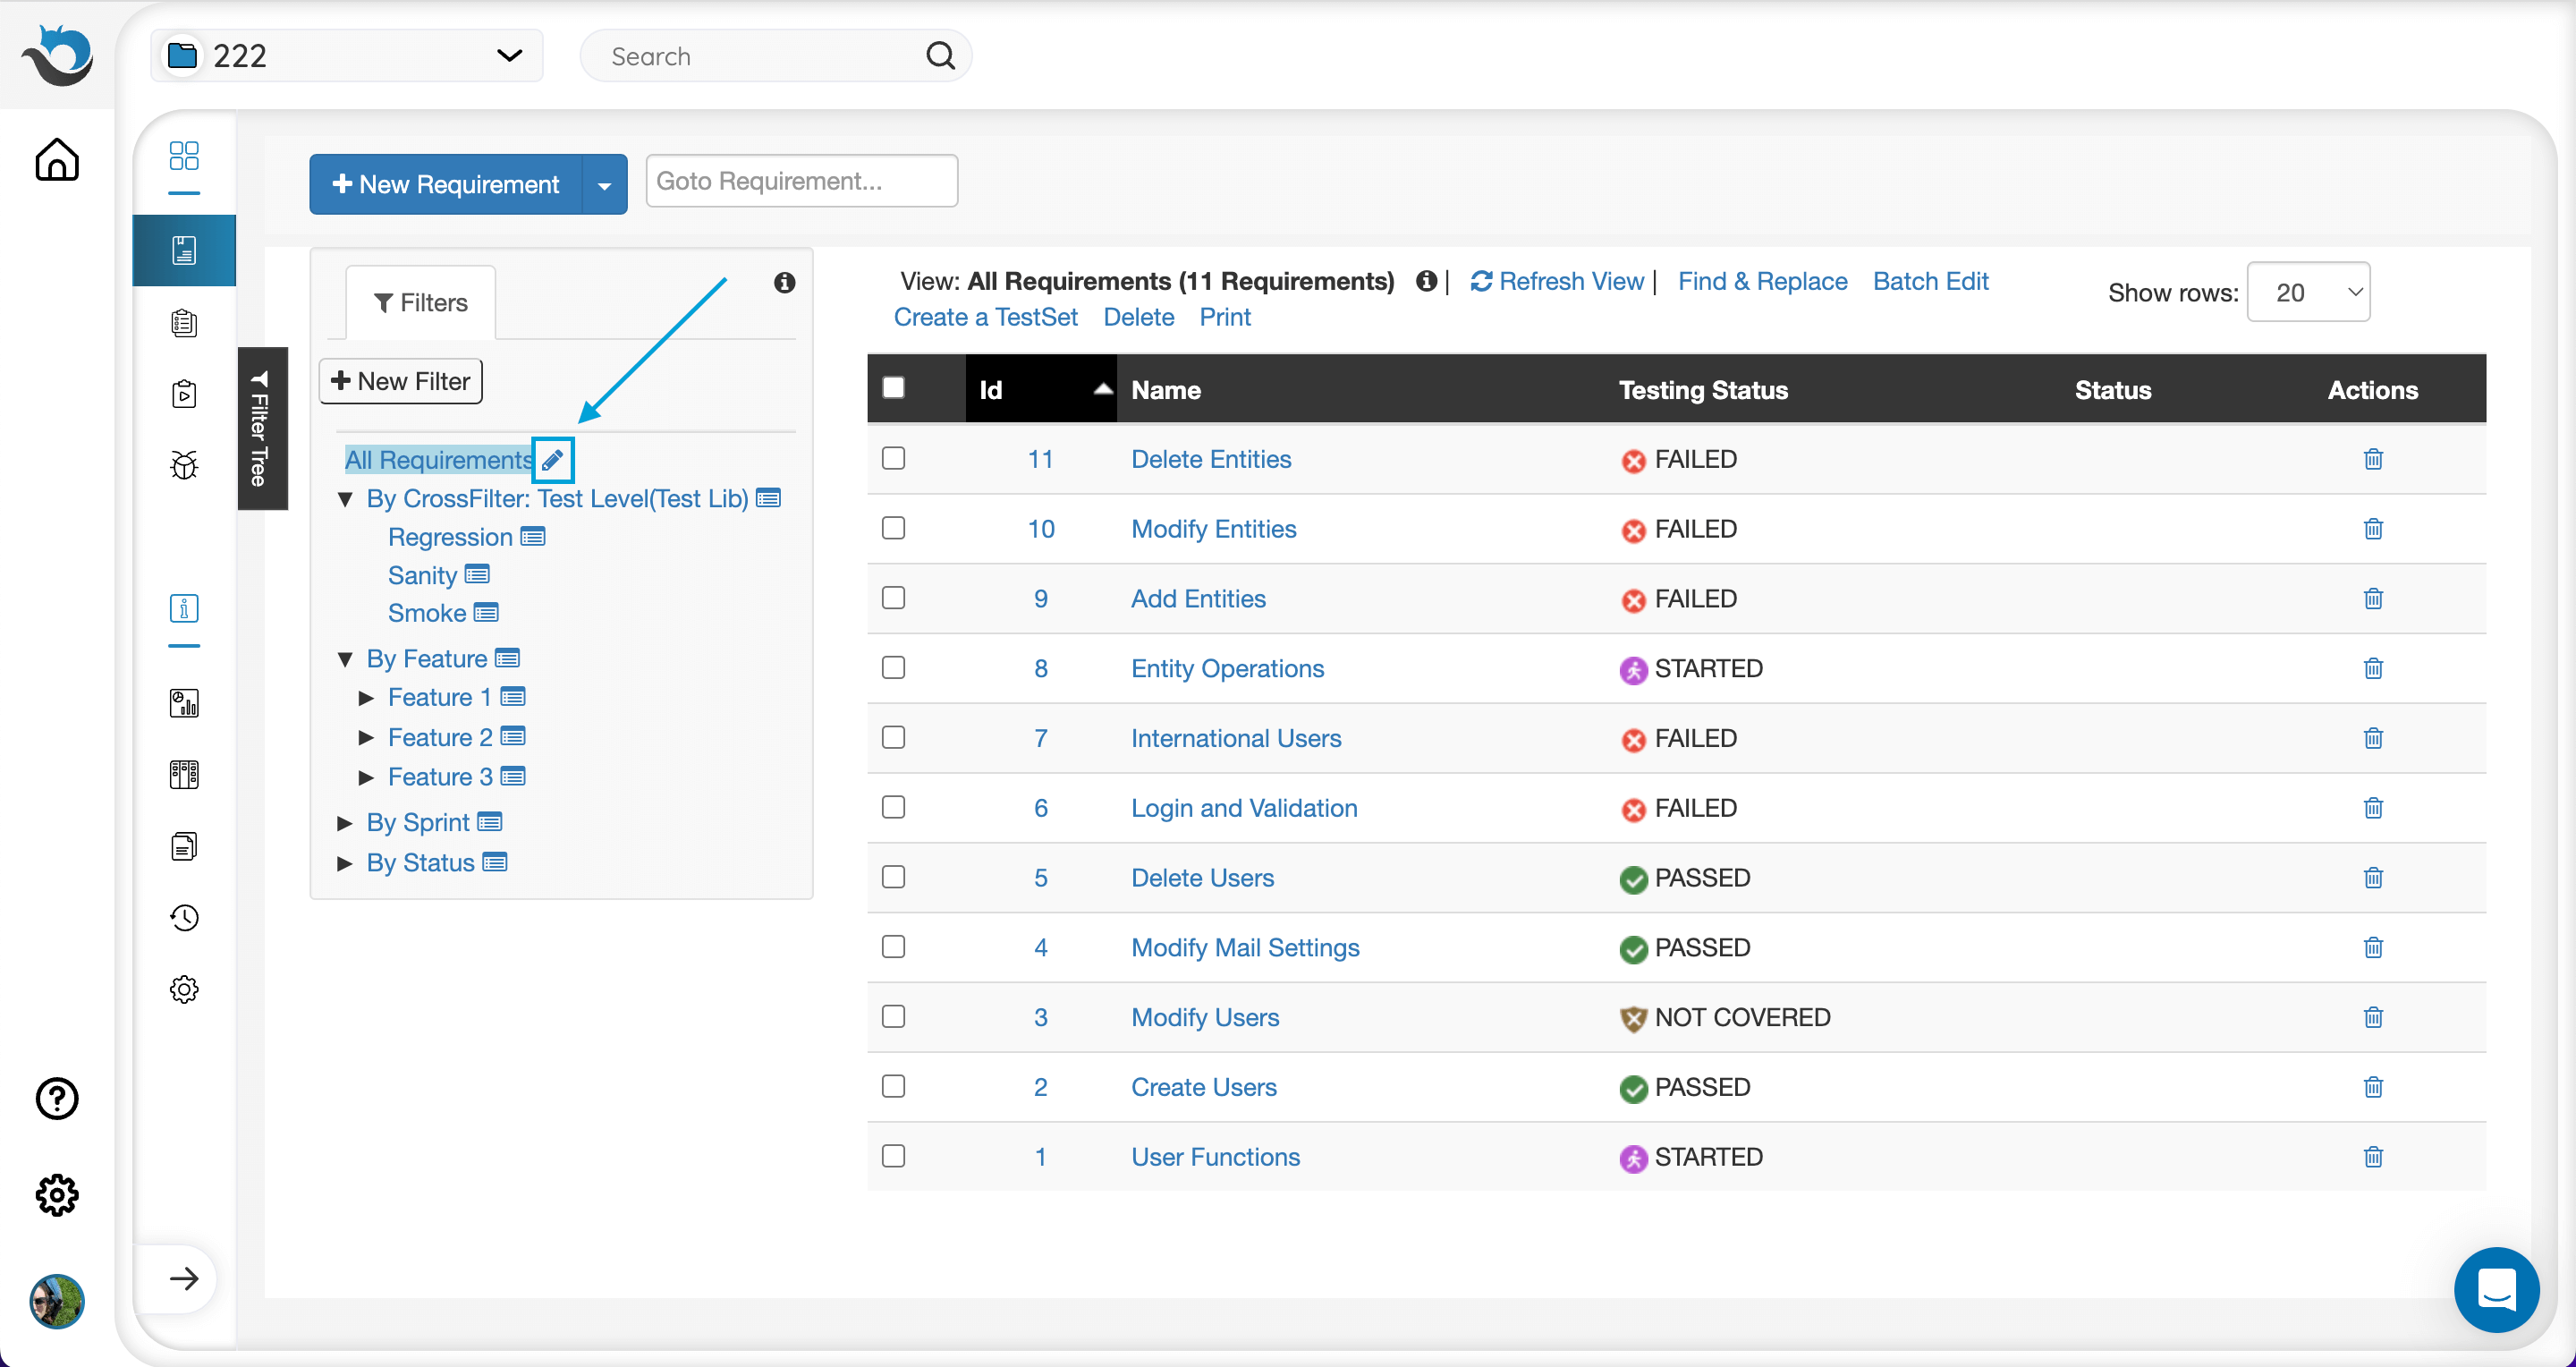
To Adjust the columns of your main Requirements view, please press the pencil icon next to “All Requirements” in the Filters window.
Find and Replace
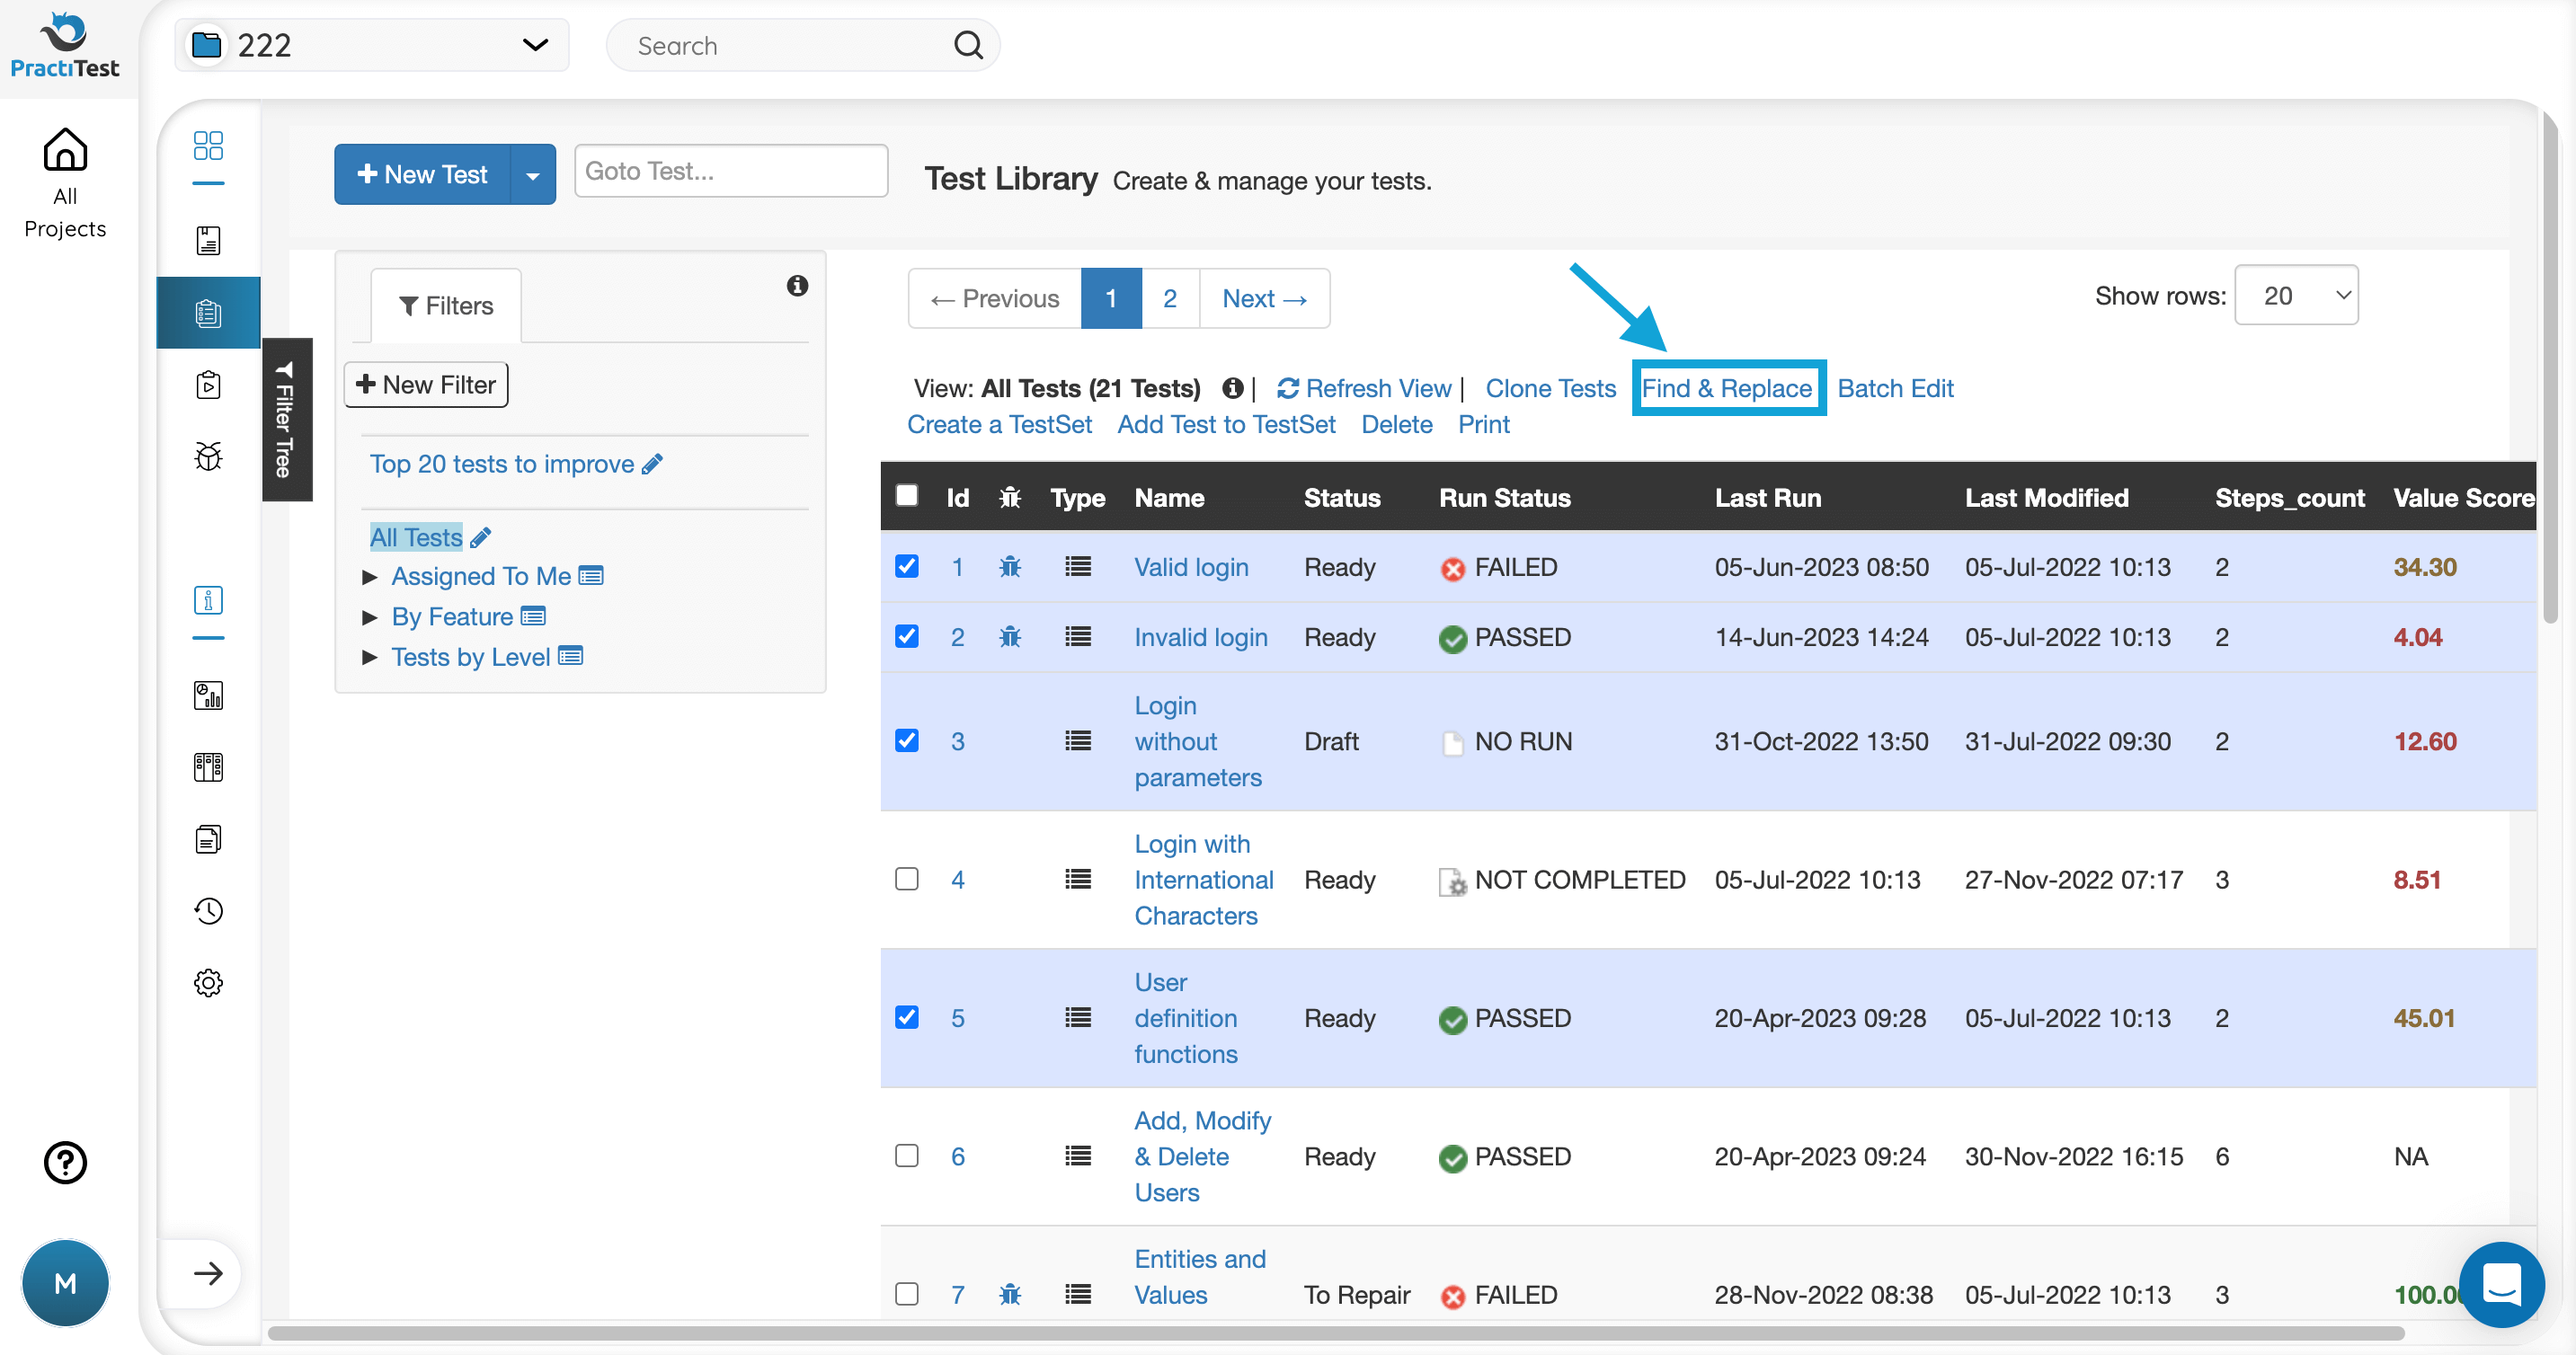
To replace the same phrase in multiple entities in a single action, go to the grid, then choose the entities (tests, requirements, test sets, or issues) you want to perform the action on. Press the Find & Replace button.
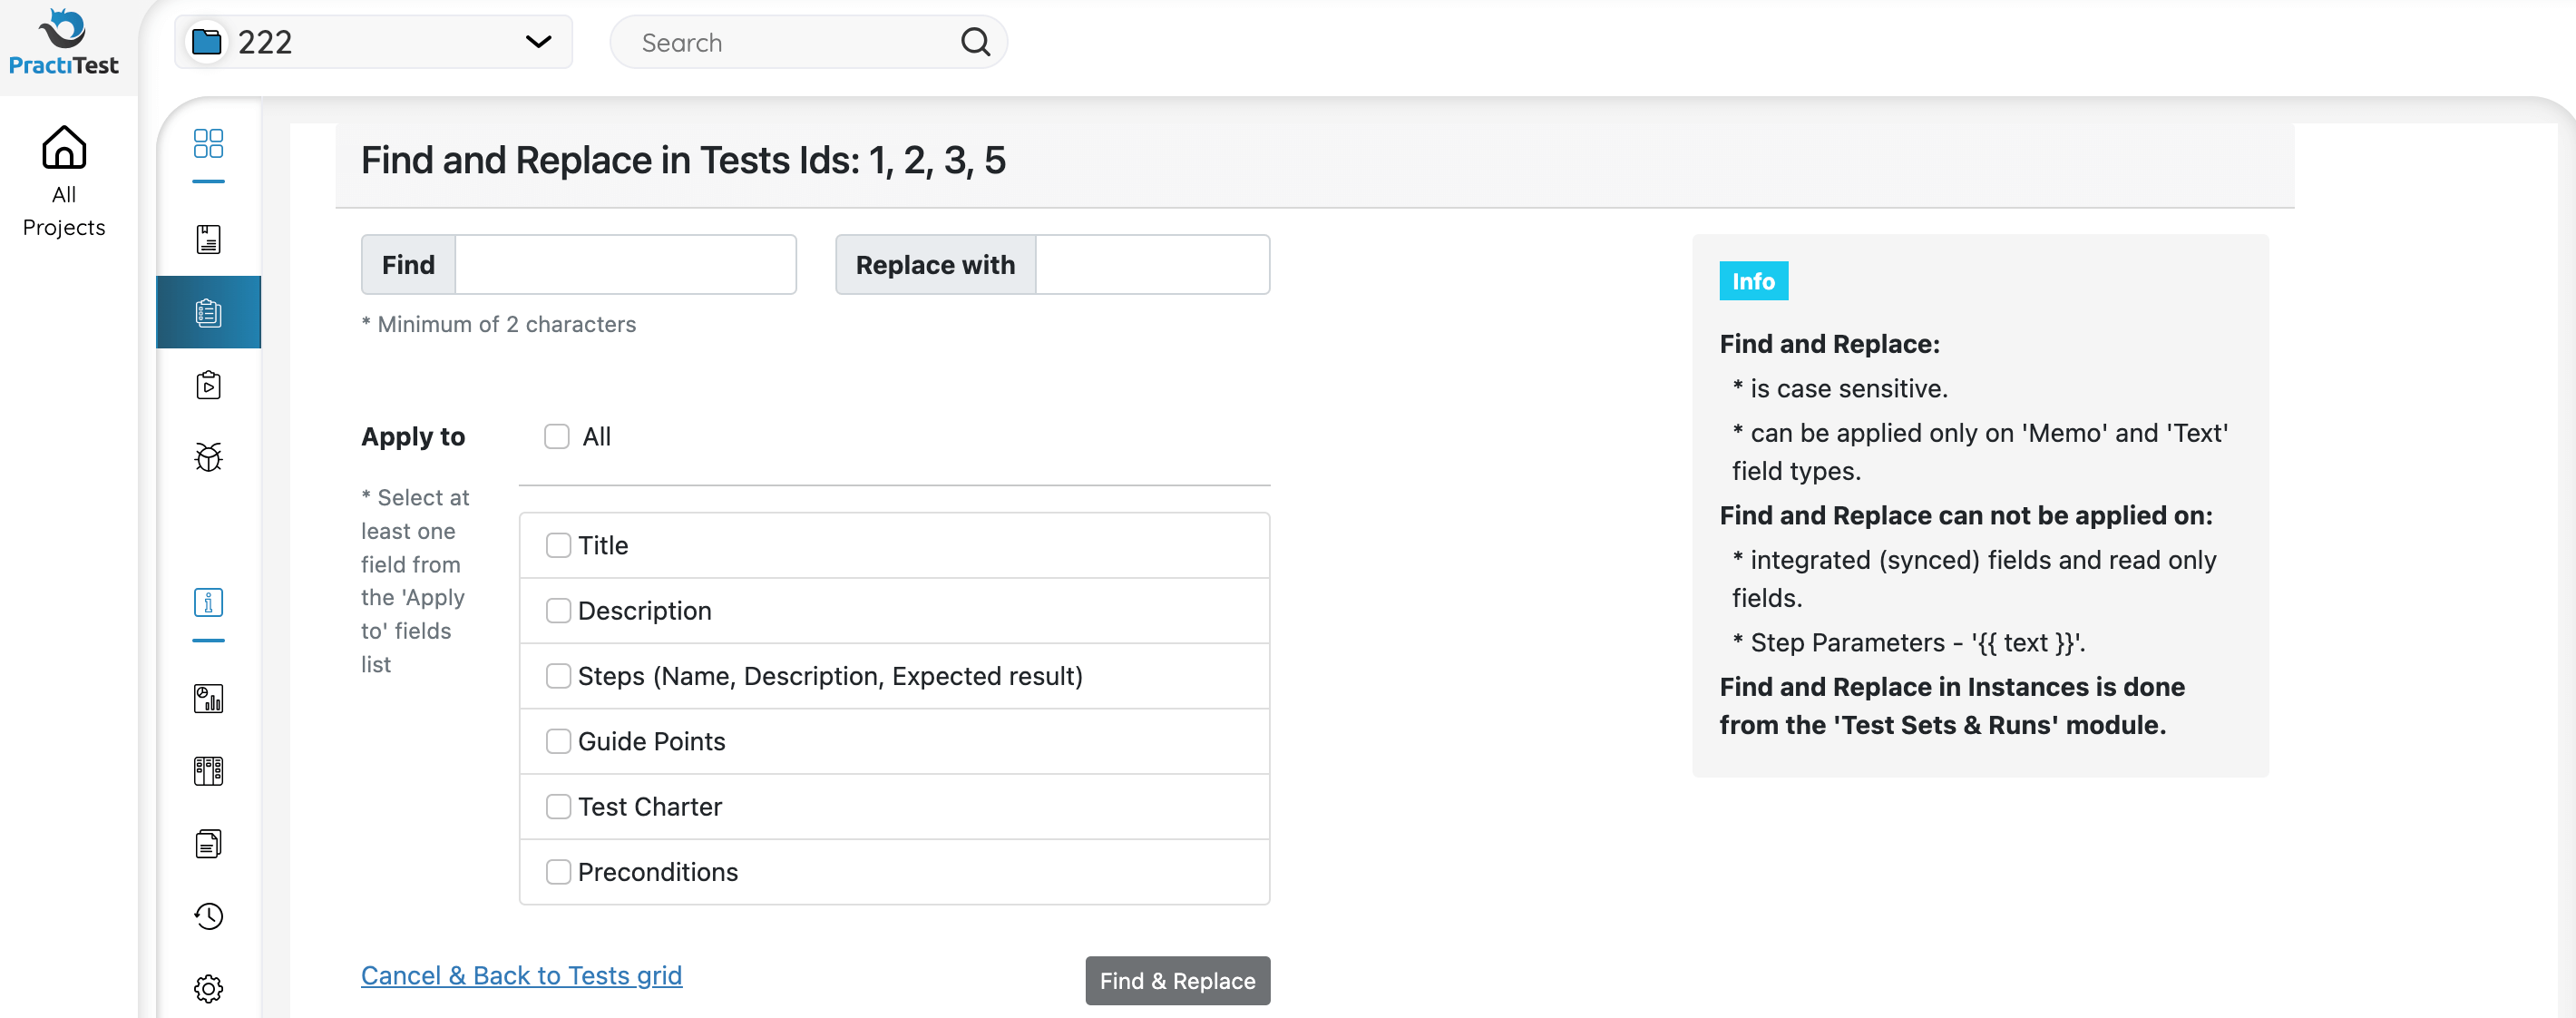
Enter a phrase you want to replace in the ‘Find’ field, then enter the value you want to replace it with in the ‘Replace with’ field. Note: The ‘Find & Replace’ action is case-sensitive.
Choose the areas and fields you want to apply the search to - you can choose to replace it in all fields or select specific fields such as title fields, description fields, and so on.
After pressing ‘Find & Replace’, you will see a message at the top of the screen confirming how many entities you are about to change. For example, if you choose 10 entities, but the word you want to replace appears only in 4, you will see 4 entities to be changed. After confirming the action, the phrase you entered will be automatically replaced.
Batch Edit Fields
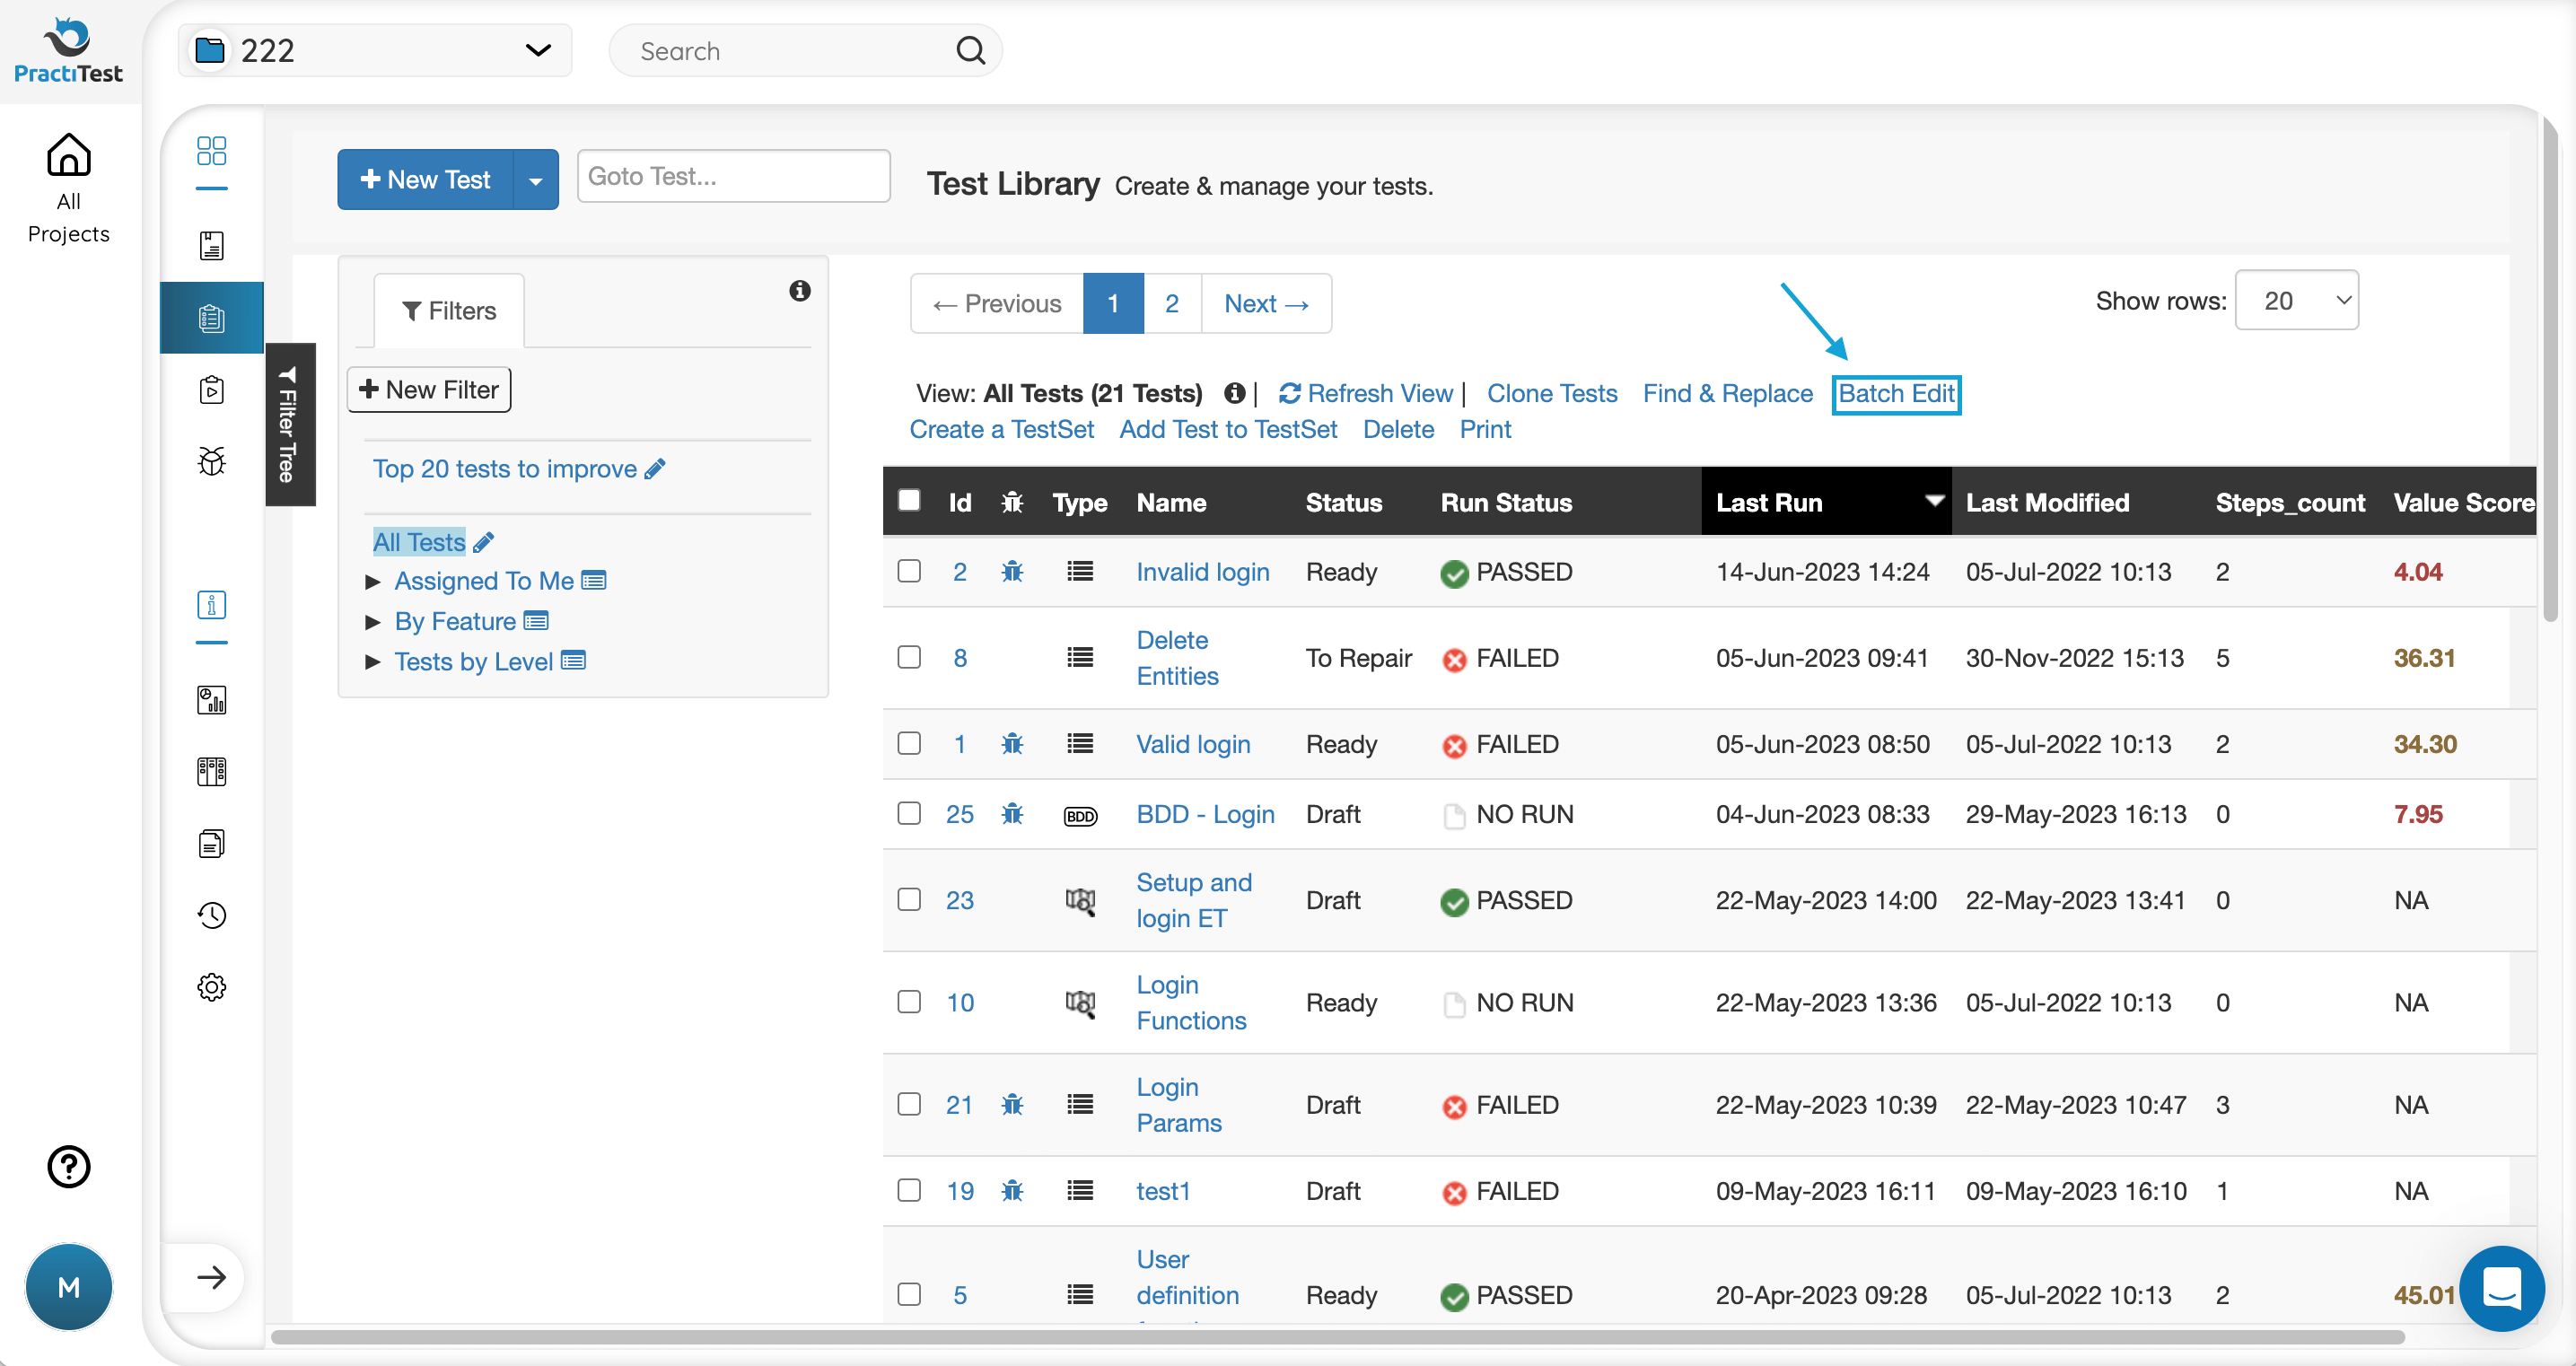
To edit fields of a few entities in a single action, go to the grid, then choose the entities (tests, requirements, test sets, or issues) you want to perform the action on. Press the ‘Batch Edit’ button.
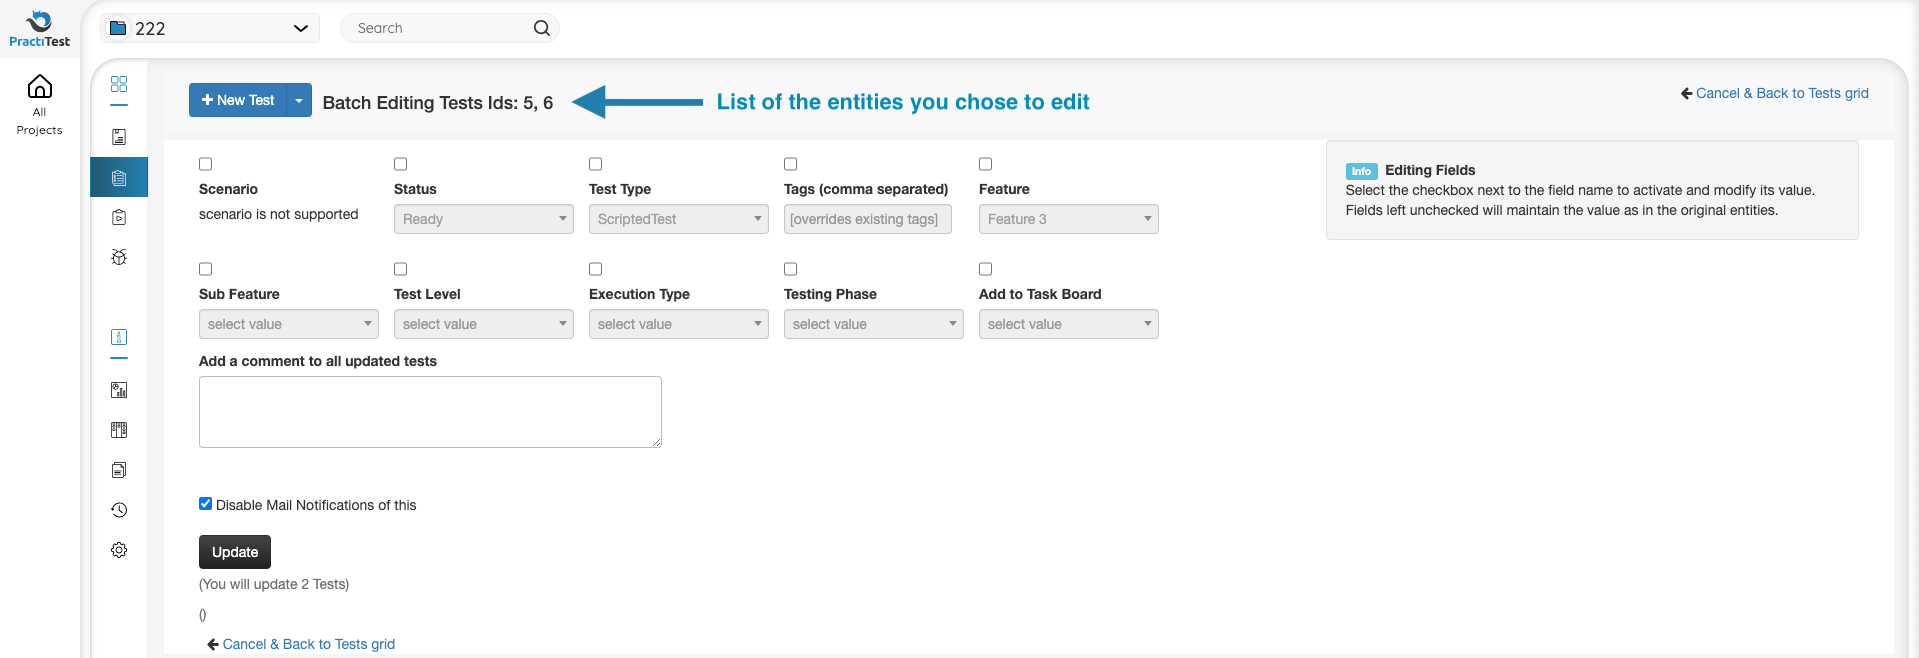
Choose the fields you want to edit in the selected entities, then enter the value you want them to receive. You can add a comment to the updated entities and enable / disable email notifications of this batch edit.
Creating a Test Set Based on Requirements’ Traceability
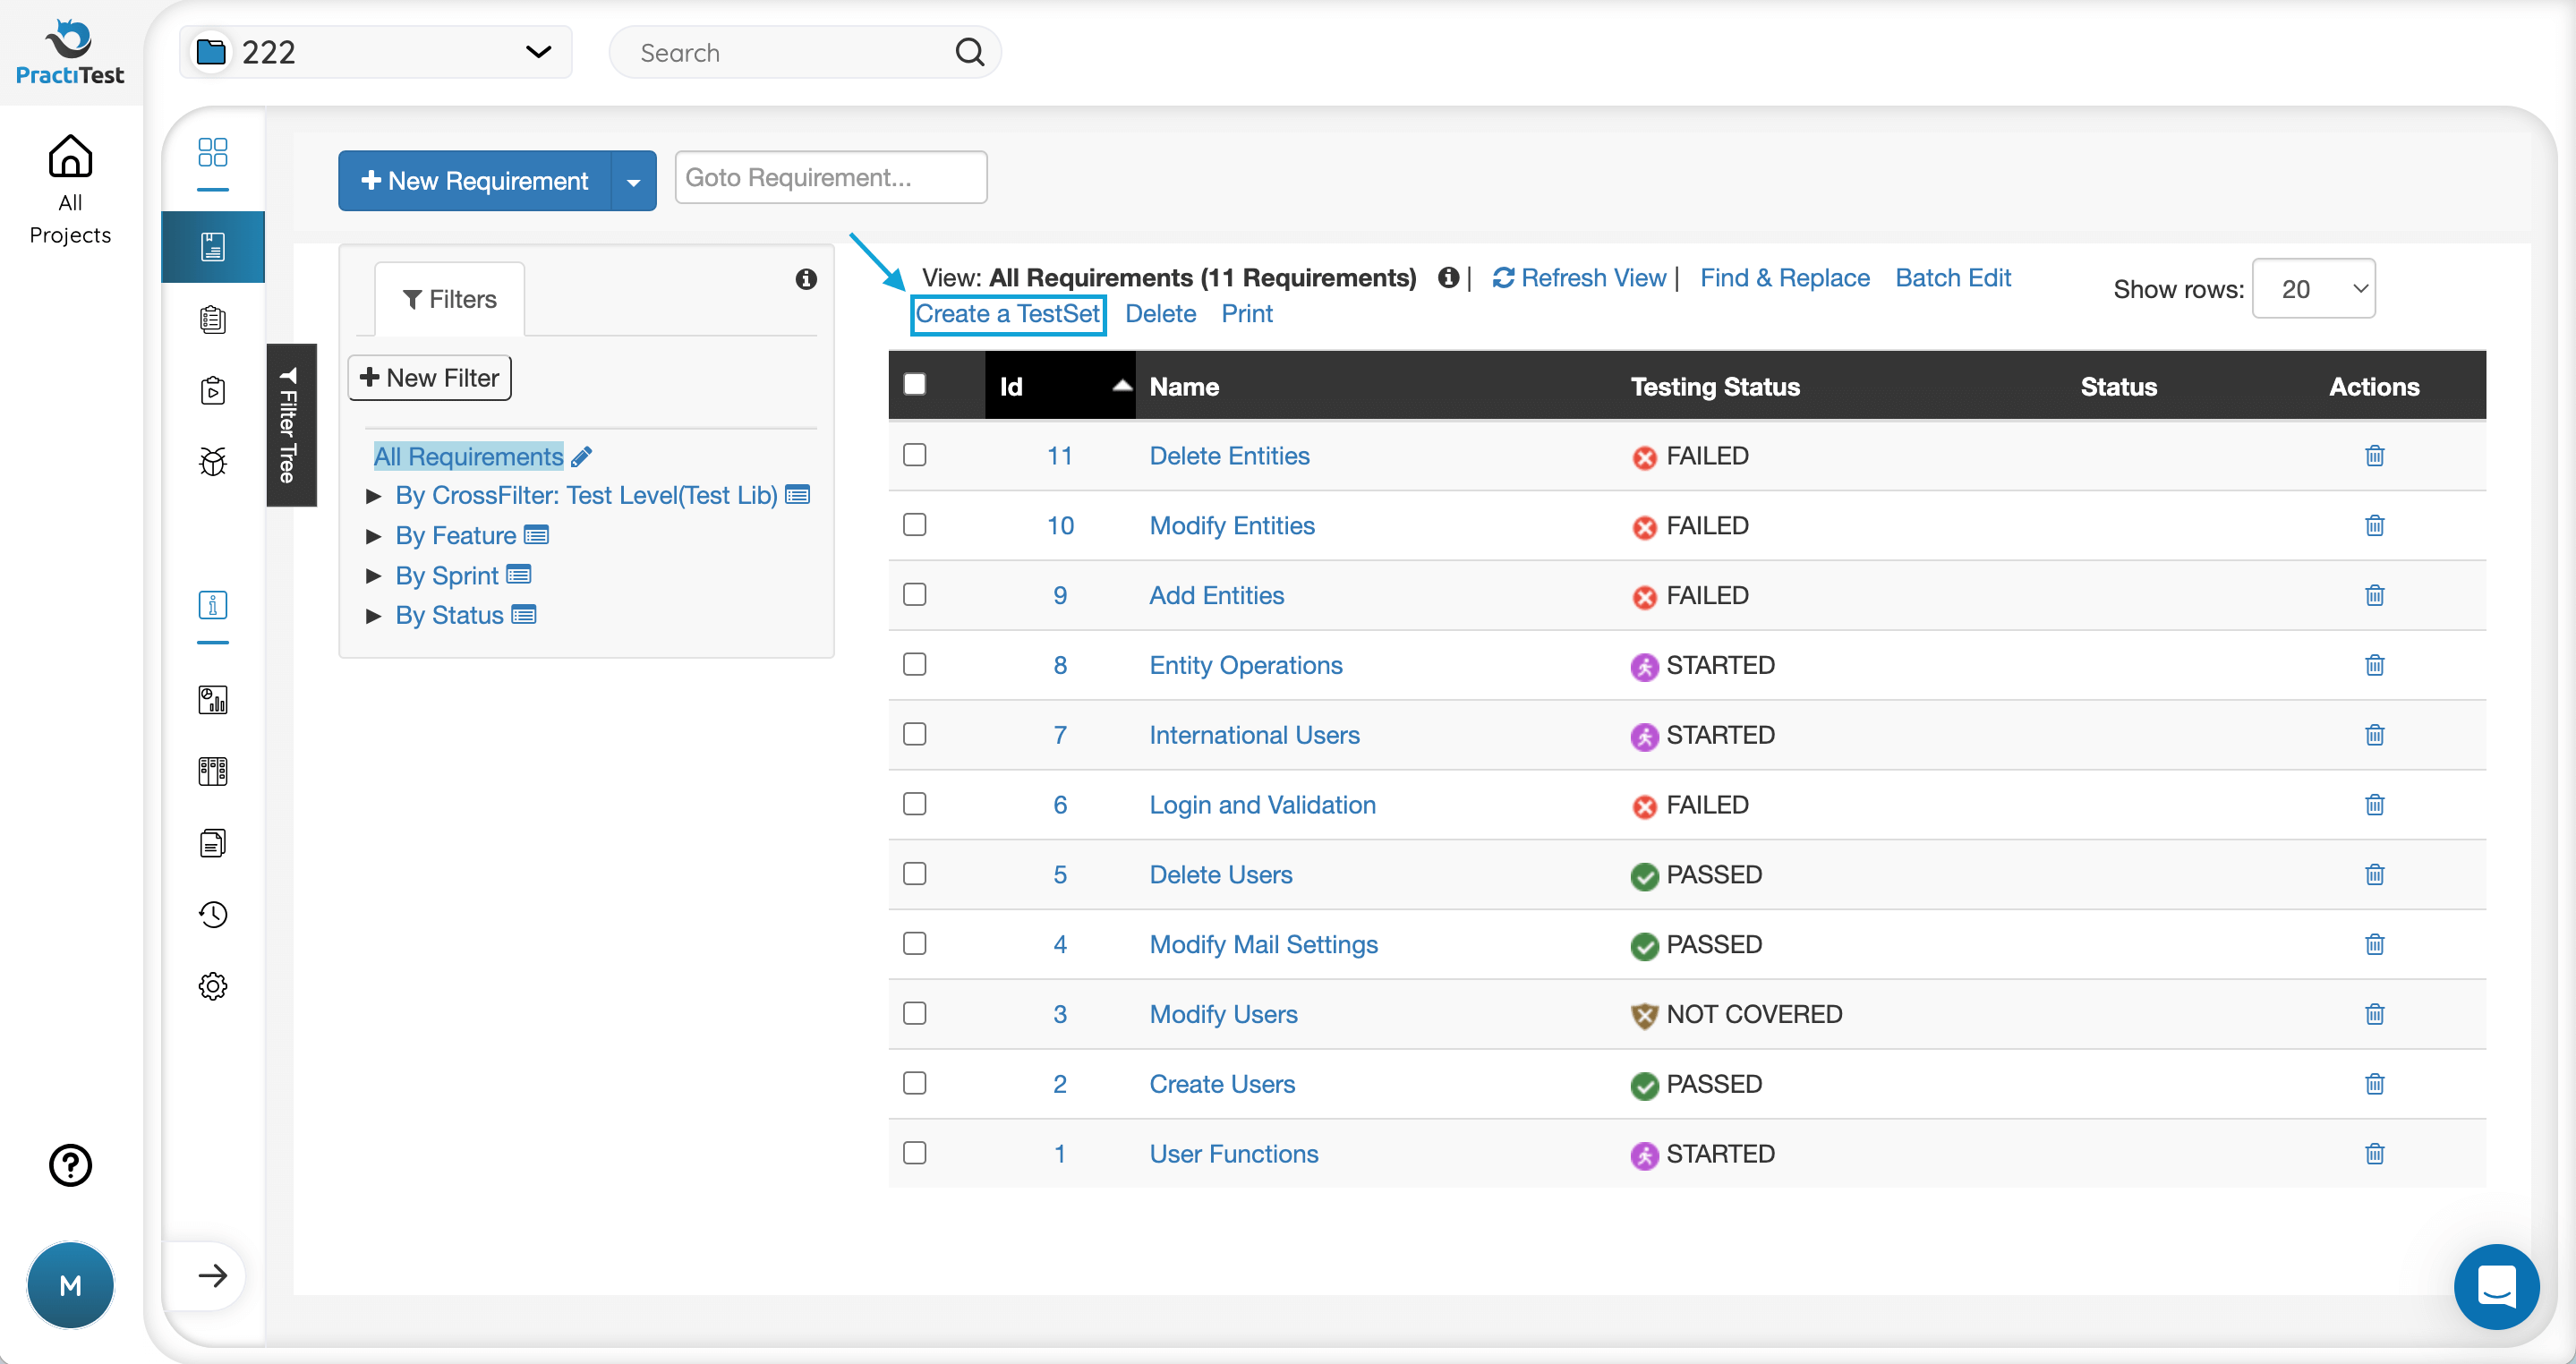
A Test Set can be created directly from the Requirements grid. If you want to create a Test Set that will cover the tests associated with a specific requirement, choose the requirement in the requirements grid and press the “Create a Test Set” button. A new test set will then be created. Once saved, you will see test instances pre-populated based on the tests linked to the chosen requirement.
Requirement Parent Field
Another way to view your requirements is by using the Requirement Tree Mode. Each requirement can have a parent and multiple child requirements, denoting the relationship and association between the different functional and non-functional aspects of your system.
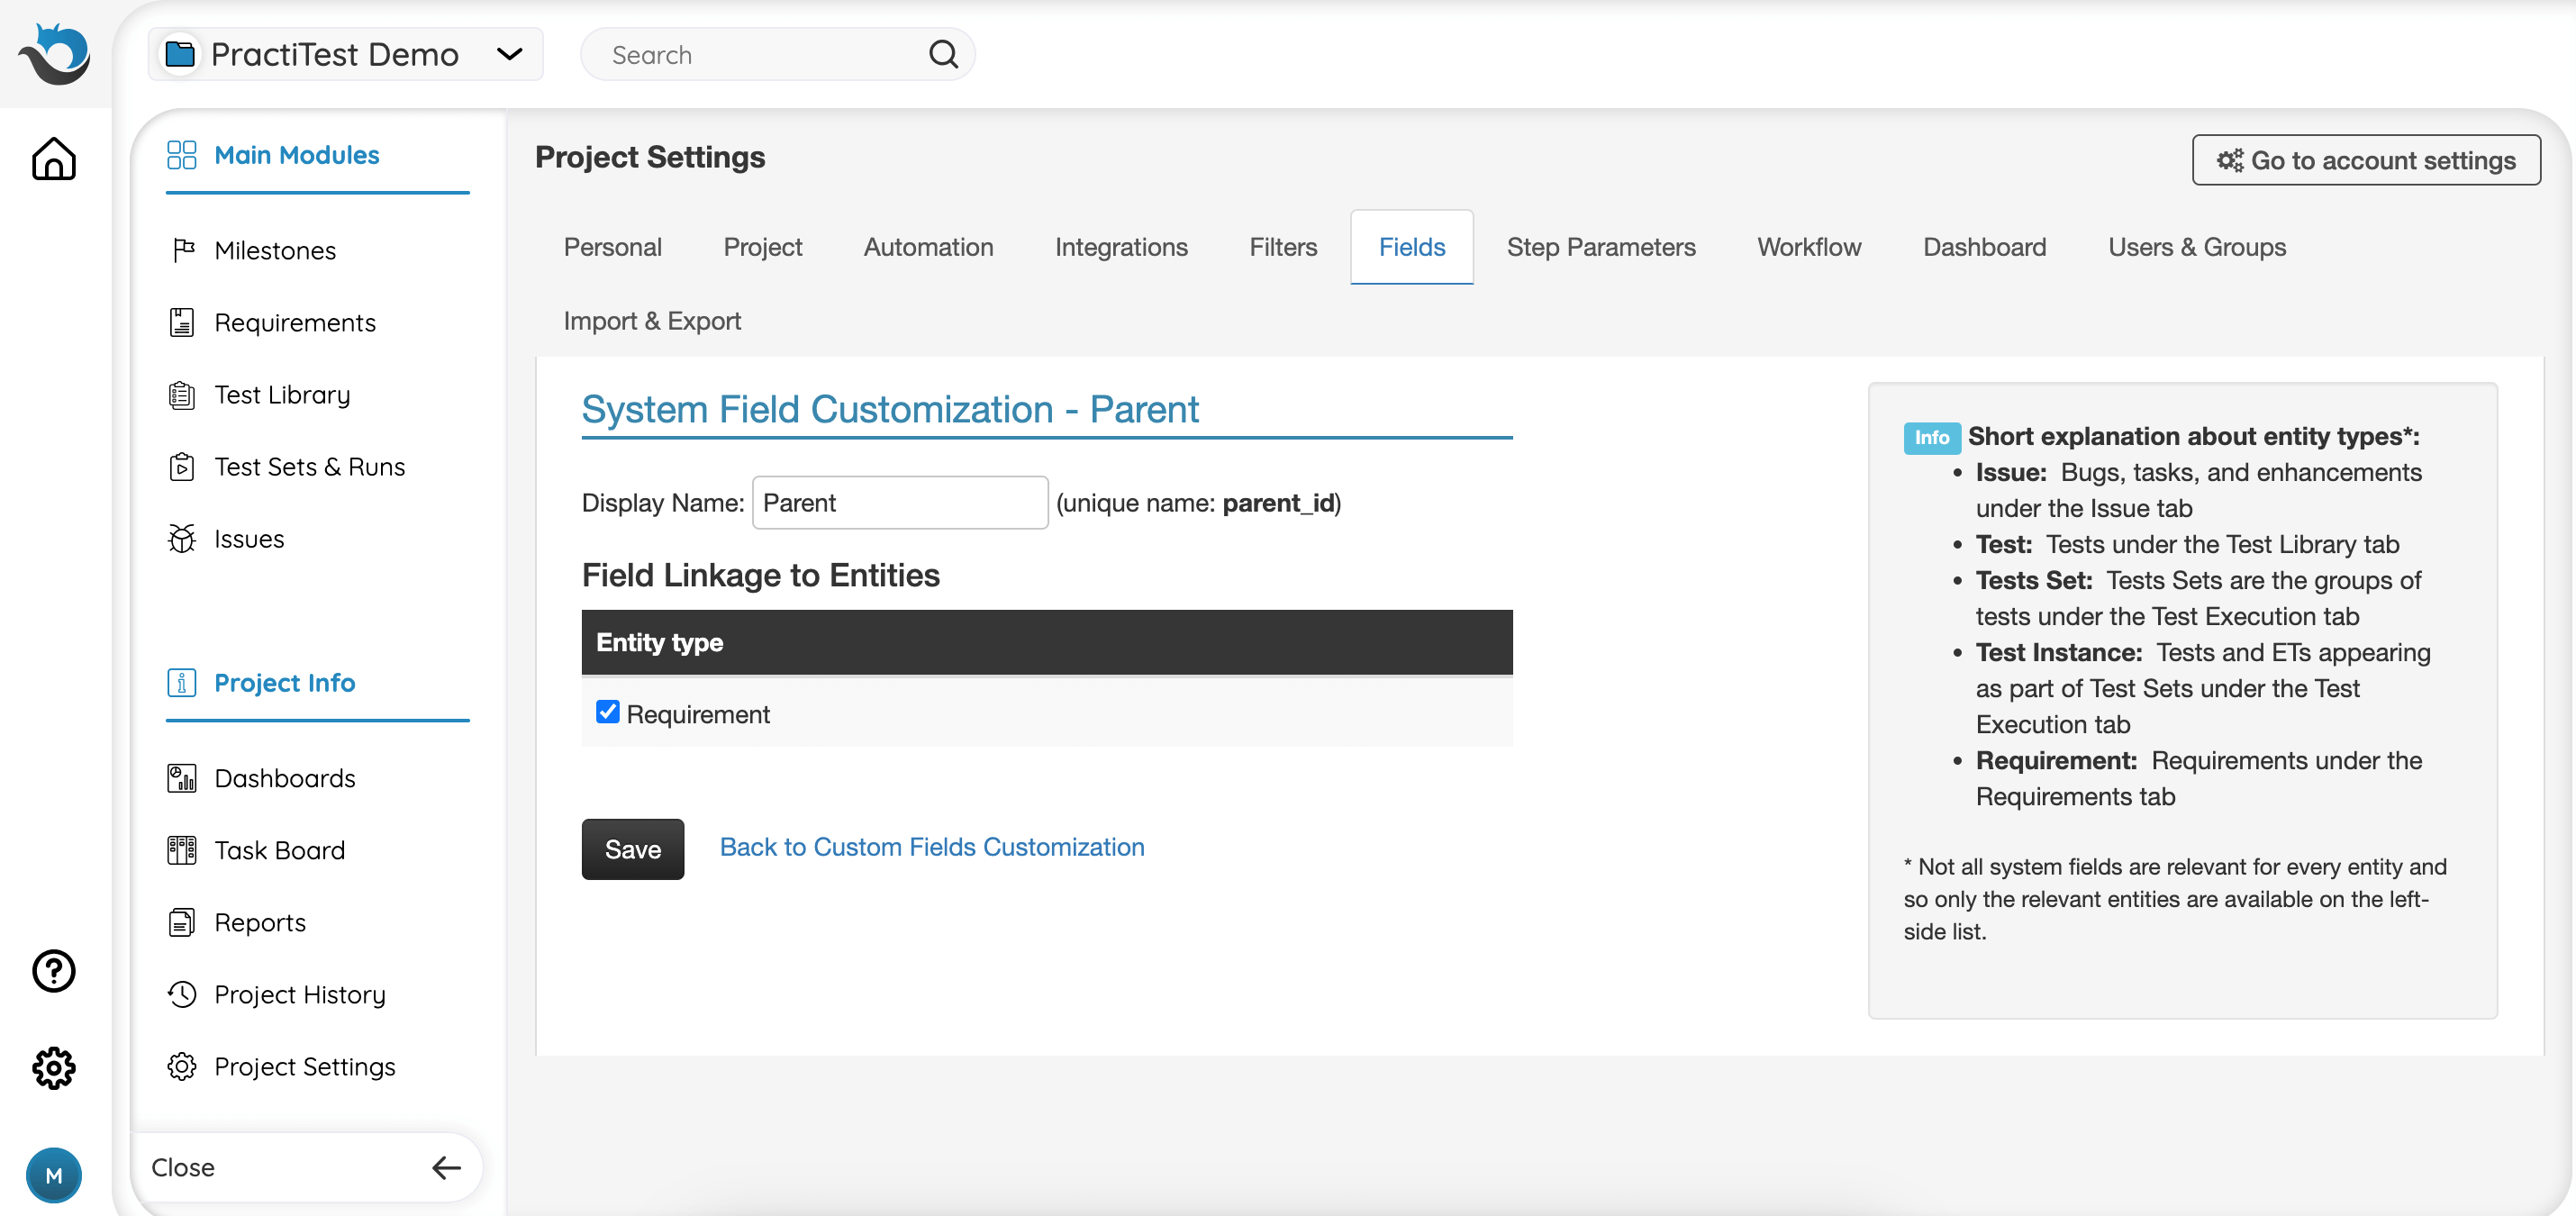
In order to enable the Requirement Tree View, head to ‘Project Settings’, access the ‘Fields’ tab, and click on ‘Parent’ in the system field section. Then, tick the box next to ‘Rquiremenet’ and click ‘Save’.
To switch to the Requirements Tree Mode view, click on the “Requirements Tree Mode” link at the top of the view tree.
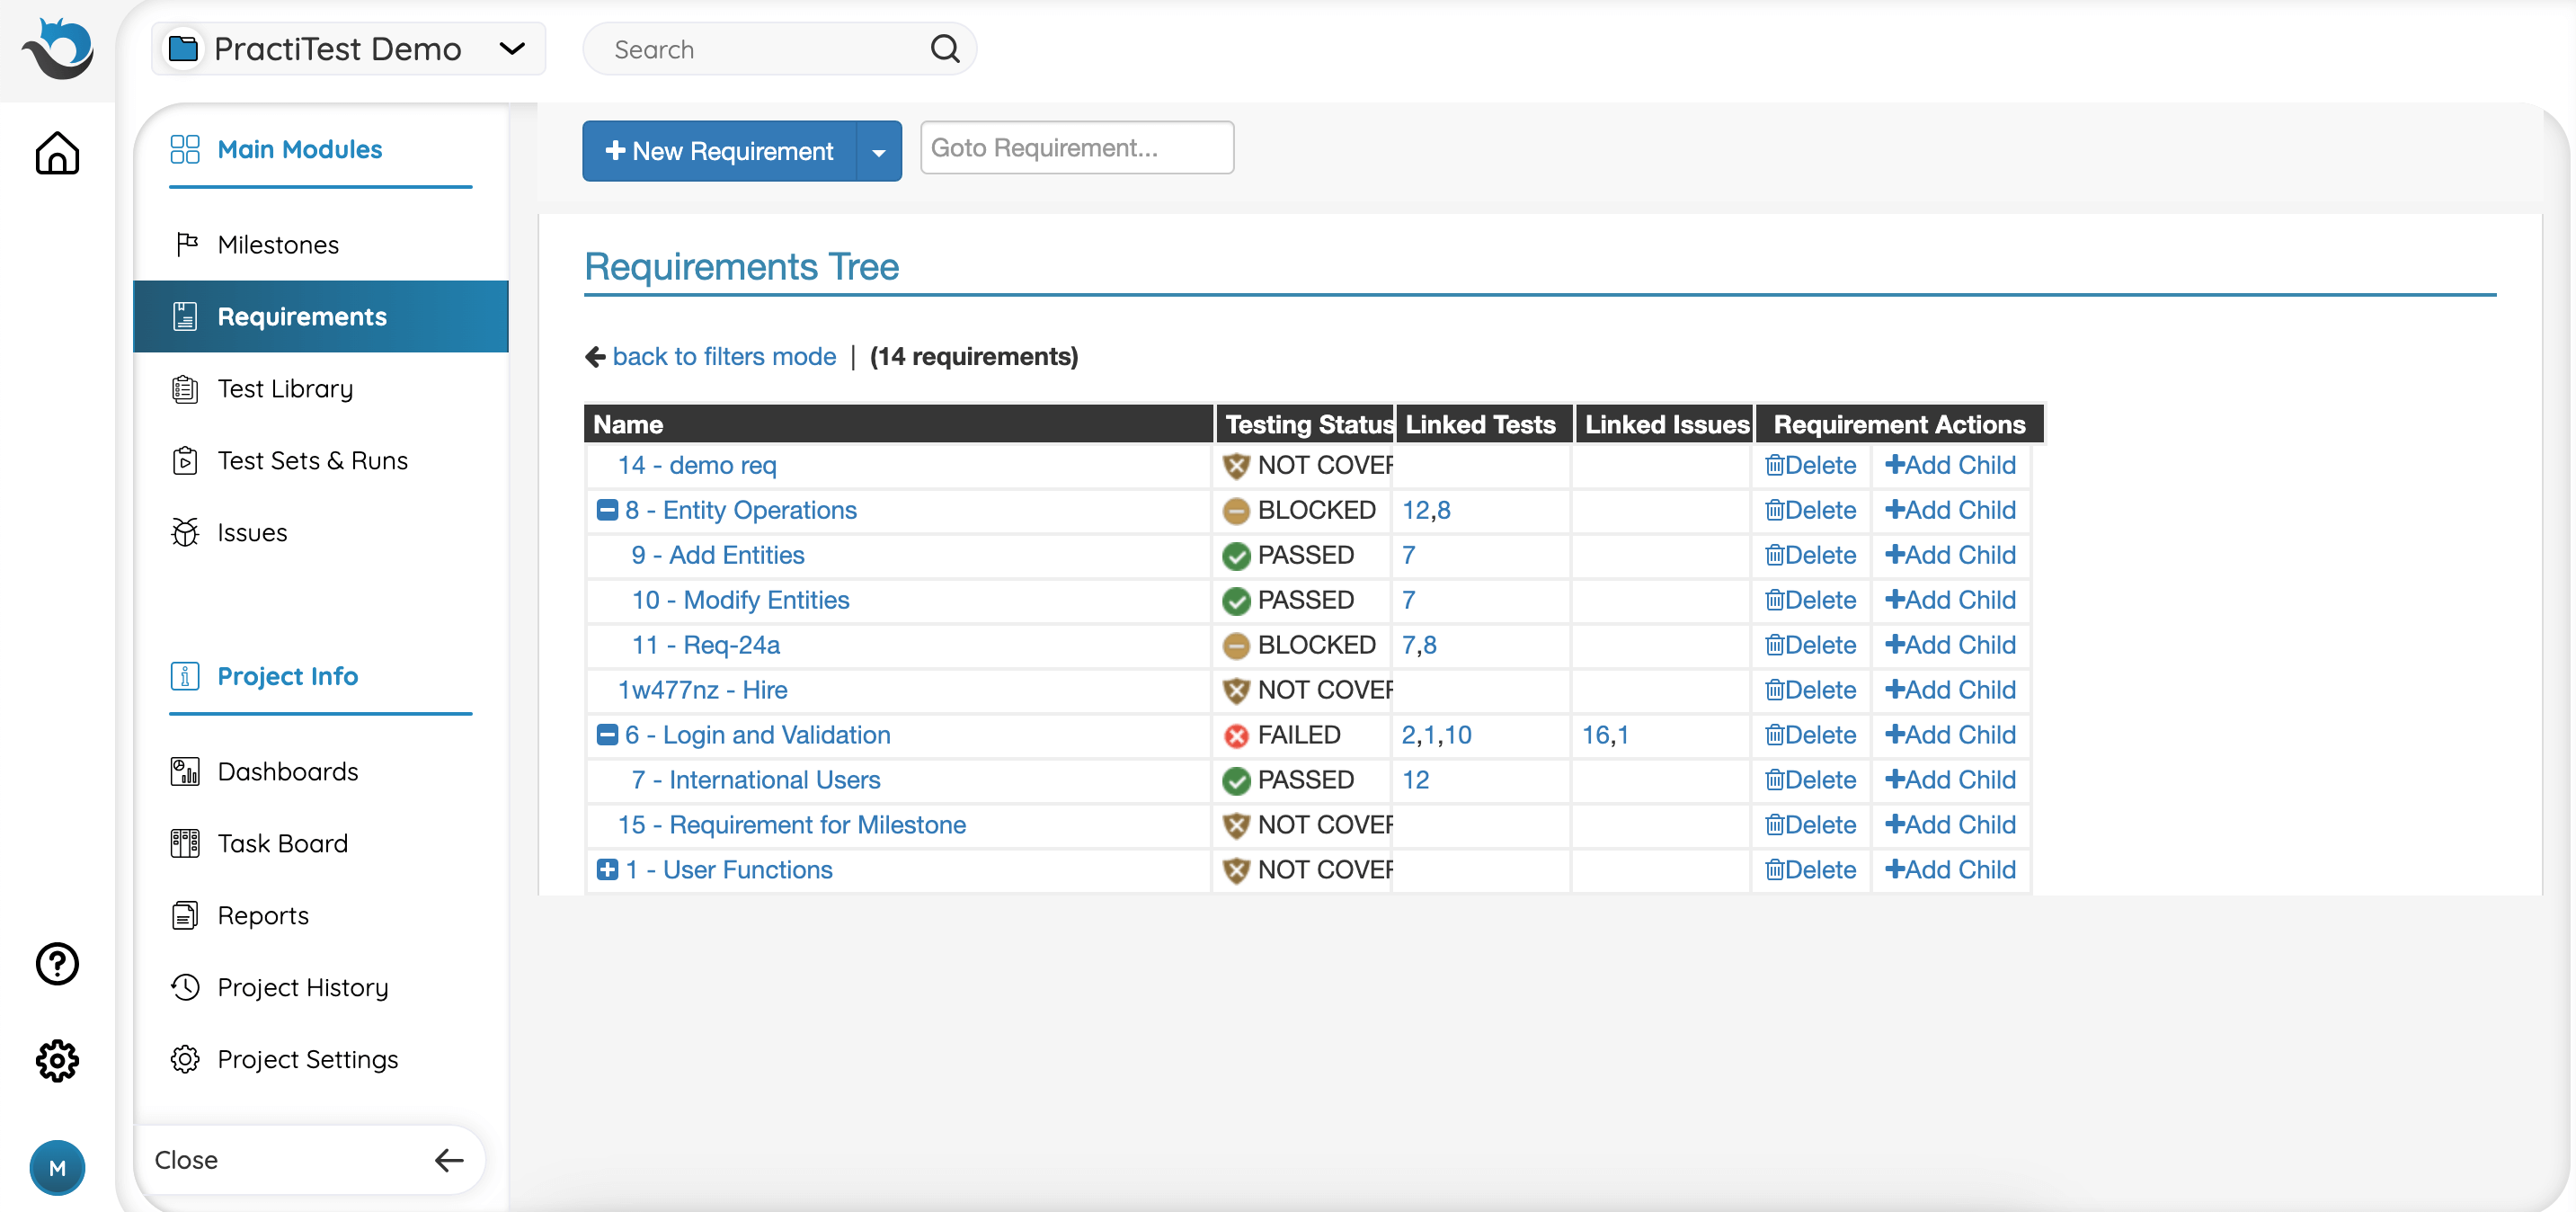
Requirements can be represented as a hierarchical tree, meaning that each requirement can have a parent requirement and multiple child requirements. In order to manage this relationship - in addition to the regular fields and Custom Fields that may be added to the requirements (and to any entity in PractiTest) - a requirement also has a parent field. This is the primary field that determines the specific tree structure for your requirements.