Note: Only users with account owner permissions can access the account settings.
From Account Settings, you can customize your account including creating and managing projects, managing users, personalizing the dashboards, creating integrations, and more.
To access the account settings, click on the ‘Settings’ gear from the main navigation:
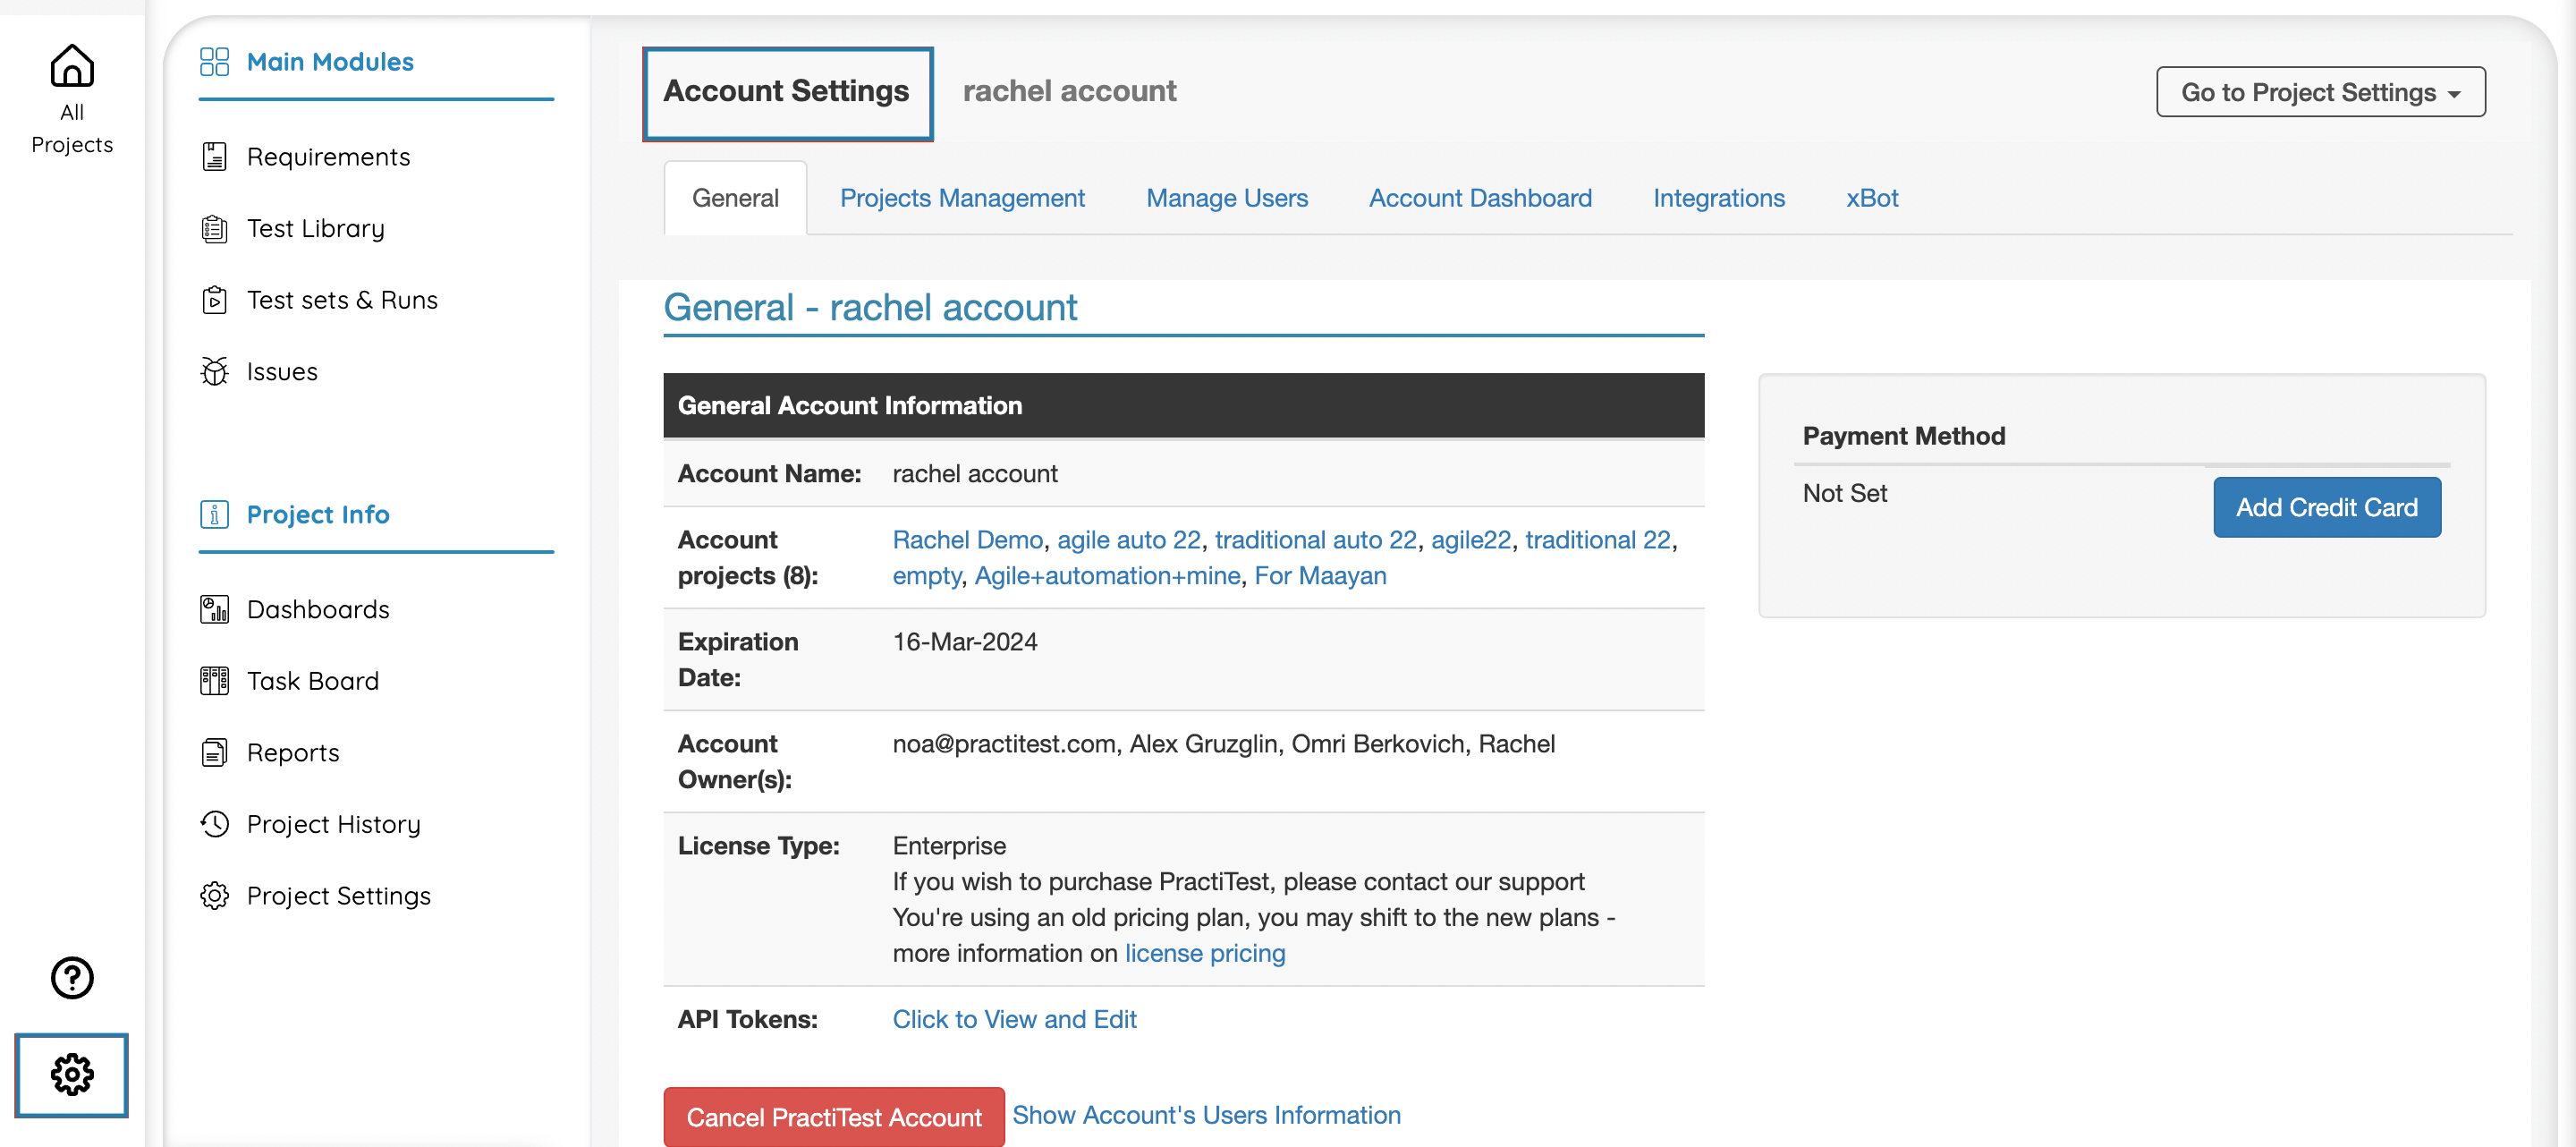
General Tab
The General Account Information section provide several account options:
- Set account details
- See all active and expired projects in the account
- View Expiration Date
- See the account owner’s information
- Accept the terms of use and enable PractiTest’s Smart Fox AI Assistant
- View the account license type and tier
- Global API tokens management
- Change payment information and see payment details (for Legacy licenses prior to March 2023)
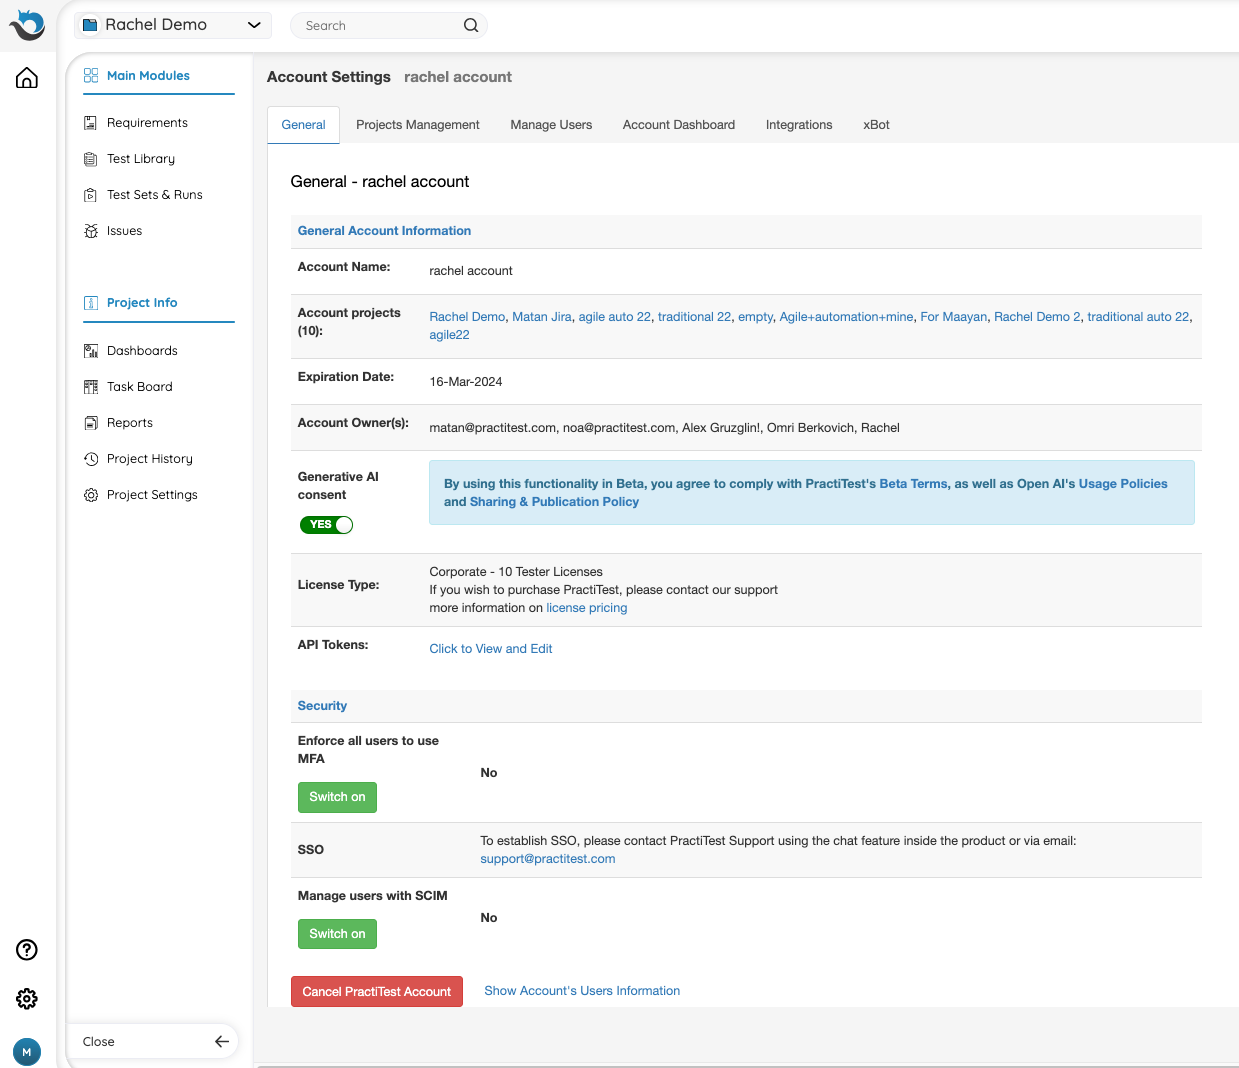
The Security section (only available for Corporate or Ultimate accounts):
- Multi-Factor Authentication enforcement
- Establish a Single-Sign-On (please contact PractiTest Support)
- Manage PractiTest users with SCIM
Project Management Tab
You can create multiple projects in your PractiTest account. Each project is independent, with the ability to create multiple users with different permission levels.
You can also migrate/clone your tests and issues between projects if needed.
When would you need to have more than one project in PractiTest?
- When multiple, independent teams are working on separate projects.
- When you have multiple projects with different external customers and you don’t want them to see each other’s information.
- When you are testing two or more separate products that have no tests and issues overlapping.
On the other hand, you may not need to have different projects if all you want to do is filter data from different types of product components, different versions, or if you feel you have too much data in your existing project.
In these cases, you can choose to use our hierarchical filters instead.
Creating a New Project
To save time, when creating a new project, you can choose whether to clone a current project’s structure or create a project based on a relevant template.
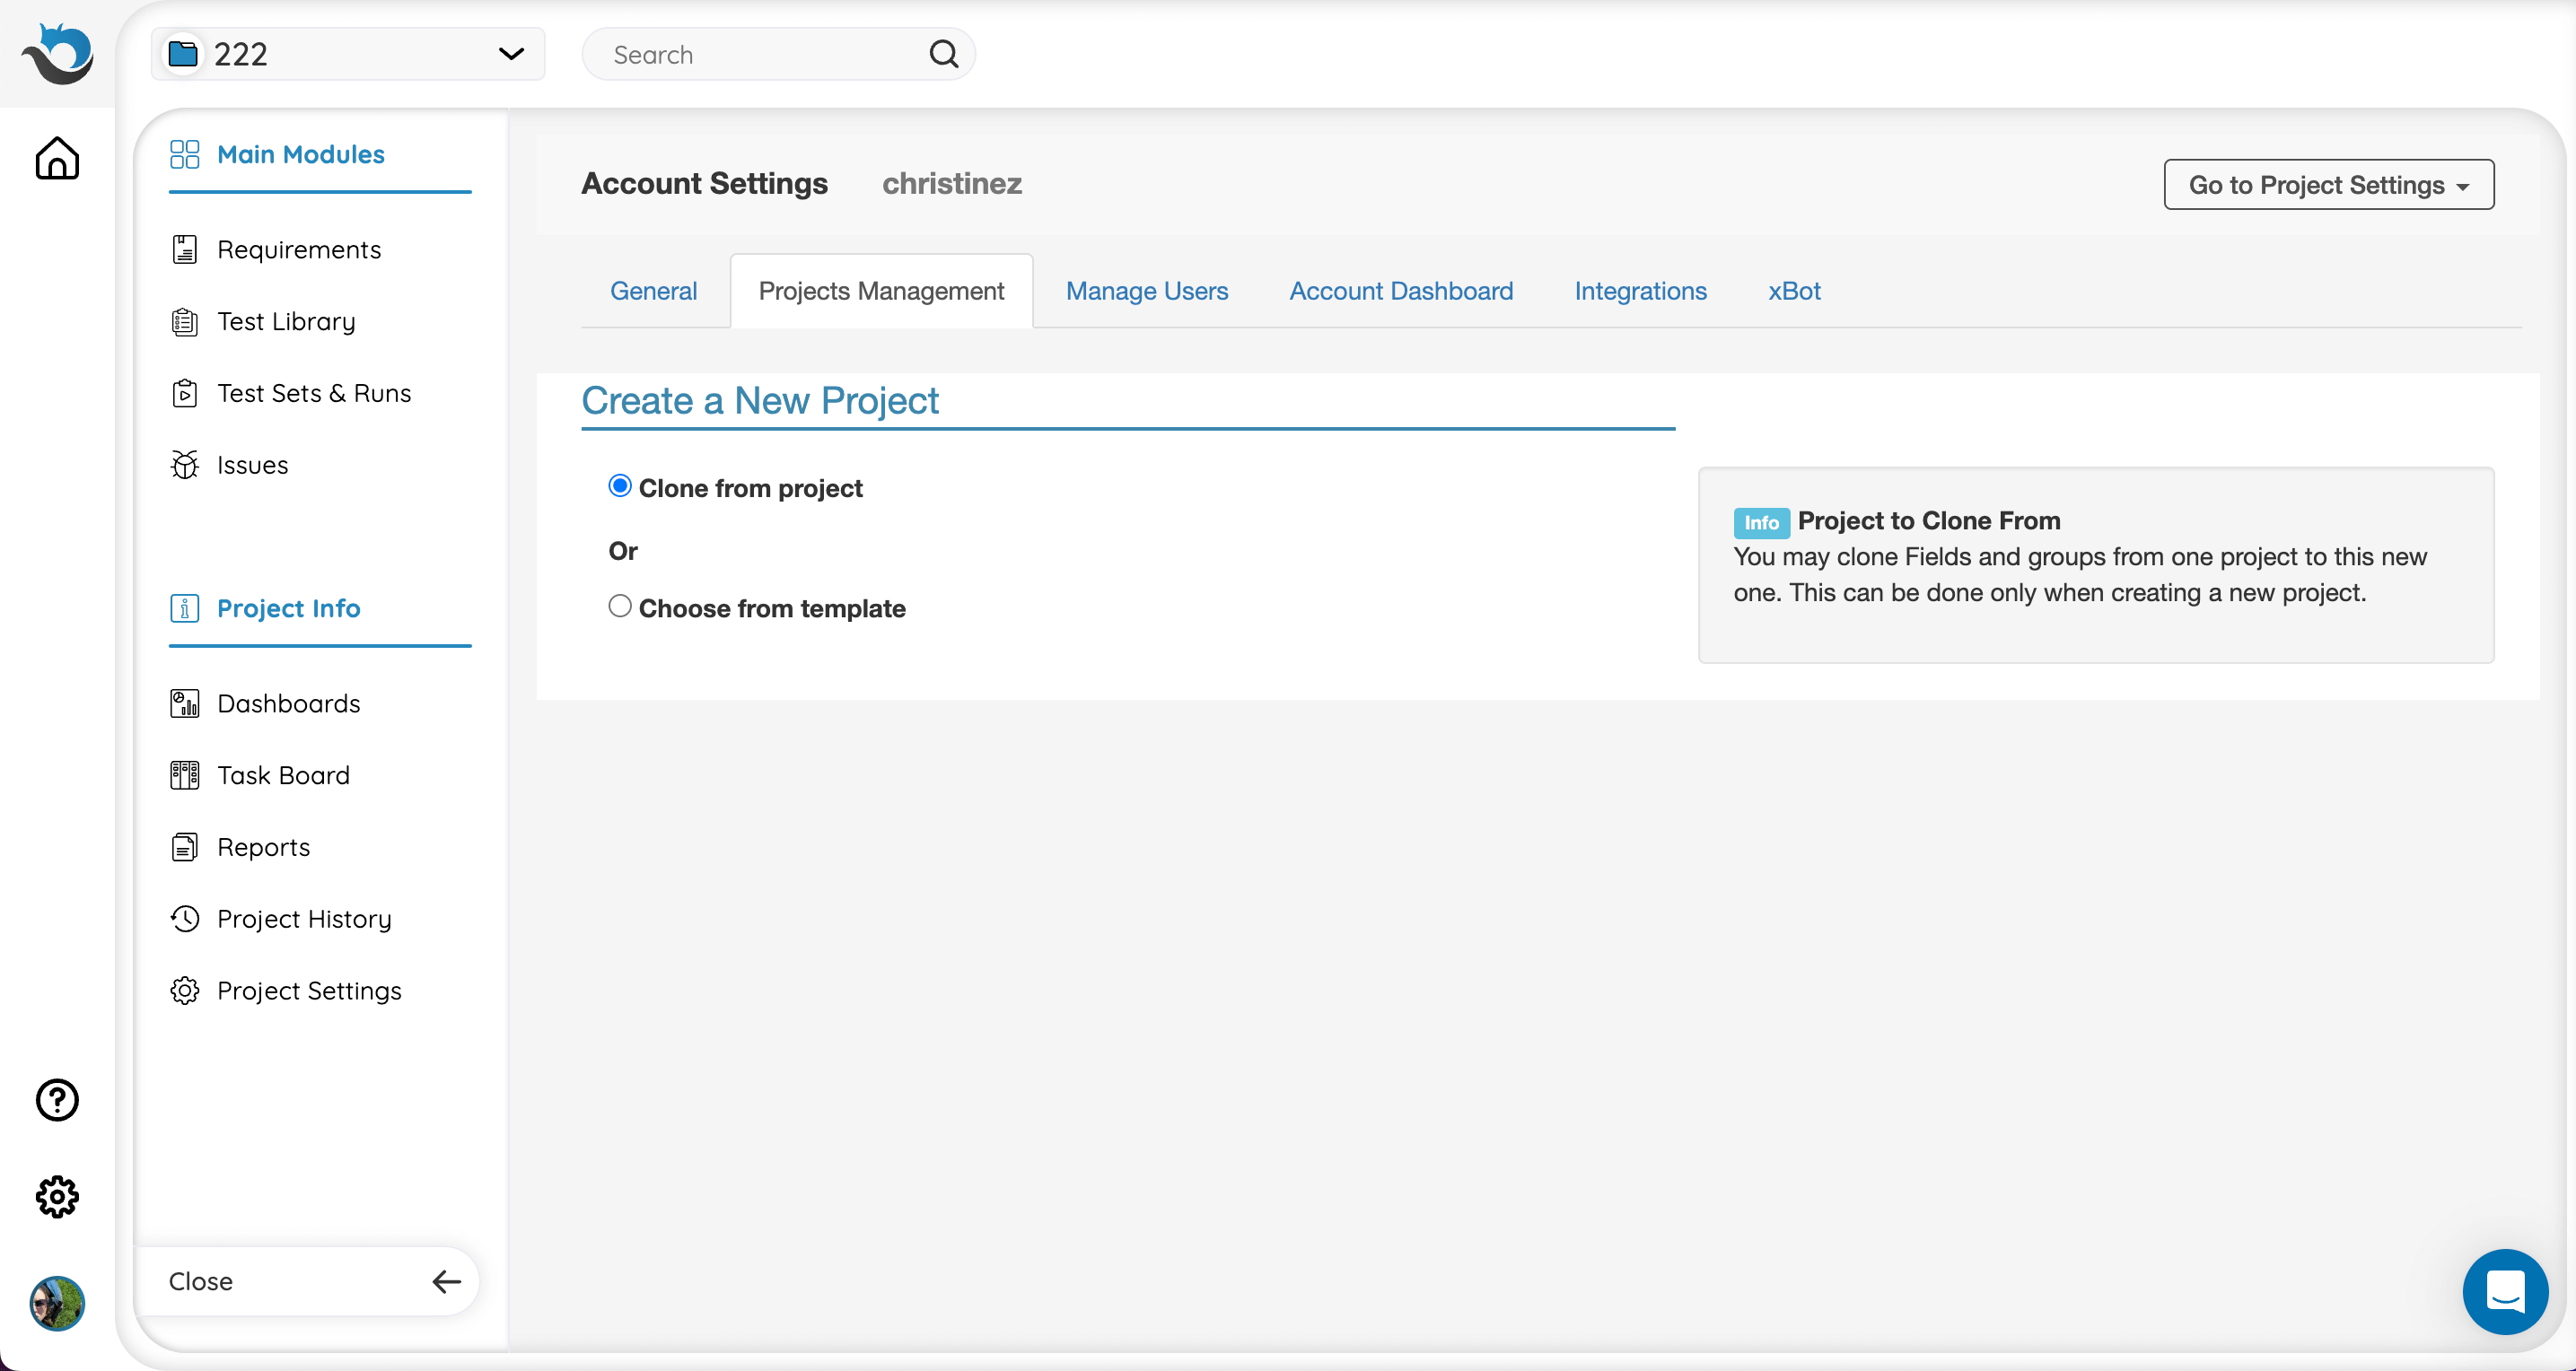
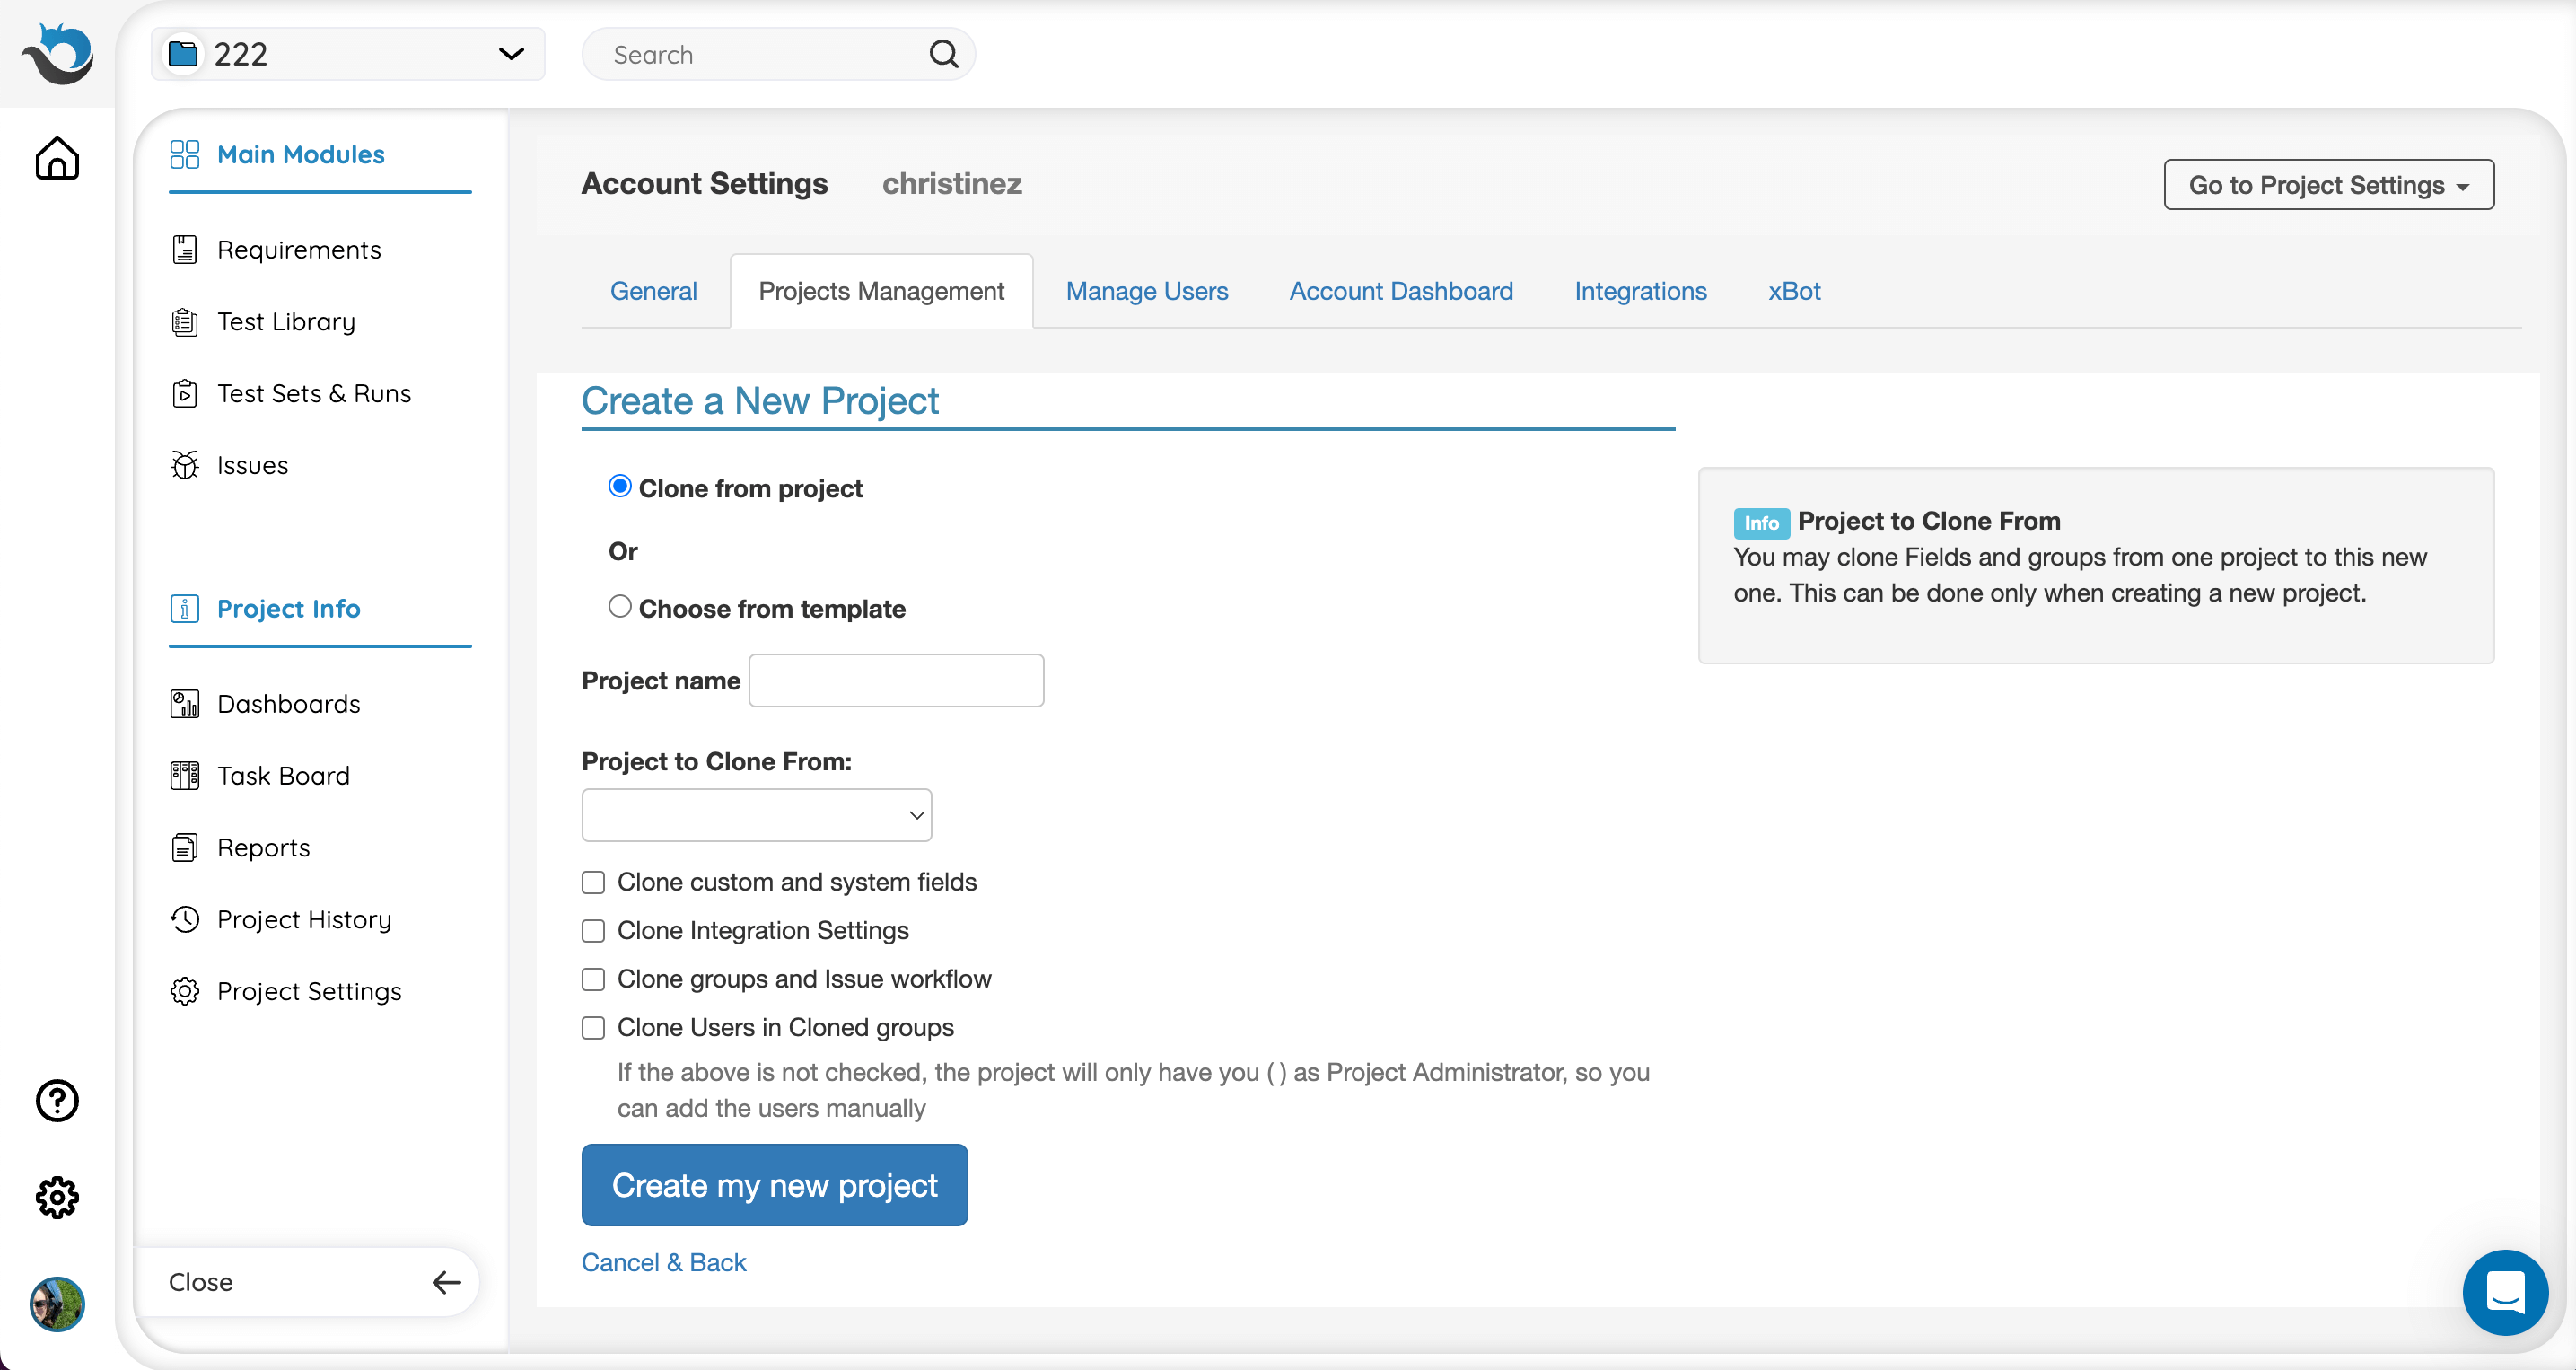
If you clone from an existing project, you can choose the configuration settings of your new project.
You can manually copy fields (custom and system), user groups and workflow, and/or users and their group assignments. If you tick ‘Clone custom and system fields’ options, the field names and values will be cloned and you will be able to copy entities - with their fields - from the original project to the new one.
When selecting the “choose from template” option, you will see five options for the new project structure:
1. Traditional: supports waterfall and similar with ready-made fields, filters, and dashboard items to support cycles, features, sub-features, Test Level, and Build.
2. Agile: supports Agile DevOps and Agile-like with ready-made fields, filters, and dashboard items to support Release, Sprint, Build, Feature, sub-features, and Test level.
3. Traditional + Automation: supports waterfall and similar with ready-made fields, filters, and dashboard items to support cycles, features, sub-features, Test Level, Build, and different execution types (manual and automated).
4. Agile + Automation: supports Agile DevOps and Agile-like with ready-made fields, filters, and dashboard items to support Release, Sprint, Build, Feature, sub-feature, Test level, and different execution types (manual and automated).
5. Start from scratch: no predefined custom fields, filters, or dashboard items. Creates a clean empty new project.
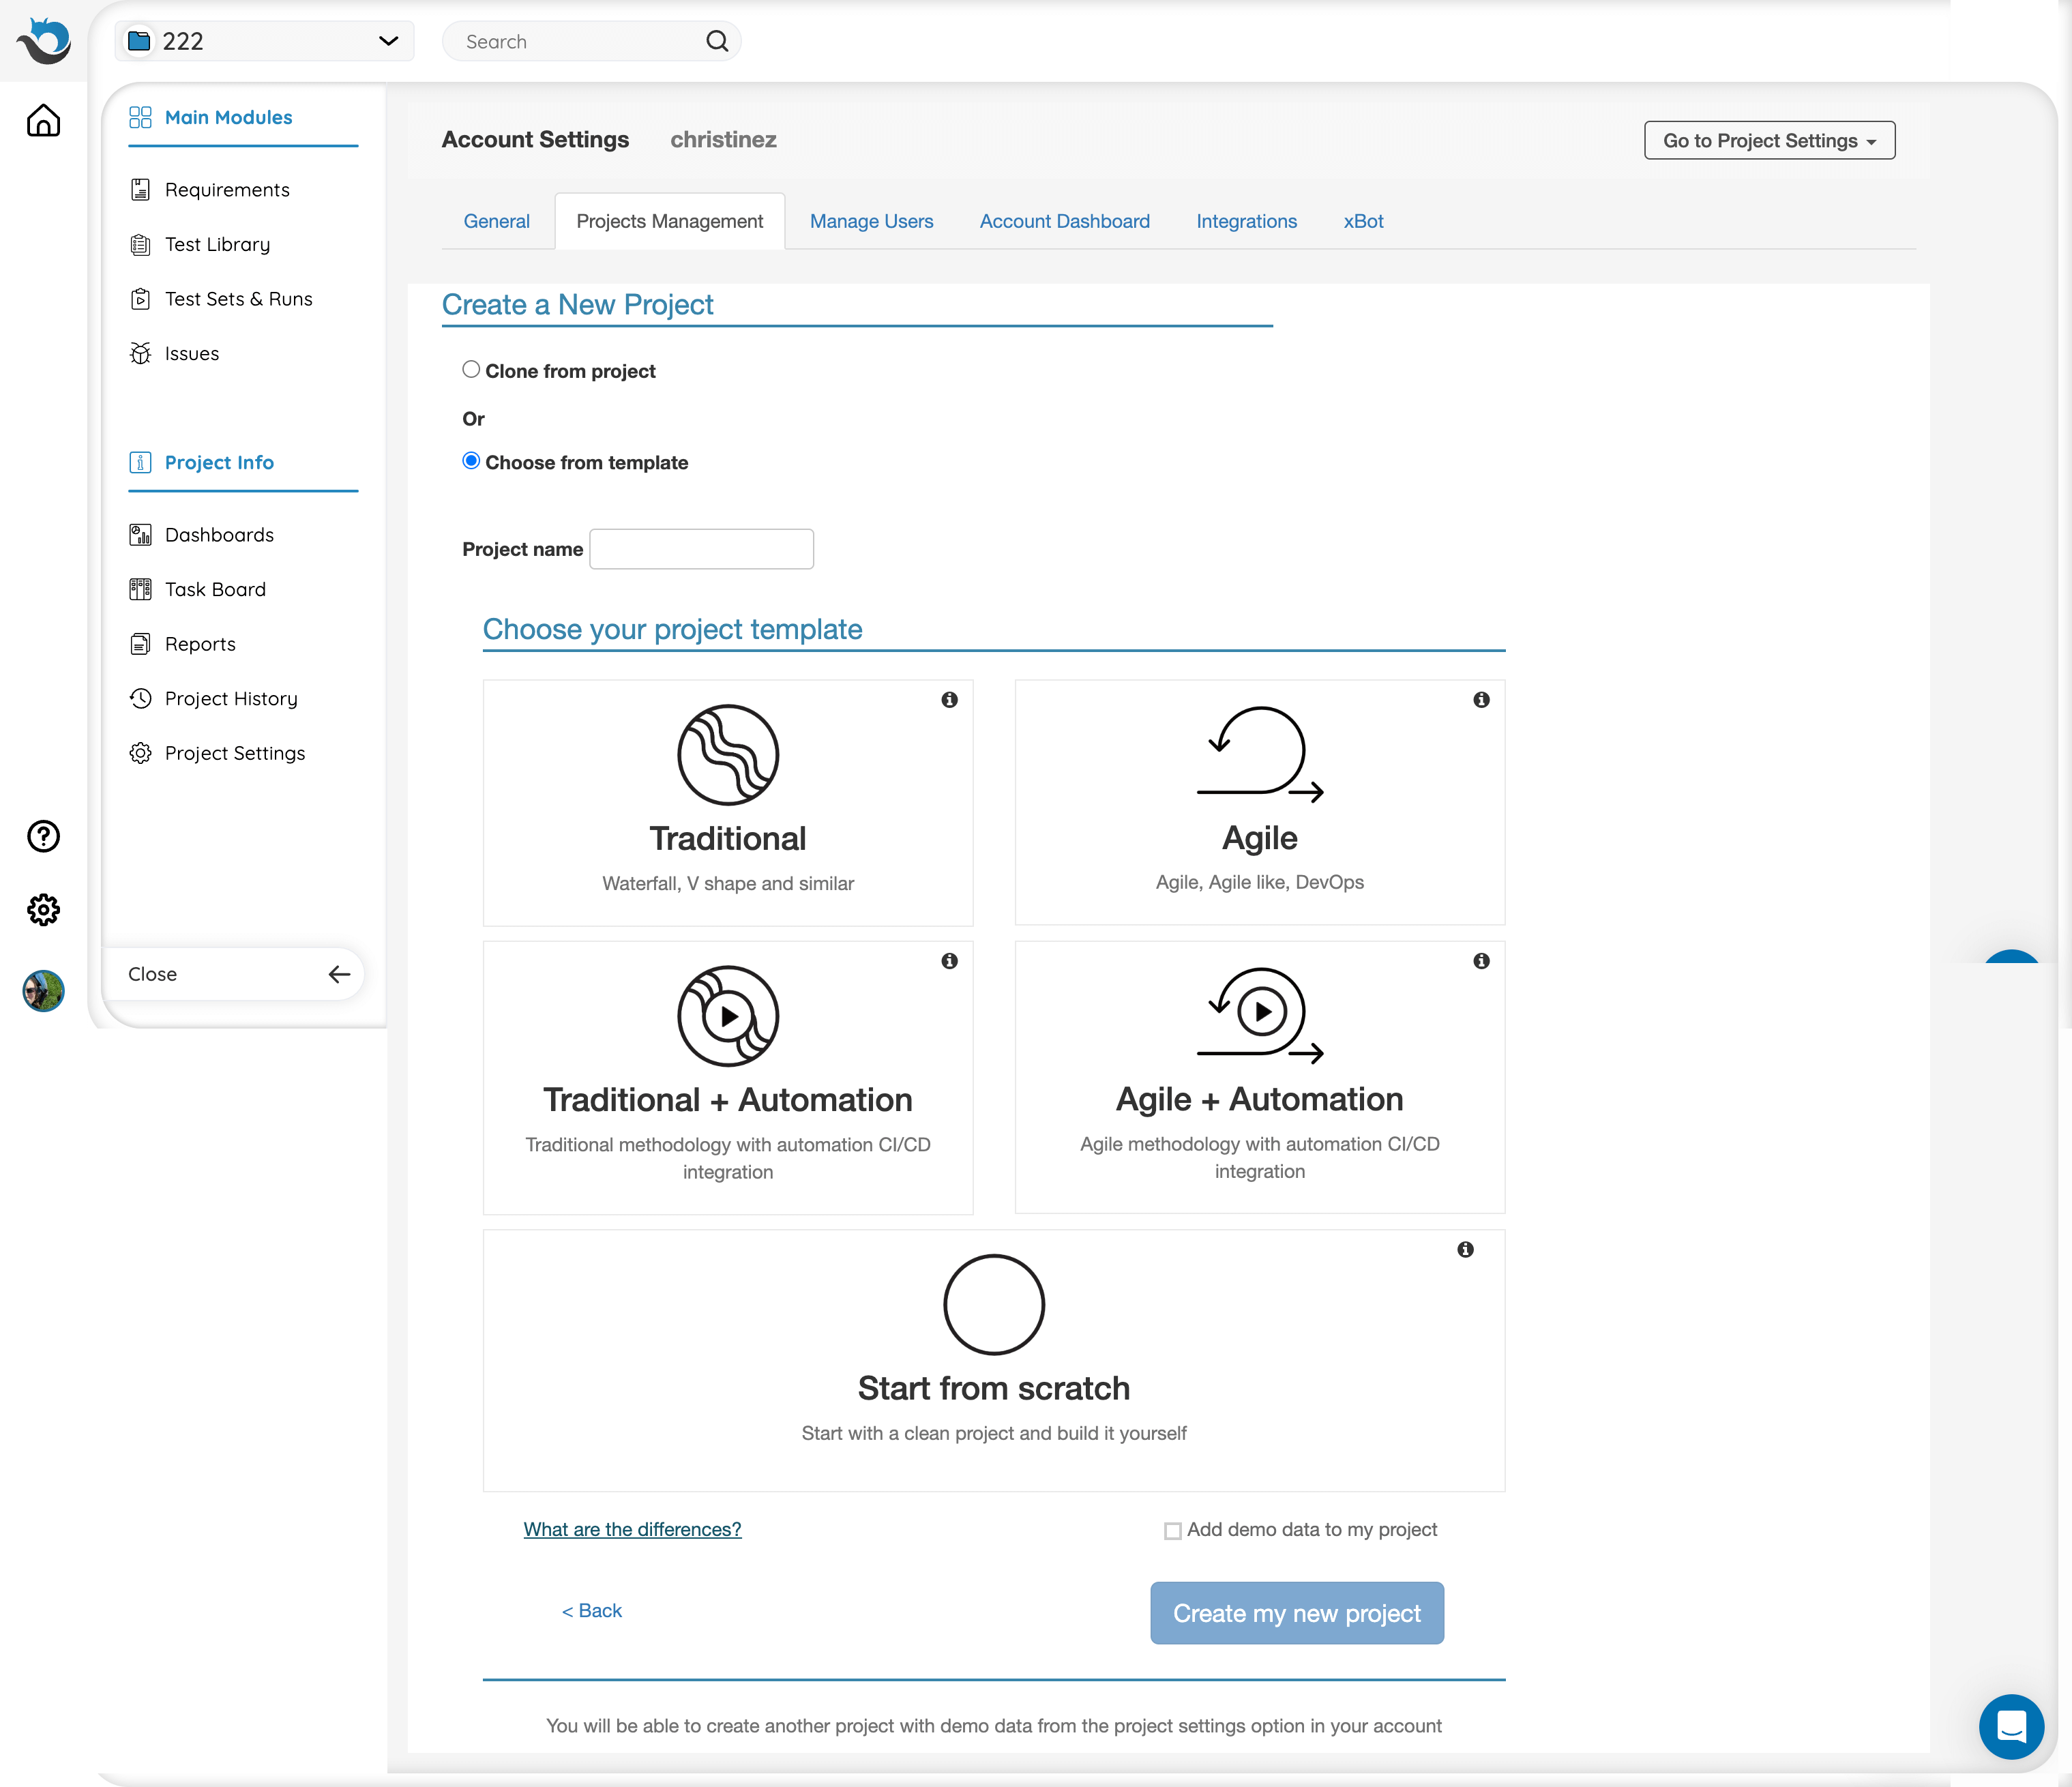
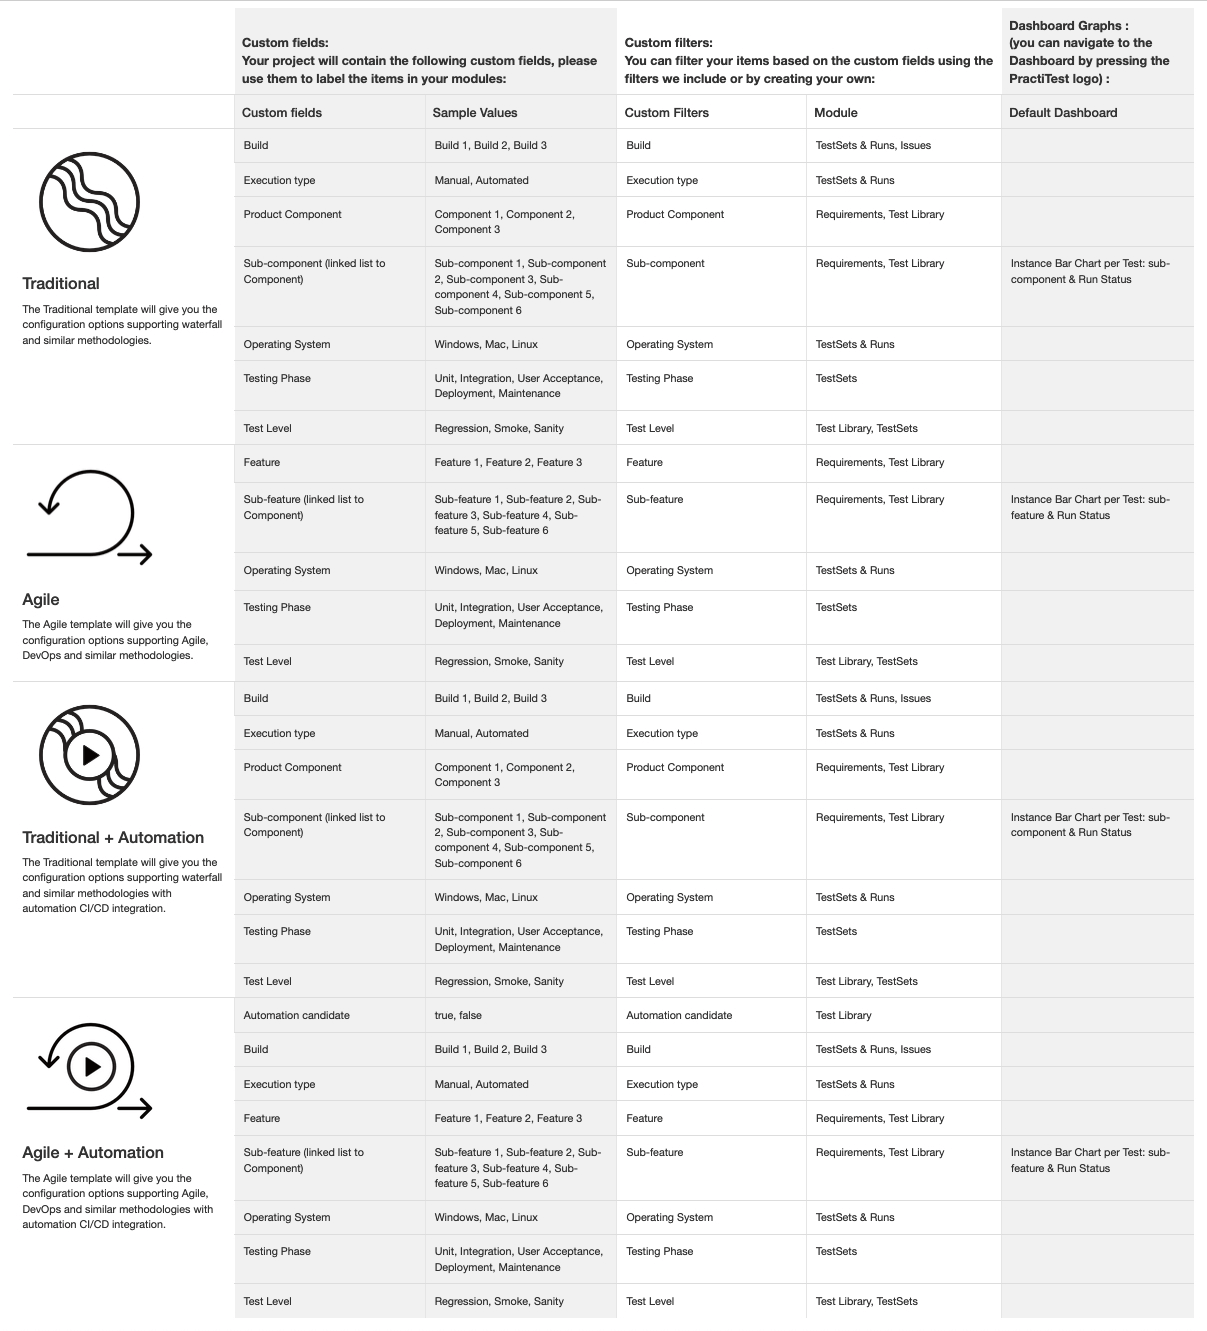
For more information about each template, click on the template. To compare all five options, click the “What are the differences?” link at the bottom.
Once you have chosen a template, click “Create my new project”. The new project will appear in the project dropdown list at the top-left side of your screen next to the “search” tab.
Note: PractiTest allows you to have an unlimited number of projects. However, new accounts are limited to four active projects to avoid creating unnecessary overhead for your users. To lift this limitation, simply contact our Support Team.
Editing a Project
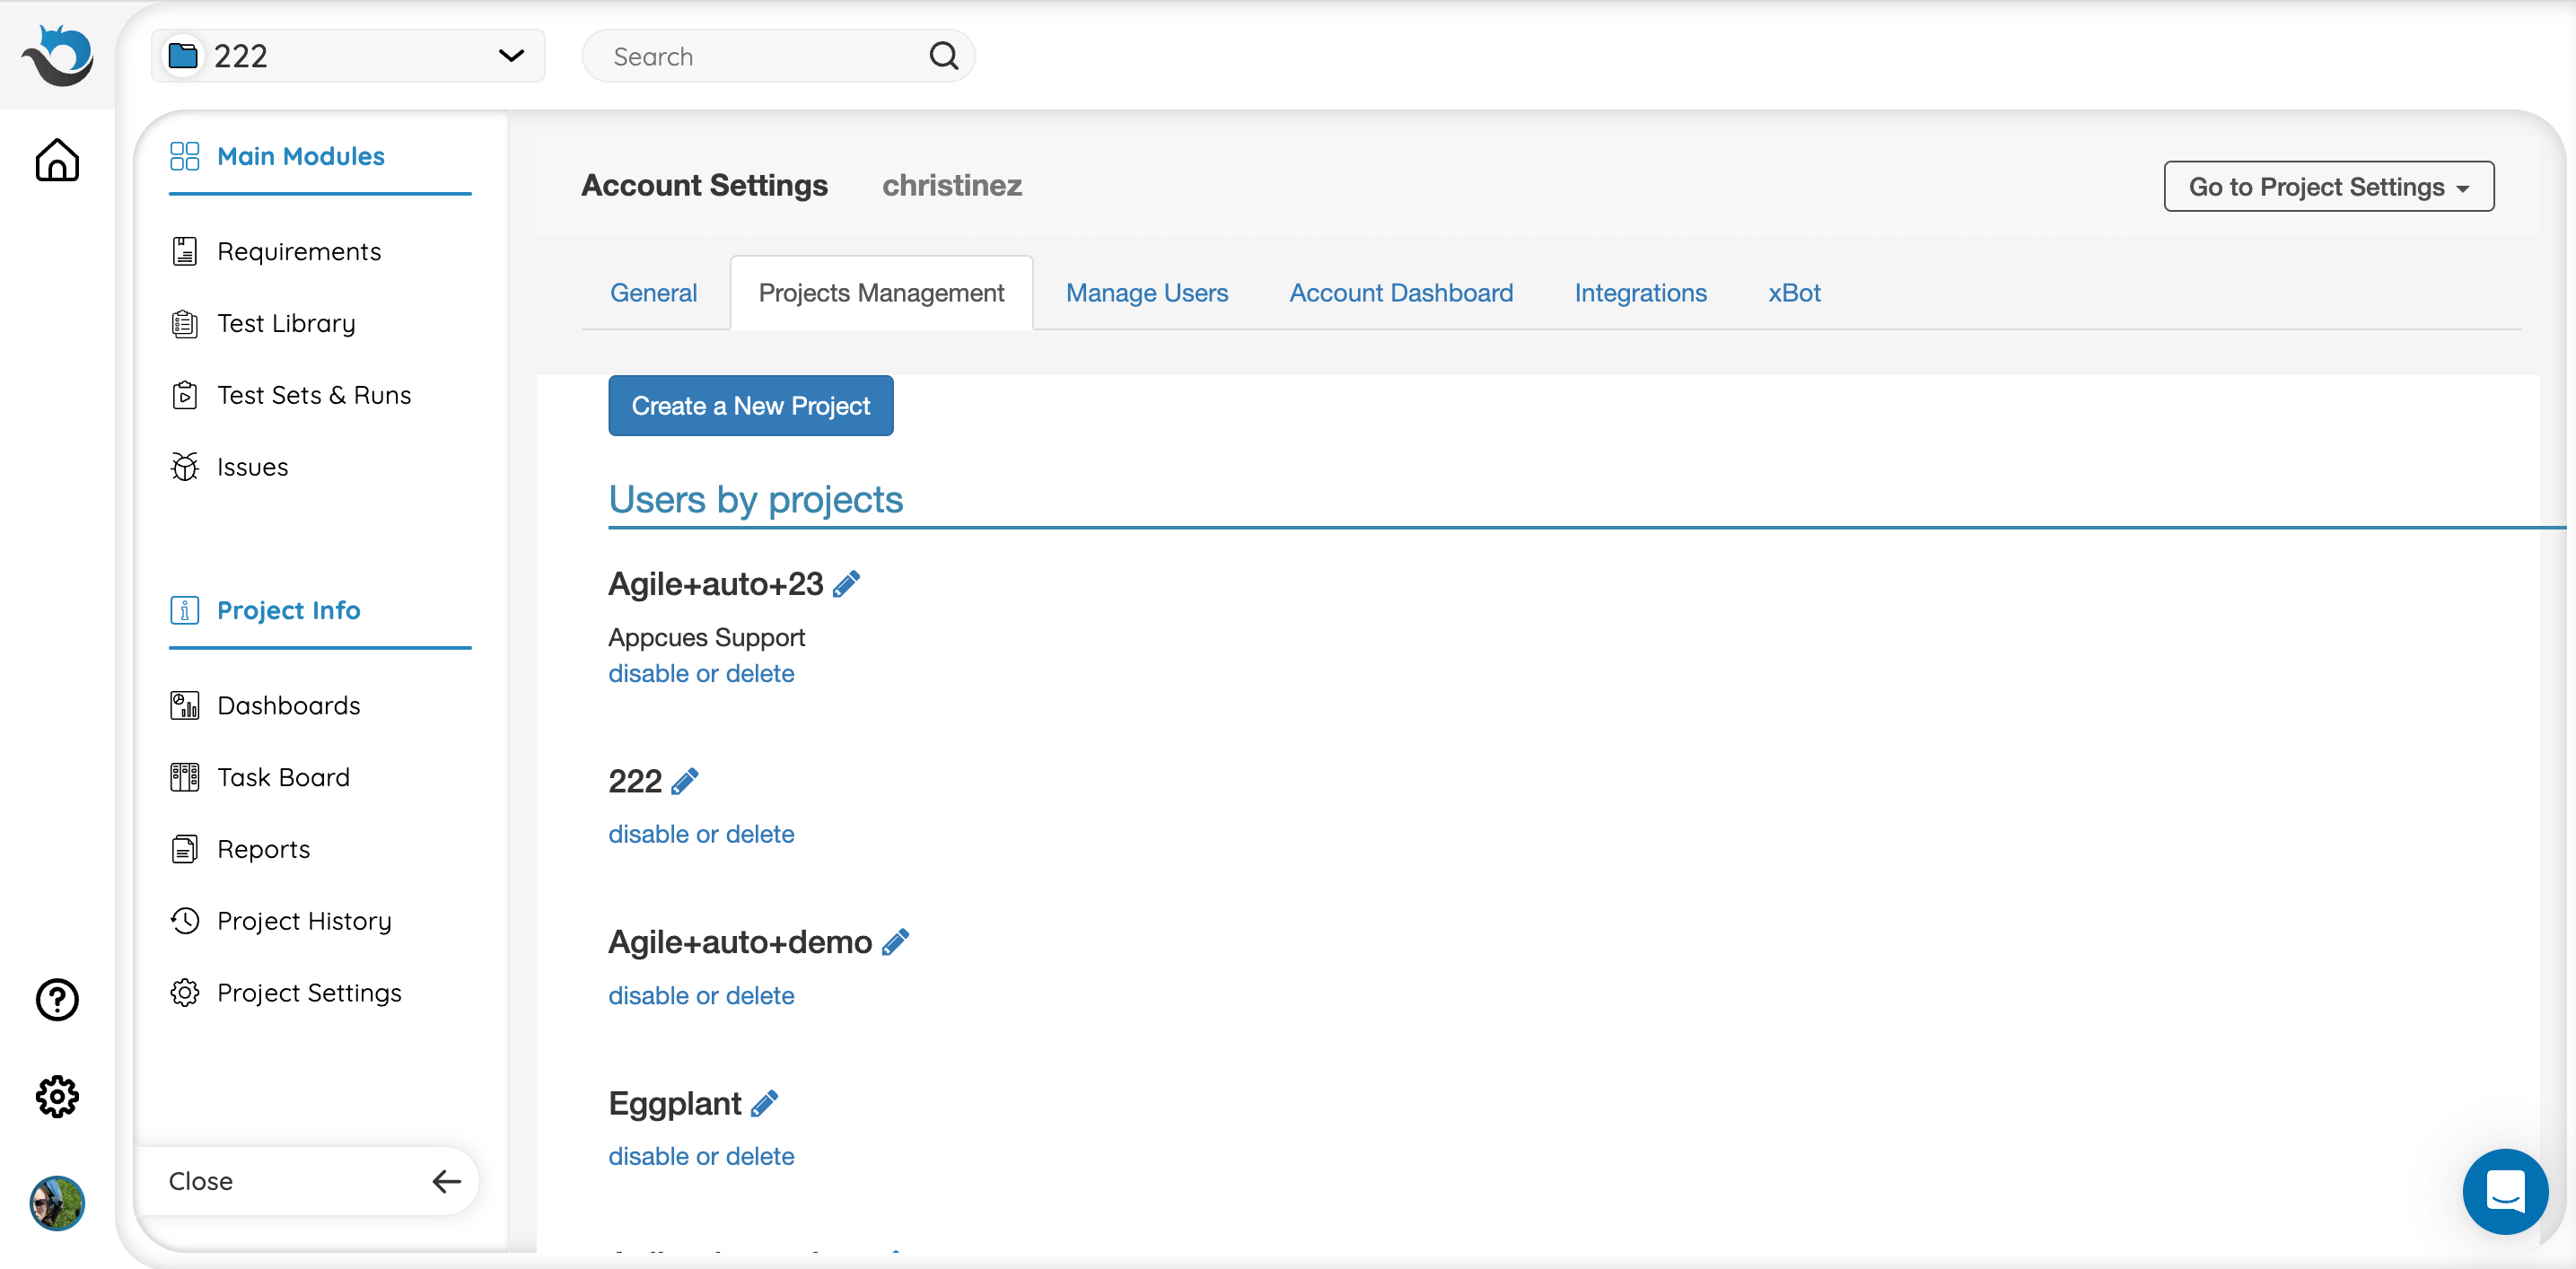
Under the same tab you can:
- See all existing projects and included users
- Enable, disable, or delete projects
- Edit a project
To edit a project, click edit (pencil icon) next to the relevant project. You will be able to rename a project or enable issue deletion.
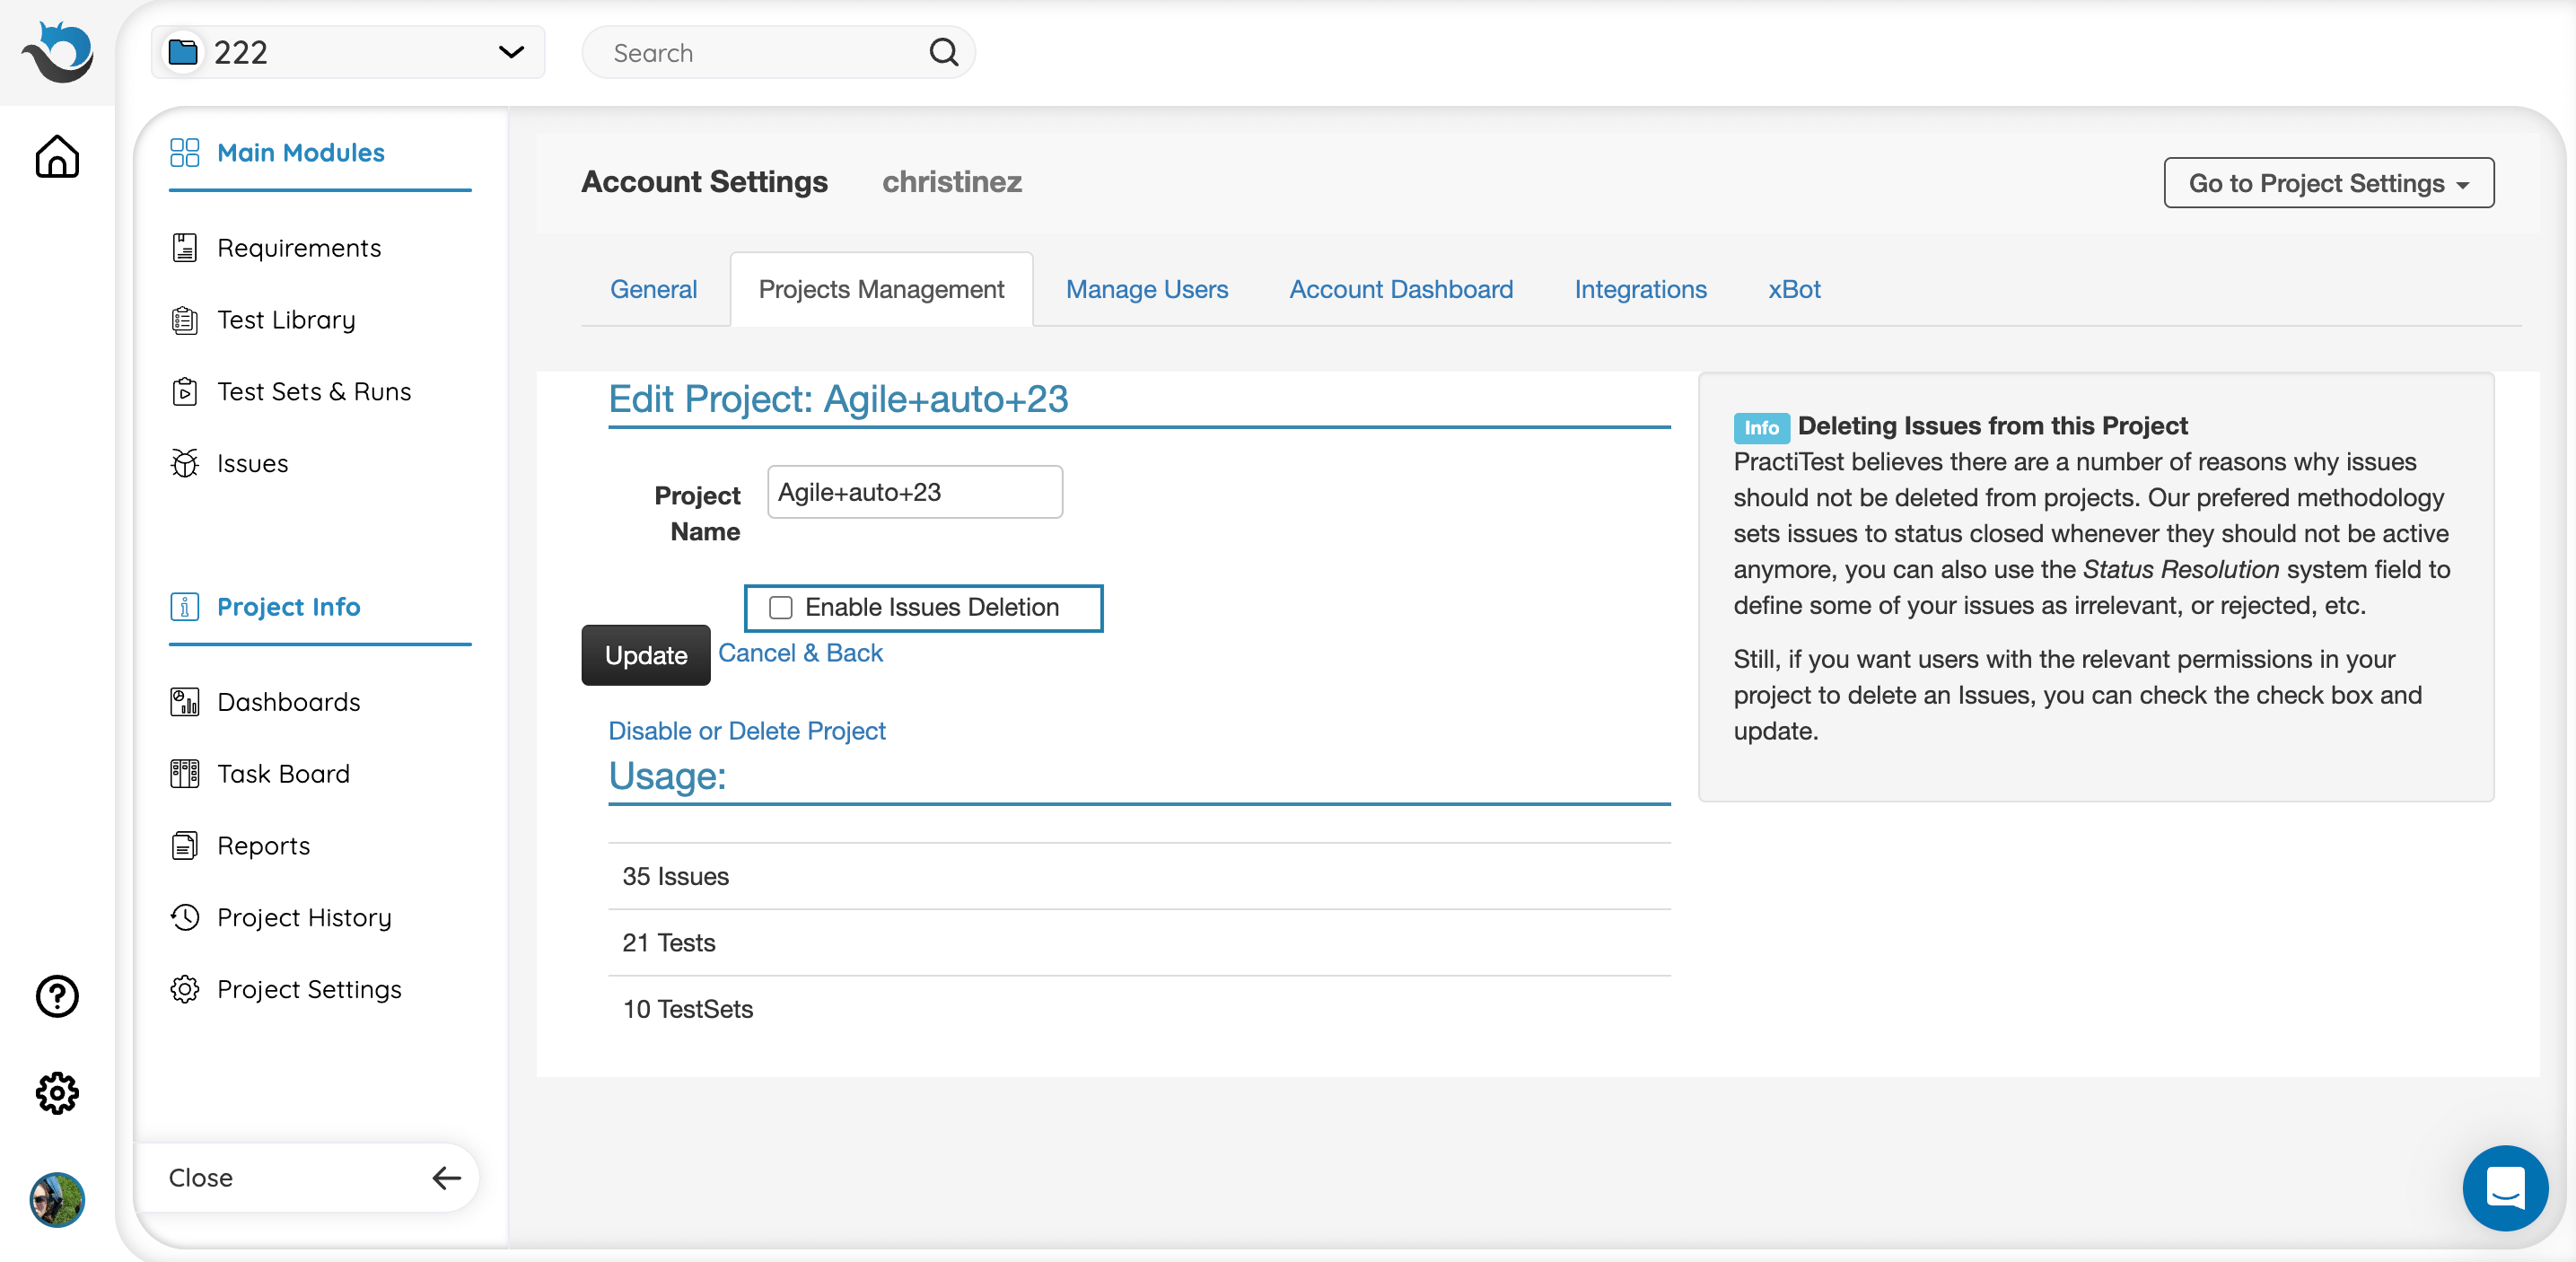
Note: we do not recommend issue deletion. Instead, we suggest changing the status of an irrelevant issue to “closed”.
Manage Users Tab
You can view and edit user permissions and activities in the Manage Users tab. The options you will see include:
- Add users to projects and groups
- View and edit user features such as reset passwords, enable Personal API Tokens, and manage account owners
- Delete users from all projects
Read more about user management here.
Enabling Personal API Tokens
When an account owner enables a Personal API Token for a user, there are two options:
-
Enable user to have a Personal API Token (PAT) with user permissions. When using this PAT, the user cannot use the Author ID. The author of tests and Test Sets will be ‘User’.
-
Enable ‘User’ to have a Personal API Token to act as a different user (user impersonation). This overrides fields such as author_id and changed-by-id. This option means the PAT permissions will be unrestricted and the user will have all account permissions. The user can either use Author ID or not. If the user decides to use Author ID, then the tests and Test Sets’ author will be according to the author ID value. If the user decided not to use Author ID, then the tests and Test Sets will have the user as the Author.
If you disable PAT and allow only account tokens from Account Settings, the user will have access to the entire account and will need to use the Author ID.
For more information about API tokens, visit the help page here.
Account Dashboard Tab
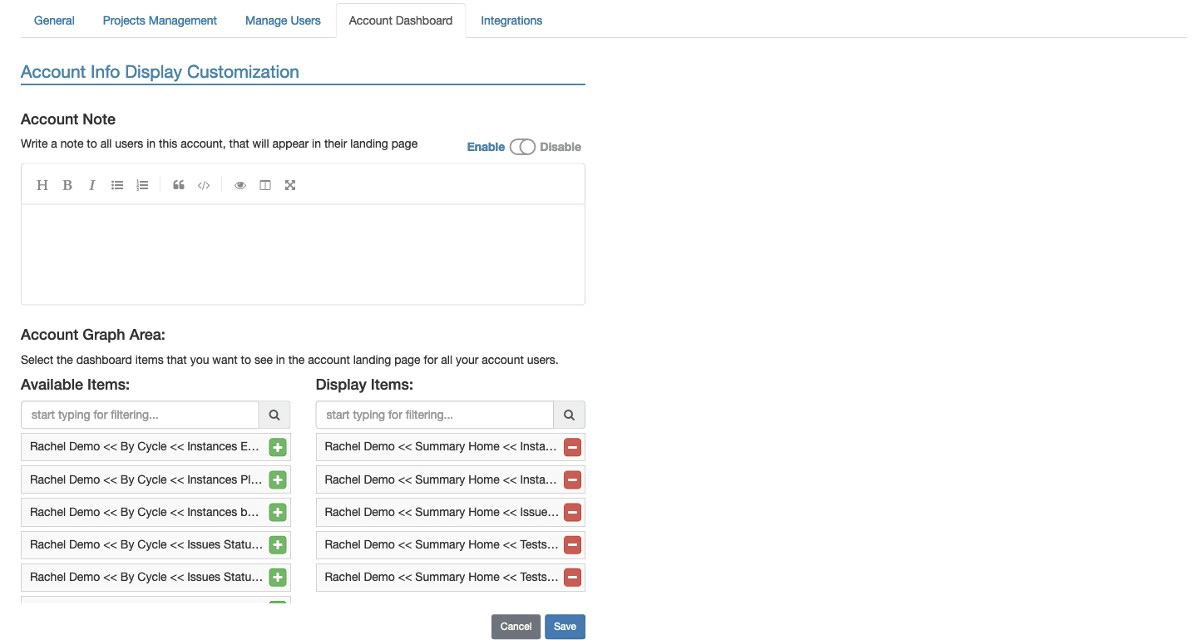
To customize your team’s landing page, go to the Account Dashboard tab. You can add notes, choose the dashboard items you would like to display, and highlight what is most important to your team and their various projects.
Integrations Tab
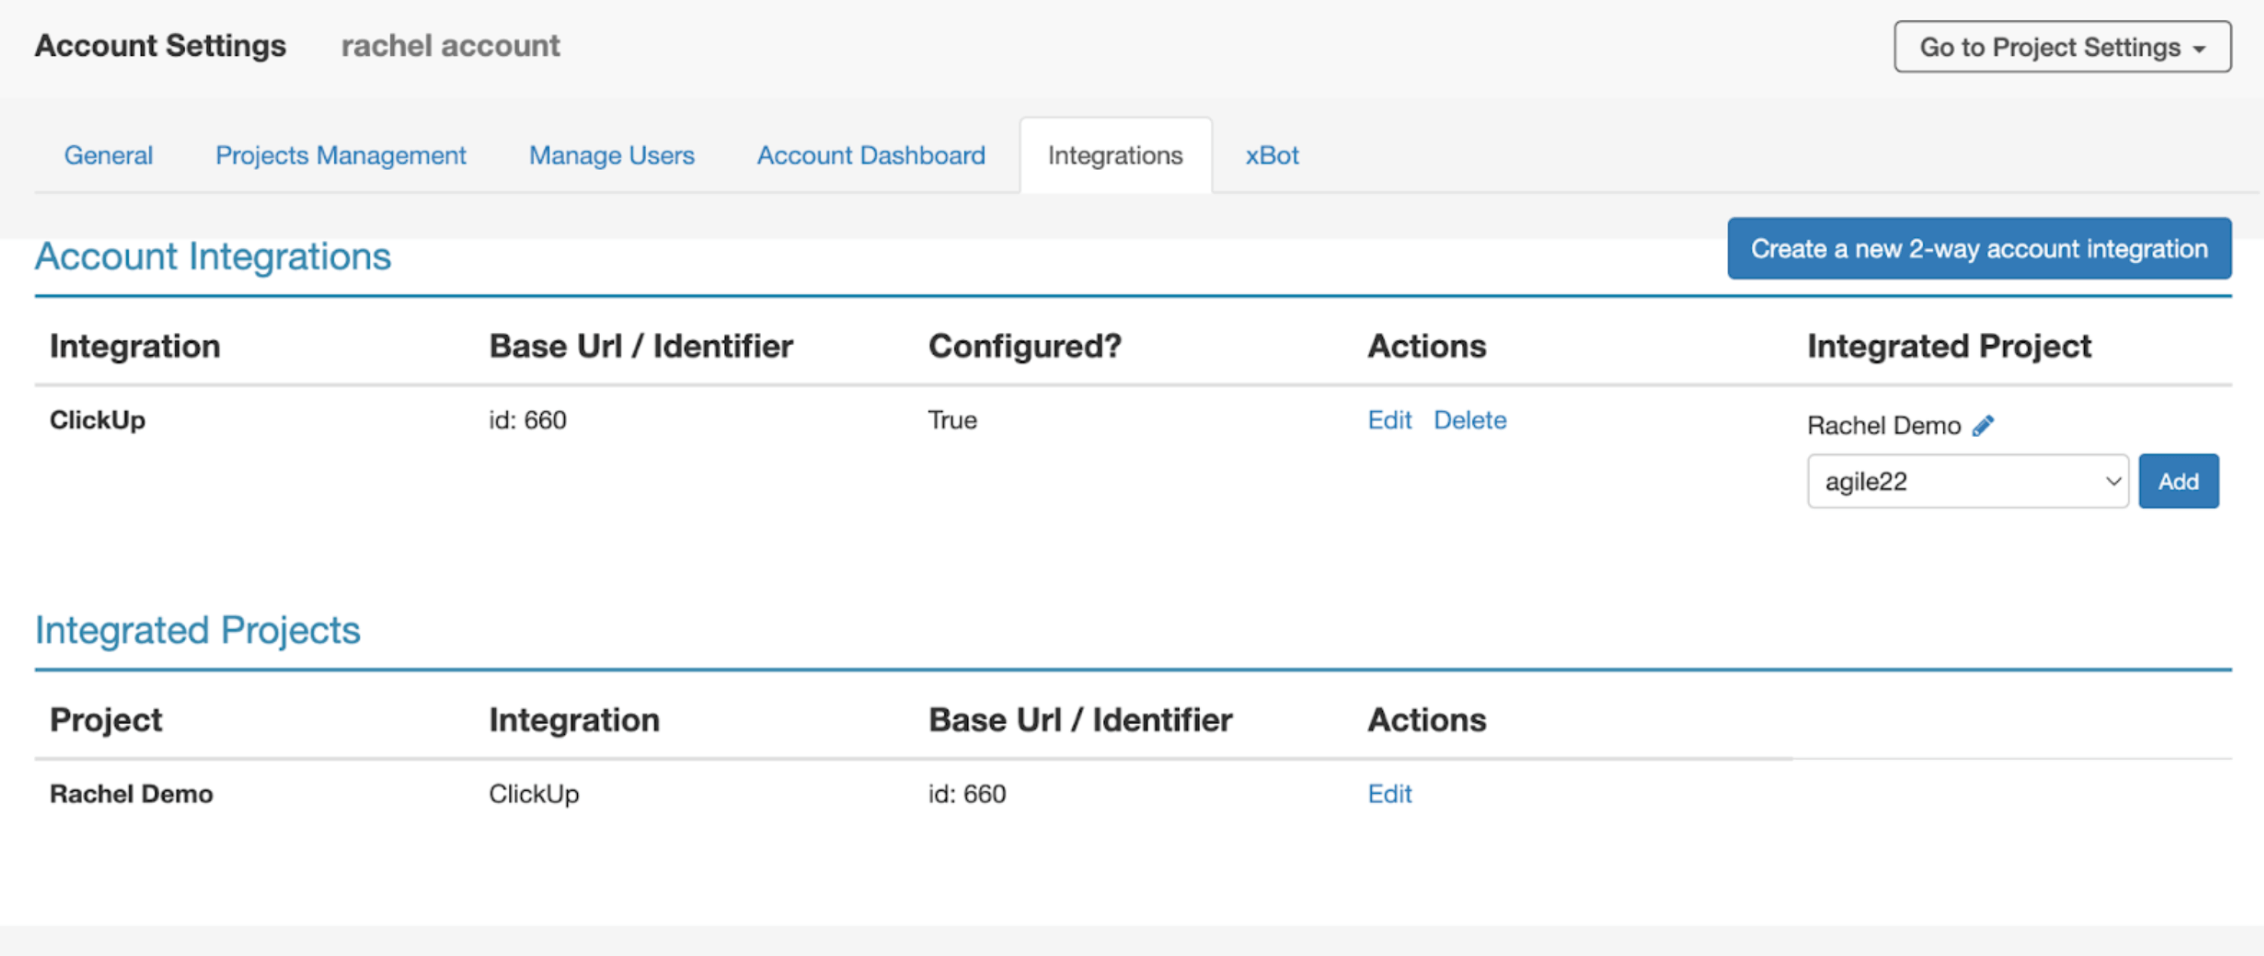
The integration tab allows you to create two-way integrations for the account. These integrations can be implemented later for specific projects in the account.
If you already have an integration configured for the account, you will be able to view details including which projects are configured for it. You will also be able to edit, delete, and add more projects to the integration.
To view the full list of available integrations or to learn how to integrate with your preferred tool, please visit the integrations help pages.
Note: one-way integrations are configured per project and do not require a separate configuration.
xBot Tab
In the xBot tab, the account owner can see the active and non-active agents, enable or disable them, get running parameters, edit client IDs, and more.
Learn more about the xBot application here.