FireCracker allows you to take XML report files from any CI/CD tool and upload them into PractiTest easily and automatically. From now on, every time you have new build results, they will be sent to PractiTest, including all fields and parameters, and you will be able to see the results of your entire software development and deployment processes in one solution.
To run FireCracker, you will need:
- FireCracker Jar file provided by PractiTest that can be downloded from here
- Json configuration file (Defines the conversion of the XML results into PractiTest artifacts and results)
- XML test results file/s

Table of Contents
- Create and edit the configuration file
- Run FireCracker manualy to check the configuration
- Automate the process
Create and edit the configuration file
A few things to prepare before starting the FirCracker’s configuration:
- Create an API token. We recommend using a personal API token that should be enabled by account admin and then generated in personal settings.
- Create test custom fields that will match your fields in the test results you get from your CI/CD tool. For example: if you have a field called ‘class_name’ in your automated tests, map it with a PractiTest test custom field. This way you will be able to see the equivalents of your automated tests, in PractiTest’s reports and dashboard graphs.
- Make sure you have Java installed on your machine
Access the configuration editing page using your PractiTest credentials and follow the steps below:
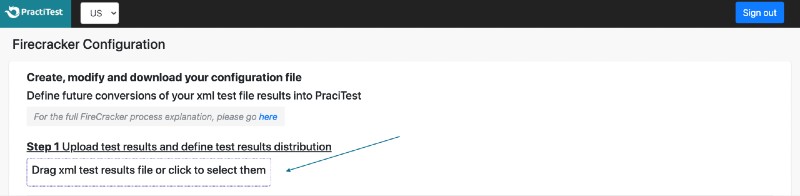
Step 1 - Upload the XML result files
Upload your XML Test Results file. You can upload multiple files to import them to PractiTest together.
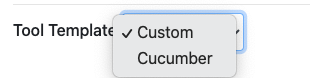
Under the file upload, you will find the drop down for Tool Template. If you want to integrate Cucumber results, please choose Cucumber and follow the instructions here. For any other tool please leave the Tool Template as Custom.
By default, every time you run the FireCracker it will add your tests to one TestSet in PractiTest (the name of the Test Set can be defined in Step 2) and will turn each original test-case from the xml into a test with one step in it (number of steps can be seen under ‘tests’ column).

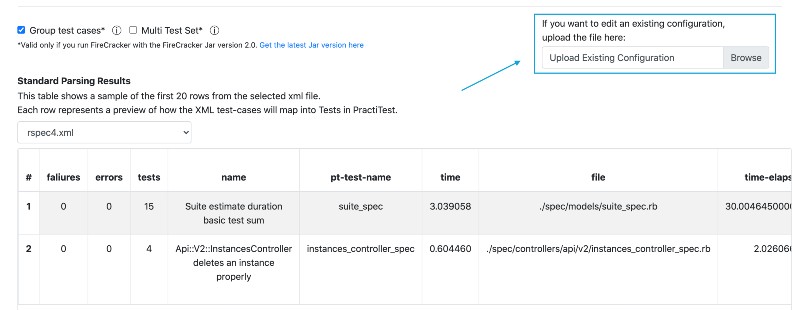
- Select the "Group Test-cases" option if you want to group test-cases that have the same classname ending (as defined by the text after the last period in the classname), into one PractiTest Test. Each test-case from the XML will become a step in the new PractiTest Test (number of steps can be seen under ‘tests’ column). If there is no classname - then the grouping will be based on having the same name attribute ending (split by >).
- Select the Multi Test Set option if you don't want all your tests to go into one Test Set. By selecting it, FireCracker will import the test-cases into multiple Test Sets in PractiTest, based on their Suite-Name attribute.
- If you select Use Test Steps and upload an xml with a test that already exists in PractiTest, FireCracker will match the reported steps to the steps in the original test. If you unselect the "Use Test Step", FireCracker will use only the reported steps. The use case for this could be when the automation system that creates the xml reports only failed steps of existing tests. For example, if PractiTest has a test with 30 steps, and the uploaded xml has the same test but it only has 5 failed steps, and you selected the Use Test Steps in FireCracker, PractiTest will not create a run with only 5 failed steps. Instead, it will mark these 5 steps as failed and use the original 25 steps and mark them as passed. If you untick the "Use Test Steps", PractiTest will create a run with only the 5 failed steps reported.
The Standard Parsing Results table shows a sample of the first 20 rows from the selected xml file where each row represents a preview of how the XML test-cases will map into Tests in PractiTest.
If you uploaded multiple XML files, you can choose which ones to preview.
Step 2 - Modify and download the configuration
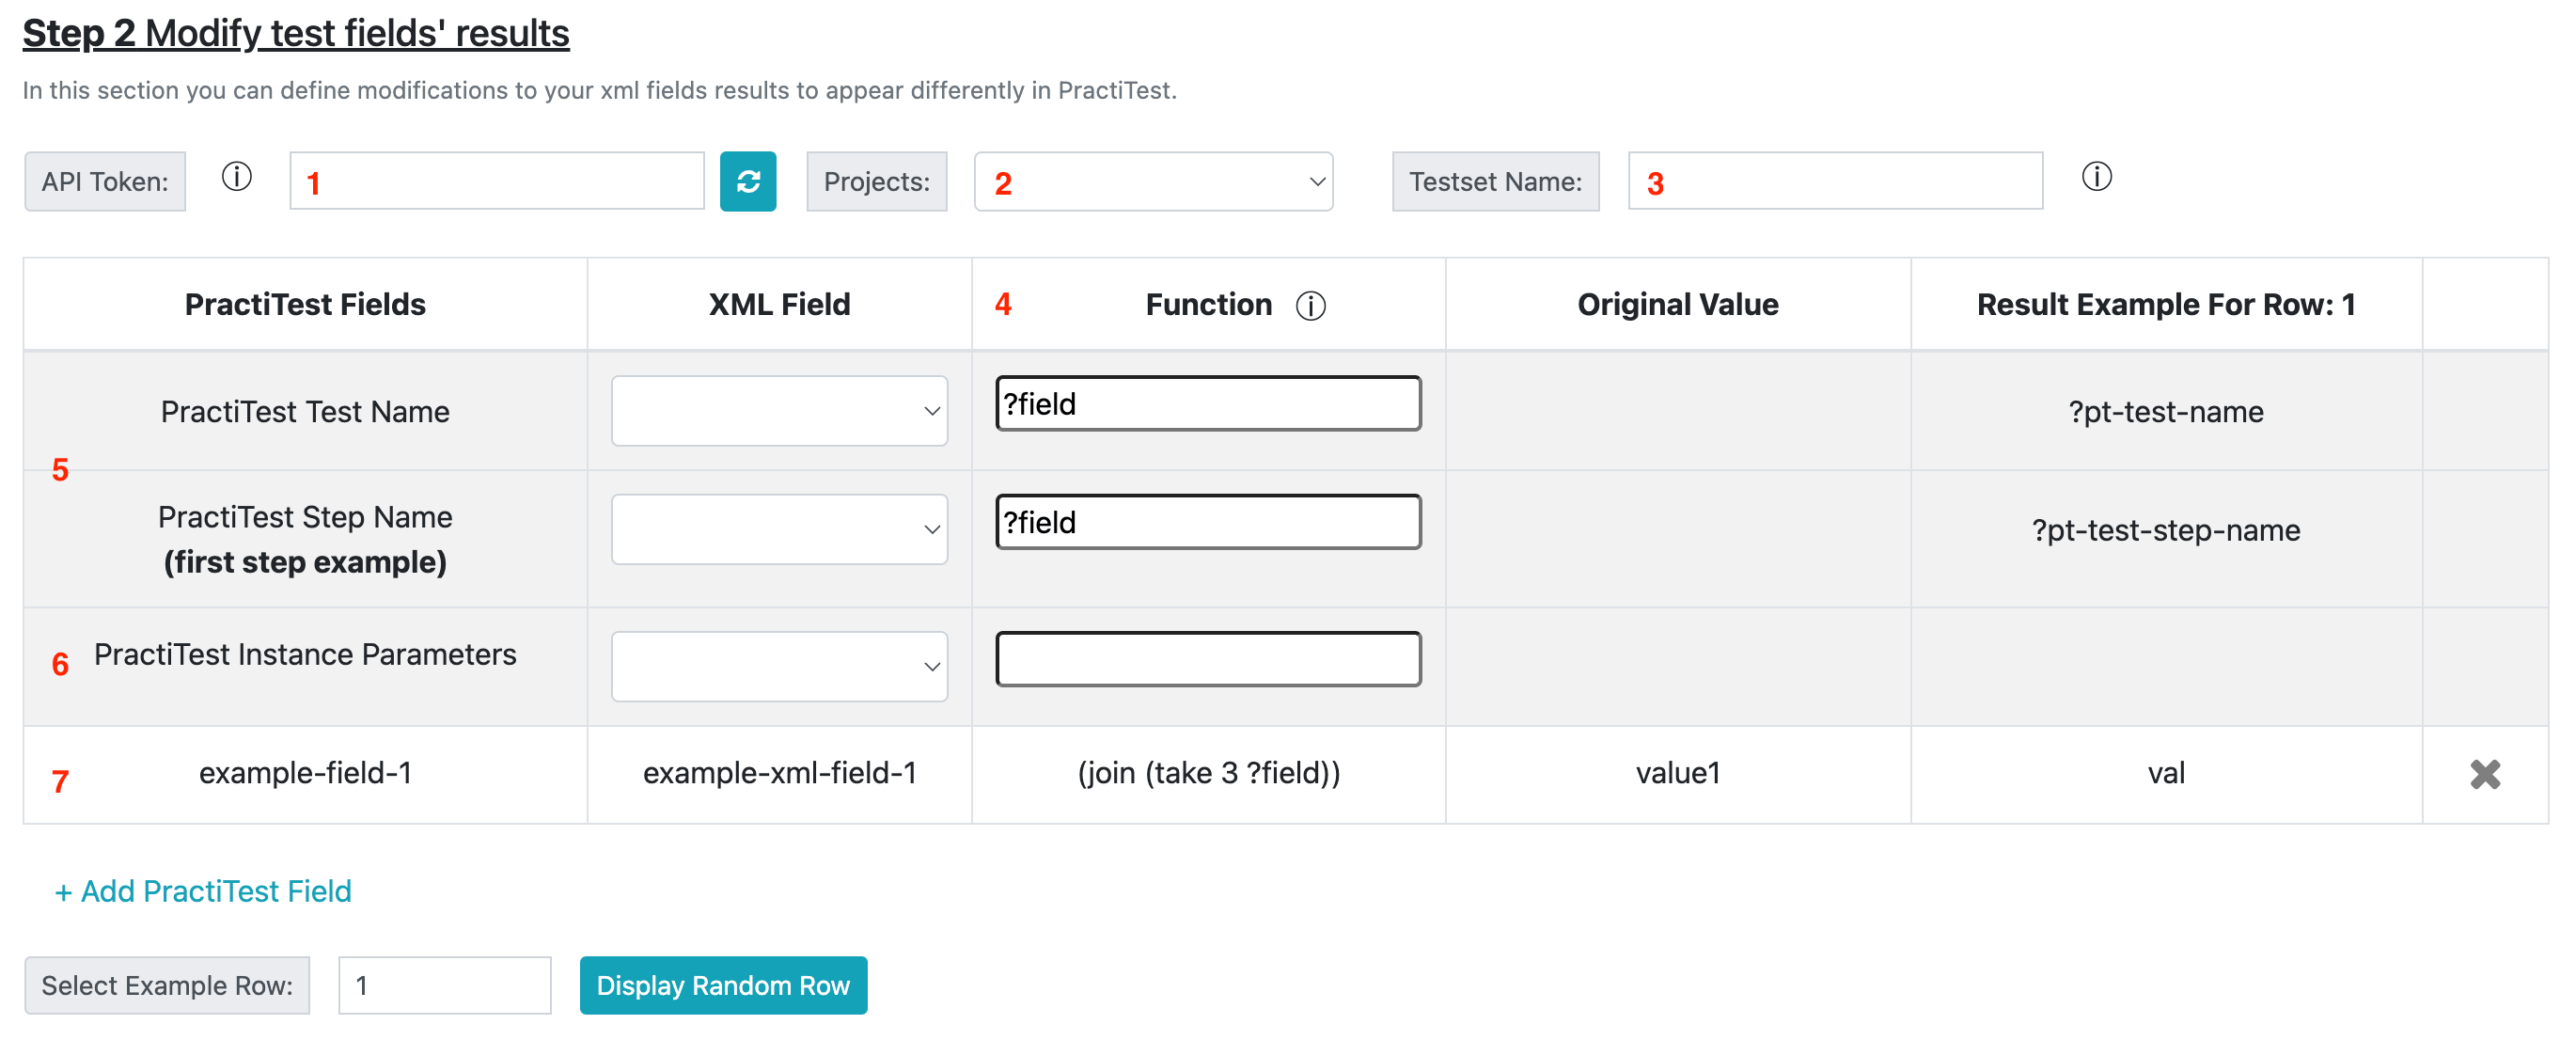
- Paste your API token and press the generate button next to it.
- From the project dropdown list select the project you would like to send results to.
- In case you didn't Select the Multi Test Set option (in Step 1), give a name to the Test Set you want the tests to be added to. If that Test Set name exists in this project - your tests will populate the existing Test Set. If it doesn't exist - FireCracker will create a new Test Set with this name and populate it accordingly.
- Functions column: Functions define the desired results of your PractiTest fields according to the manipulations you set on your xml attributes.
There are several methods that can be used to manipulate the xml attributes. The most basic function is the ?field, which takes the selected xml field and inserts it as-is to the PractiTest field. It is possible to use ?’any-other-field’, for example ?name, to use the xml name field value in a different field. It is possible to encapsulate and use several functions one after another on the same value like this: (get 1 (split "_" ?field )).
The actions will start from the inner side of the brackets moving to the outside. In the (get 1 (split "_" ?field )) example, the first action is Split. Split will split the xml field value where there is an underline ("_") to a list of values. So if the value of my xml is "suite_spec", I will receive the list of values as "suite" "spec". The next action is ‘get 1’, which will get the first value from the list. This will mean that the end value that will be inserted to my PractiTest field will be "suite".
Another example: (join (drop-last 2 (drop 4 ?field))). This function will drop 4 first letters, then drop the last 2 letters, and then join the result to one string.
Here is the full list of methods/functions available:- ?field - will take the value from the xml field as is. ?field
- split - split the value by any string input. (split " " ?field)
If the field value is suite_spec and I use the function (split "_" ?field) the result will be "suite" "spec" - tokenize-package - split the value by dot. (tokenize-package ?field)
- tokenize-class-name - split the value by capital letters. (tokenize-class-name ?field)
- get - get the indexed value from a list or a string. (get 2 ?field)
If the field value is "suite" "spec" and I use the function (get 2 ?field), the result will be spec. If the field value is suite and I use the function (get 2 ?field), the result will be u - take - Create a list of the number of characters according to the index (has to have two parameters). (take 5 ?field)
If the field value is suite_spec and I use the function (take 5 ?field) the result will be ("s" "u" "i" "t" "e") - drop - drop the first characters according to the index (has to have two parameters) and create a list of the rest of the characters. (drop 5 ?field)
If the field value is suite_spec and I use the function (drop 5 ?field) the result will be ("_" "s" "p" "e" "c") - drop-last - drop last value and return a list of the rest (can add a value to drop more than 1 value from the end). Adding the value is optional - the default value is 1. (drop-last ?field)
If the field value is suite_spec and I use the function (drop-last 2 ?field) the result will be ("s" "u" "i" "t" "e" "_" "s" "p") - concat - change the value to one string. (concat ?field)
If the field value is "s" "u" "i" "t" "e" and I use the function (concat ?field) the result will be suite - capitalize - make all letters to be capital letters. (capitalize ?field)
- join - connect string or list together. (join ?field)
If the field value is “suite” “_” “spec” and I use the function (join ?field) the result will be suite_spec - trim - trim the spaces from the start and the end of the string. (trim ?field)
- The first 2 rows in the table define the Test and the Step name in PractiTest. By default, they will be based on the ‘class name’ field. You can use the function column to define the modification you want to apply on the ‘class name’ xml field (or any other xml field you chose), in order to receive the desired result in PractiTest.
- The 3rd row, PractiTest Instance Parameter, allows you to define instance parameters in the xml results. The parameters can then be used for a PractiTest test that has parameters.
First, FireCracker will find the parameter values according to your definition in row 3. FireCracker is expecting the parameter values to be in the following format:
| Parameter 1 Value | Parameter 2 value | etc.
Next, FireCracker will match the parameters' values to the relevant test instance in PractiTest. This way you can have different instances, each instance with its relevant parameters values, instead of having the same instance with different runs, each run containing different values. - Add a new row for each field modification. Map the PractiTest field to the xml field. Use the function column to define the modification you want to apply on the xml field result, in order to receive the desired result in PractiTest. For Example: If the function is ‘join (take 3 ?field)’ the result that will appear in PractiTest are the first 3 letters of the value in the chosen field of the xml.
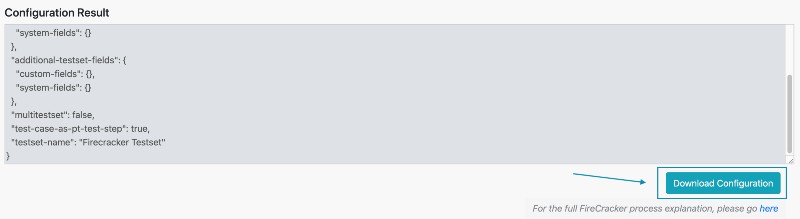
- Click the ‘Download Configuration’ button. You will receive a JSON file.
Use the table to modify the results that will appear in PractiTest.
In case you will need to map more fields or to change the project you are sending results to, you can always upload the Configuration file to the FireCracker UI mode, modify it and download an updated version. No need to remap existing fields, only to update the information when needed.
Run FireCracker manualy to check the configuration
Create a folder that will store your XML files, the configuration JSON file you downloaded and the JAR file of FireCracker that can be downloaded from here in this structure:
Folder:
- xml_reports
- xml1.xml
- xml2.xml
- ...
- CONFIGURATION_FILE.json
- practitest-firecracker-standalone.jar
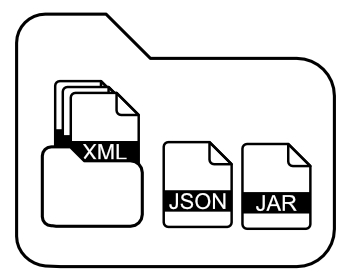
Note: The File & folder names can change based on your selected names.
Now you need to run the command below, in any Shell, in order to send results into PractiTest:
* Make sure you specify the name of your relevant folder.
java -jar practitest-firecracker-standalone.jar --reports-path="xml_reports" --author-id=USER_ID --config-path="CONFIGURATION_FILE.json" create-and-populate-testset
Please Note:
- In case your account is located in EU environment, please add this parameter to the command:
--api-uri=https://eu1-prod-api.practitest.app - USER_ID should be a user who belongs to a PractiTest account. you can retrieve user IDs by sending this GET request.
- In case you are using FireCracker JAR file version lower than 2.0, you have to define the Test Set name parameter in the command:
--testset-name="TEST_SET_NAME" - In case you created a firecracker test manually and you want it to be updated with the new runs, please make sure the name you give it matches the name of the test in the xml file.
Now you are able to see all the results in PractiTest.
Automate the process
To make this uploading process automatic, you will need to write a script that will download new XML report files into the ‘xml_reports’ folder, remove old files and run the command. This way every time you get a new build and result files, they will automatically be uploaded into PractiTest.
If you are using CircleCI, please use the FireCracker Orbs as described here
Here is an example script for Jenkins, running on linux:In order to make sure the script will continue to update PractiTest via FireCracker, we are using the Pipeline plugin for Jenkins (that makes sure Jenkins continues to update PractiTest even when a test fails). We are also using the Parameters plugin for Jenkins to allow multiple projects in Jenkins to update PractiTest.
Minimum requirement for this example is Jenkins version 2.13.
- Inside Jenkins go to Manage Jenkins --> Manage plugins --> sub tab Available --> look for Pipeline plugin and install.
- For this example, we want multiple Jenkins projects to to activate the pipeline that update PractiTest. So, inside Jenkins go to Manage Jenkins --> Manage plugins --> sub tab Available --> look for Parameters plugin and install.
- In Jenkins, press Create a new item - choose Pipeline. Name your pipeline.
Paste the below script, inside your new pipeline under Script field, then press save. For now, leave the defaultValues empty, as we are going to define them using the parameters:
pipeline { agent any parameters { string(name: 'TESTSET_NAME', defaultValue: '', description: 'testset name') string(name: 'PROJECT', defaultValue: '', description: 'jenkins project folder and name') string(name: 'RELATIVE_TEST_LOCATION', defaultValue: '', description: 'folder where test results where located in jenkins project') string(name: 'JAR_VERSION', defaultValue: '', description: 'firecracker jar version') string(name: 'AUTHOR_ID', defaultValue: '', description: 'author id') string(name: 'API_URI', defaultValue: '', description: 'api uri') string(name: 'CONFIG_FILE', defaultValue: '', description: 'firecracker config file content- downloaded from Firacracker') booleanParam(name: 'RUN_BUILD', defaultValue: true, description: 'run build or don\'t for parameterized call') } stages { stage('run project') { steps{ script{ if ("${params.RUN_BUILD}" == "true") { build "${params.PROJECT}" } } } } } post { always { script{ if (!fileExists("practitest-firecracker-standalone.jar")) { sh "wget https://github.com/PractiTest/practitest-firecracker/releases/download/v${params.JAR_VERSION}/practitest-firecracker-standalone.jar" } if (!fileExists("surefire-reports")) { sh 'mkdir surefire-reports' } if (fileExists("surefire-reports/*")) { sh 'rm surefire-reports/*' } } sh "echo \'${params.CONFIG_FILE}\' > config.json" sh "cp -a ../${params.PROJECT}/${params.RELATIVE_TEST_LOCATION}/. surefire-reports" sh "java -jar practitest-firecracker-standalone.jar --api-uri=${params.API_URI} --reports-path=surefire-reports --config-path=config.json --testset-name=${params.TESTSET_NAME} --author-id=${params.AUTHOR_ID} create-and-populate-testset" } } } -
Since we want to see multiple projects in Jenkins updating PractiTest, go to the project you want to build and trigger the Pipeline:
- Press configure.
- Scroll to Post-build actions. On the bottom left side you will see a button "Add post-build action". Press the arrow next to it and choose "Trigger parameterized build on other projects.
- Fill the "Projects to build" field with the name of the Pipeline you created.
- For the "Trigger when build is" field, choose "Complete (always trigger)" - or something else that better suits your process.
- Press Add parameters --> Predefined Parameters. A Predefined parameter window will open. Inside this window, define your parameters using the text below. Add the relevant values for each parameter according to the explenation underneath the text box:
Please add the relevant value as follows:
- TESTSET_NAME= If you use an existing name - the FireCracker will update an existing testSet with a new run. If you give the test set a new name - the firecracker will create a new test set in PractiTest with the name you gave it.
- PROJECT=The project name is the name of Jenkins project we are currently in and want to run.
- RELATIVE_TEST_LOCATION = is the location of the test report XMLs that can be found under the Post build actions, Publish Junit test result report. This can be configured using the ‘Add post build action’ button
- JAR_VERSION= is the version of the Jar file we downloaded from the help page. Can be found here
- AUTHOR_ID= fill in the user id of the person running the firecracker.
- API URI= for the US users: https://api.practitest.com, and for the EU users: https://eu1-prod-api.practitest.app
- CONFIG_FILE= paste the content of the json config file downloaded from the FireCracker.
- RUN_BUILD= Always keep false in order to prevent Pipeline from building the current project again and again in a loop
- Press Save.
From now on, each time this project will build, it will automatically update Pipeline which will update FireCracker and will send the build results into PractiTest automatically.