Table of Contents
- Download files
- What is the xBot?
- The process
- Setting up the xBot agent
- Creating xBot Tests
- Defining the Test results for your scripts
- Running xBot Tests
- xBot test run statuses
- Scheduling xBot runs
- xBot tests view - Current & queue, scheduled and history
- Account owner’s agents view
Download files
xBot 2.0 Files to download:
What is the xBot?
xBot is an application that allows a user to run (or initiate a run by scheduling) automated test scripts on a remote machine from the PractiTest UI.
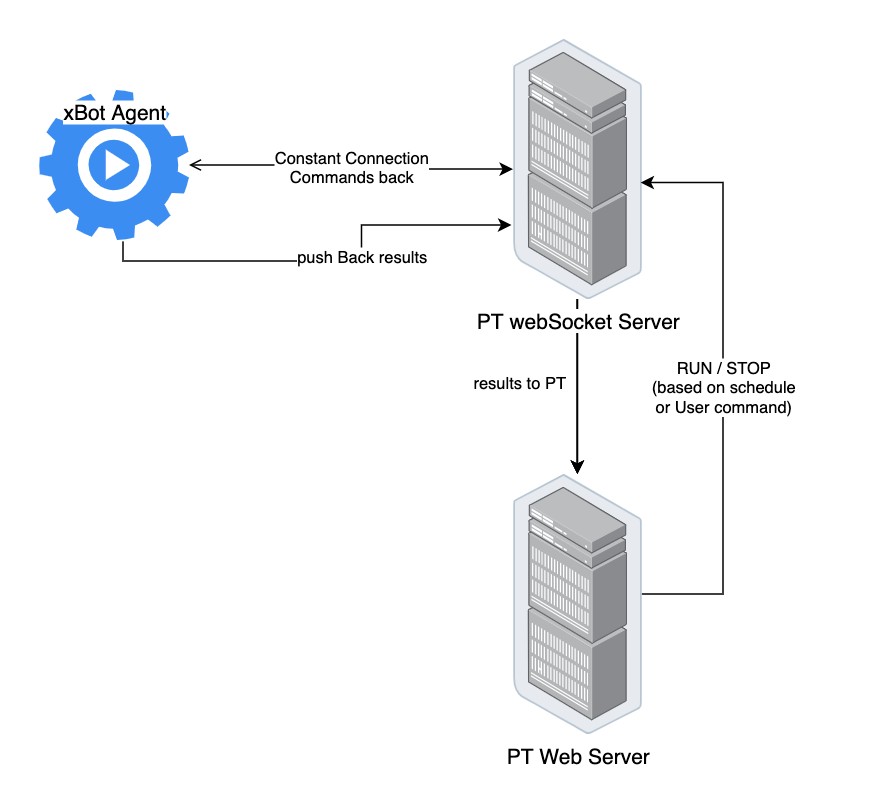
The Process
- Copy and execute the xBot agent on the remote machine.
- Create Tests of Automation type “xBot” in your PractiTest project and update them with the relevant script details.
- Create Test Sets for the xBot Tests and run them either immediately or later by scheduling them.
Setting up the xBot agent
- Download the xBot agent executable for your platform: Windows, Linux, or Mac (OS supported at the moment) to a folder on the machine where you plan to run the automated script. The files to download are available at the top of this page.
- Open a console, navigate to the folder where you downloaded the xBot agent executable.
- Obtain a PractiTest Account API token (not a personal API token) (You can find the instructions here).
-
Run the xBot agent from the console (you will need to specify 3 parameters when you run the agent for the first time).
Following is a Windows example:xbot-agent-win.exe --backend-url="wss://xbot-backend-prod.practitest.com" --api-token="YOUR_API_TOKEN" --client-type="CLIENT_TYPE"- backend-url - For the US datacenter: "wss://xbot-backend-prod.practitest.com"
For the EU datacenter: "wss://eu1-xbot-backend-prod.practitest.app" - API-token - The API token you obtained from the account (instructions above)
- client-type - A string you will specify when you create the xBot tests in PractiTest, normally used to make sure tests for different platforms will be run by the appropriate agent
- backend-url - For the US datacenter: "wss://xbot-backend-prod.practitest.com"
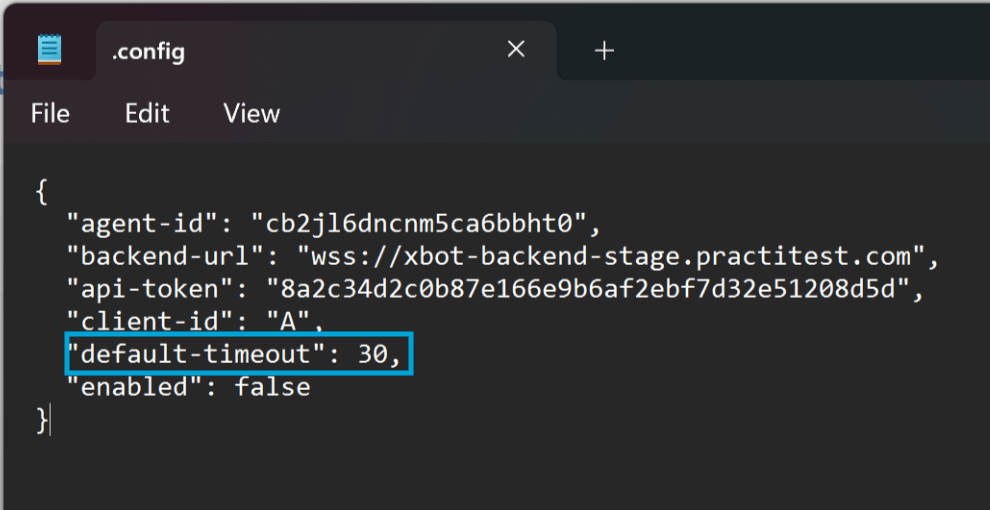
- After the first run of the xBot via the console the .config file will be created in the xBot agent's folder and you will be able to run the agent without specifying the parameters again.
- If you need to change a parameter, just specify it once.
xbot-agent-win.exe --client-type="SOME_OTHER_CLIENT_TYPE" - If you don't want to change anything, you can run the agent without any parameters:
xbot-agent-win.exe - Please note the .config file has the 'default-timeout' of the agent set to 30 minutes by default. When the agent reaches the timeout - it will stop reporting the results of your script and the test run status will change to ERROR. To change the default timeout, for example, if your script is longer than 30 minutes, please go to your .config file and edit it:
Creating xBot Tests
- Go to the Test Library, and click on "New Test".
- Choose “Automated Test” as Test Type, then select “xBot” from the dropdown menu.

-
In the “Automation Info” section, you can find the xBot parameters that need to be defined:
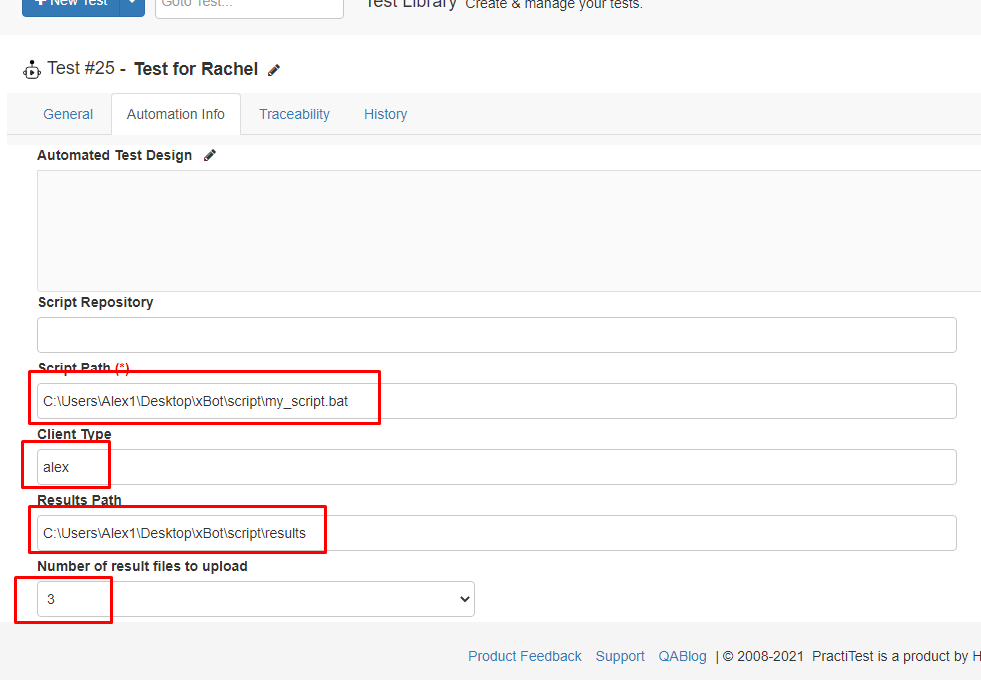
- Script Path: Fill in the exact or relative path of the script on your machine. The path should be from the xBot client machine to the automated test itself (for example a path to a script written in Selenium). Make sure all machines can access this address.
- If you want to use parameters, insert $1 $2 etc to your script where you want your parameters. In the Script Path field in PractiTest, add the values after the path with a space between each parameter like this: 'my_script.bat value1 value2'.
- Client type: Fill in the name of your agent as defined when you ran the xBot Agent for the first time via the console. This is a unique id of the xBot client machine that should run the test, as defined in the configuration of the xBot.
- Results Path: Fill in the exact path from the xBot client machine to the automated test result file(s) location. It can be the path to a single file or to a directory. At the end of the script execution, the XBot will upload files from this path to the PractiTest server and attach them to the Test’s run.
- Number of result files to upload: Fill in the number of files you’d like to be uploaded from the above location to PractiTest. If you fill in a number smaller than the actual number of results you will get, xBot will upload the 5 most recent files sorted by the last modification date descending.
- Script Path: Fill in the exact or relative path of the script on your machine. The path should be from the xBot client machine to the automated test itself (for example a path to a script written in Selenium). Make sure all machines can access this address.
- Click on “Save Changes”.
Defining the Test results for your scripts
The xBot will send a report to the PractiTest server with the results of your automated tests based on the following convention:
- A Passed Test should result in 0 (zero).
- A Failed Test is everything but 0.
In addition, the xBot will send the results file(s) to PractiTest server
- Each of the uploaded files will be saved as an attachment of the automation run.
- The xBot will upload the latest defined number of files in the specified directory, or a specific file.
Running xBot Tests
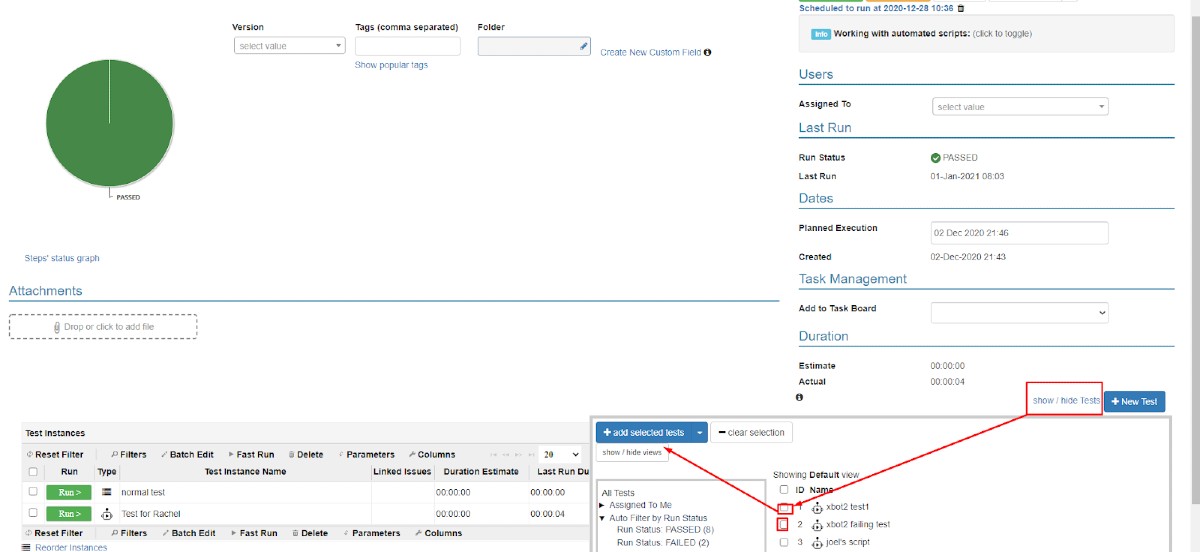
- Create a new Test Set and add xBot Test/s to it:
-
Click on “Run now” to run all of the Tests one by one, or you can click on each “Run” button in Test Instances Grid to execute them separately:
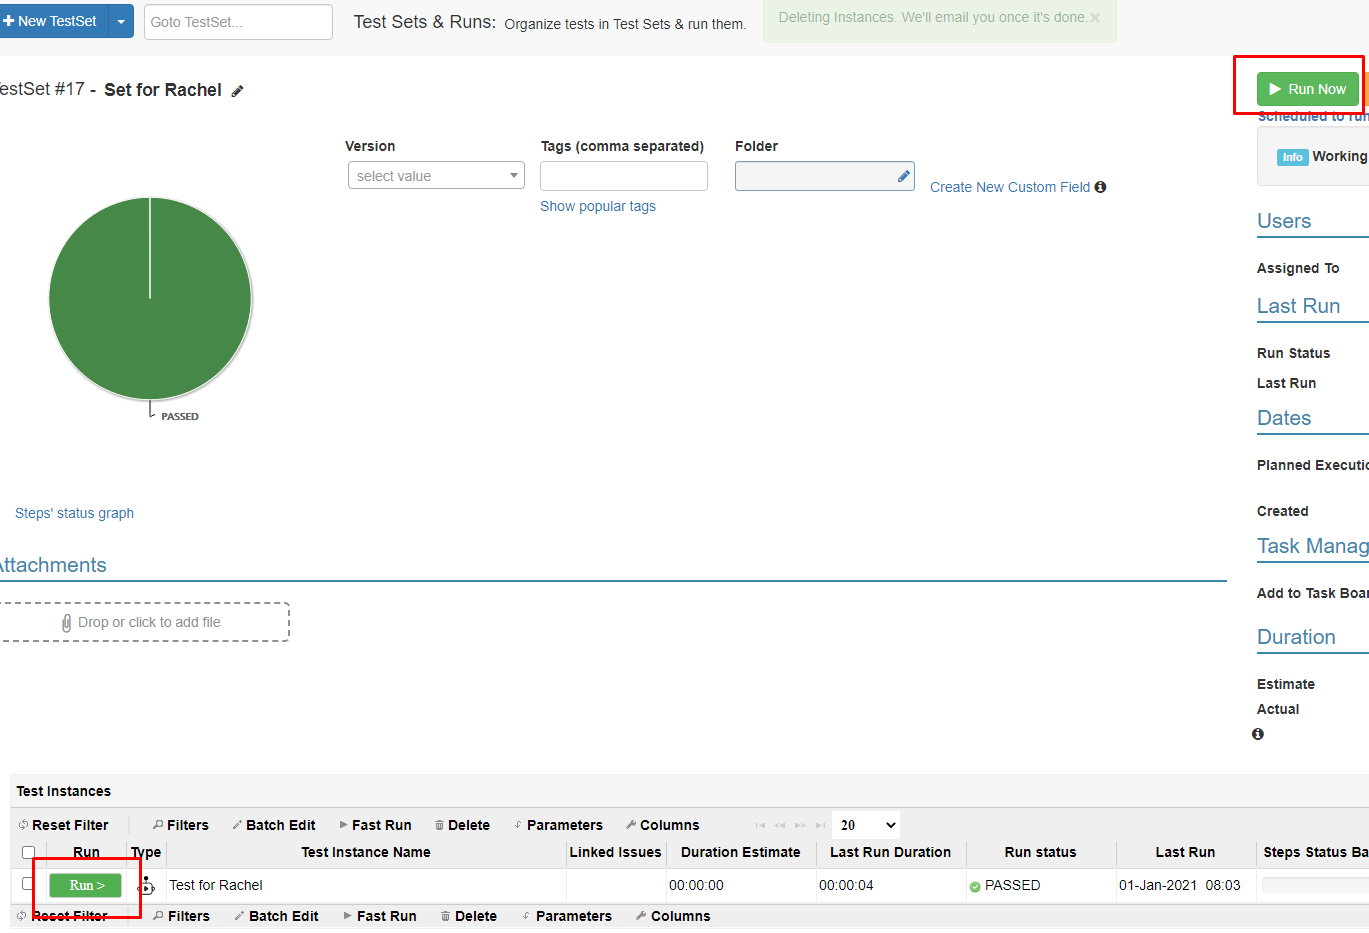
-
While the test is running, you can follow up with the CPU and memory capacity during its execution on the machine where the xBot is currently running. On the right-hand side of the window, you can see the xBot Status that indicates whether your browser is connected to the xBot backend and shows you real-time data. At the bottom of the screen you can find other tests pending in queue:
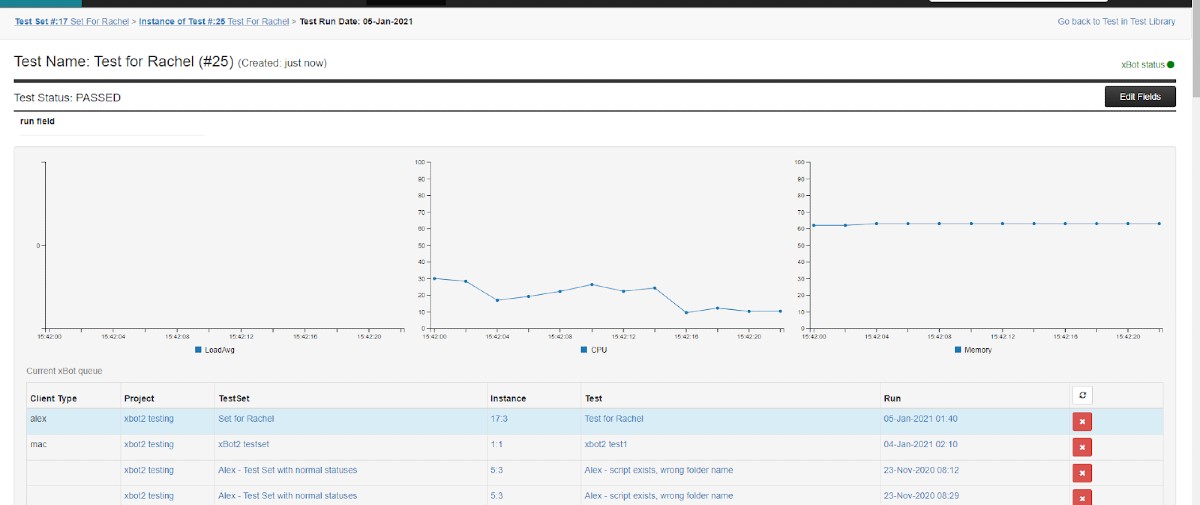
-
After refreshing the Run page, you will see:
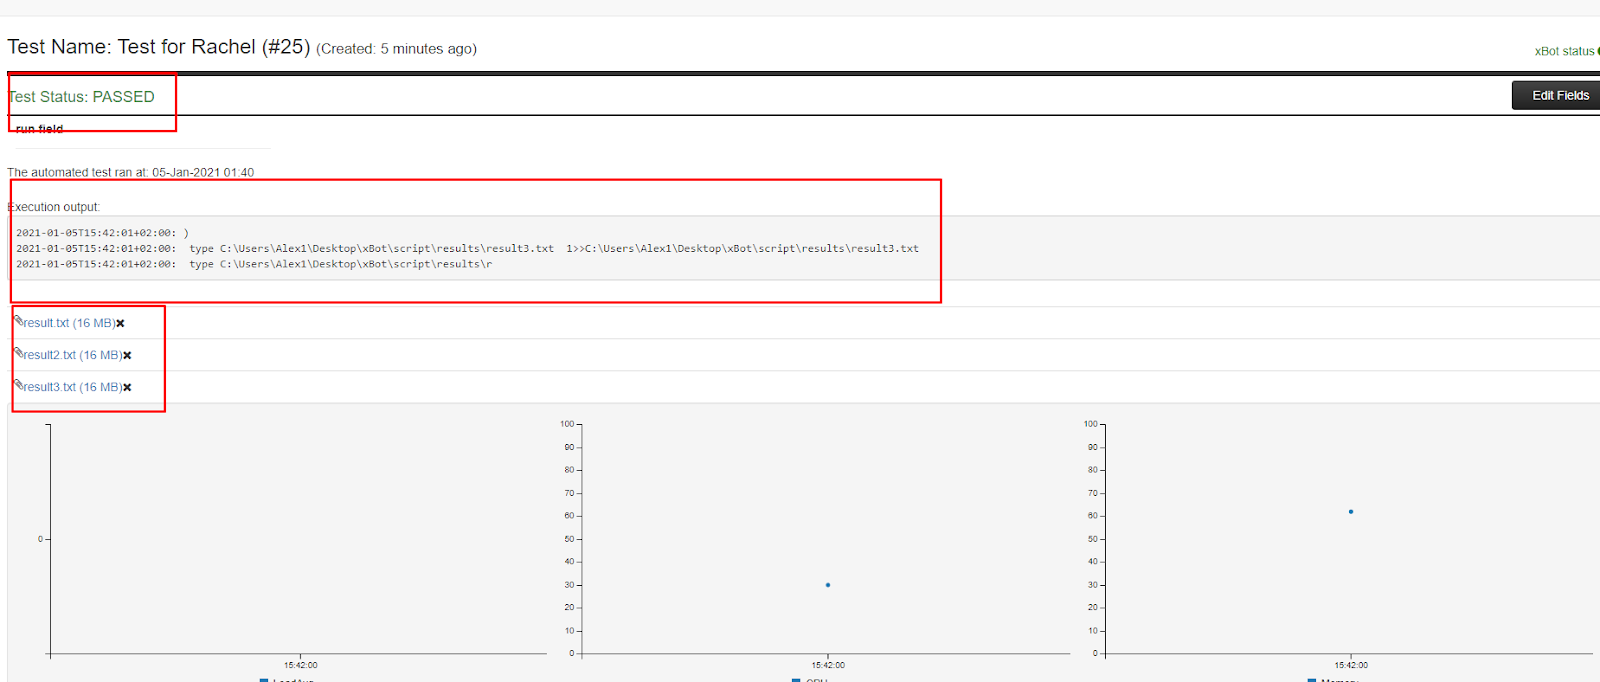
- Updated Run Status (Passed, Failed, or Error).
- Execution output, as per script.
- Uploaded Result files:
xBot Test Run Statuses
Here are the optional statuses for an xBot test and their meaning:
- PASSED - The test ran and the result is 0.
- FAILED - The test ran and the result is anything but 0.
- RUNNING - The test run was taken by an agent. The agent is now running the user script on the user's machine.
- PENDING - The user hit the run button (on the set/instance/run), and the run was added to the runs queue. the run is now waiting for an agent with a matching client type to be available to run/execute this run (if an agent is not picking up the test, it is either because the agent is busy OR the client type does not match OR the agent is disabled OR the run is scheduled for later).
- CANCELED - The execution was canceled while it was running (please see below).
- ERROR - The xBot agent failed to execute the test and the run/script execution was not completed. For example, when the script doesn't exist or is not executable, or when the xBot agent's default timeout has exceeded.
Scheduling the Test Run
- Go to the Test Set containing xBot Test Instances window, you will see the additional “Schedule” button.
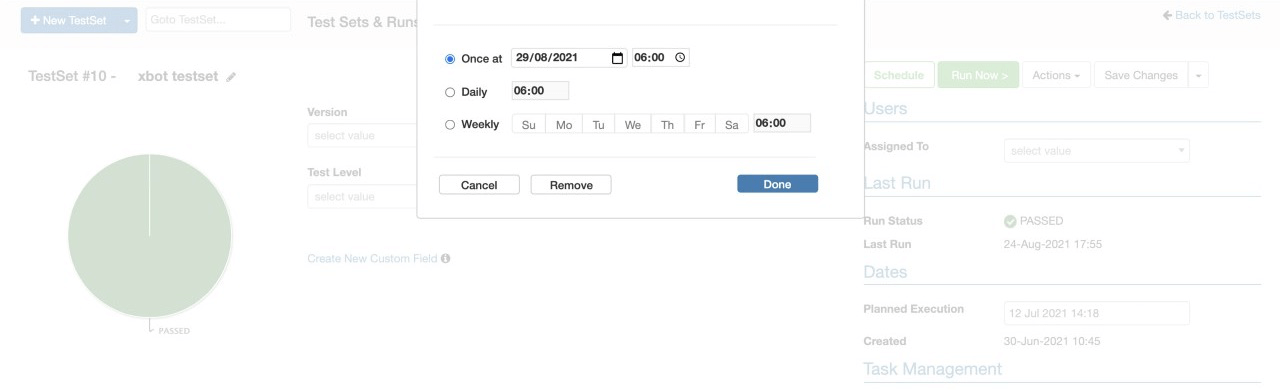
-
Press the button and schedule the Run of the Test Set to a specific date or to run on a daily/weekly basis:
xBot tests view - Current & queue, scheduled and history:
Go to the Test Sets & Runs module, press the Automation tab and you will find 3 sub-tabs:
(Each of the tables can be refreshed by pressing the blue refresh button at the top right-hand side of the table)
Current & Queue
In this table, you will see the queue of running/pending xBot tests. If you have the right permissions you will be able to delete pending tests or cancel running tests by pressing the 'x' next to them.
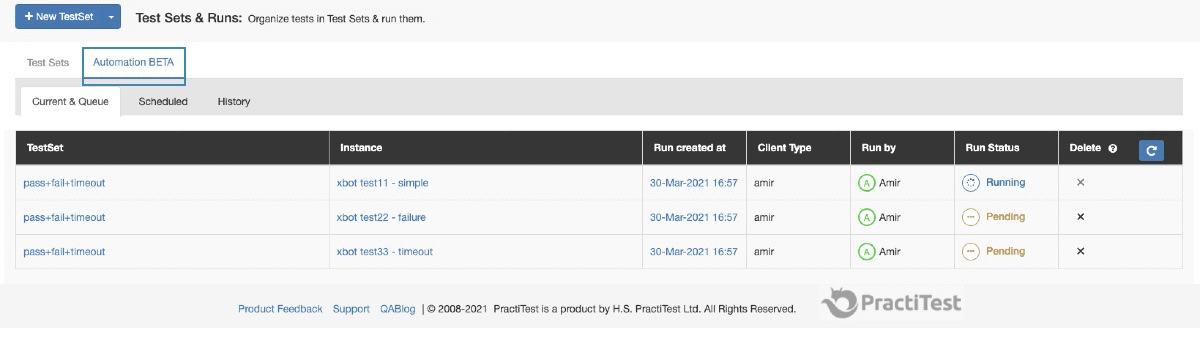
These canceled tests will receive the status CANCELED.

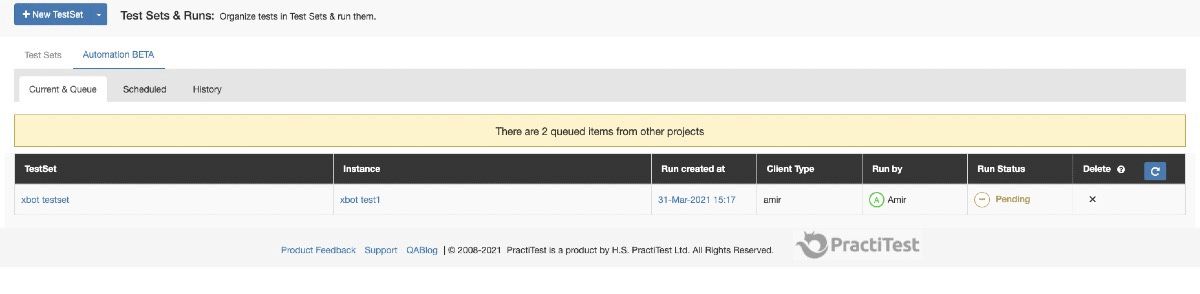
In case your tests are pending and you cannot see another test running, there are probably xBot tests from different projects running on the same agents. This is how it will look:
Scheduled
In this tab you can view the scheduled test sets for xBot2.
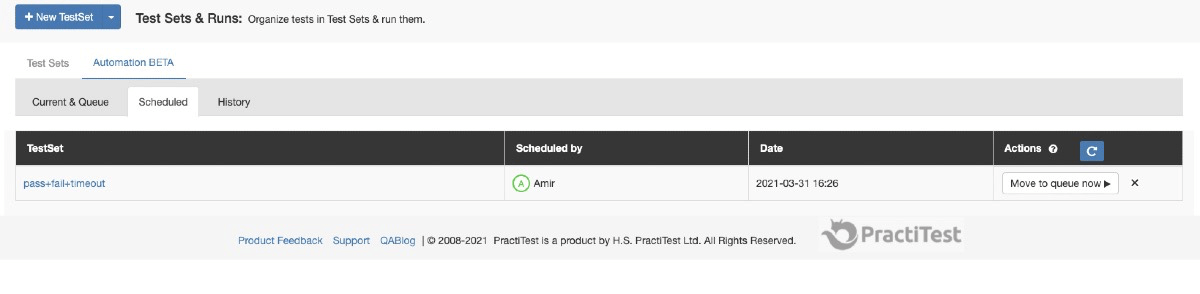
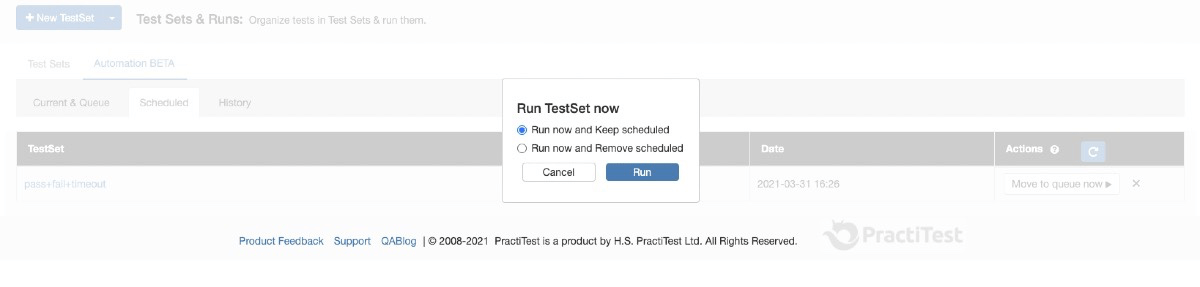
Under 'actions' you can choose to move a test to the queue now (meaning to run it now). The system will ask you if you wish to run it and keep the scheduled test set or to run now and remove it from the scheduled table.
History
In this tab, you can view the history of xBot2 test runs. Under 'actions' you can choose to re-run an old test.

Account owner’s agents view

In account settings, under the xBot tab, the account owner will be able to view the xBot status (1) and manage the xBot agents. By default, you will see all agents, online and offline. You can hide the offline agents by pressing the “View offline agents” button at the top right side (2). When an agent is online, the agent status at the top left side of each agent box will be green “online” (3). When an agent is online, you can see whether it is free or busy under the availability status (4). If an agent is free and its parameters are suitable for an xBot test that was initiated, its availability status will change from “Free” to “Busy” and he will run the tests. You will be able to see the utilization and log parameters as the agent runs. You can toggle the log display with the “View agent’s log” button (5).

When an agent is offline or free, you can edit its client type using the pen icons under the Agent details. (6) You can choose to disable or enable an online agent. Disabling the agent will keep it online but will prevent it from receiving new jobs. Enabling the agent will allow it to receive new jobs(7).

If the agent is busy, you will see a “Cancel & Disable” button instead of the Enable/Disable button. By pressing it you will cancel the running test and disable the agent (8). When an agent is offline, it can be removed from the agents list by pressing the button that appears on the top-right of the agent box (9).