- Test Steps
- Generating Steps Using Smart Fox
- Editing Steps Using Smart Fox
- Step Attachments, Test Attachments, and Step Run Attachments
- Step Parameters
- Call a Test
- Copy Step
Test Steps
A test is usually comprised of several steps. The steps describe in detail the validation checks that need to be performed on your application or system.
To add steps to your tests, go to the Steps tab and add the steps one by one. You can either create a step or call steps from a different test using the test ID. Each test step contains the following fields: Name, Description and Expected Results. You can attach a file or link and add a comment to each step or to the entire test. During the run, you will be able to add files and links to the Step Run.
Generating Steps Using Smart Fox
The Smart Fox is PractiTest’s AI assistant that will help you create suitable test steps for your test cases. Based on the name and description you give to your test, the Smart Fox will generate relevant steps that you can later update, refine, and reorder according to your needs.
To use the Smart Fox:
- Create a new scripted test with a clear name and a detailed description that outlines the main test objective.
- Click ‘Save Changes’.
- Go to the ‘Steps’ tab and click the Smart Fox icon located at the top right-hand side.
- Select ‘Generate steps’.
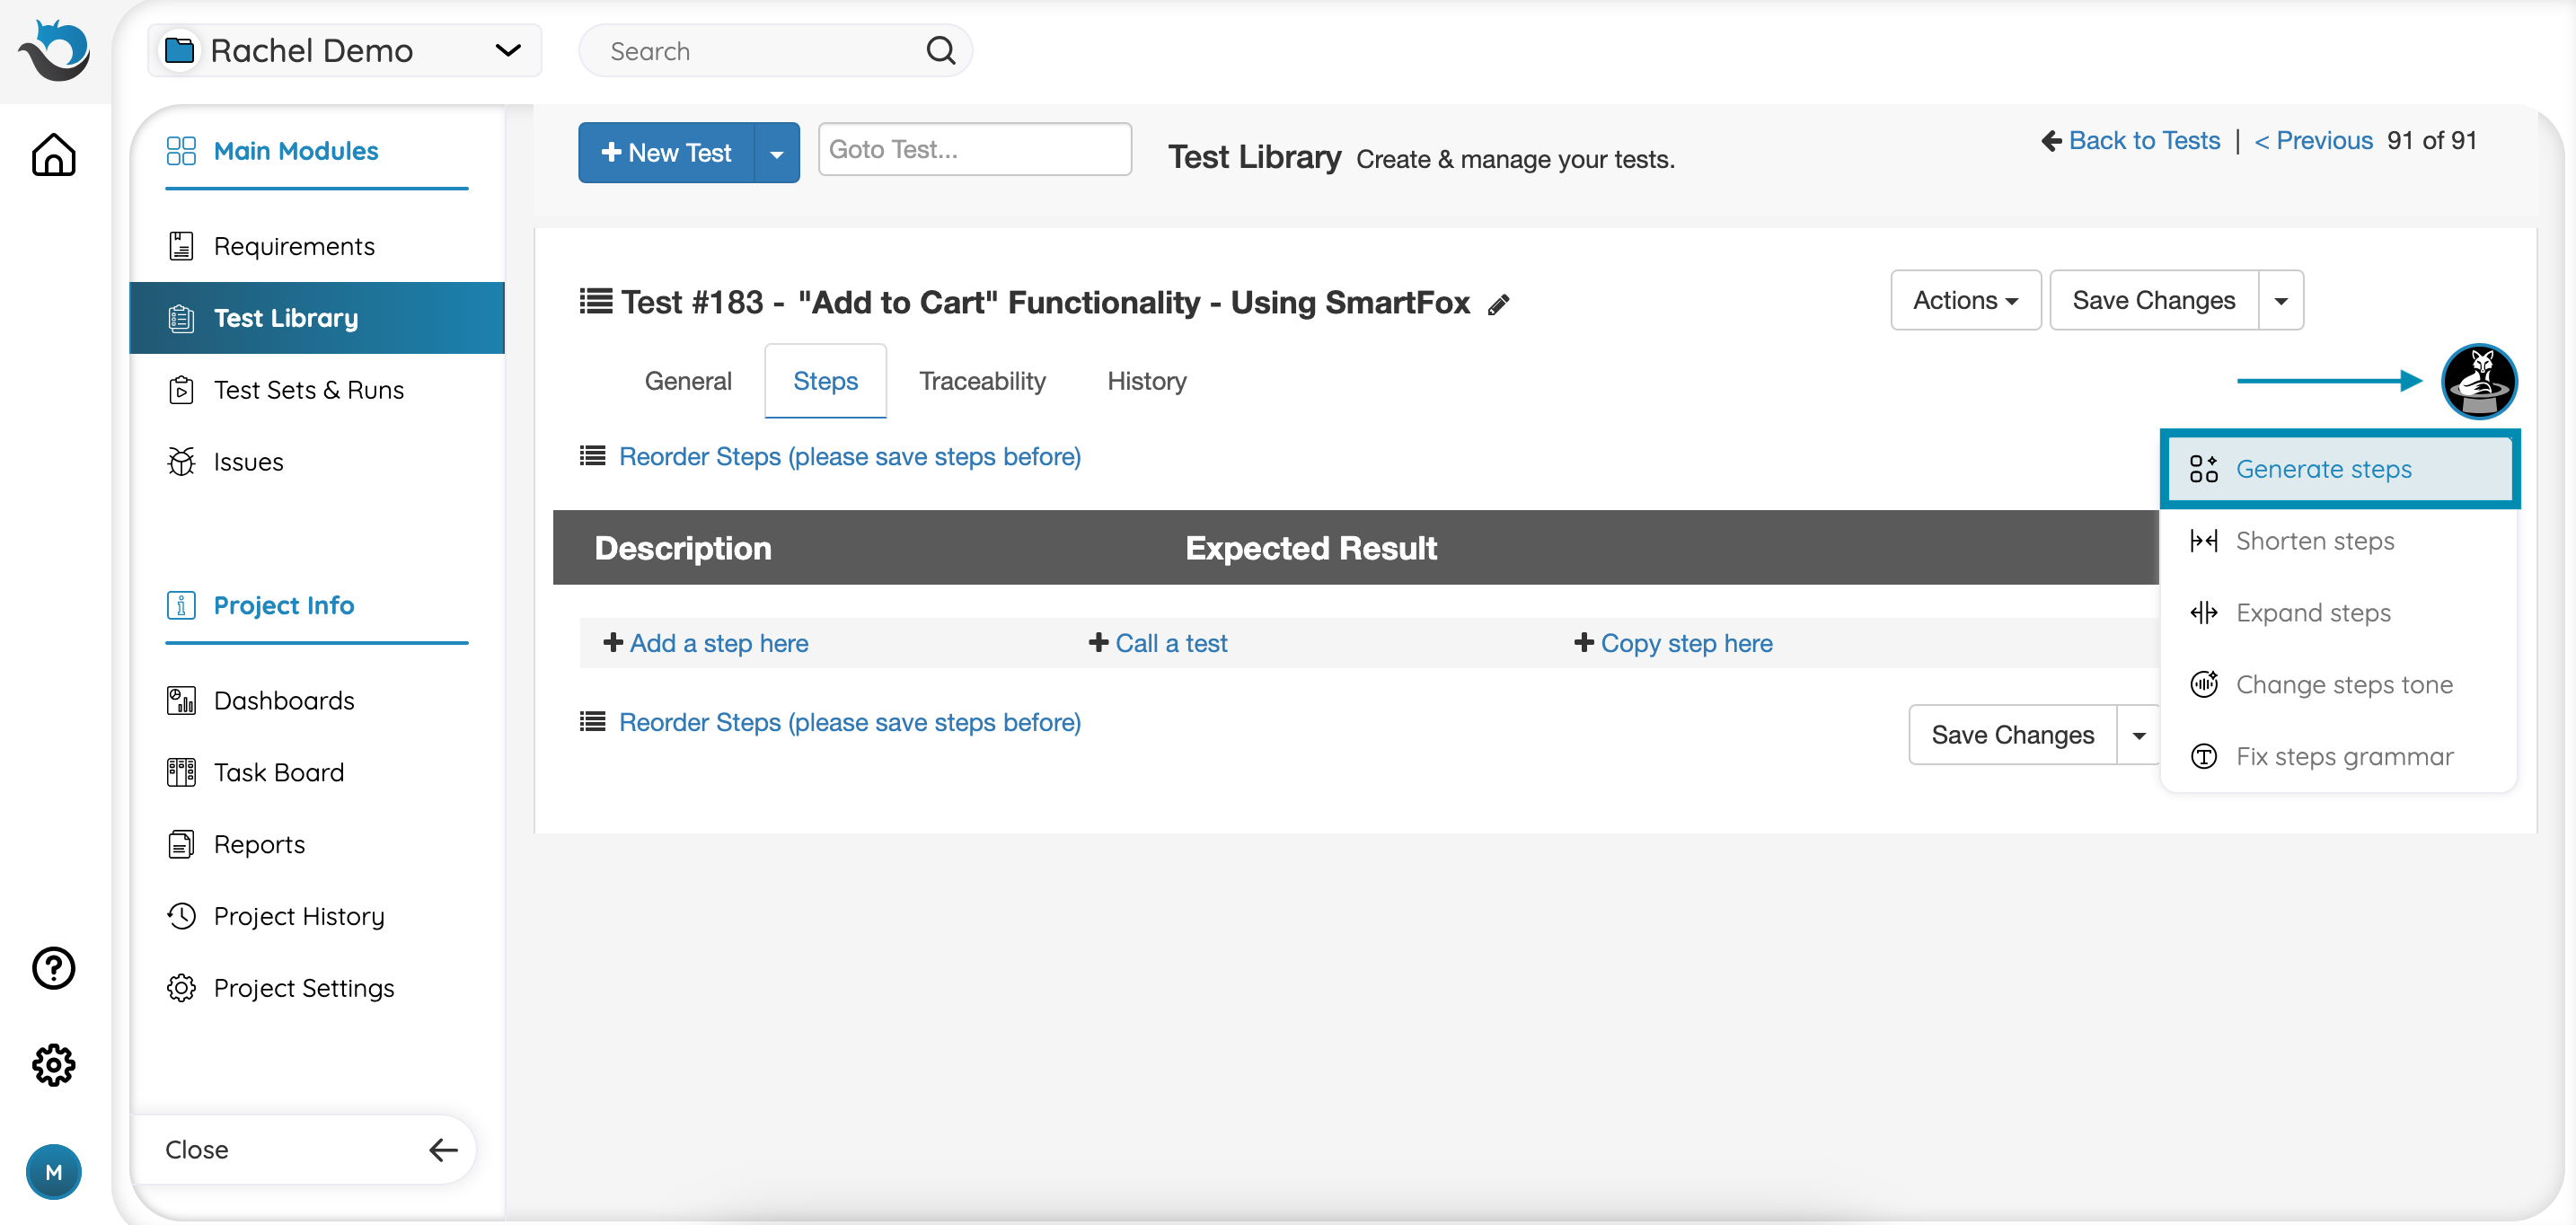
In order to use the Smart Fox, please ensure that your account owner has accepted the beta terms of use and enabled this feature in the account settings.
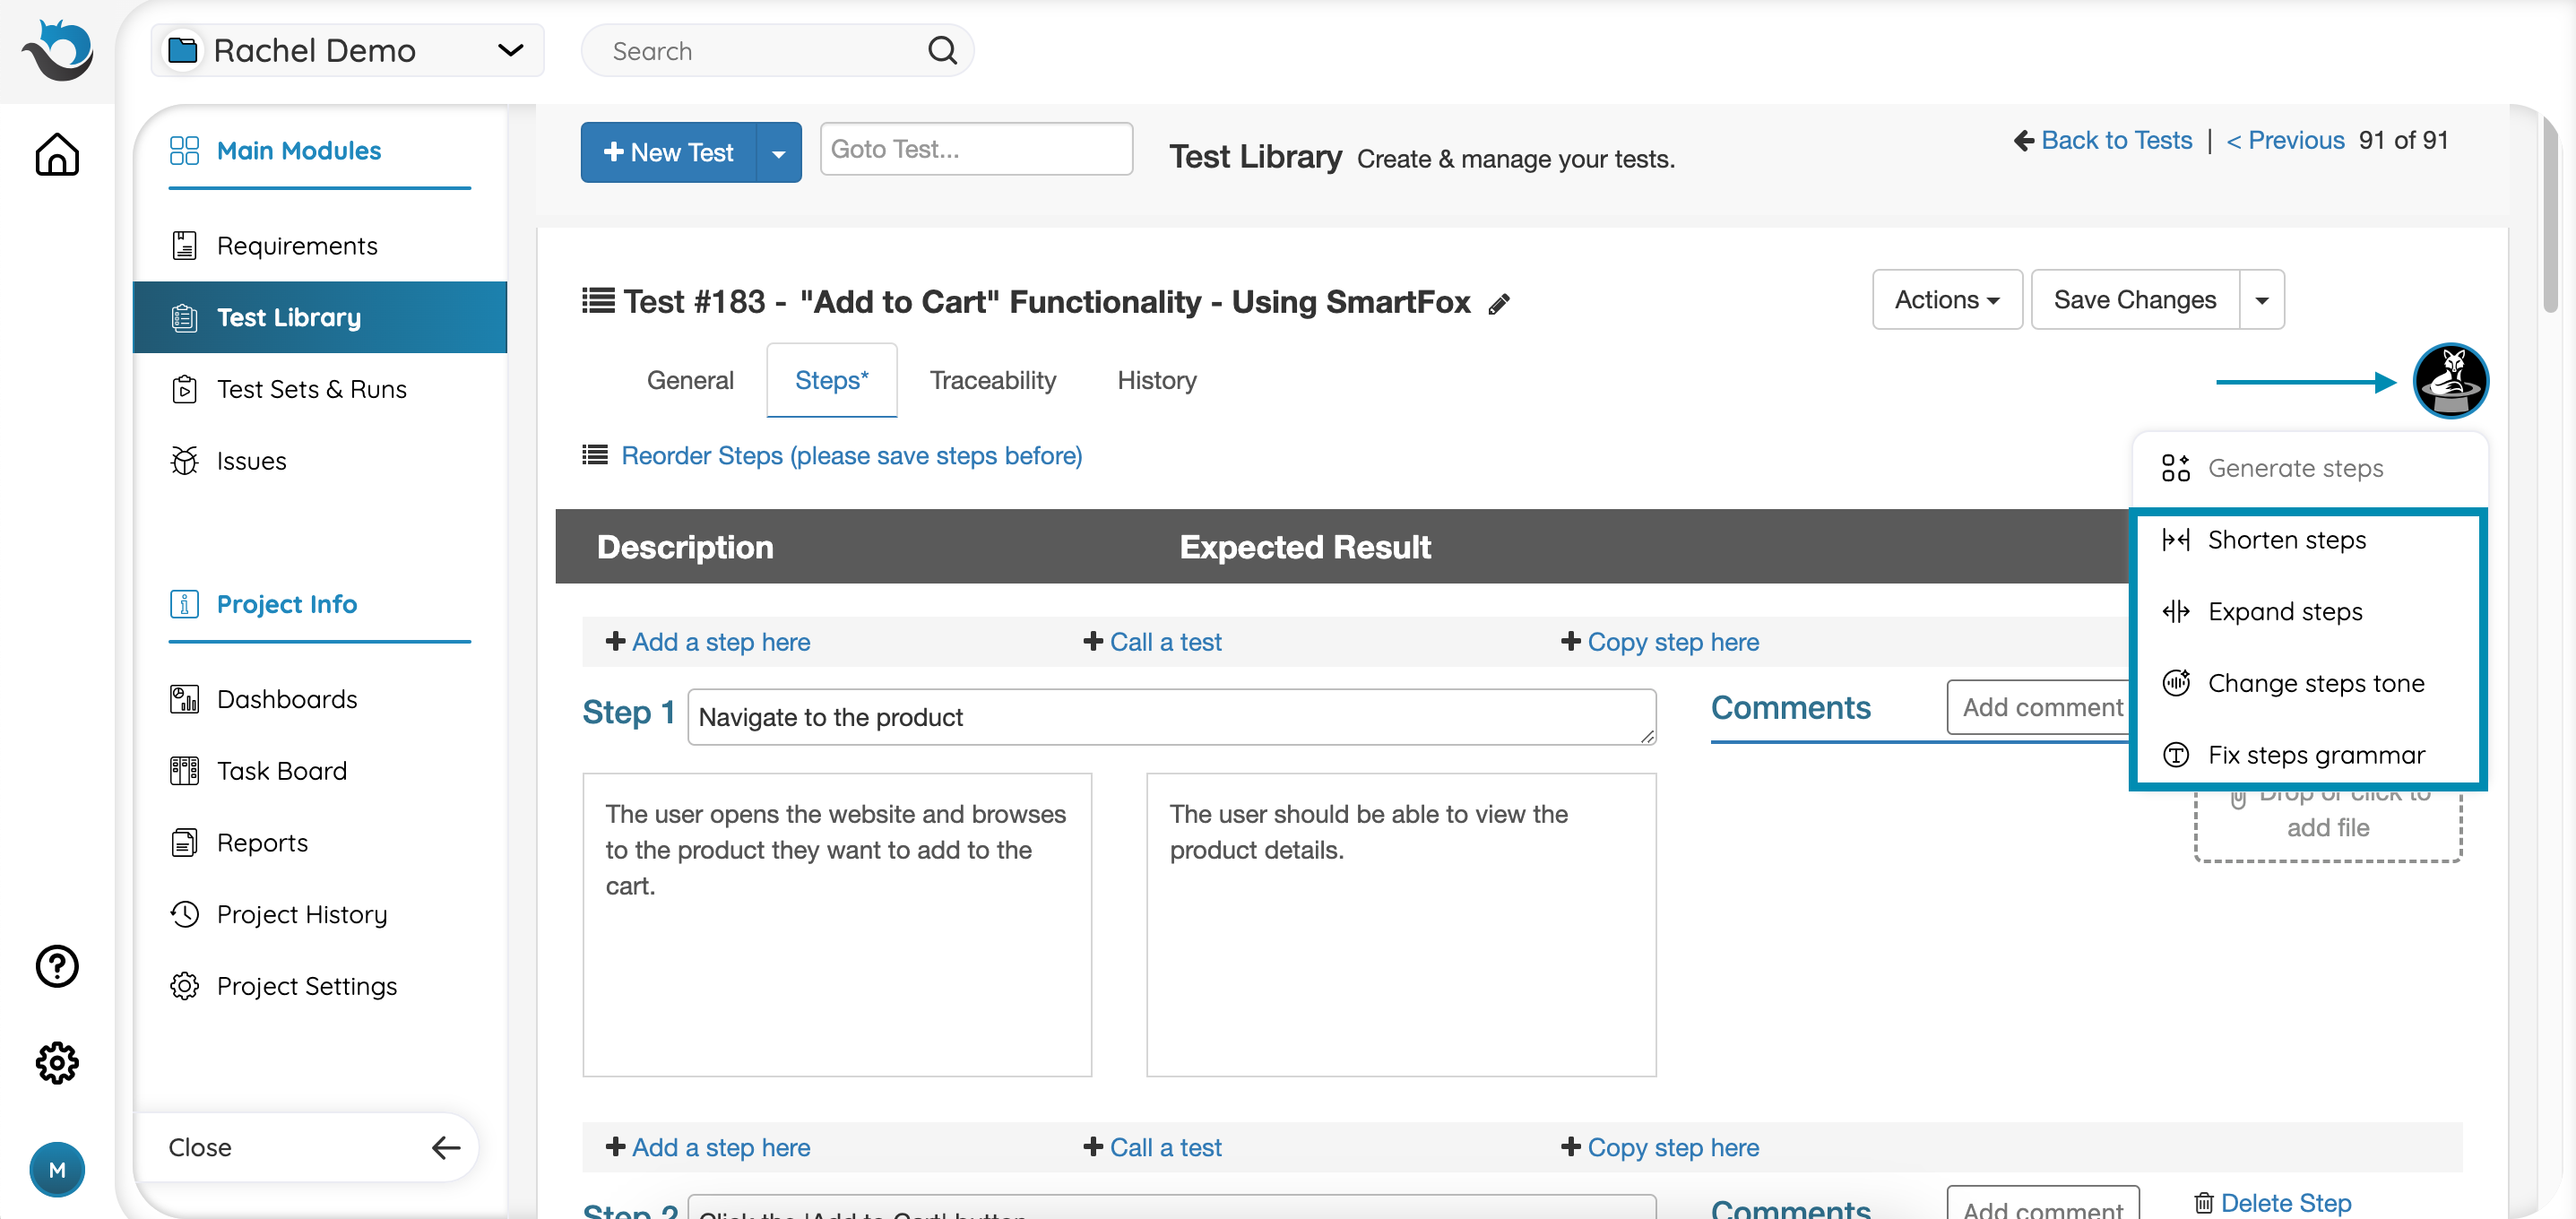
Editing Steps Using Smart Fox
After creating test steps for your scripted test, you can easily edit and improve them using the Smart Fox. It will allow you to expand, shorten, change tone, and fix grammatical errors.
To edit steps using the Smart Fox:
- Go to the desired test that you want to edit its steps.
- Click on the Smart Fox icon at the top right-hand corner.
- Choose from the pop-up window the action you want the smart fox to perform (shorten, expand, change tone, fix grammar).
Step Attachments, Test Attachments, and Step Run Attachments
In the test’s general attachment section, you can add attachments that are relevant to the entire test rather than a specific step (ie., system configuration document for the test).
Test step attachments are relevant to a specific step, such as a screenshot of how things should appear. While running, each step of a test run (ie. step-run) will show the test library’s step fields and attachments. During the run, you can add attachments to the step run; for example, to show a log of the run or a screenshot of how things look while running the test.
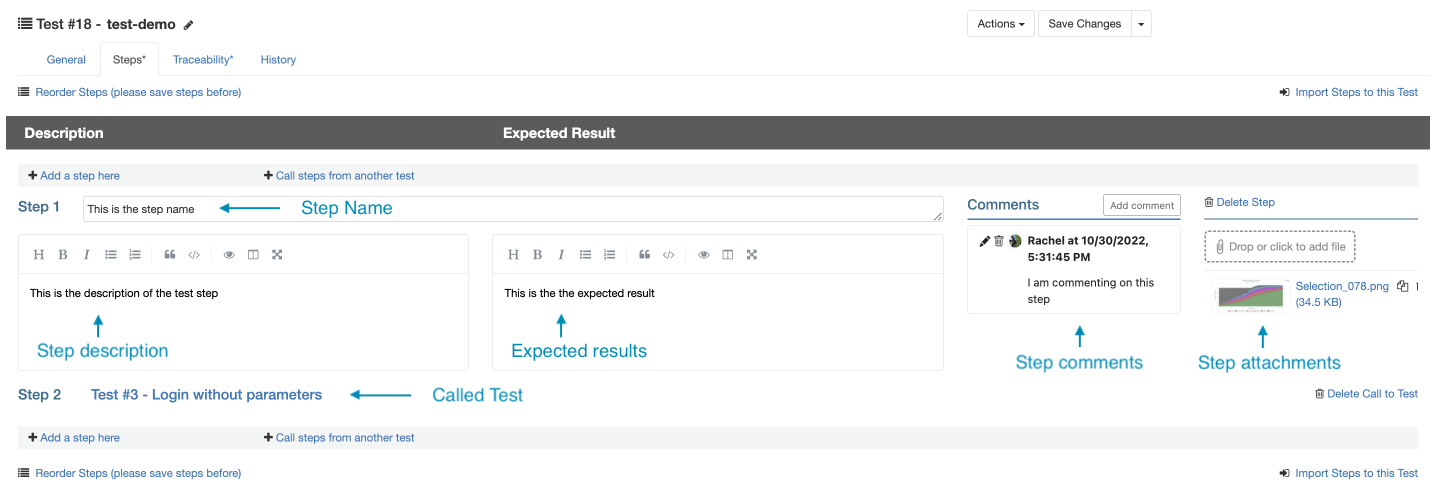
After saving a test, you can always go back and add, delete or reorder steps, or call steps from a different test. PractiTest even allows you to modify your steps as you run your tests.
Note: Each attachment has a maximum size limit of 50MB.
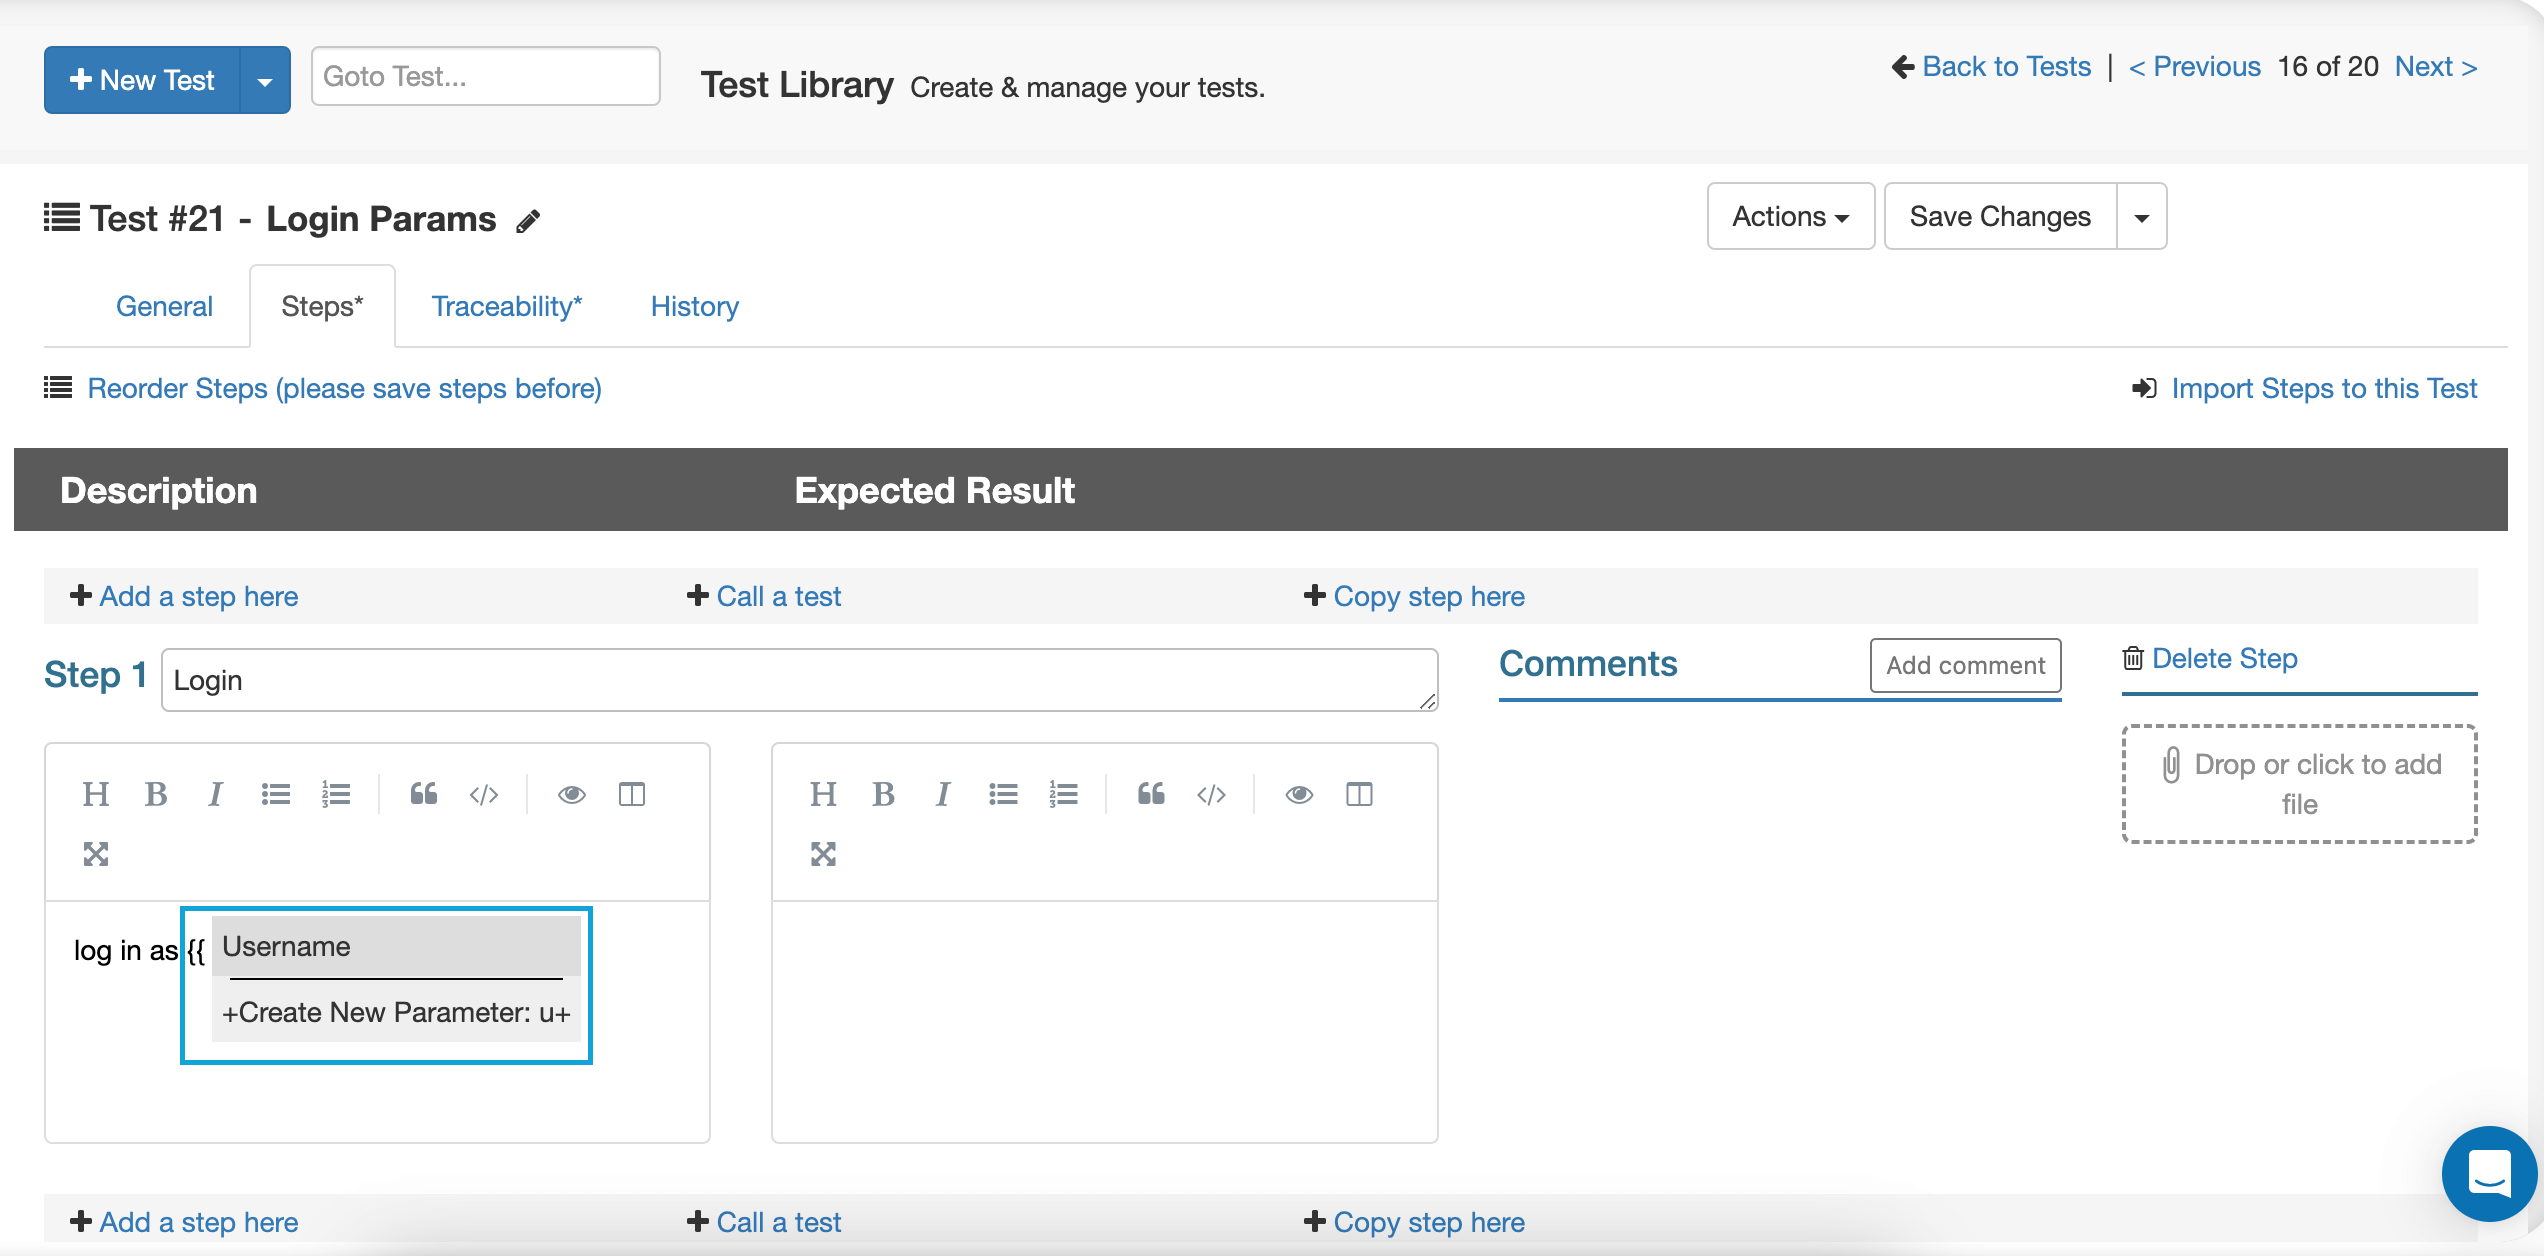
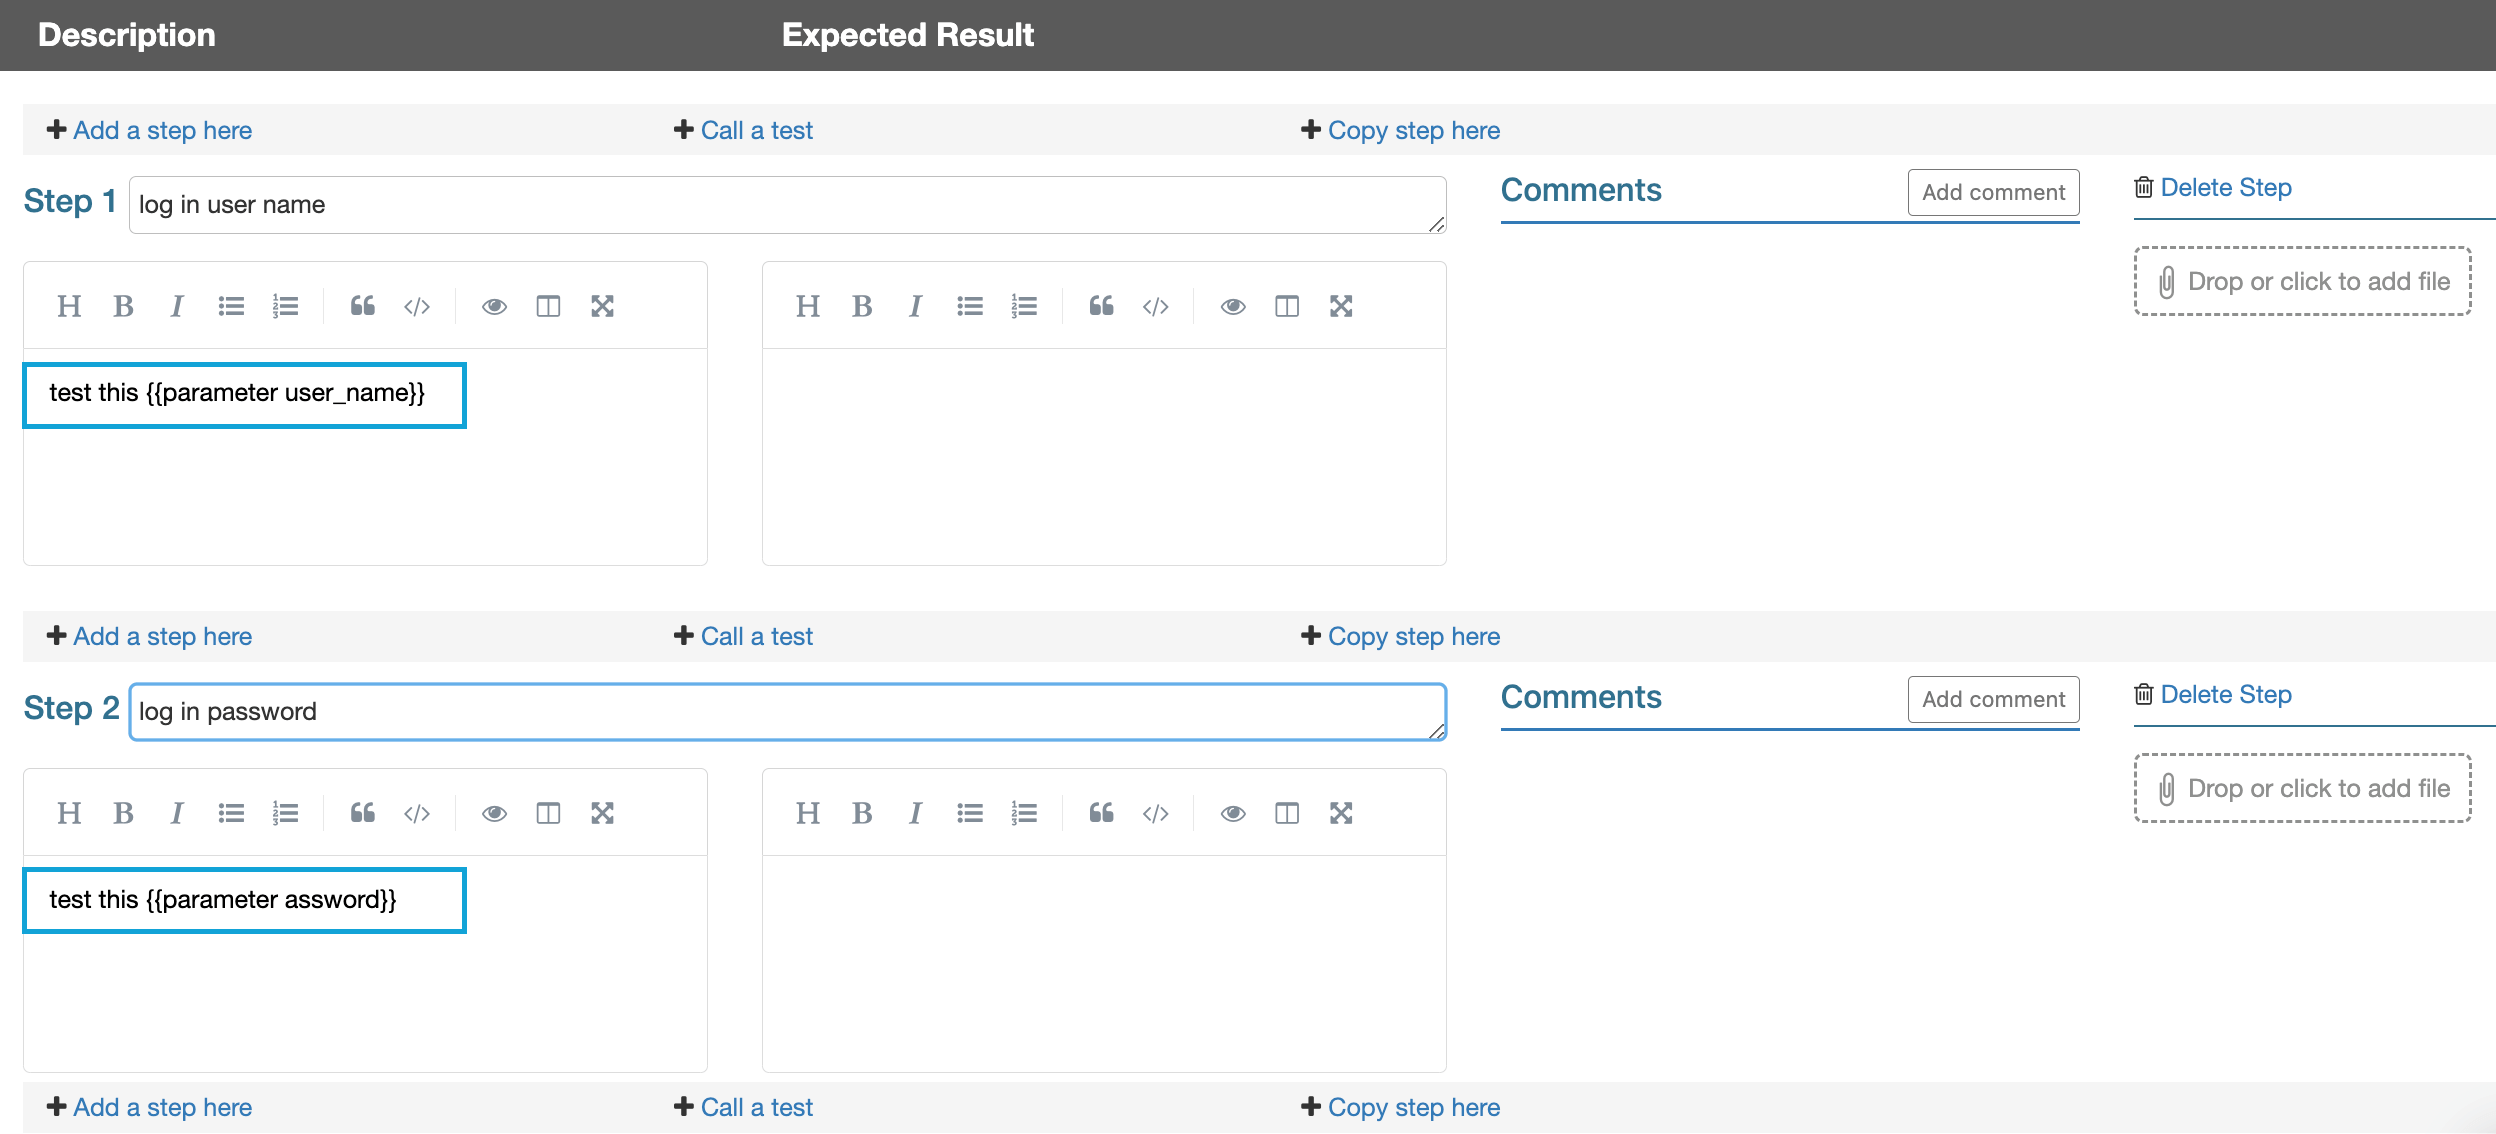
Step Parameters
Step parameters are a smart way to increase test reusability. Test step parameters allow you to reuse tests and run them in various test instances while changing the parameters/data being run. For example, when testing the same functionality but on different systems such as various OS’ or mobile devices, you can reuse a test rather than creating a new one.
When used in conjunction with the Call a Test feature, you can achieve even more flexibility and reusability. Calling tests with step parameters already defined in them increases QA coverage and enhances efficiency.
Adding Step Parameters to a Test
Go to any test in the Test Library. In the Steps tab, choose to add a new step or update an existing step.
-
Add step name.
-
In the Step Name/Description/Expected results field, add the parameter placeholder using double curly brackets.
-
When beginning to add a parameter and type opening double curly brackets, a parameters dropdown list will appear. Select an existing parameter from the list or type a new parameter inside the curly brackets to create a new parameter.
-
Add as many steps with parameters as needed, by repeating the steps above.
-
Save and close.
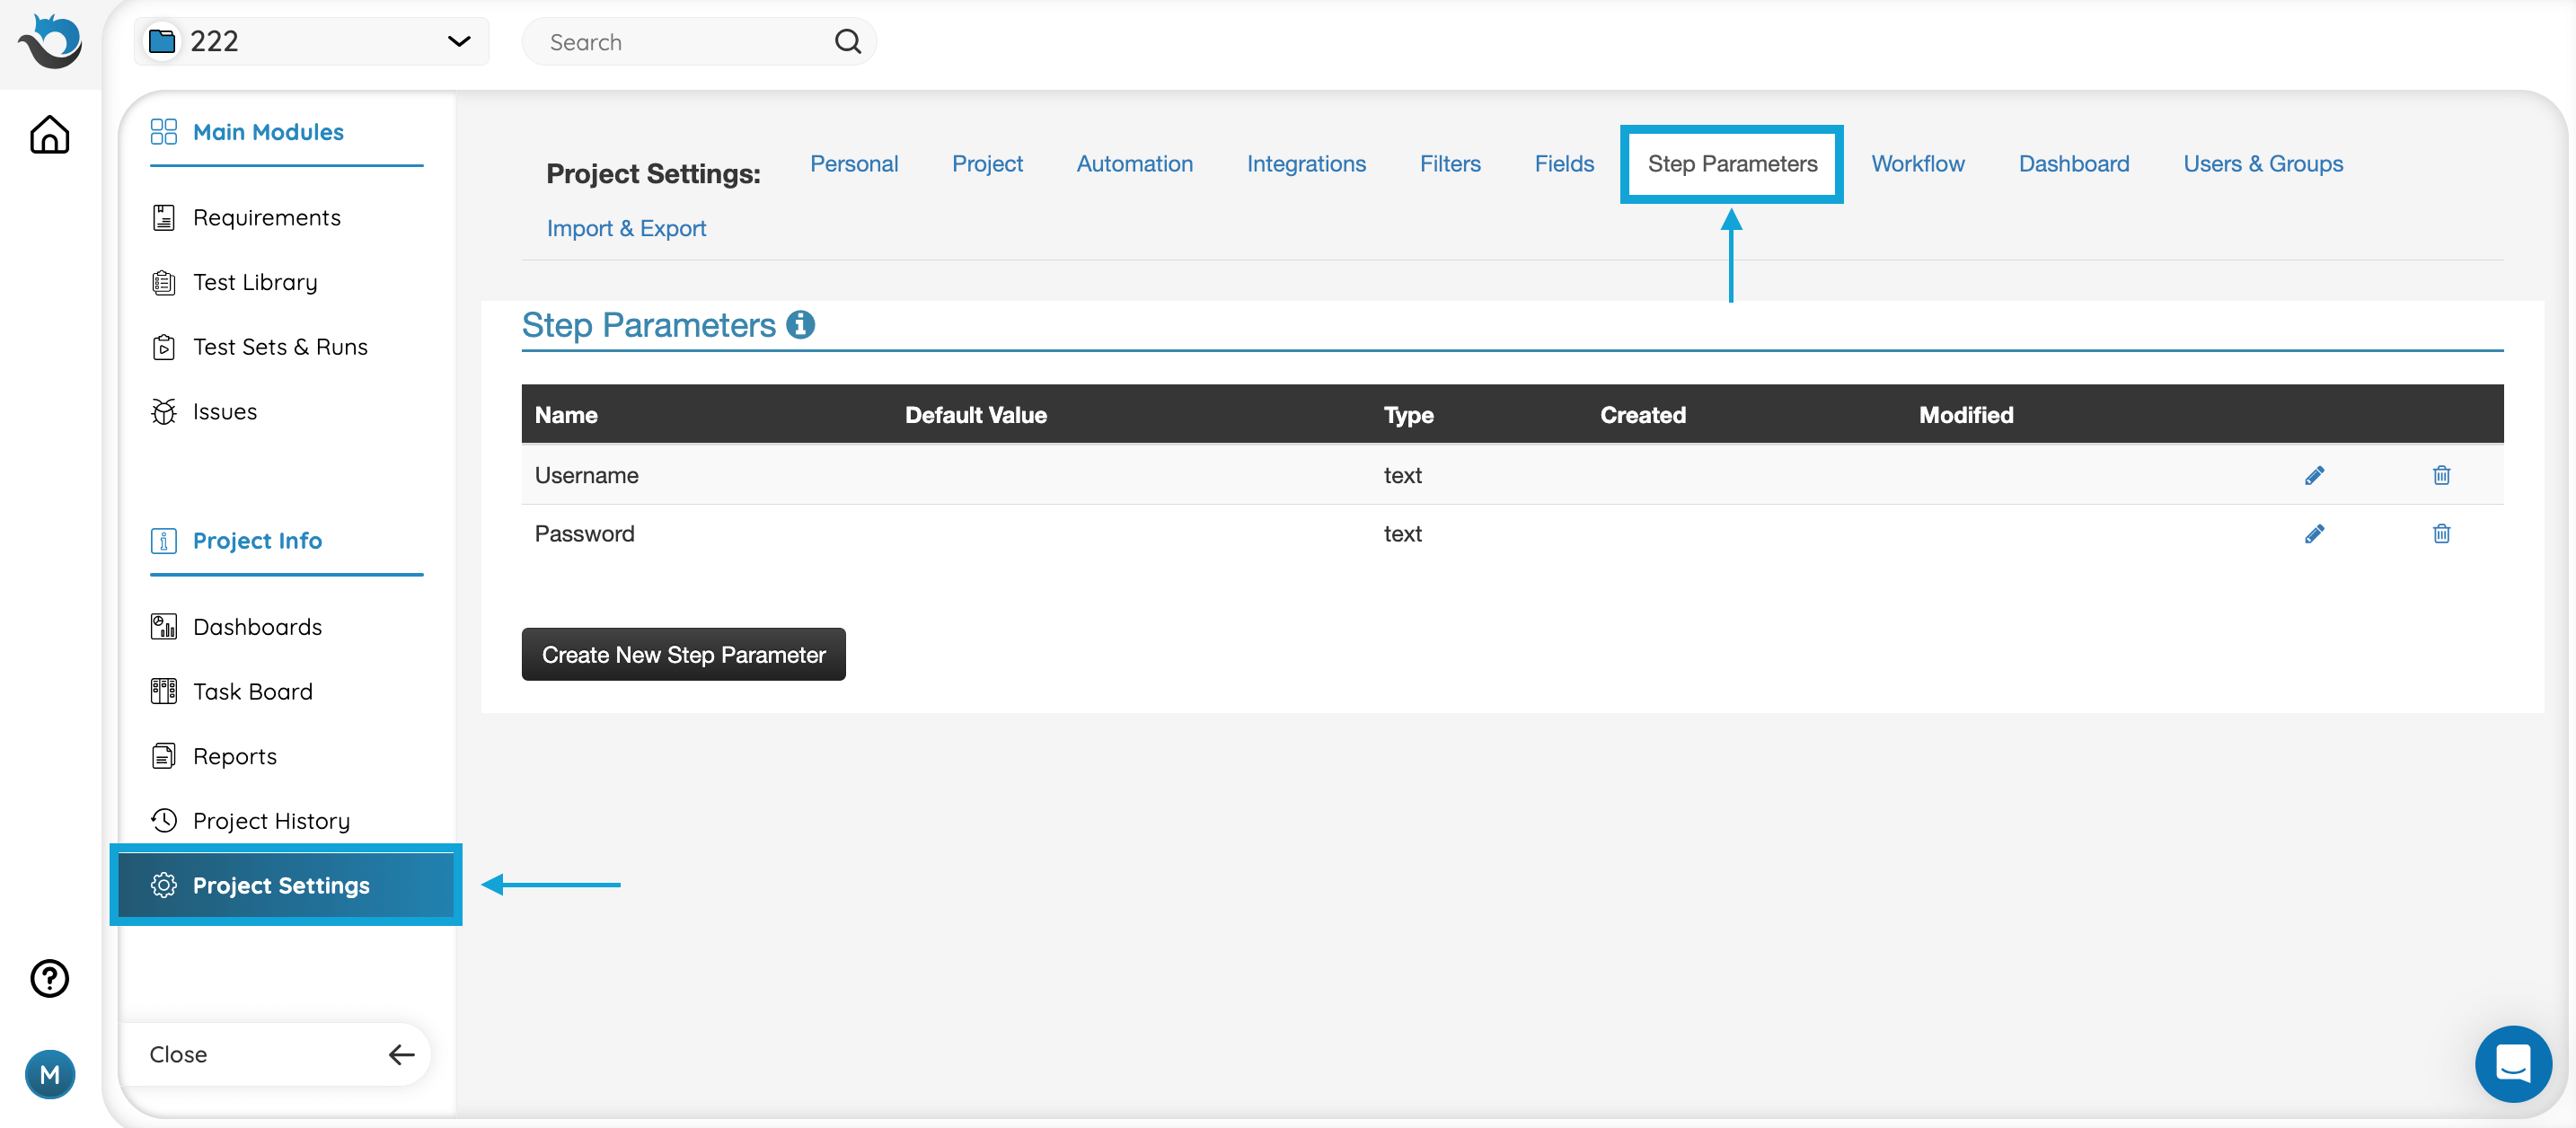
Step Parameter Settings
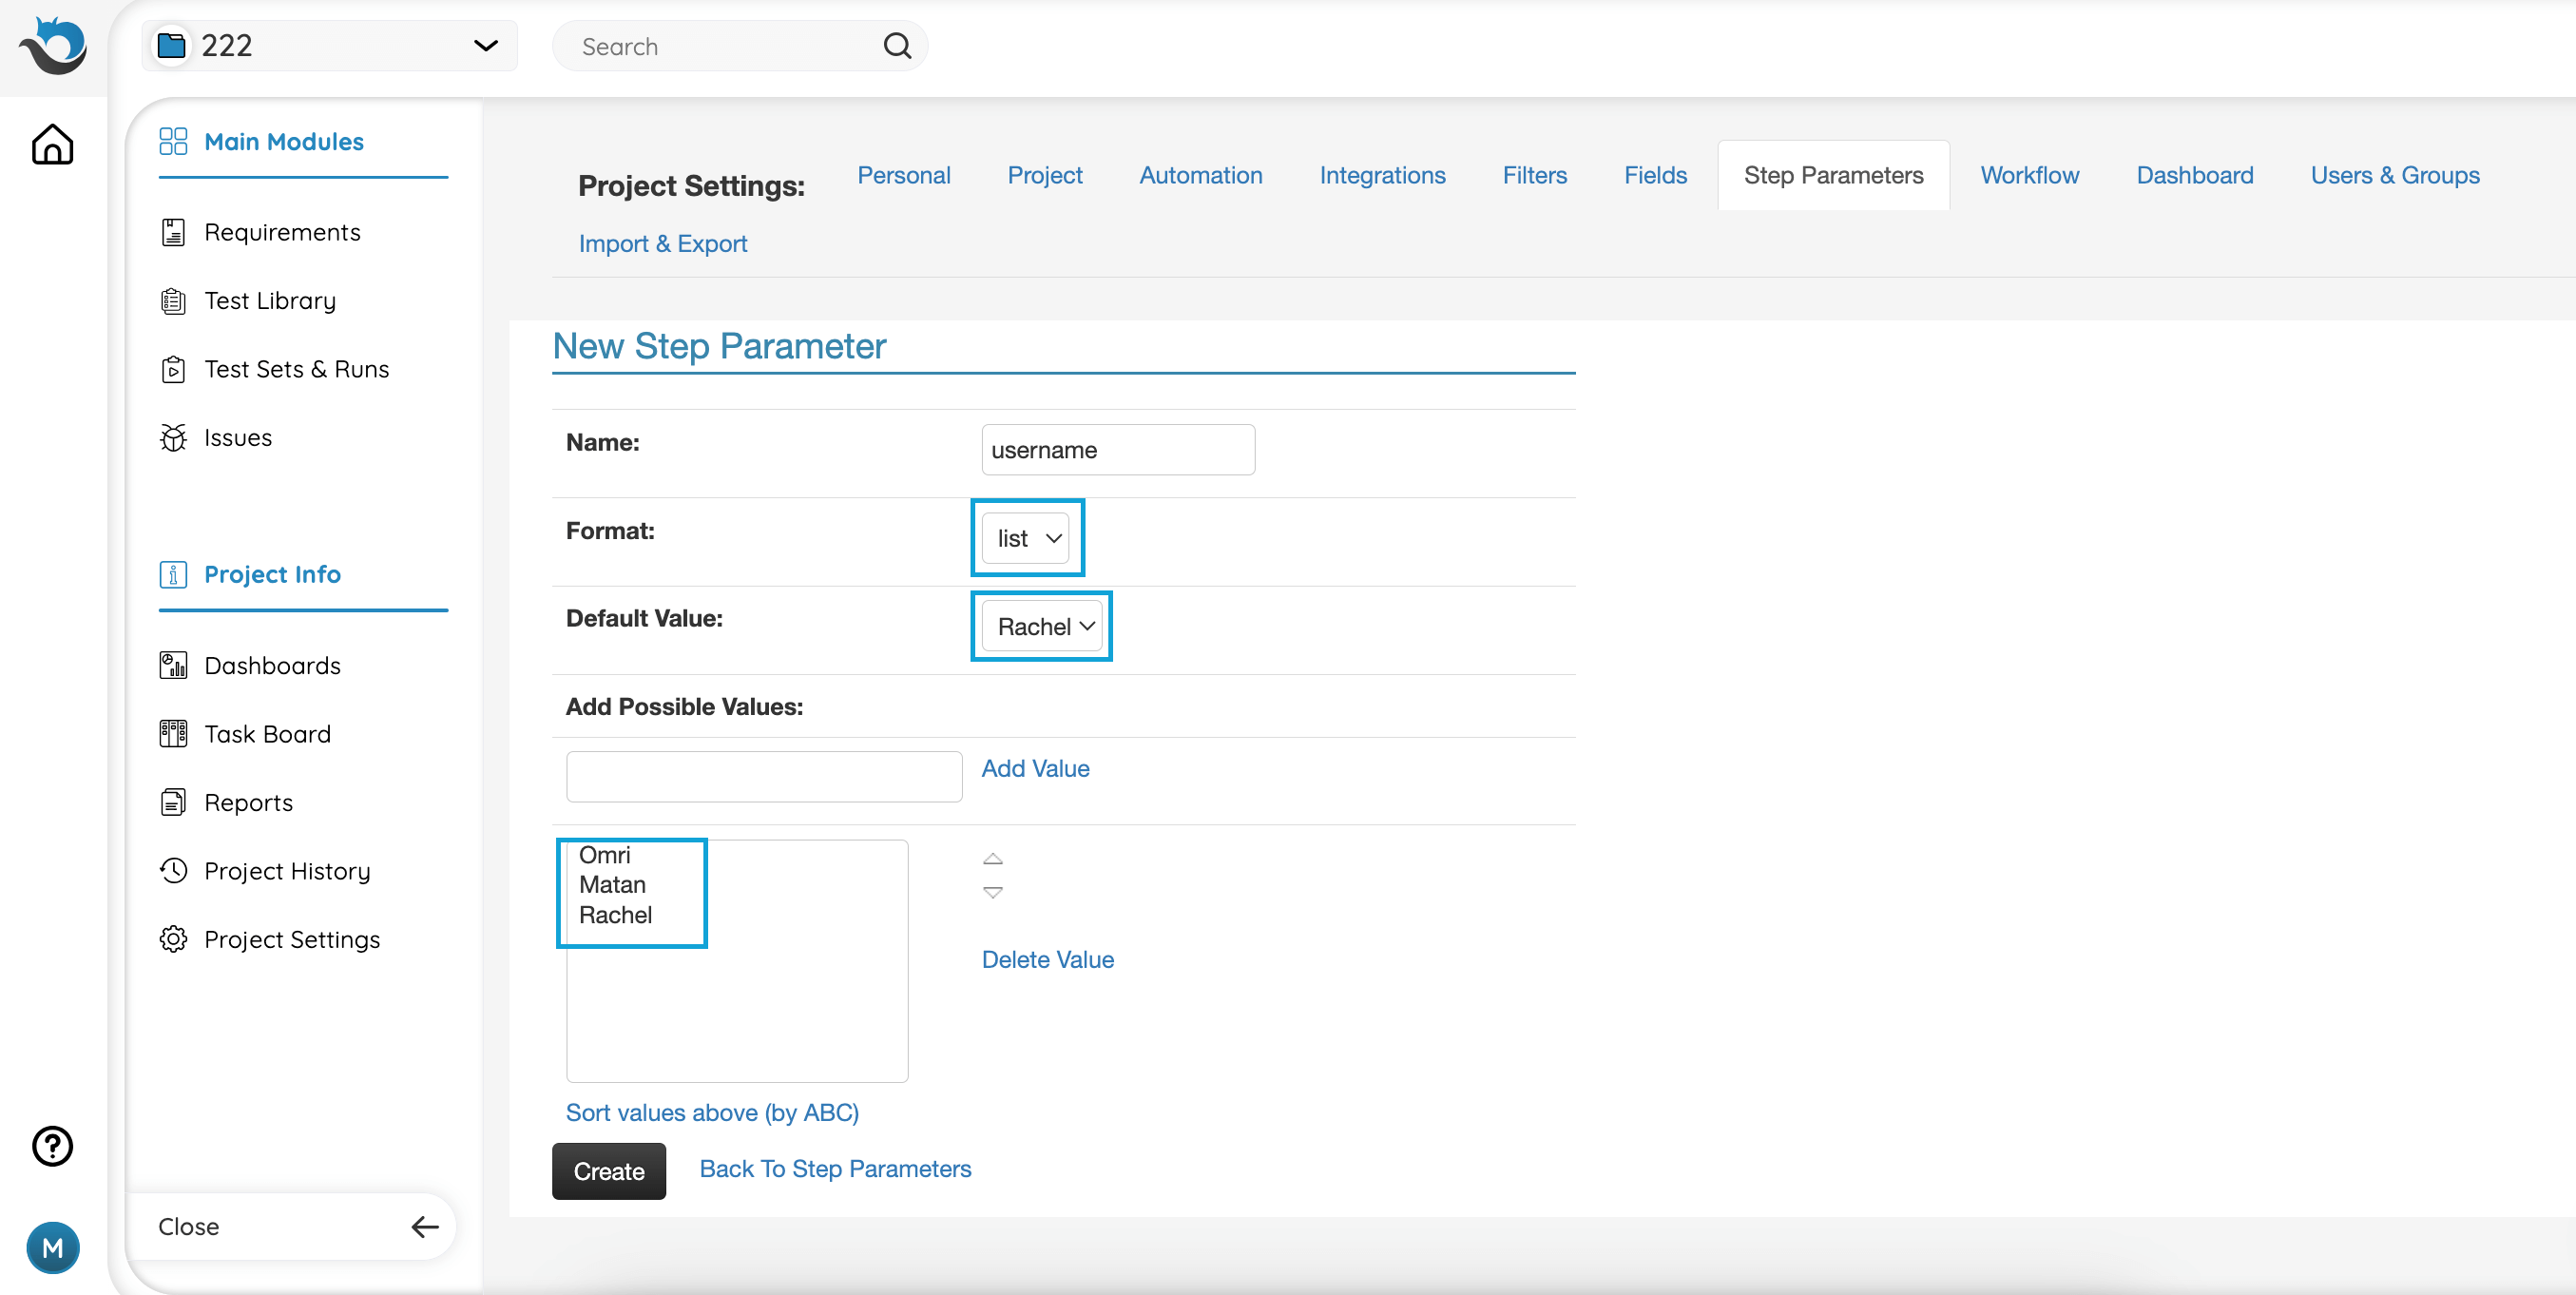
After adding parameters to the tests in the test library, you can edit the parameters and add predefined values for each one.
To do so, click on ‘Settings’ -> ‘Step Parameters’. Then click on the small pencil icon in the parameters line to edit an individual parameter.
To define values for the parameter, change the parameter’s format from ‘text’ to ‘list’ and add the values from the ‘Add possible values’ field.
Note: you can define a default value for the parameter and rename it.
Once you have finished editing the parameter, click ‘Save’.
Run a Test With Step Parameters
Please see the instructions here.
Call a Test
When creating new tests or editing existing tests, it is possible to call test steps from other existing tests in the test library. This feature can save time by reusing already well-defined test steps.
Calling Test Steps Into a Test
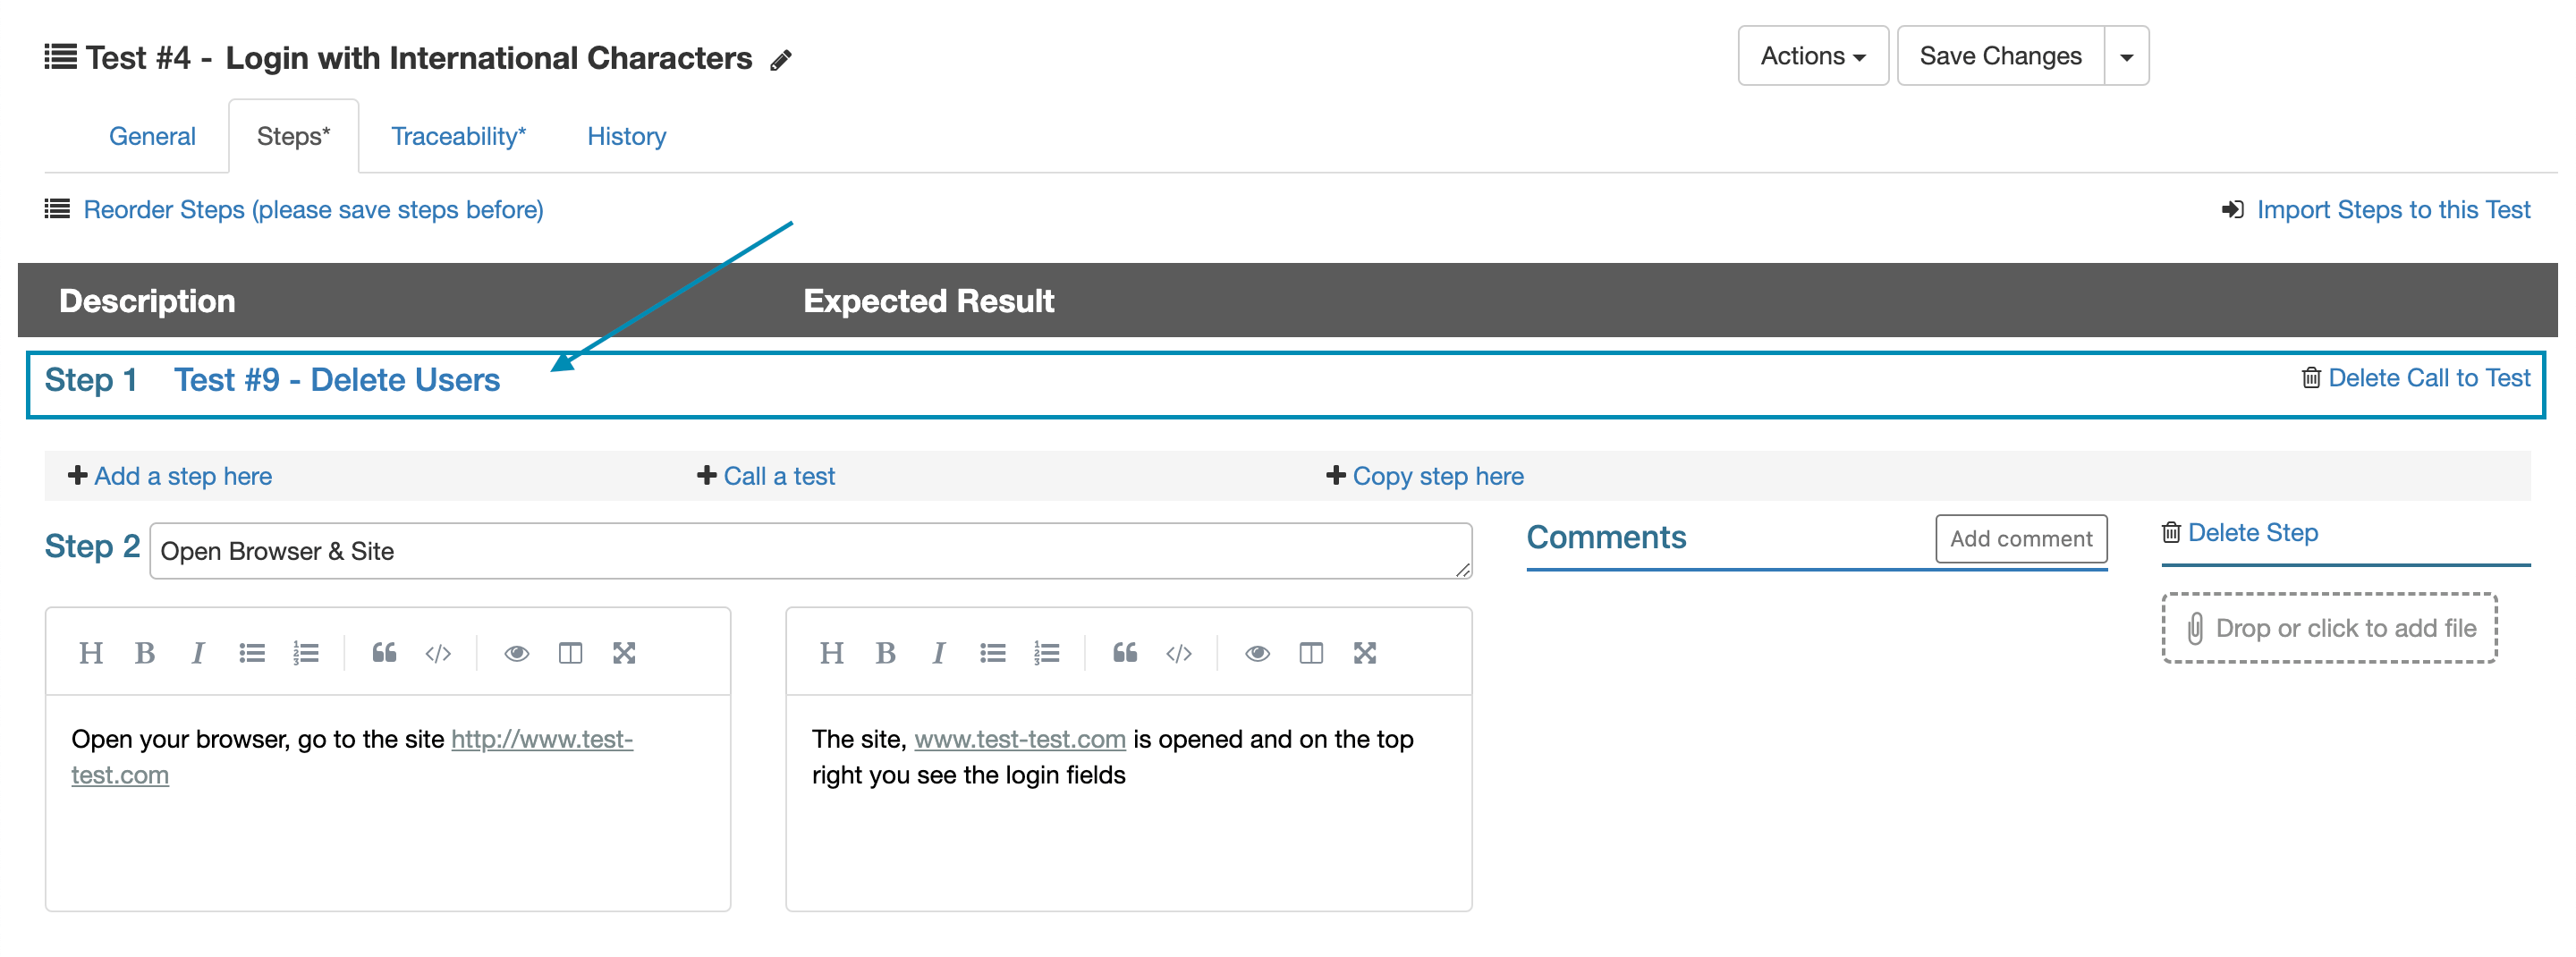
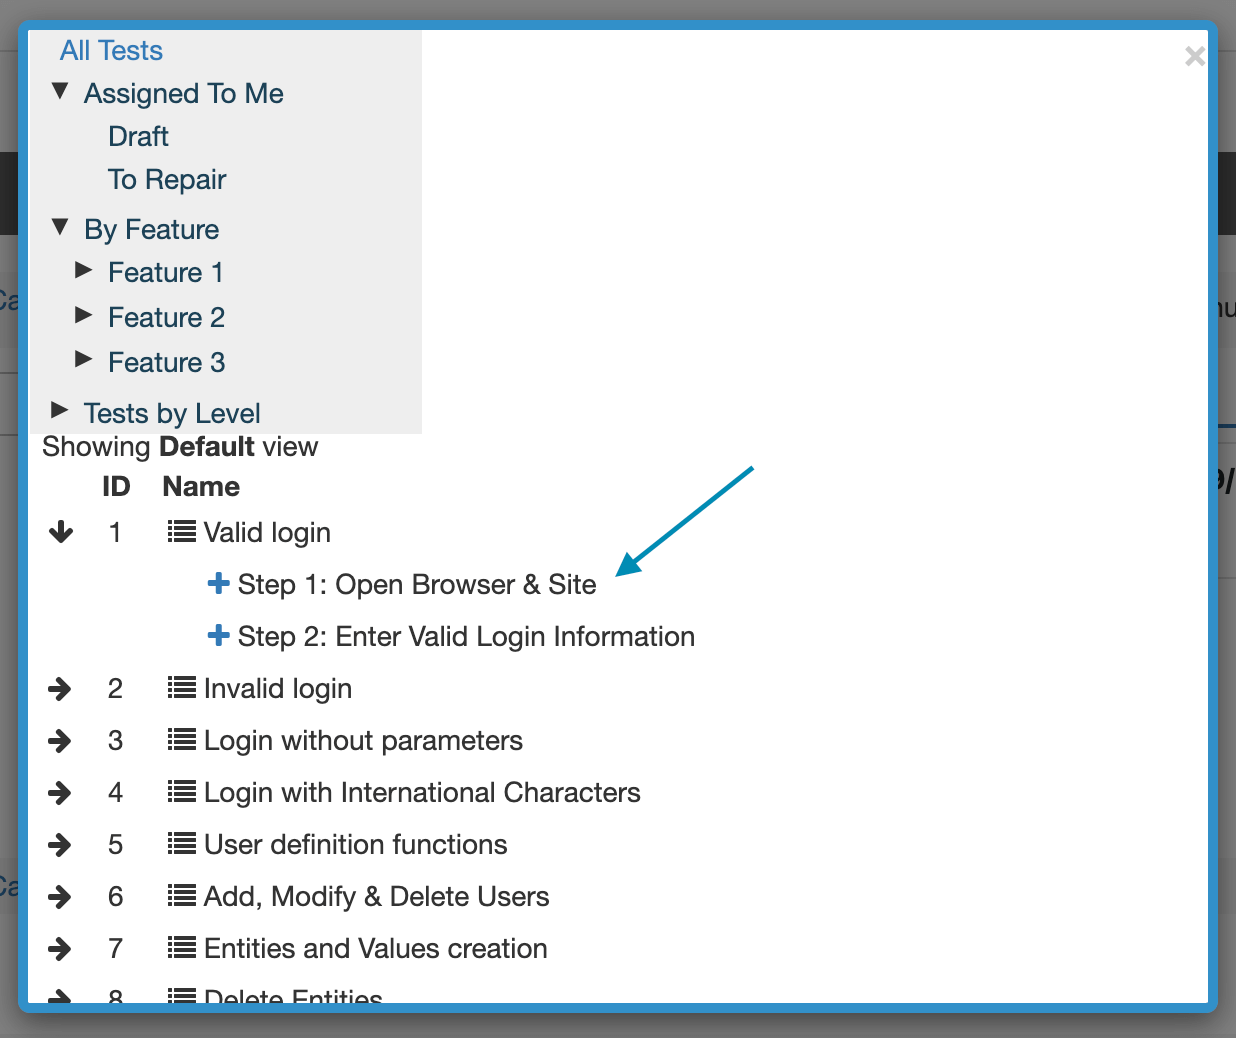
Go to the Steps tab and click on ‘call a test’.
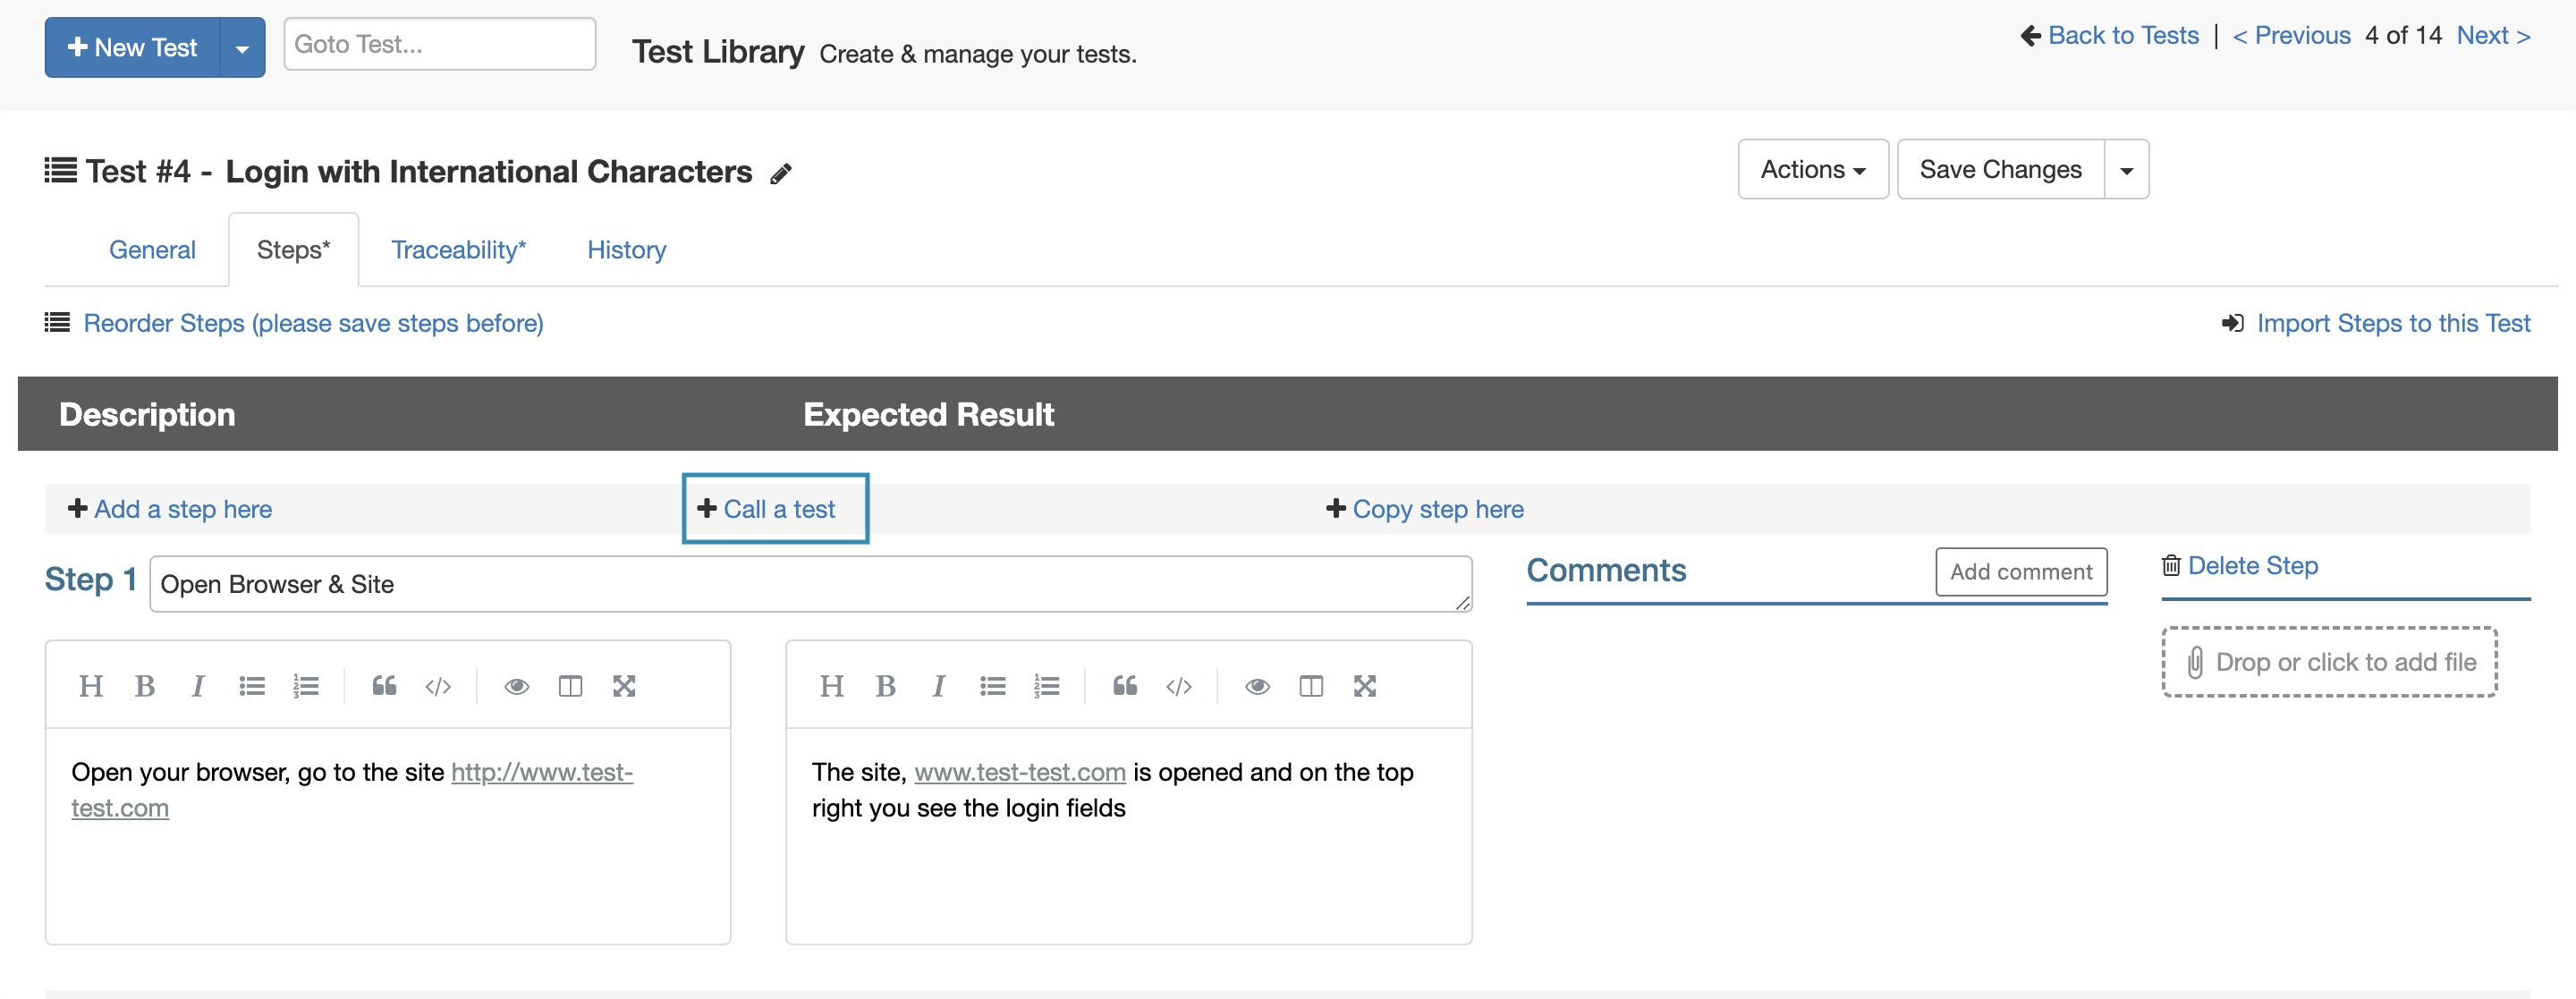
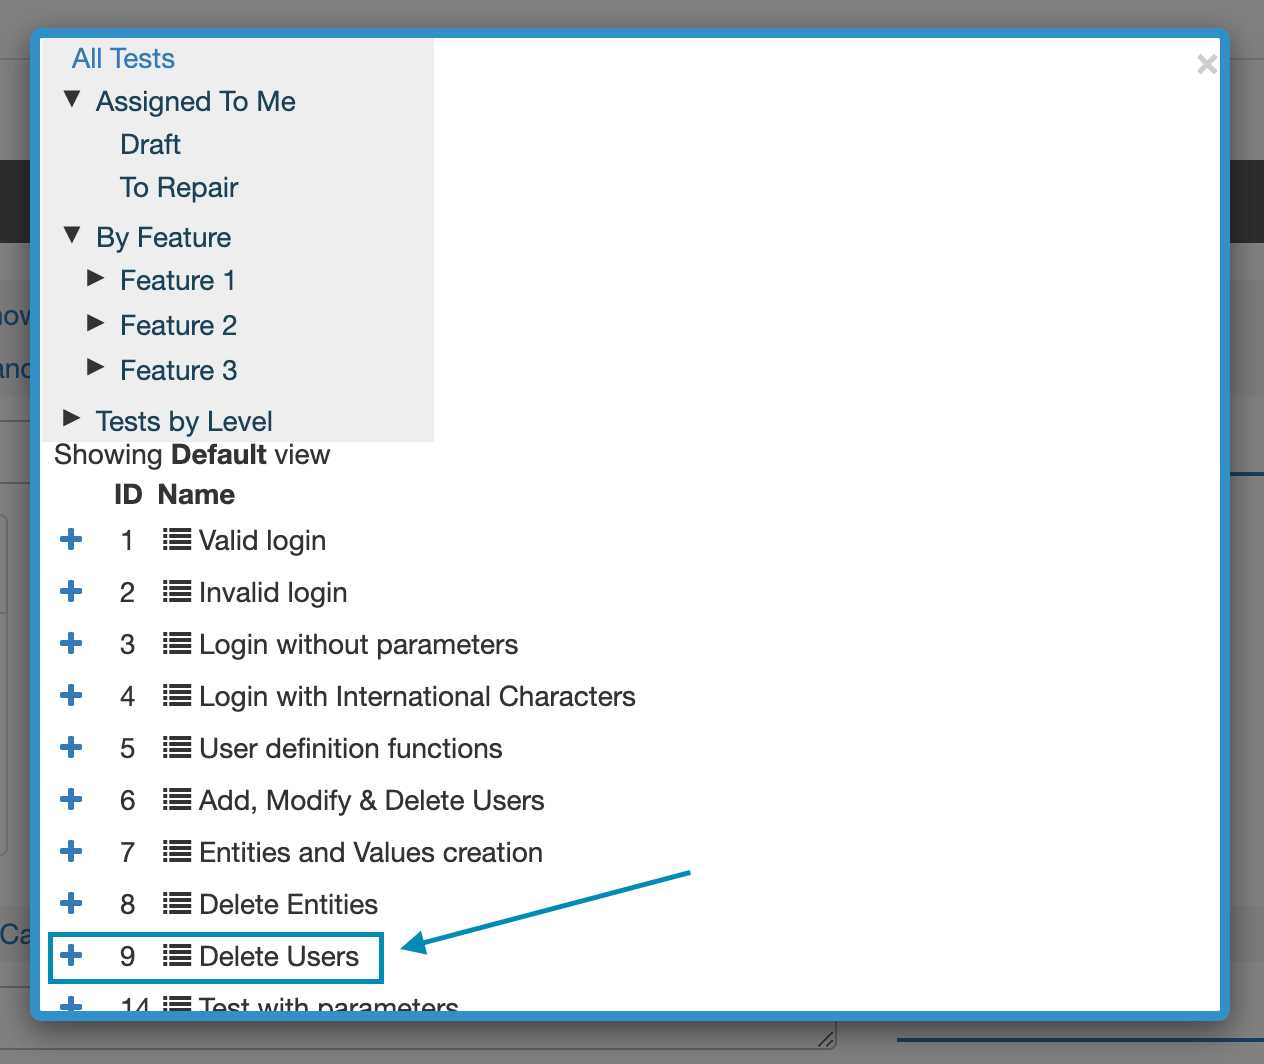
Call test steps by entering an existing test ID from the test library and clicking “submit”. You can also select “Show tests” and choose test(s) from the pop-up window.

The called test will appear as a link to the original test within your steps tab display.
Save the new test.
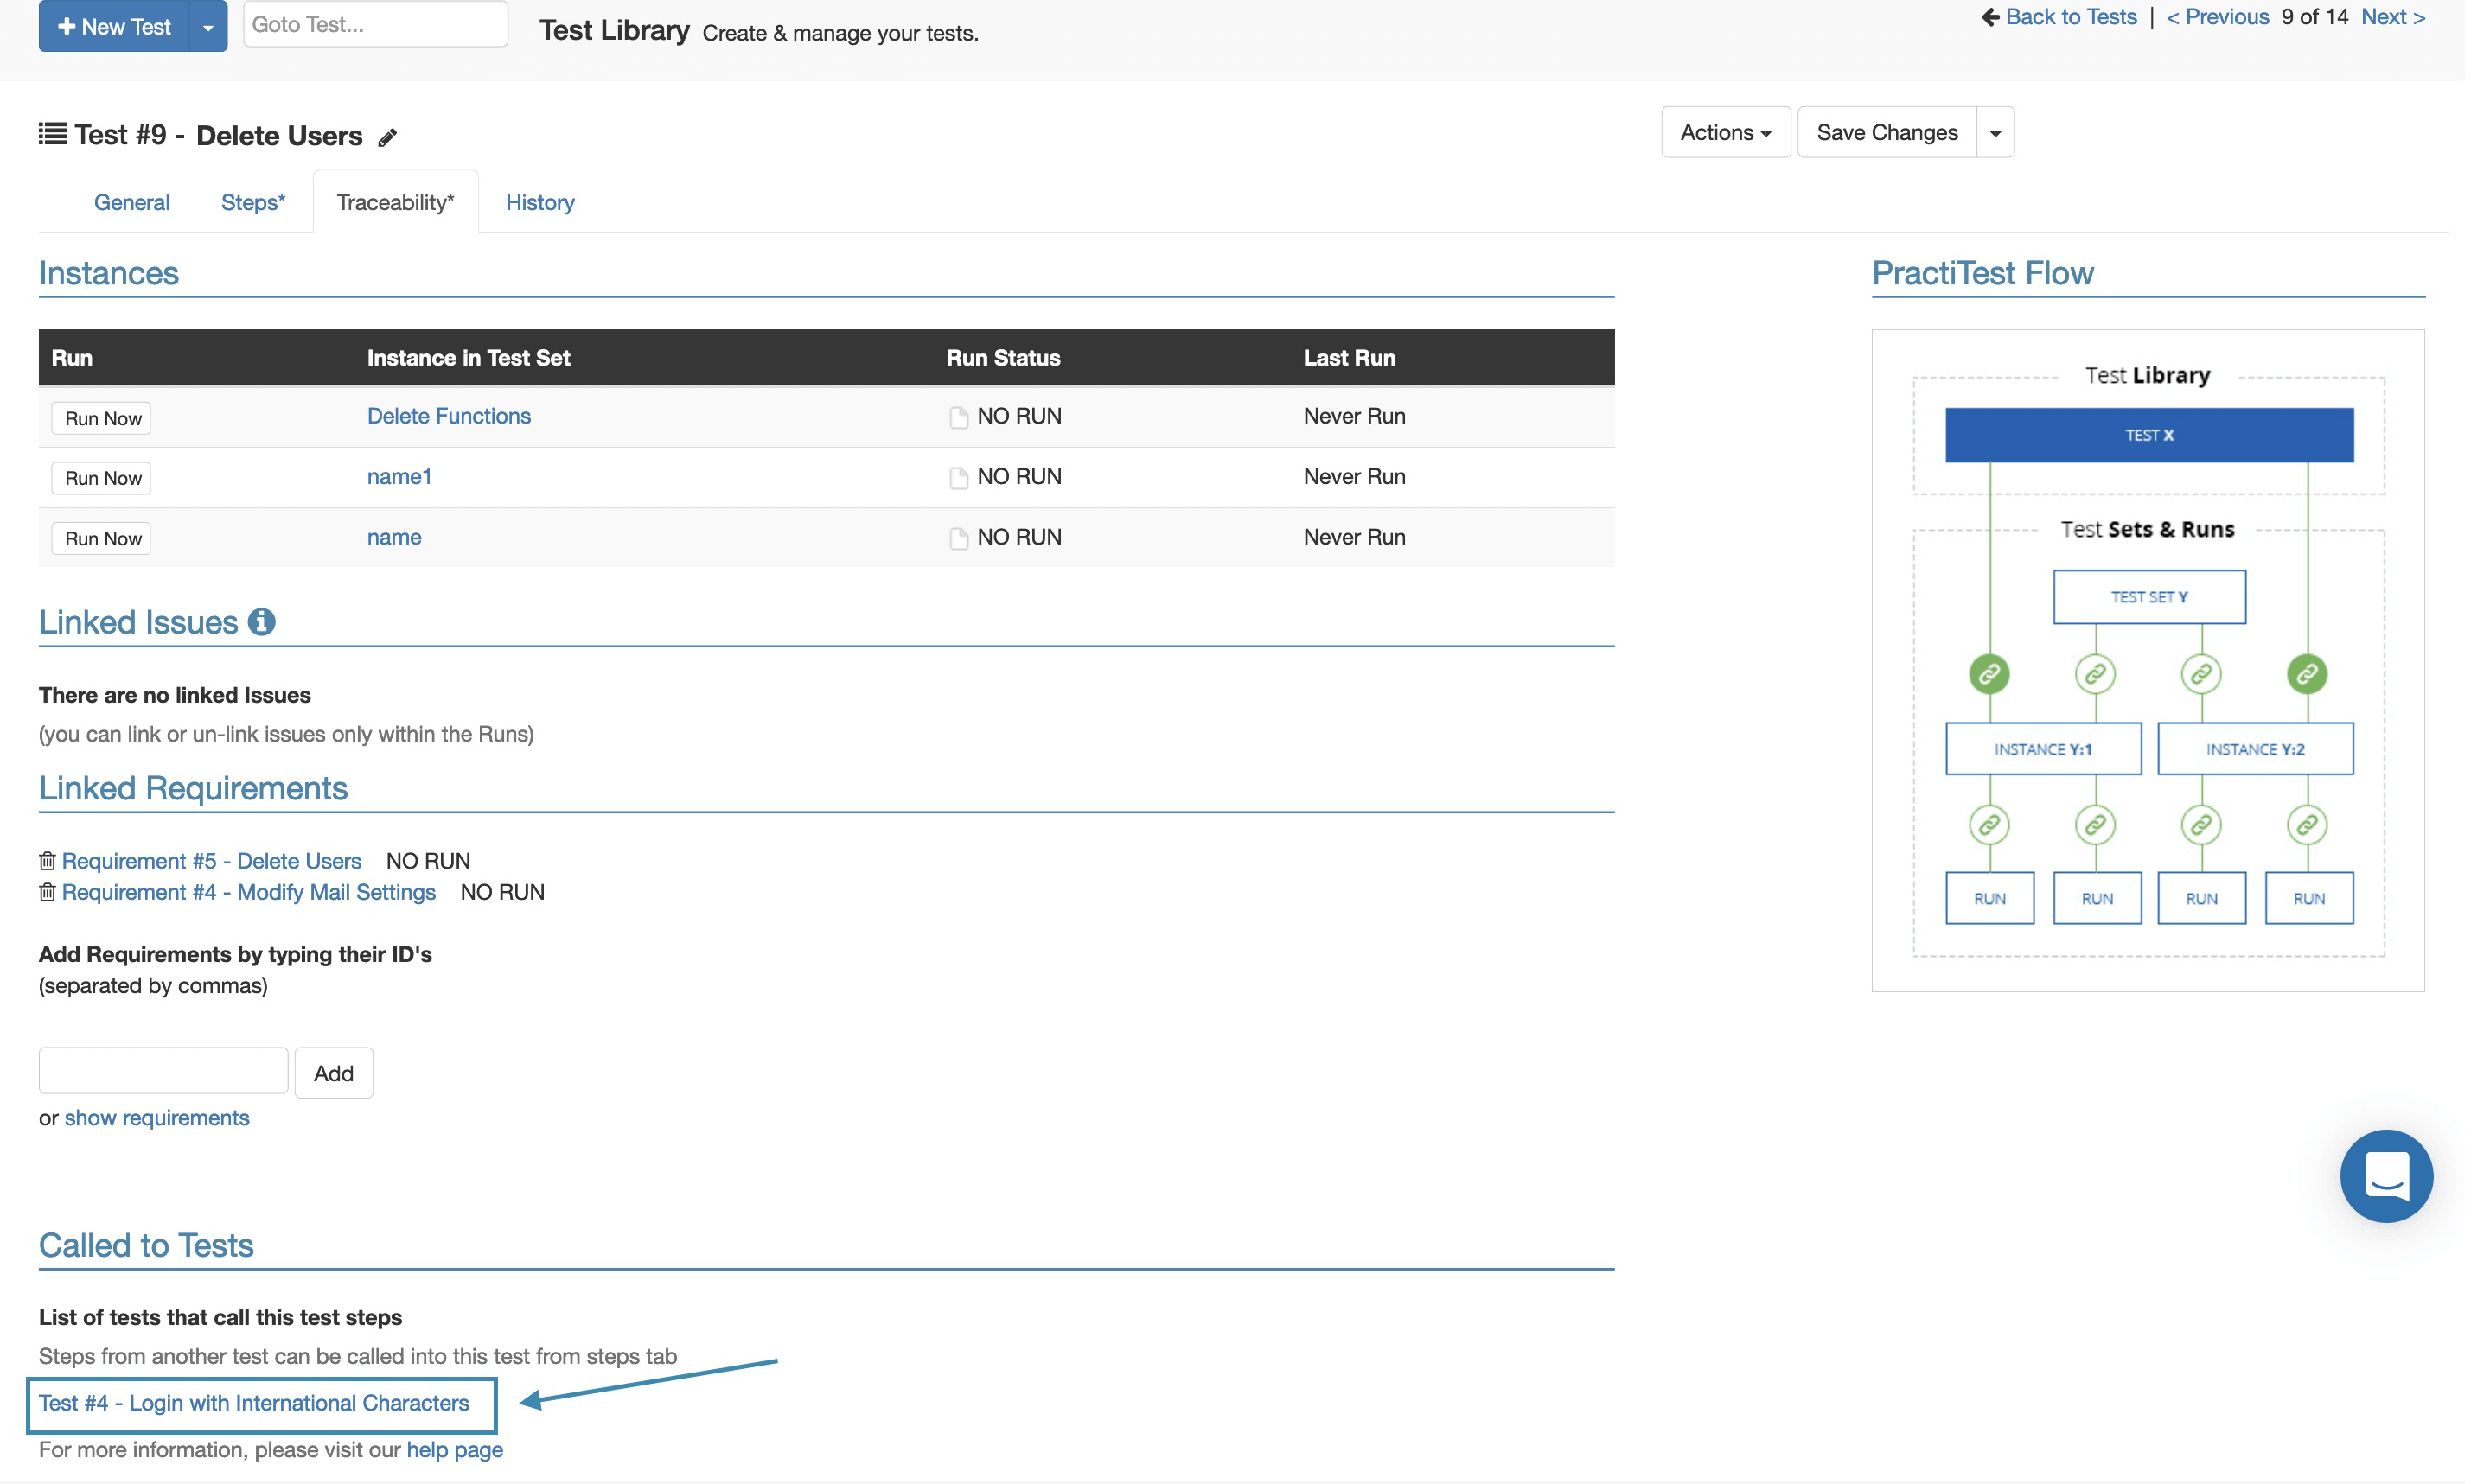
A link to this called test will be added to the traceability tab.
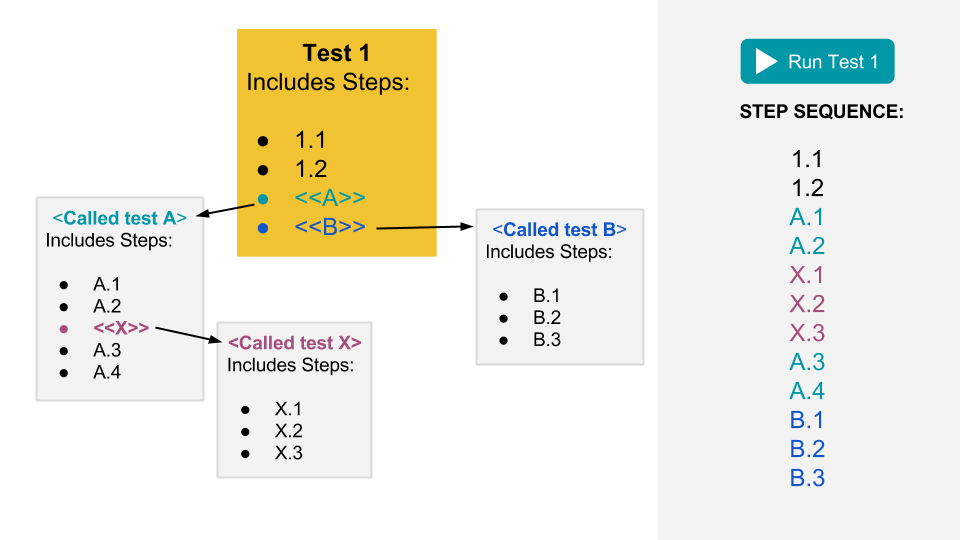
Nested Tests
You can nest as many called “child” tests under any “parent” test with multiple levels, as seen in the diagram below:
Running Called Tests
Please see the instructions here.
Copy Step
When creating new tests or editing existing tests, it is possible to copy test steps from the same test or other existing tests in the test library. This feature can save time by reusing already well-defined test steps.
Copying Steps From One Test to Another
In the test library, select ‘Create a new test/Edit an existing test’.
If you have added a new test, name it and add relevant information in the custom fields, then go to the Steps tab. Instead of manually adding a new step, select “Copy step here“.
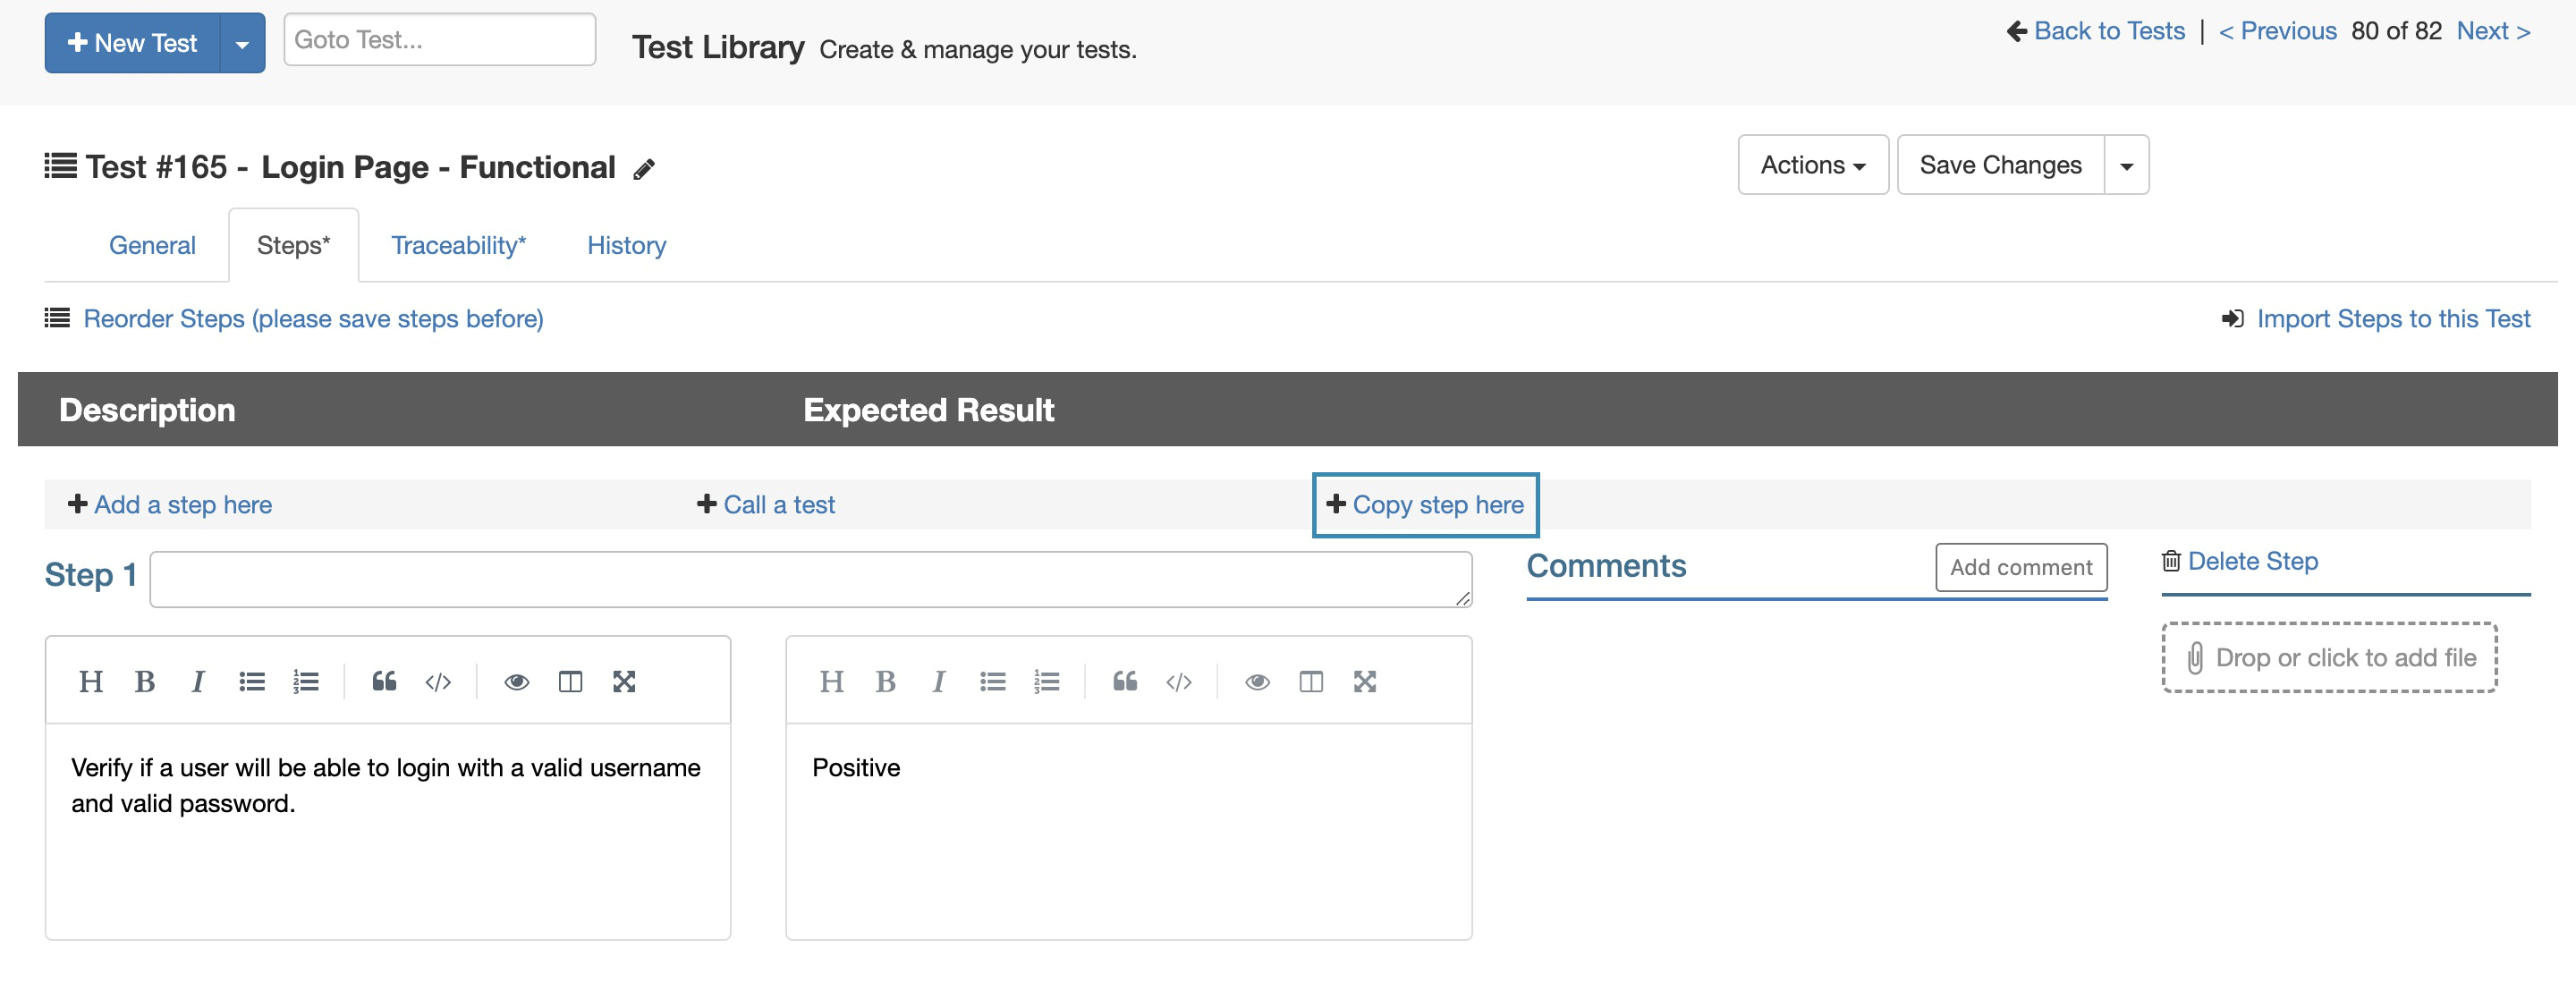
Copy test steps from a test by entering its test ID and Step number and clicking “Submit”. You can also select “Show Tests”, which will open a pop-up window with all tests (including the existing test, if you saved it). Here you can expand each test to choose the test step to copy to your test.

The copied step will appear within your steps tab with all information including attachments.
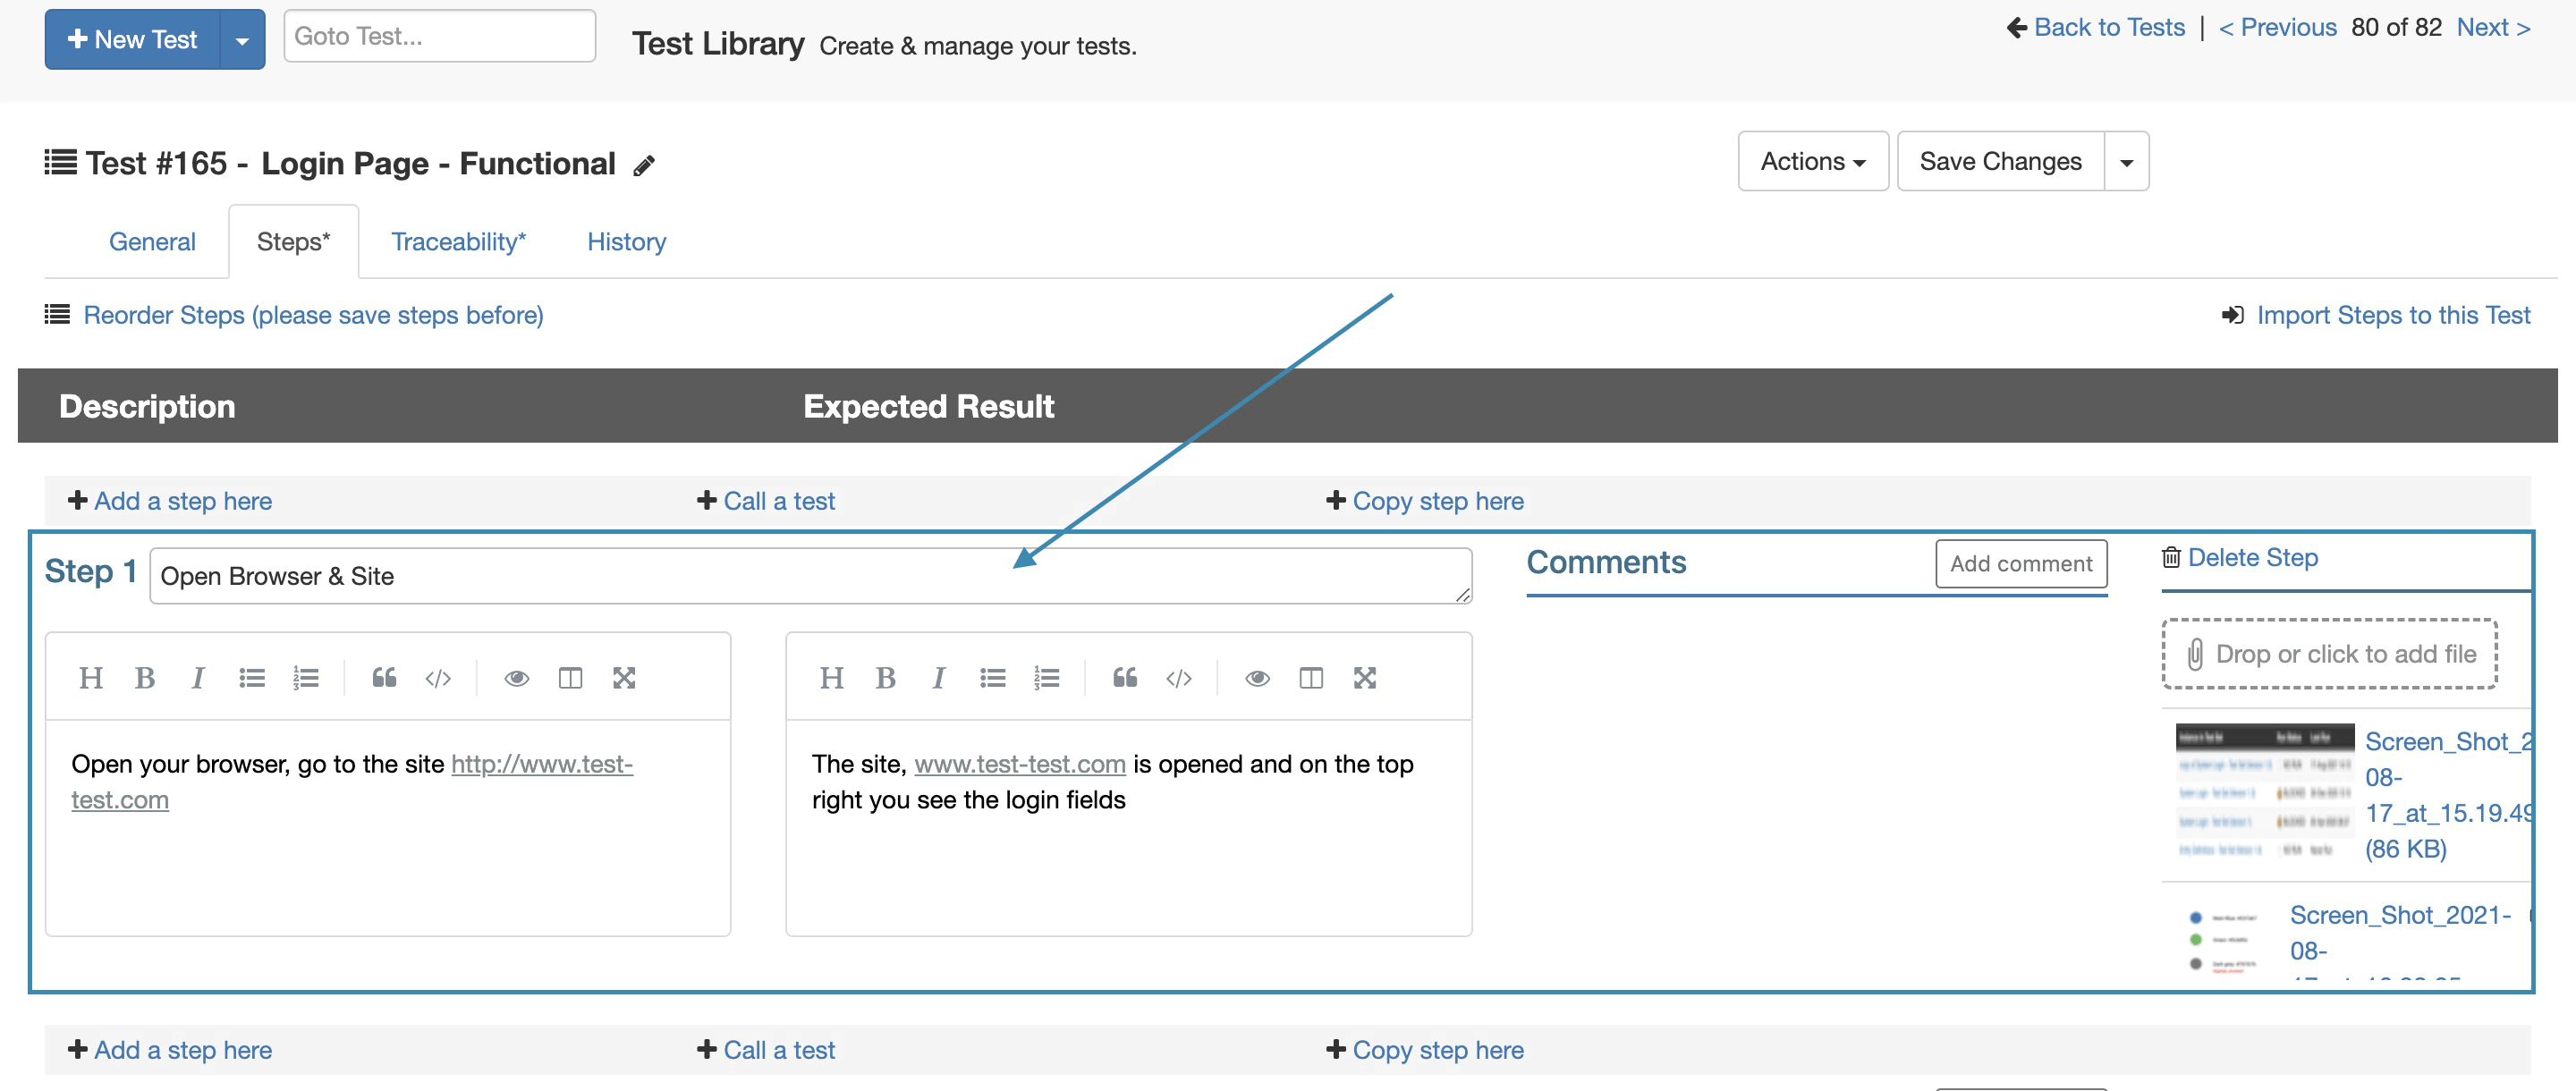
When running your test, the step will appear as usual.
