- Adding Filters
- Sub Filters
- Filters with Multiple Criteria
- Cross Filters
- Auto Filters
- Multilevel Auto Filters
- Changing or Deleting a Filter
- Additional Resources
Viewing your information using hierarchical filters can be very useful. With filters, you can view your entities (requirements, tests, test sets, issues) based on field criteria.
For example, you may want to organize your tests according to different components of your application, or according to the person that will run them; or you might want to sort your issues by status, priority or version. It can be used, for example, to represent complex products with features and sub-features (sub-components) or releases with sub-versions/builds/sprints, etc.
You can also create cross-filters based on filters from a different module and automatic filters that are automatically updated based on changes to the field they are based on.
Using filters, you can display the information in each module under multiple “trees”. For example, you can organize all the tests in your project under two different trees: one based on the testing level (regression vs. sanity) and the other based on the application and the module they cover. The same test can appear under multiple trees, since each test may belong to several categories (i.e., a sanity test for the application server).
Adding Filters
You can add and customize filters from the Filter tab in the Project Settings, or from the tree of each module.
In the example below, we will create a filter for the Issues module, displaying only open issues, and a sub-filter displaying open issues that belong to a specific product component (database).
-
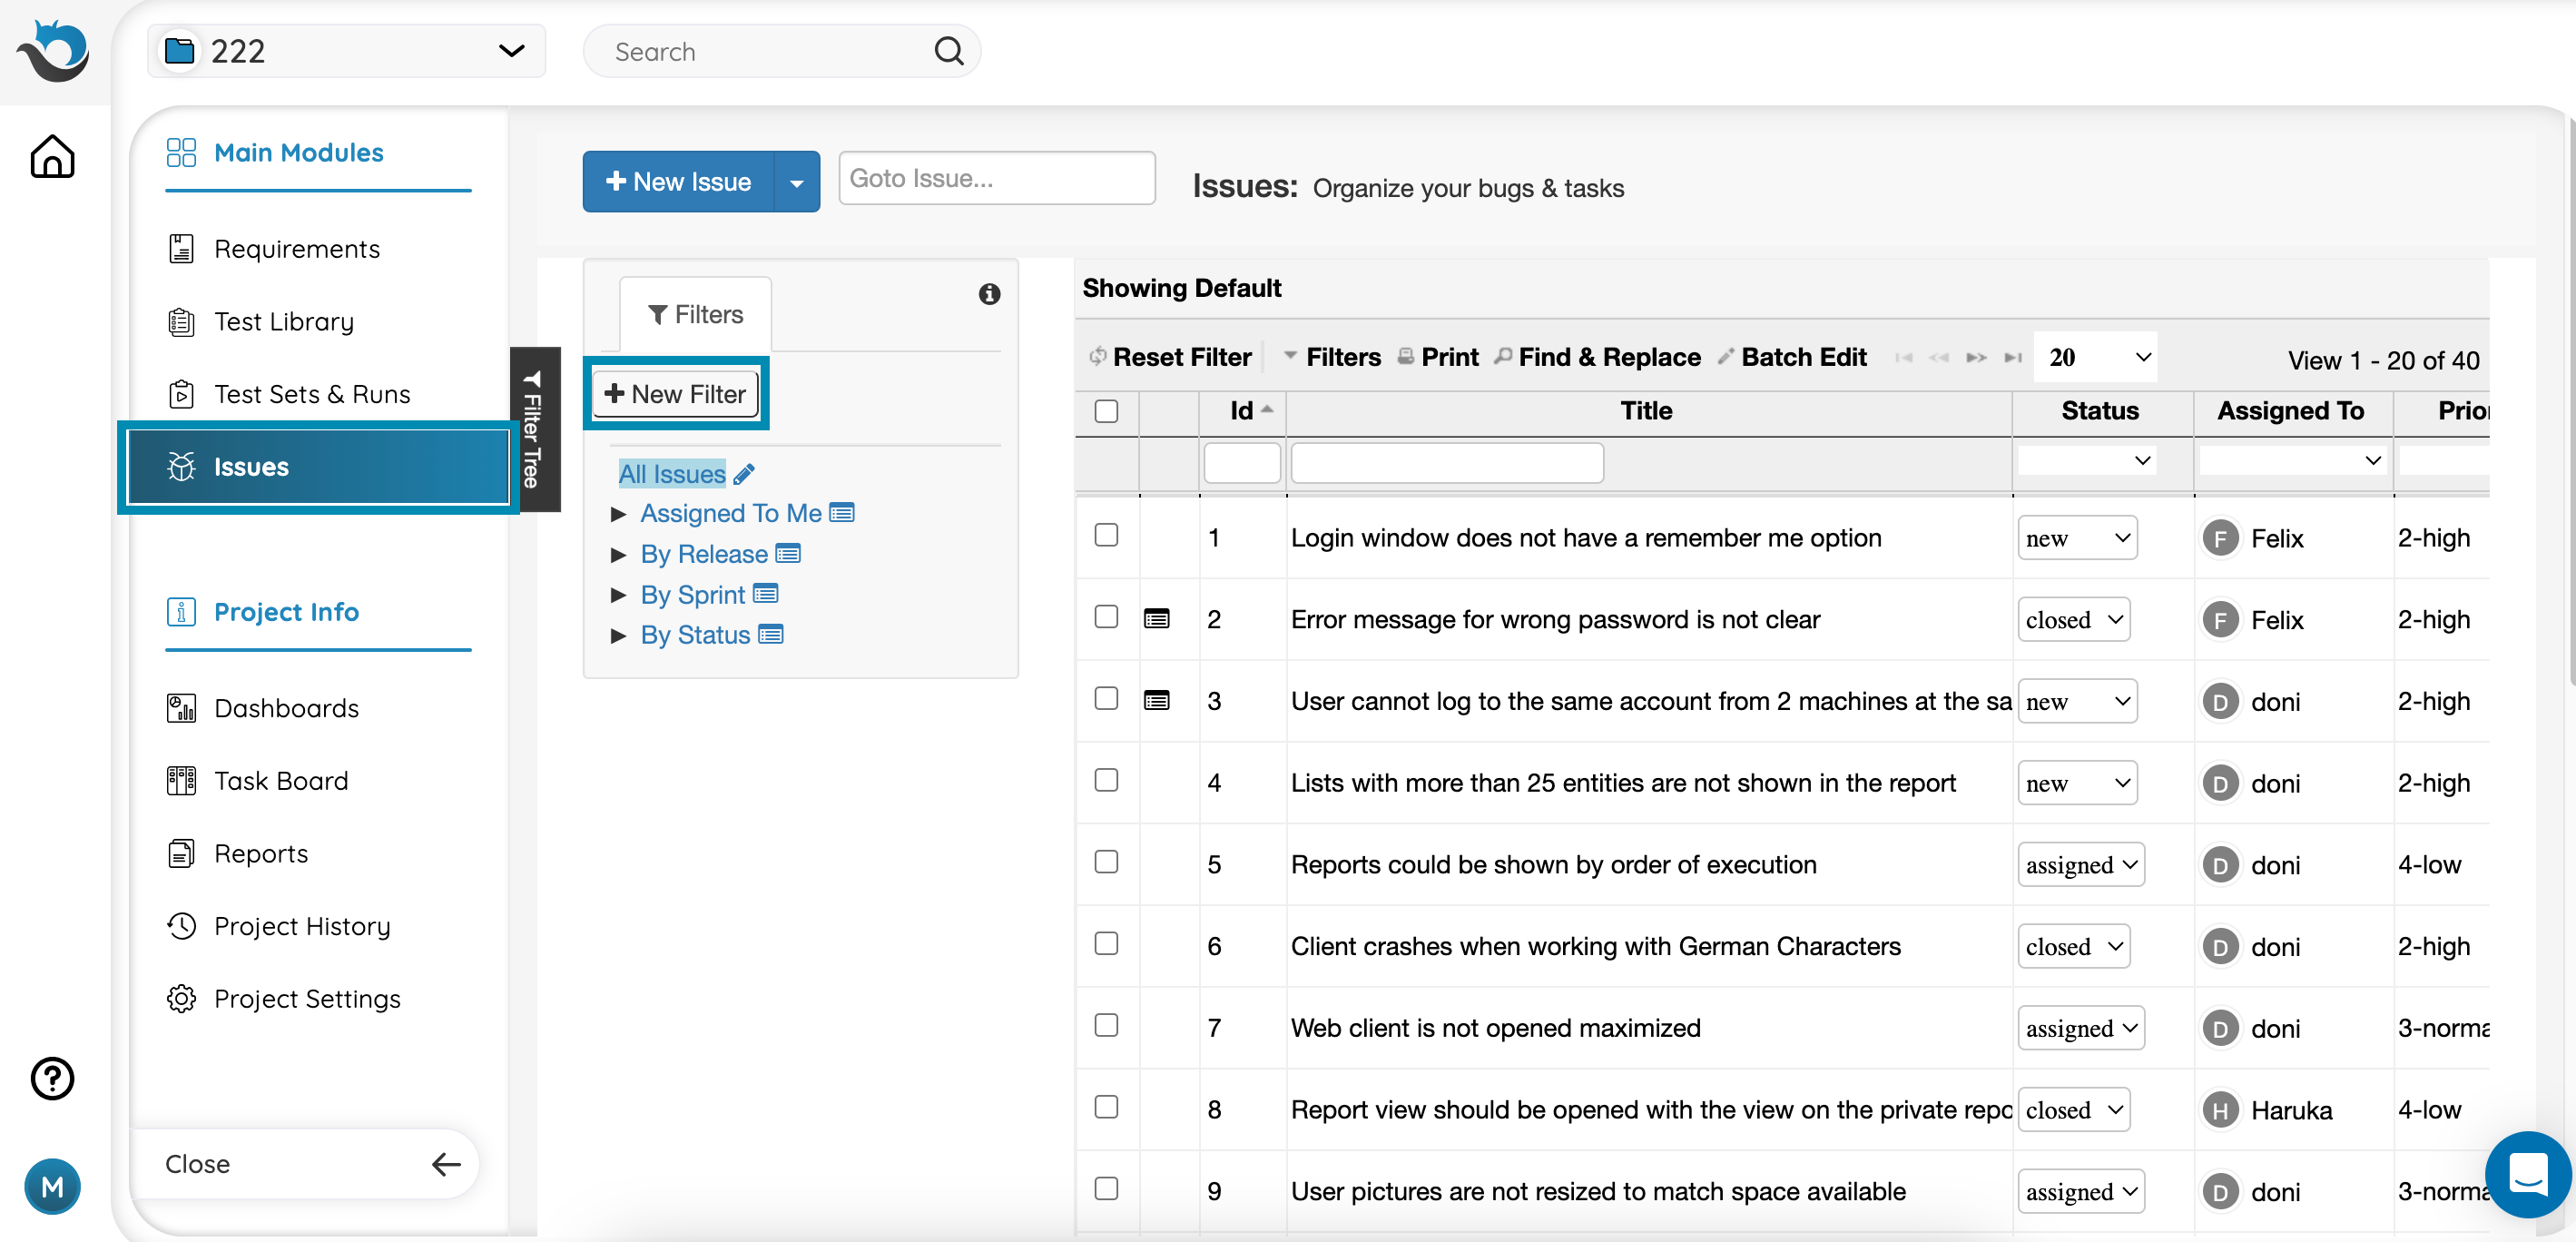
Go to the Issues module. You can see the filter tree located on the left side of the screen. Note: if the view tree is closed, click on “Filter Tree” to open it.
-
Press New Filter
-
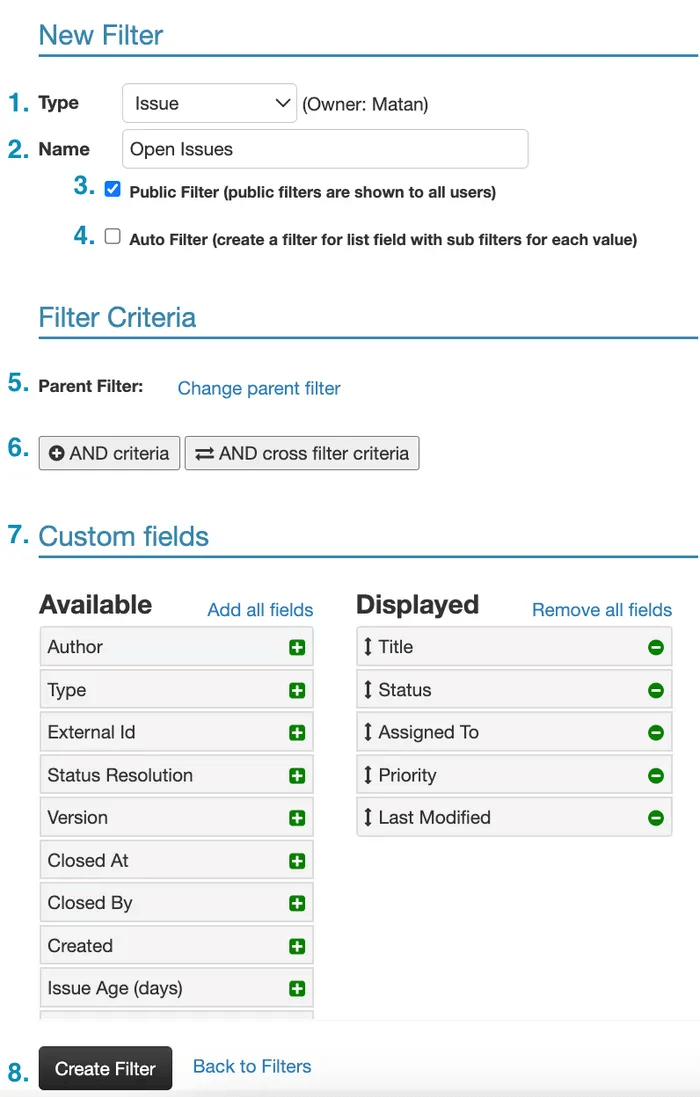
Define your filter
-
Filter type: When creating new filters from the “settings” page, this field will allow you to select under which module your filter will be created (Issues, Tests, Test Sets, or Requirements). Since we are adding a filter from an existing filter tree, the module is already selected.
-
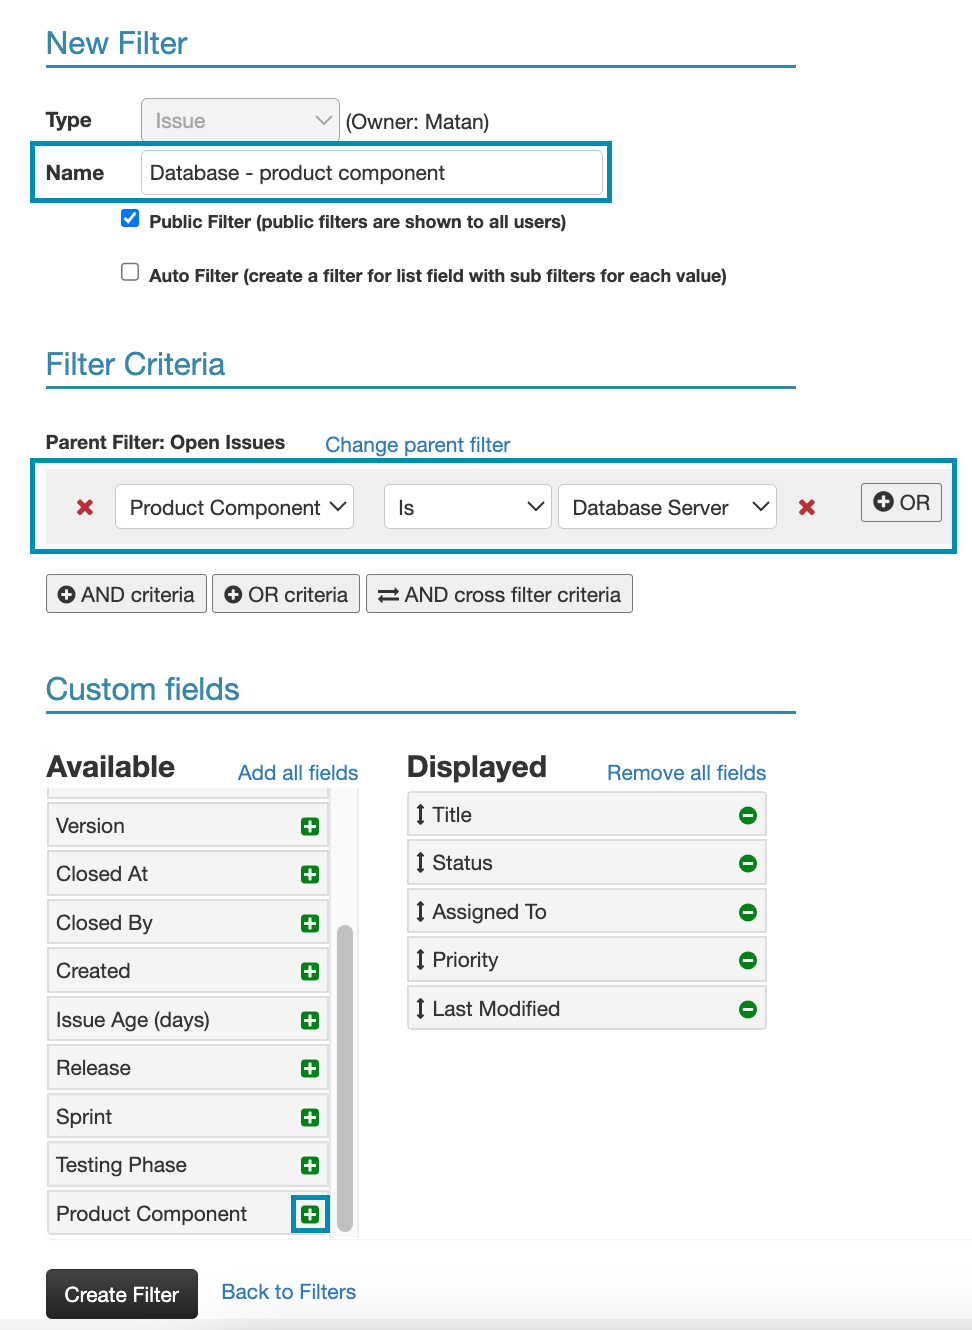
Filter name: It is recommended that the filter’s name will be descriptive enough to allow your users (and yourself) to understand what will be displayed when this filter is selected. In this example, we’ve chosen to name this view “Open Issues”.
-
Public filter: public filters are available to all users, while Private filters will only be available to the user who created them. Uncheck this checkbox if you think that only you will be interested in the current filter.
-
Auto filter: Please see below.
-
Parent Filter: Filters in PraciTest can be arranged in a hierarchy: a child filter will only show information based on its parent filter. This feature is called cascading or hierarchical filters. Please see below for a further explanation of sub-filters.
-
Add filter criteria: To select the criterion you would like to filter by, click on the “add AND query”. In this example, we are adding a filter that will only show us open issues.
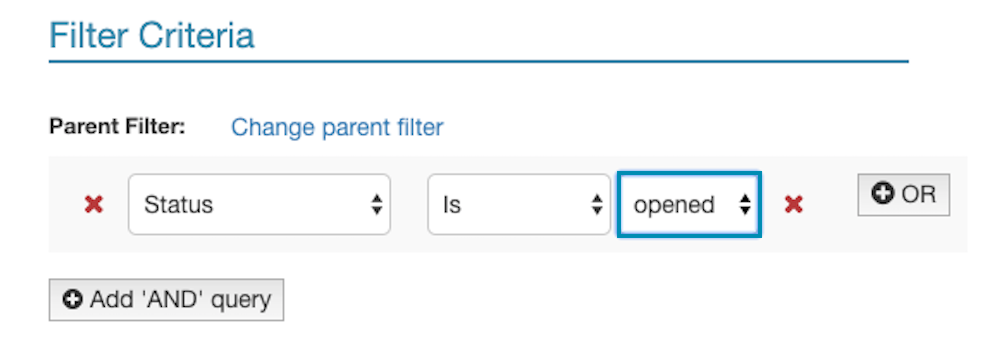 First, select the field you would like to filter by from the drop-down list. In this example, we selected to filter by Status. Next, select “is” to determine which product component this filter will show. Finally, select the appropriate criterion – in our case, “Opened”. Our filter will now only show us open issues.
 -
Custom Fields: In the Field Selector section, you can customize the fields you want to display in the grid.
Note: The system provides you with a list of fields you can select to display in the grid, depending on the module (filter type you have selected. The available fields in the Filter section also depend on the module.
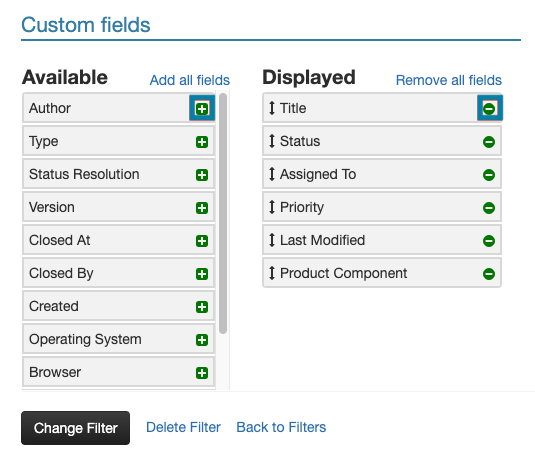 To add a field, click on the “plus” icon next to a field’s name, on the left column.
To remove a field, click on the “minus” icon on the right column.
Note: the display order of these fields is based on the order of appearance in the Selected Fields box. You can change the order by dragging and dropping the fields on the right column.
-
Create Filter: To save the filter, click the “Create Filter” button. This will take you back to the “issues” module, and show you your new filter.
-
Sub Filters
To create a sub filter, open an existing filter menu by clicking on the icon next to it. Then Select “Add Sub Filter”.
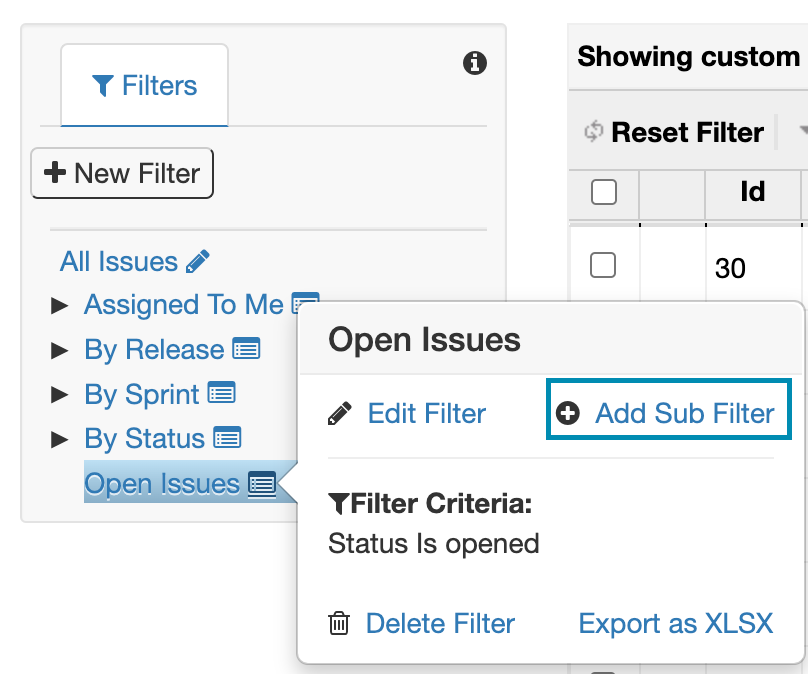
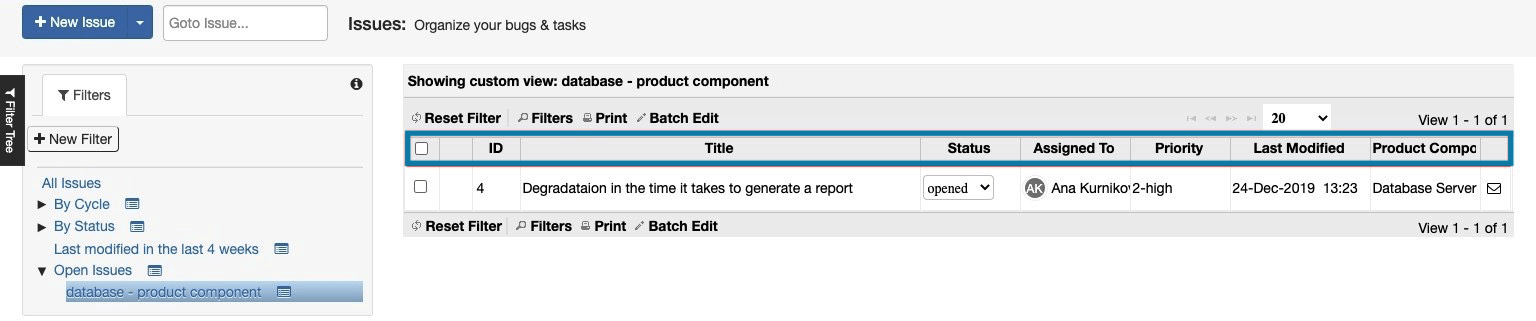
In this example, we are creating a child-filter for ‘product component - database’, under a previously created filter named “Open issues”. The existing filter only shows issues with the status “Open”; Hence, creating a child view for “database - product component” will only show issues that fit the criteria of both filters.
We choose the name “database - product component” for the child filter, the parent filter is automatically chosen according to the filter we decided to create the child filter for. In the criteria we add the field of “product component” and we define it as “database”.
After pressing ‘Create filter’, this is how it will look in the filter Tree menu:
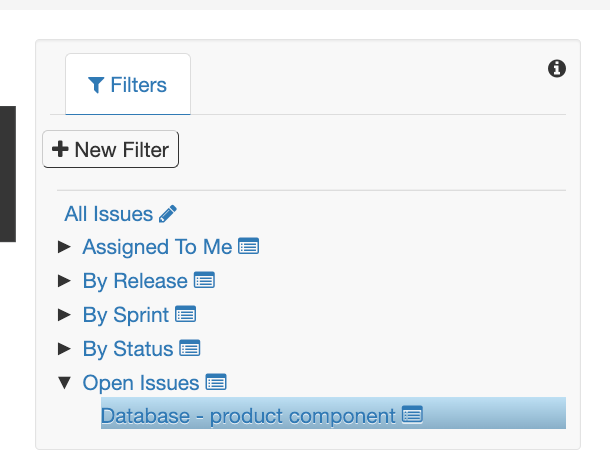
You can see that just as we defined, this view only displays Database issues in status Open. In addition, the fields displayed in the grid are those we selected.
If you want to convert an existing filter to a sub filter, or if you started creating a regular filter and want to change it to be a sub filter, you can change the Parent filter field in the filter settings window:

Filters with Multiple Criteria
Custom Filters help you organize your information and make it more easily accessible. You can use them any way you want, but you don’t have to organize your information using a single criterion – adding a filter with multiple criteria is simple.
In the following example, we will show you how to create a view that will display all issues that are:
assigned to you (the current user), and are related to version 1.5 or 1.6, OR in highest priority and are related to version 1.5 or 1.6.
{assigned to me + (version 1.5 or version 1.6)} OR {Priority highest + (version 1.5 or version 1.6)}.
For this, we will use the “OR” & “AND” queries for filter criteria.
-
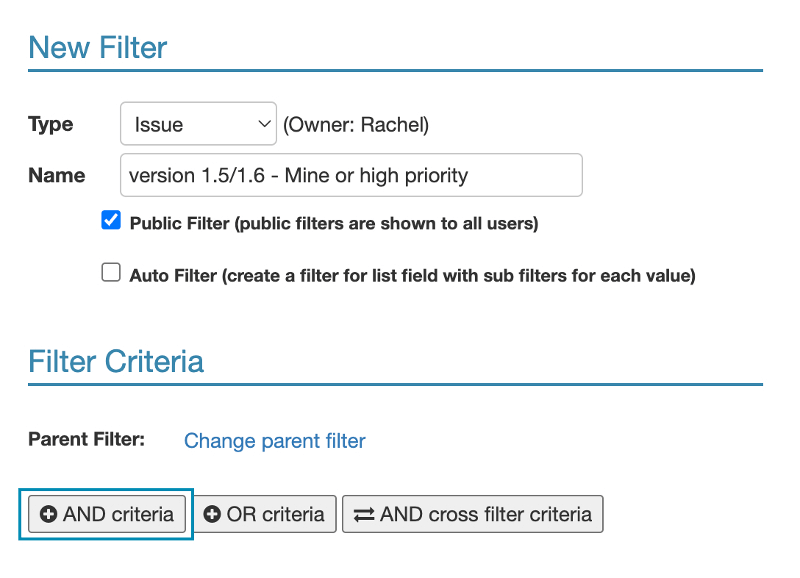
Create a new filter and name it.
-
Then, in the Filter criteria section, click the “+ AND criteria” button
-
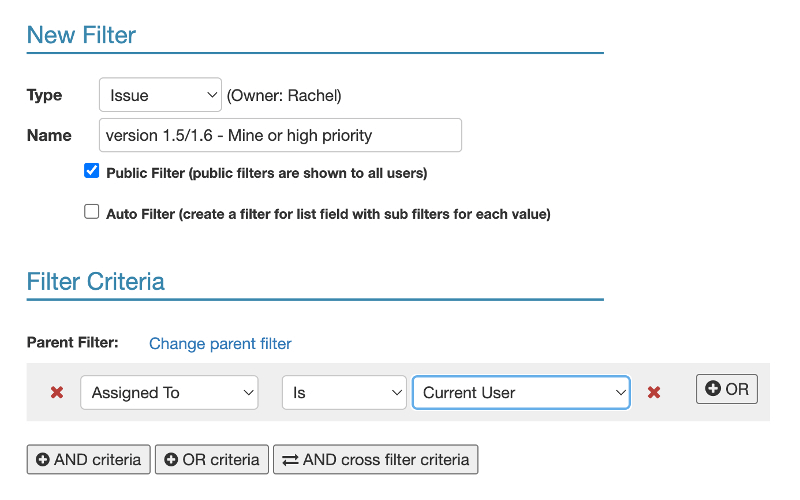
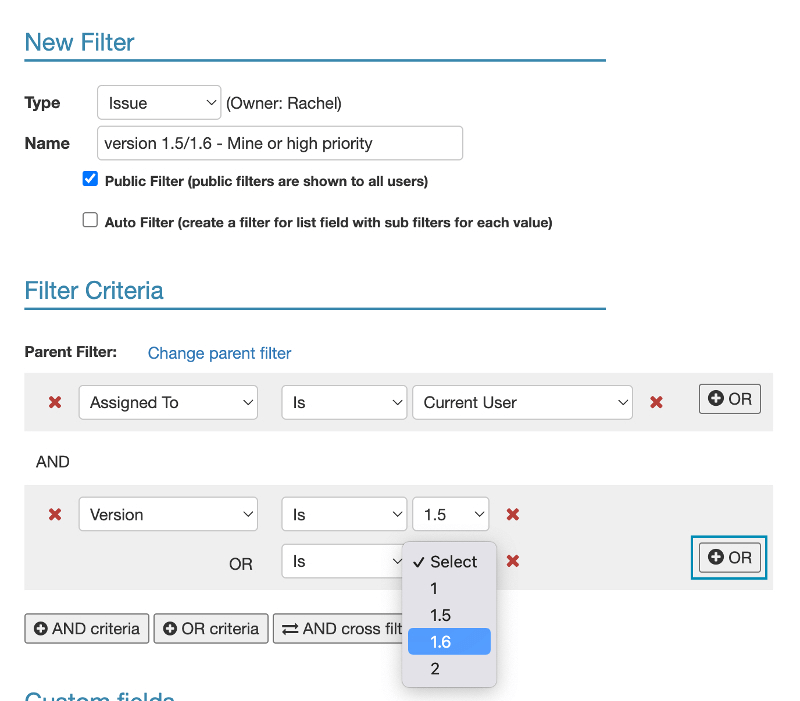
Choose the first criterion you would like to filter by. In this example, we’ve chosen to filter by the ‘assigned to’ user field.
-
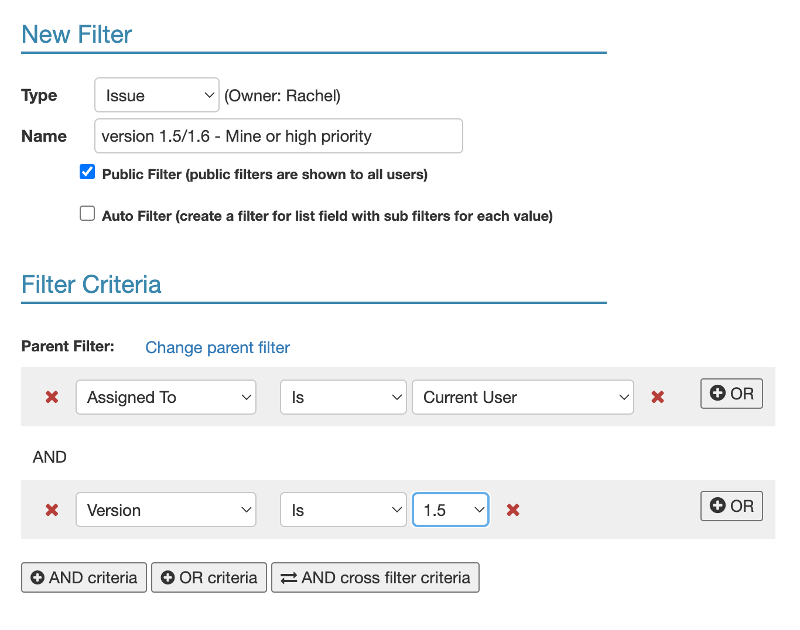
Now we can add another criterion. Click the “+ AND criteria” again, and add more criteria to your filter. In this example, we have based the second criterion on the version field.
-
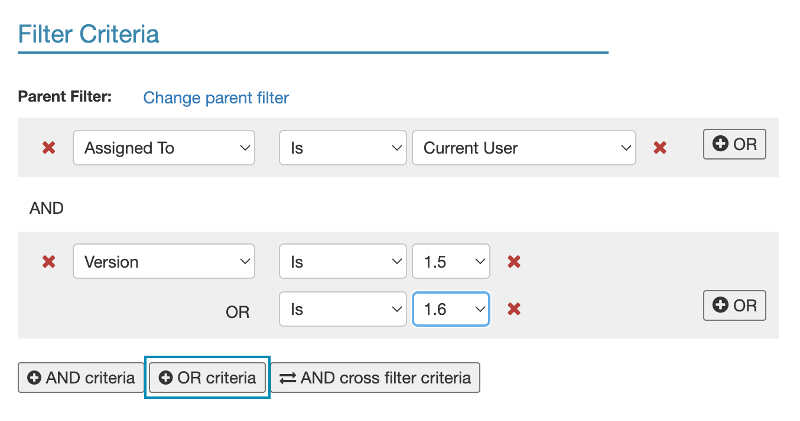
If more than one version is relevant to this criteria, you can press the “+OR” button to add more versions.
-
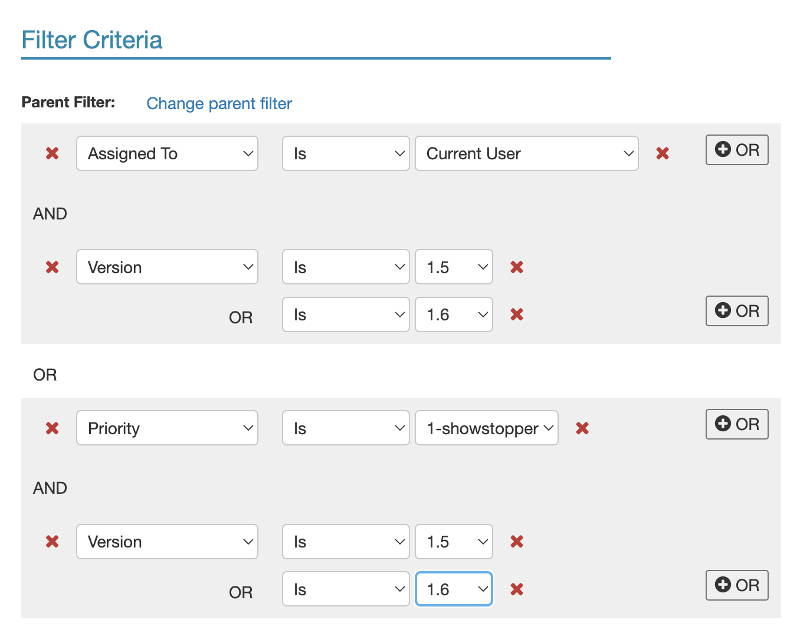
For this example we want to show issues from version 1.5 or 1.6 that are either assigned to current user OR are in high priority. Press the “+OR criteria”.
-
This time, our first criterion is based on the Priority field.
-
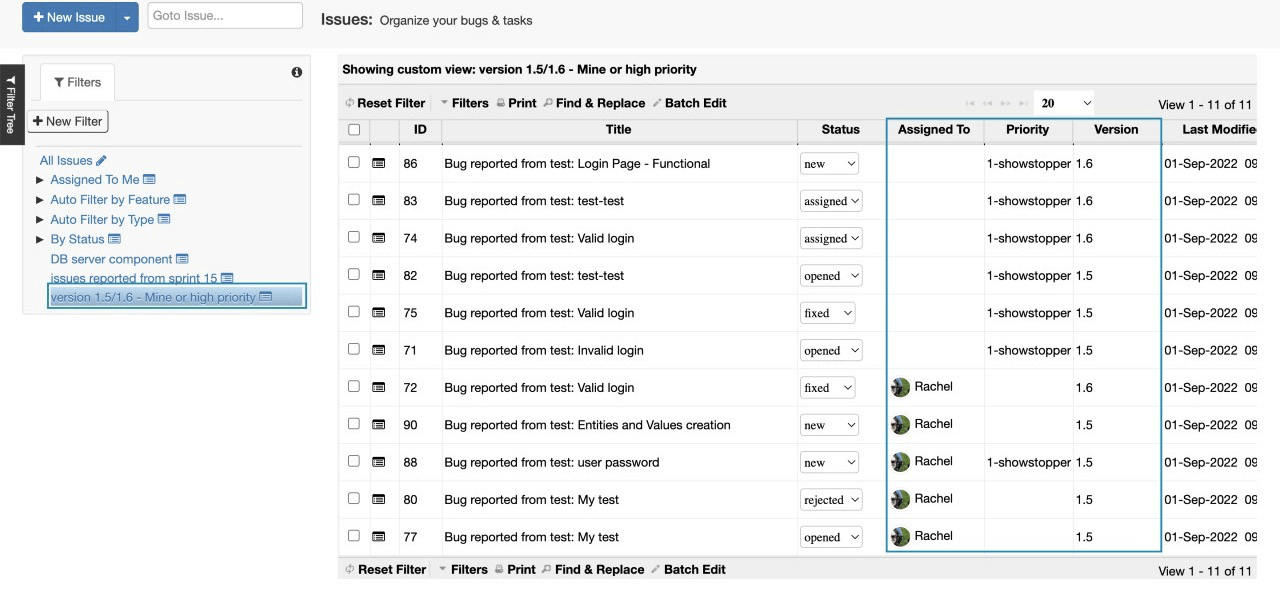
After choosing the relevant filters, click the “Create filter” button. This will take you back to the issues page to the filter view you just created. You can see that just as we defined, the issues shown in this view are only the ones related to the versions we chose (1.5 or 1.6) and are either assigned to a specific user (the current one) OR are in high priority.
Cross Filters
Cross filters allow you to create a filter in one module, based on a filter in another module. For example, if you want to see all issues related to a certain sprint, and you have a relevant ‘Sprint’ filter in your Test Sets & Runs module, you can create a cross filter in the issues module and base it on the sprint filter from the Test Sets & Runs module. Learn more about cross filters from this post.
Auto Filters
When creating an auto filter based on a field, it will automatically create sub-filters for each one of the field’s values.
Auto filters can be based on a list, multi-list and linked-list fields (Please find an explanation about the different field types here). When basing an auto filter on a multi-list field, each entity can appear in more than one sub-filter according to its multi-list field values.
For example, we will create a new auto filter based on the ‘Version’ list field.
Once we tick the ‘auto filter’ option, we can choose the field we want to base the filter on, under ‘Filter Criteria’. You can name this auto filter as you wish or simply use the name given automatically based on the selected field.
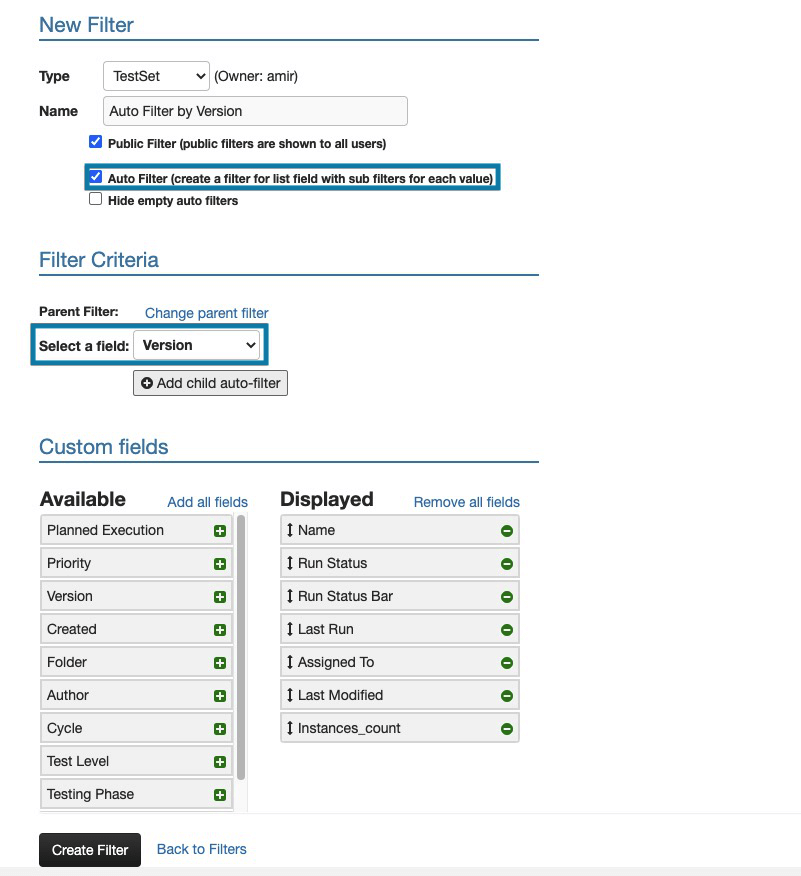
This will automatically create sub-filters for all the list items in the ‘Version’ field + a sub-filter for “Other/Empty values”.
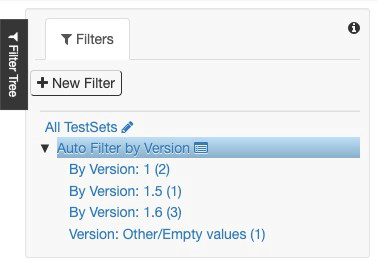
“Other/Empty values” are for entities without any values or entities with values that are not part of the list options. For example, if we import an issue with the value “1.4” under the Version column. The numbers at the end of each line represent the number of entities that belong to this value/subfilter.
Auto filters are synced to the field they are based on and any change to that field will be reflected in the filter as well. For example, when adding or deleting a value from the field list - the filter will automatically create or delete the relevant value sub-filter. In this example, I am adding a new value “1.7“ under the list field “Version”
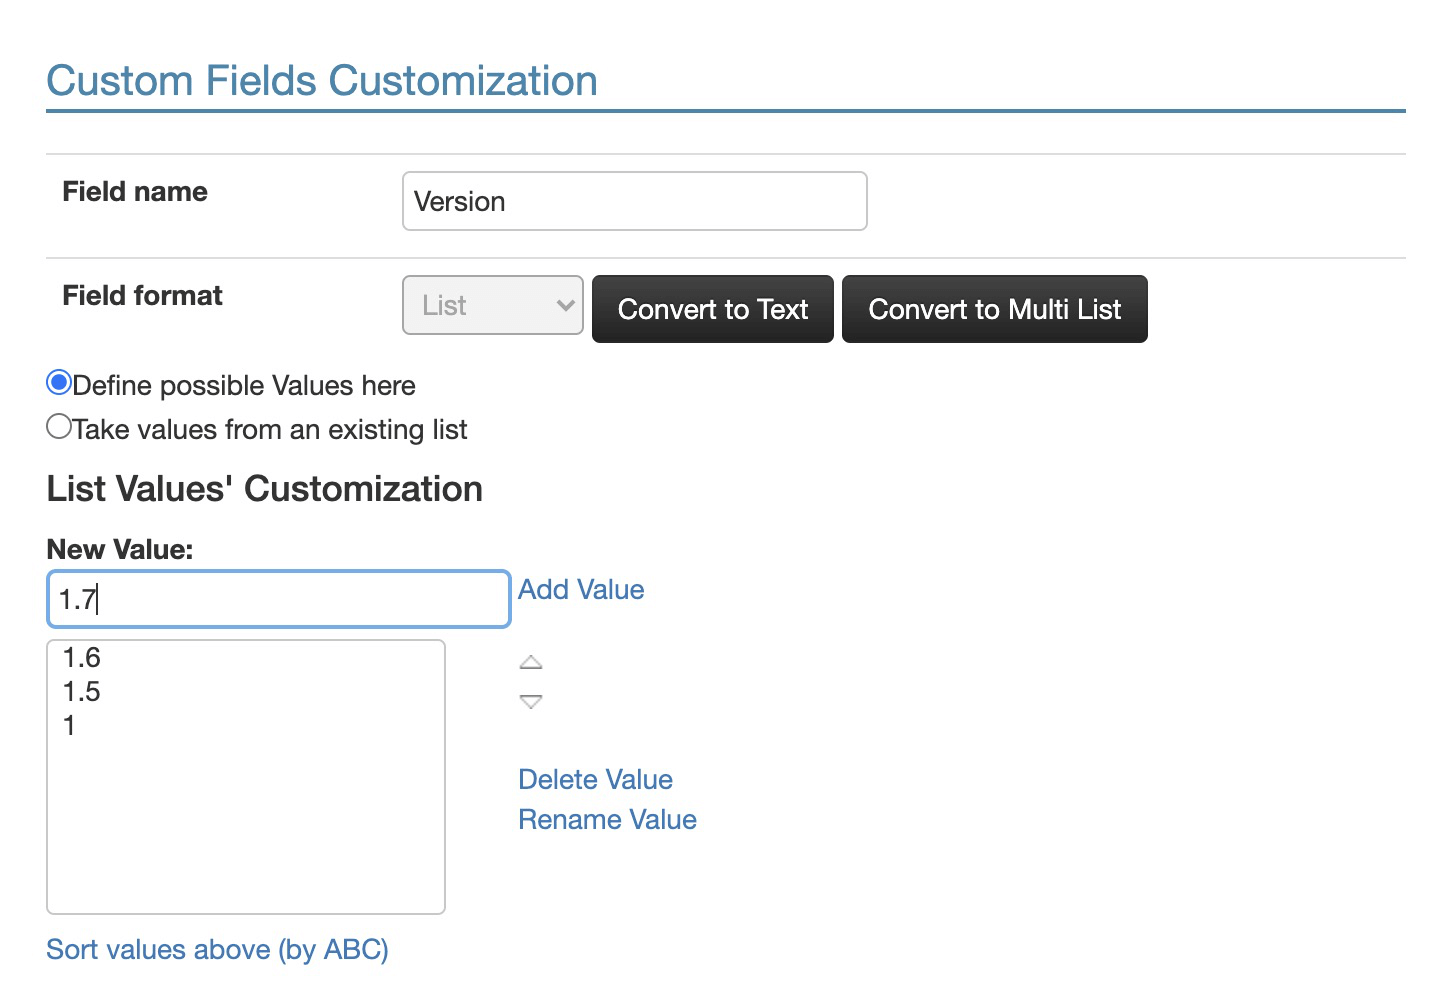
A sub-filter with that value is automatically created.

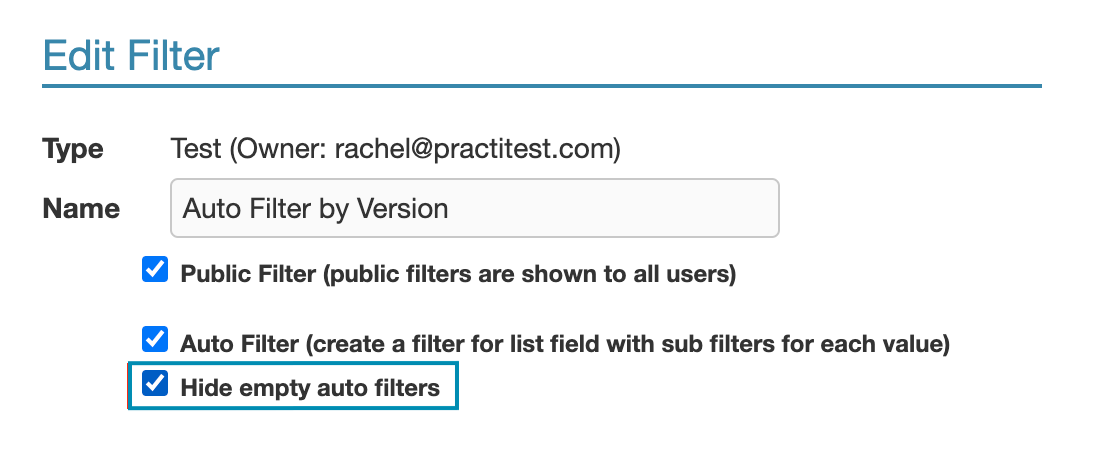
You can also decide to hide empty sub filters when creating the auto filter. To do so, simply tick the ‘Hide empty auto filters’ box when creating or editing the filter.
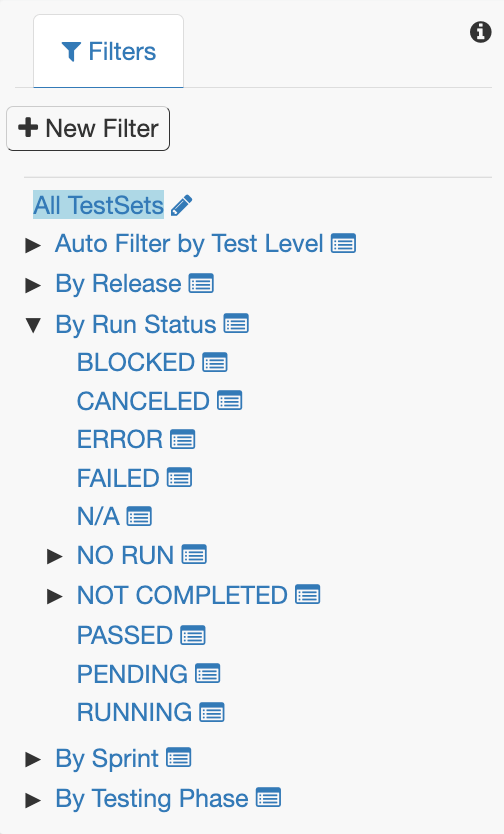
Multilevel Auto Filters
In PractiTest, you have the option to create Multilevel Auto Filters. This means you can create your first level of auto filters as explained above and create a second level of filters for each of the sub-filters that were created automatically, based on another list, multi-list, or linked-list field. For example, If we go back to creating the ‘Version’ auto filter, this time, after choosing the version field, we will press the “Add child auto filter”
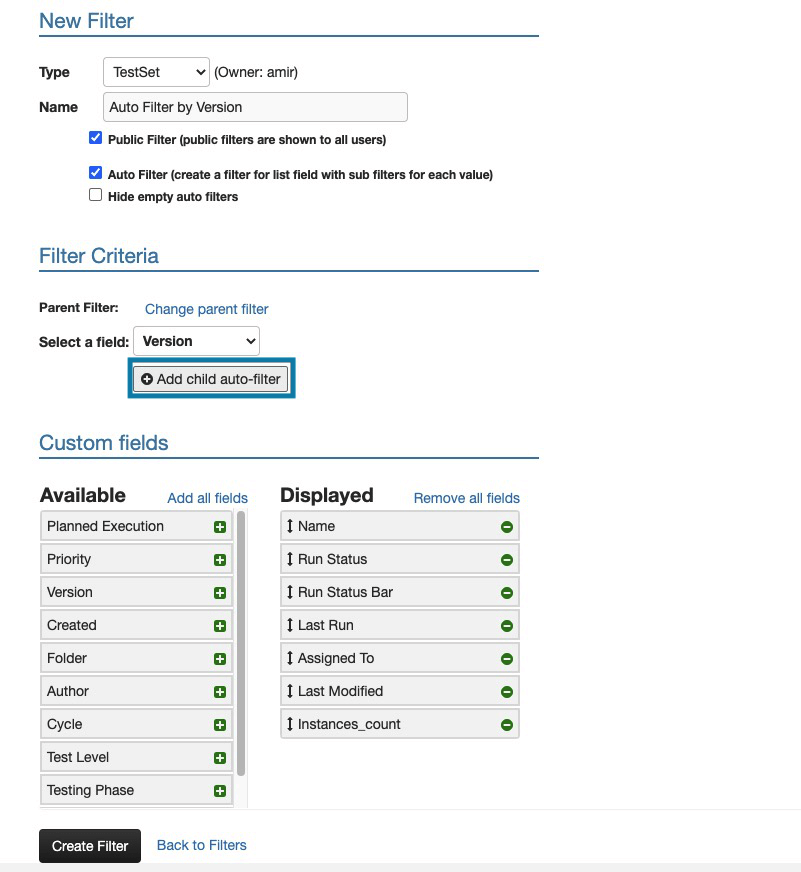
This option will let us choose the field we want to base our second level of auto filters on. For this example, we will choose the “Run Status” field.
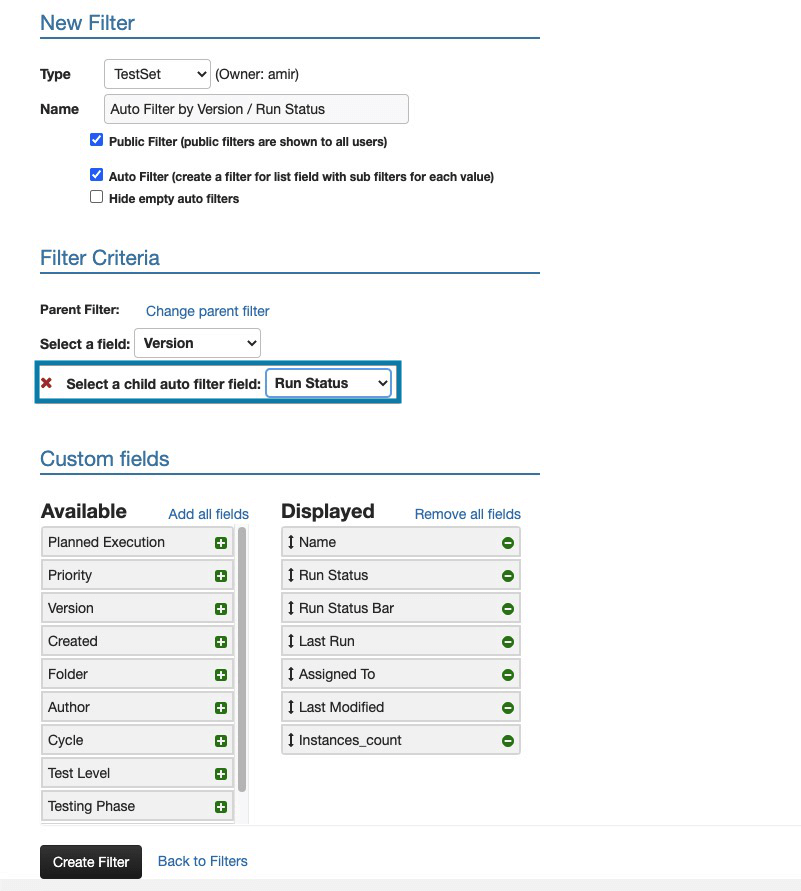
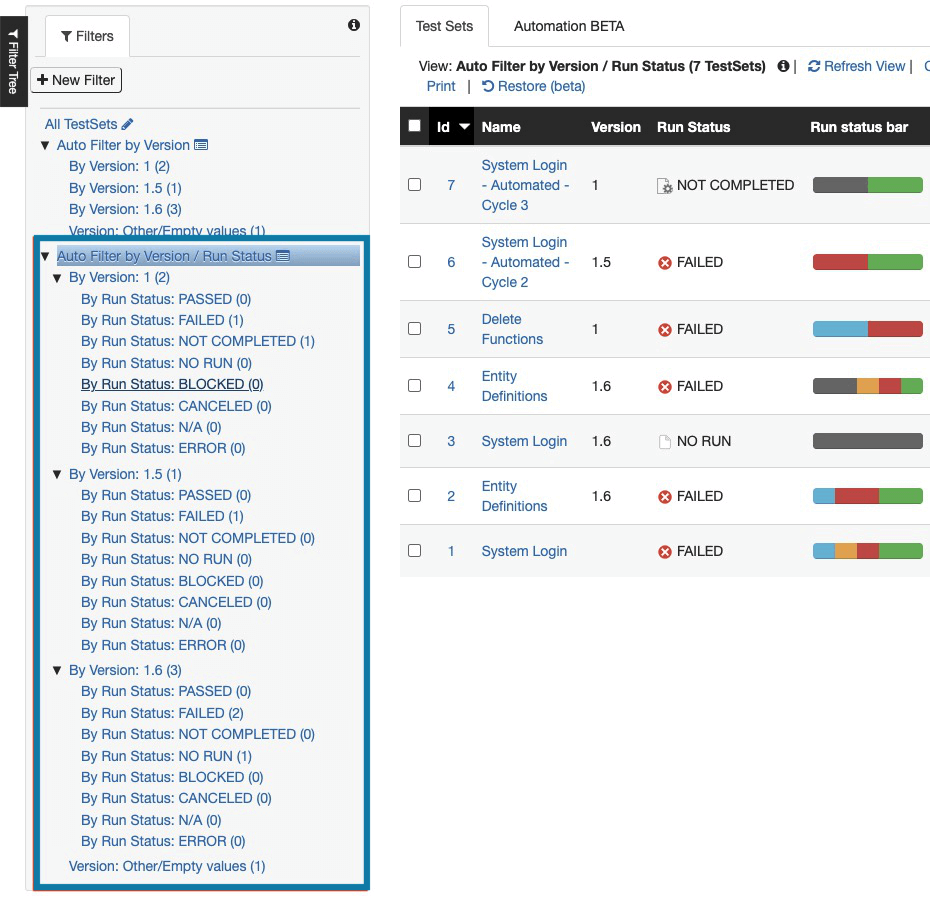
This will automatically create sub-filters based on all list items in the ‘Run Status’ field, to each one of the sub-filters based on the “Version” list items.
Changing or Deleting a Filter
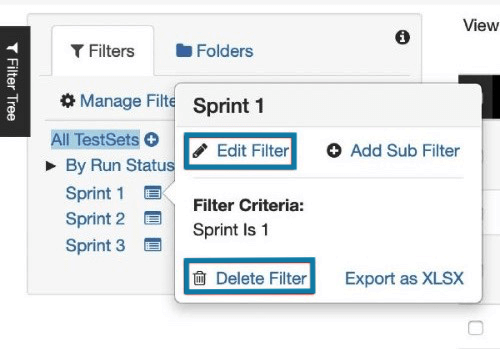
To edit a filter, click on the menu icon next to the relevant filter, then click on the “Edit” link. To delete a filter, click on the menu icon, then click on “Delete Filter”. You can also go to Settings –> Filters, and edit or delete your view from the list.
Additional Resources
View this webinar where we focused on how to use PractiTest’s unique filters and custom fields to your advantage for clear QA coverage.