- Configuring the Two-way Integration
- Working With Two-Way Integration
- Configuring a One-Way Integration
- Working With Bugzilla One-Way Integration
PractiTest has two types of issue integration with Bugzilla:
- Two-Way Integration: advanced integration that syncs and updates the information between the two systems. With this integration, you can report issues from PractiTest runs directly to Bugzilla, and PractiTest allows Bugzilla to update PractiTest whenever the subject, status, or descriptions are modified.
- One-Way Integration: standard integration where you can report issues and data from PractiTest to Bugzilla. Once you click on the Fail & Issue link in a test run, it will open a new bug form in Bugzilla, with all the data (including steps and actual results) already pre-entered.
Configuring the Two-way Integration
To configure the two-way integration, follow these steps:
Add the designated Bugzilla extension for PractiTest.
- Install Bugzilla.
- Install extra perl modules: REST::Client, JSON, Digest::MD5, Crypt::SSLeay, Data::Dumper (via cpan).
- Copy this folder to the ‘Extensions‘ directory of Bugzilla.
- Change the directory’s name to “PractiTest”.
- In Extension.pm, update the CONFIG_API_TOKEN constant (line 33).
- Add a custom field in Bugzilla, named cf_pt_id (Type is ‘Free Text‘). If you are unsure how to do this, see the instructions below.
- Restart Bugzilla. Note: If you need to disable the extension, an empty file with the name ‘disabled’.
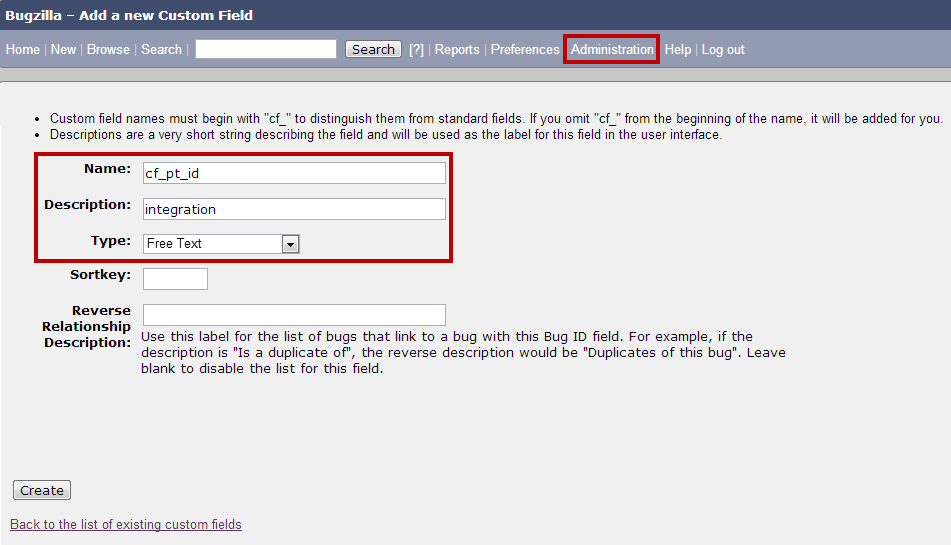
Adding the cf_pt_id Custom Field to Bugzilla
- Add an integer custom field named “cf_pt_id”.
- In Bugzilla, go to Administration.
- Click on the ‘Custom Fields’ link.
- Create a field named “cf_pt_id” and set the field’s type to ‘Free Text’.
- Click on the ‘Create’ button.
- Configuring PractiTest to Integrate with Bugzilla
Configuration in PractiTest is similar to the one-way integration.
- Go to Project Settings → Integrations, and select Activate.
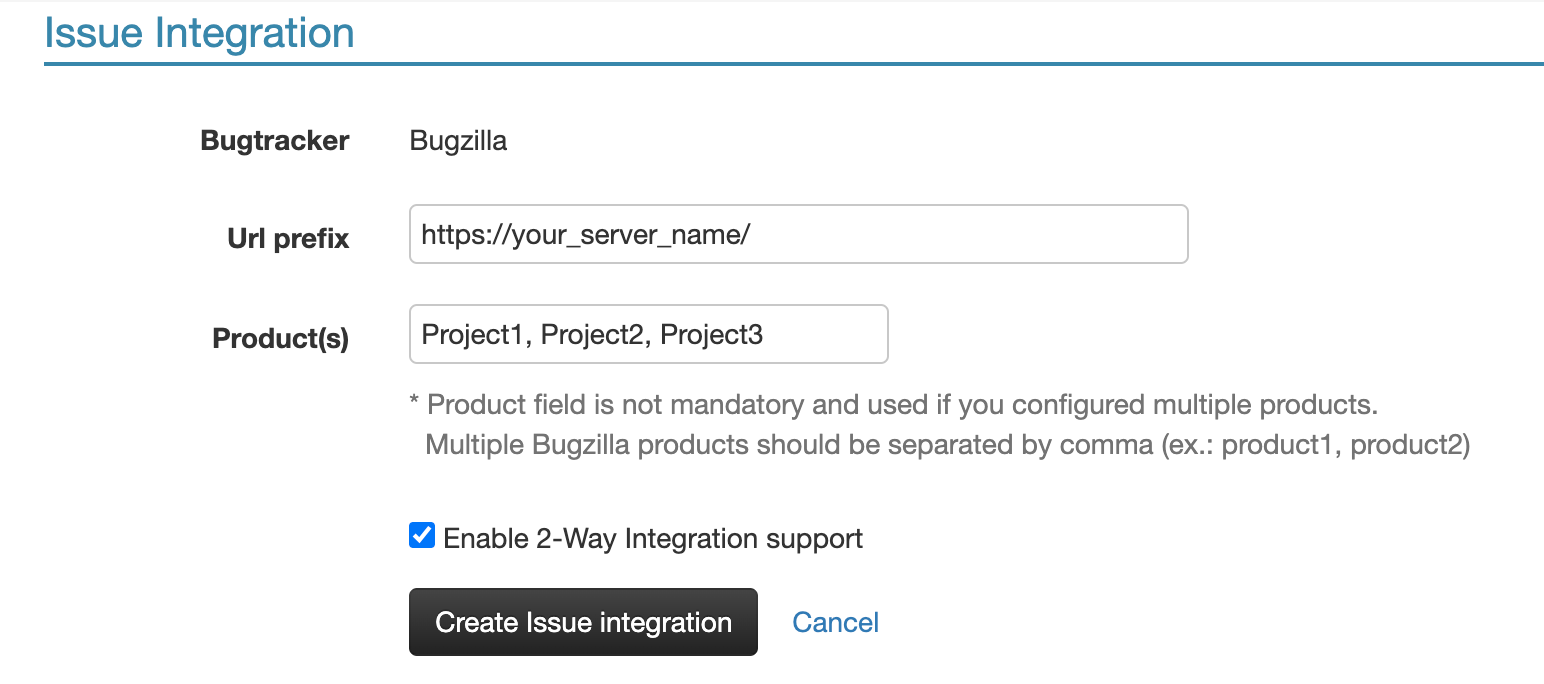
- On Issue integration, select Bugzilla, enter the URL prefix and the project prefix.
- Enter the ID for the cf_pt_id field. You will receive this after adding the field to Bugzilla.
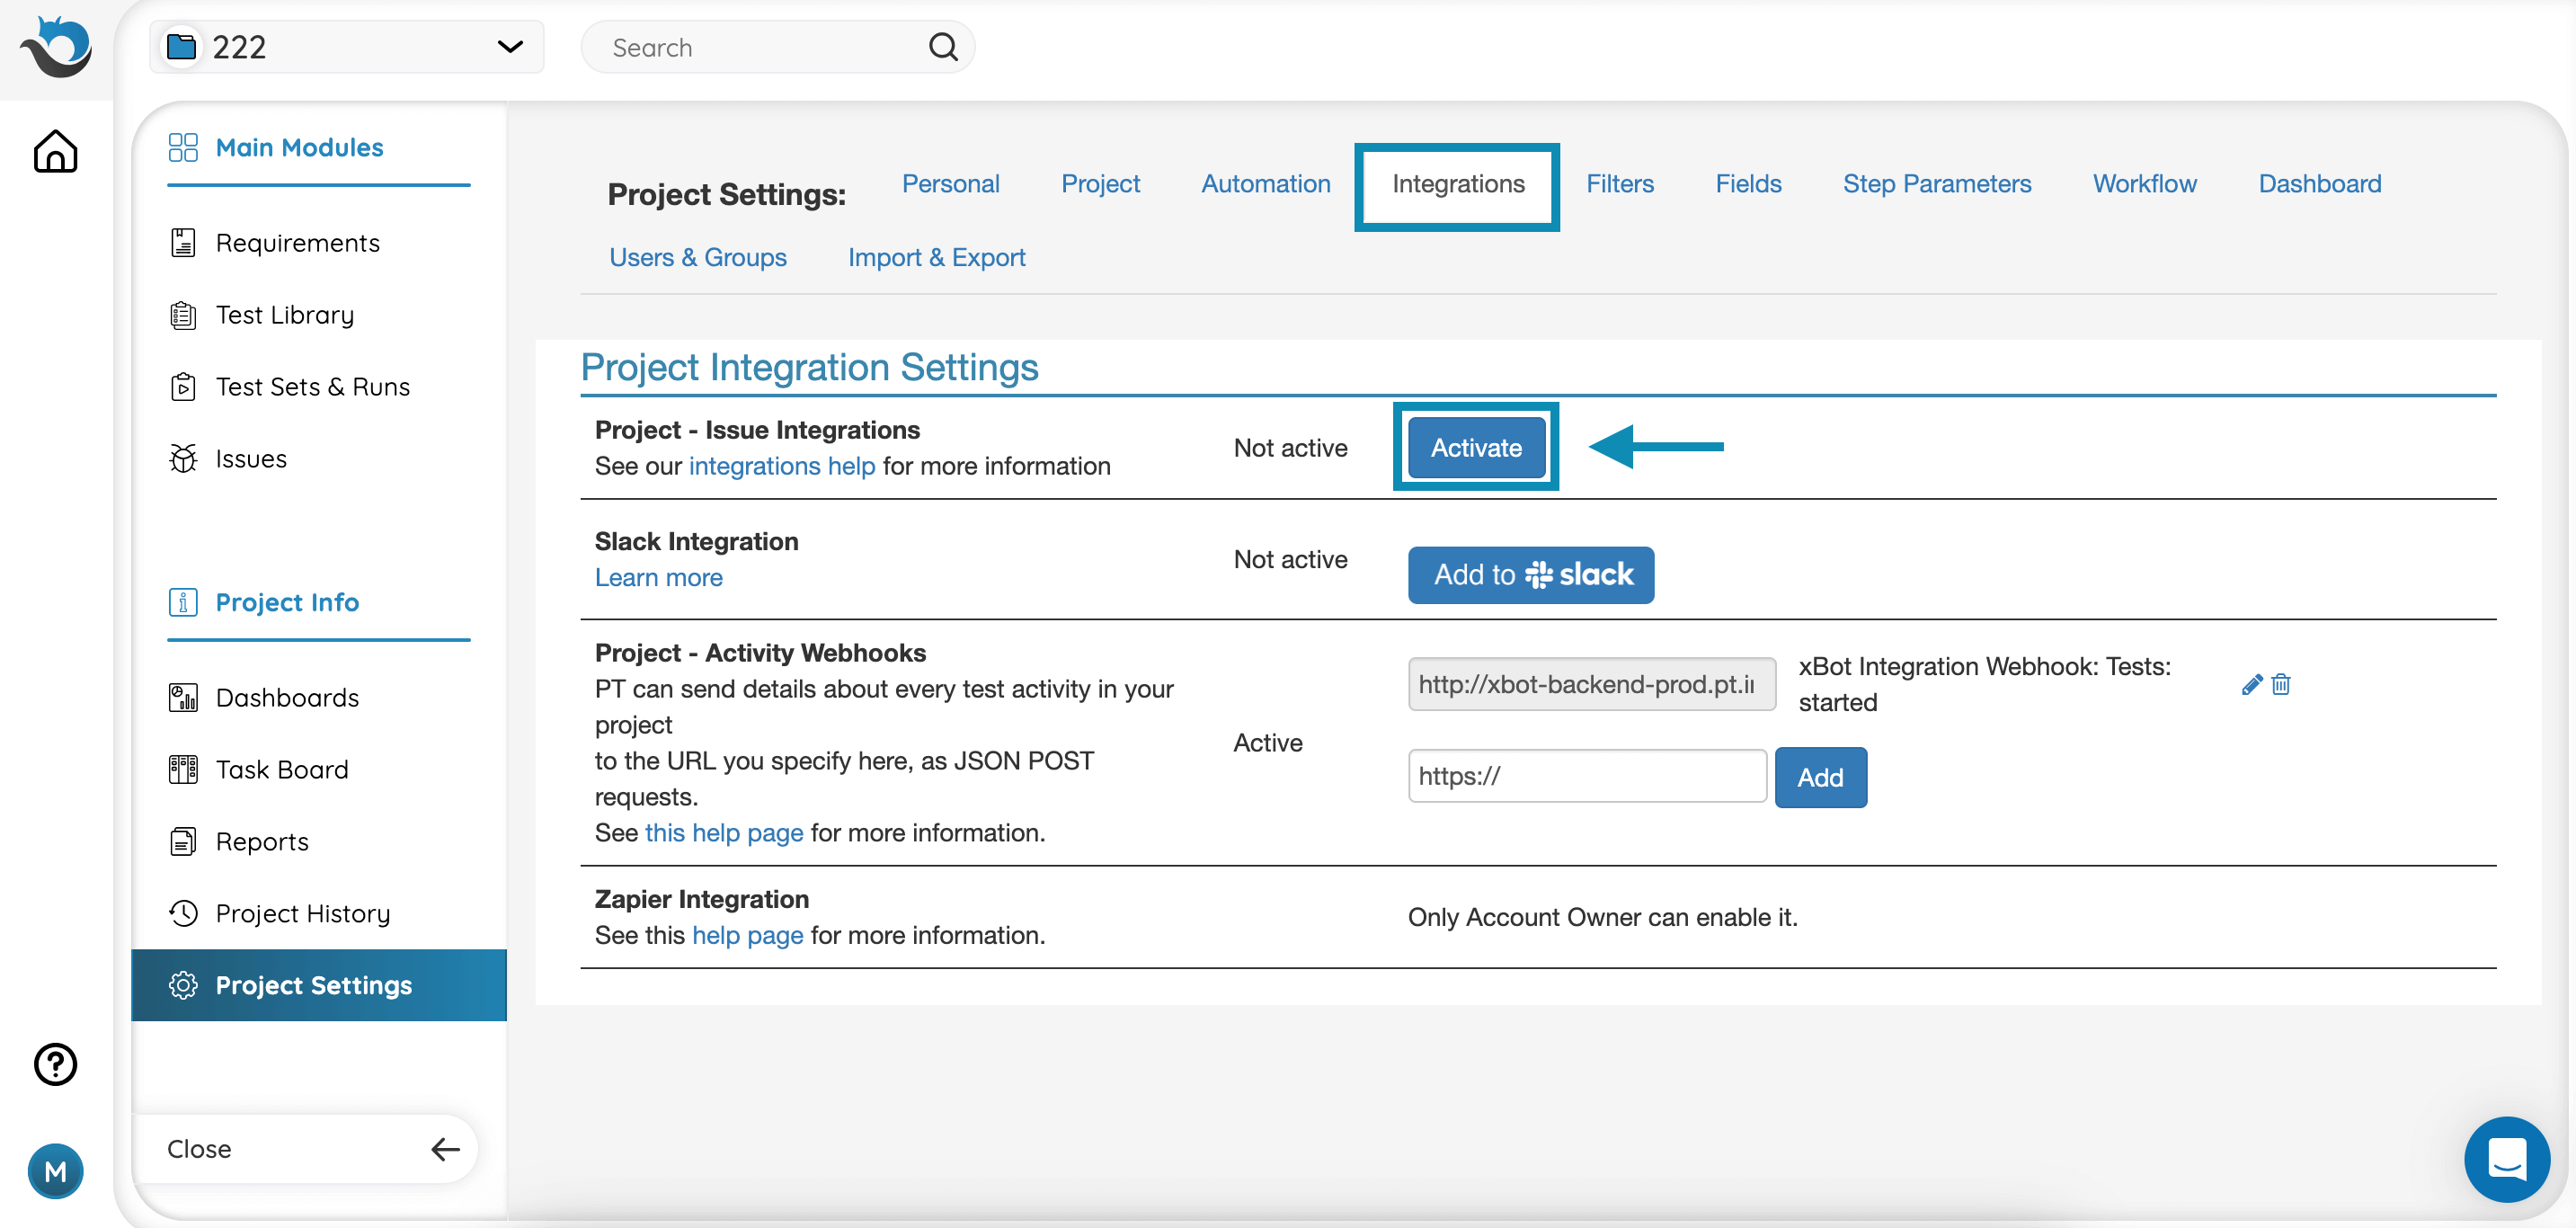
You can set different Bugzilla projects. This way, when you report an issue, you will be able to choose to which Bugzilla project you want to report.
That’s it! You and your users are ready to start enjoying the two-way integration.
Working With Two-Way Integration
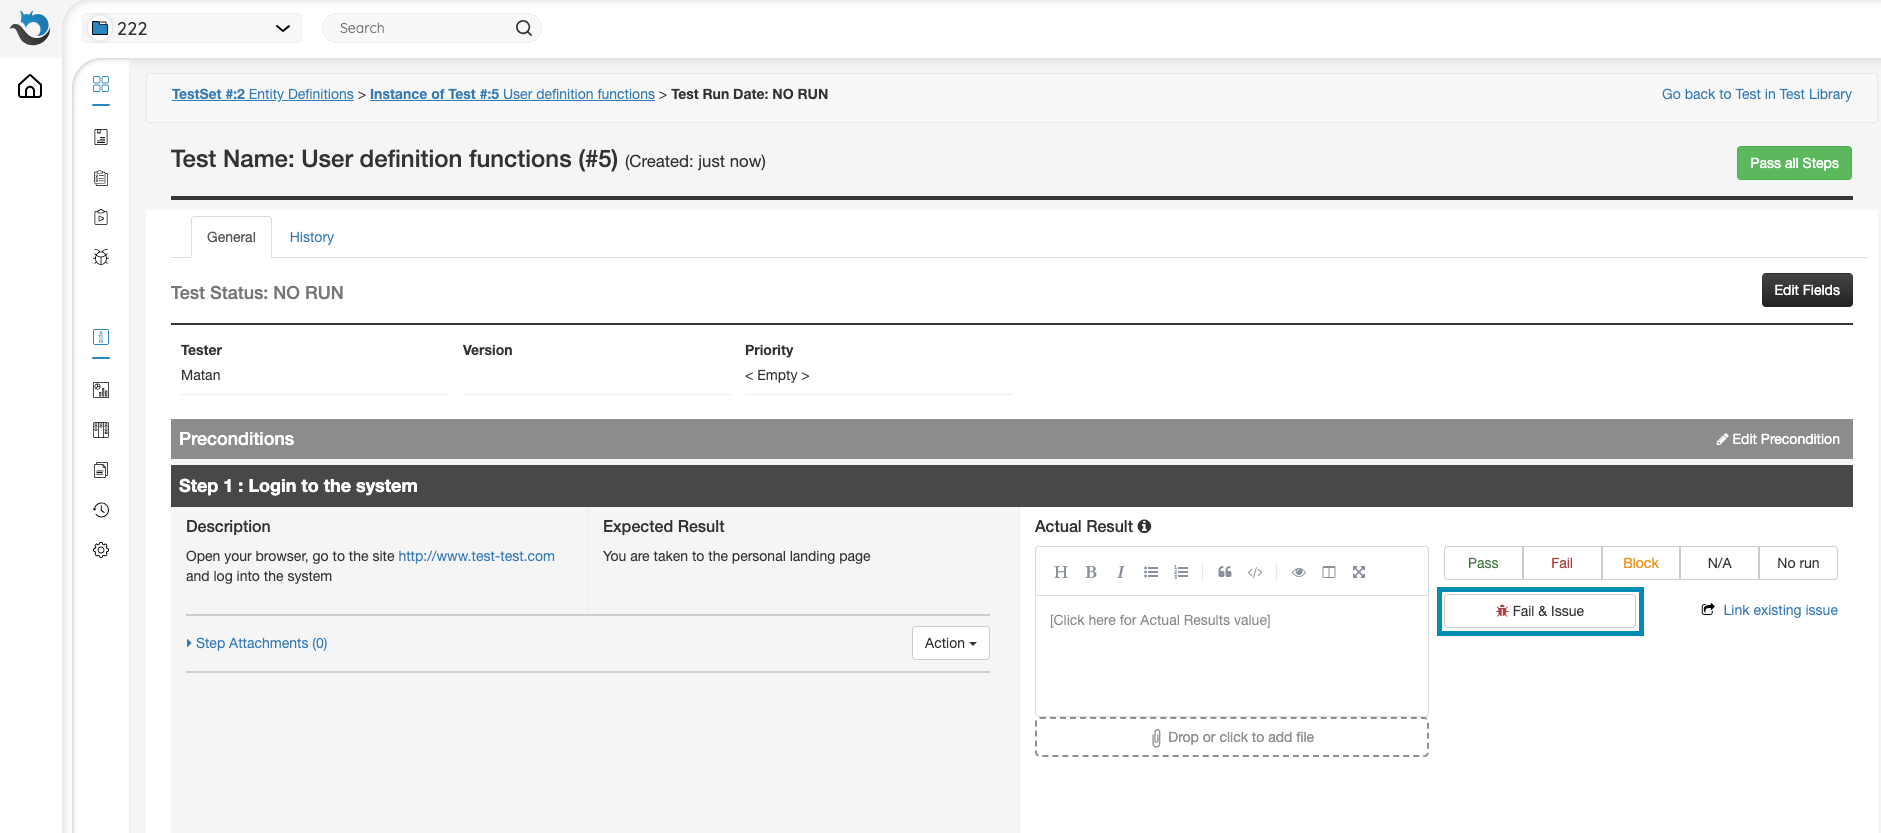
This step is the same for both one-way and two-way integration with Bugzilla. Begin by running the test from PractiTest’s Test-Sets and Runs.
- Go to a TestSet
- Choose the test you want to run and click the ‘Run’ link
- When a step fails, update the actual results
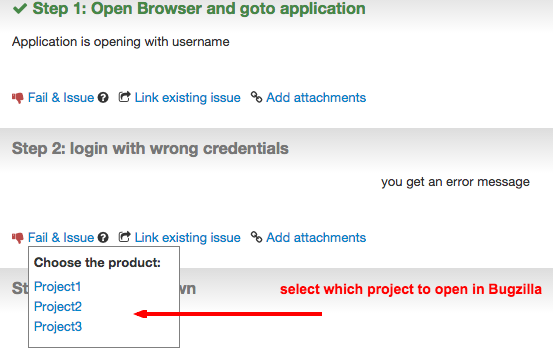
- Click on the ‘Fail & Issue’ link.
-
If you have configured multiple Bugzilla projects, when you place your mouse over ‘Fail & Issue‘, you can select which project (based on your previous configuration) will open in Bugzilla.
-
Choose the relevant project and PractiTest will open Bugzilla’s New Issue form with all the data pre-entered.
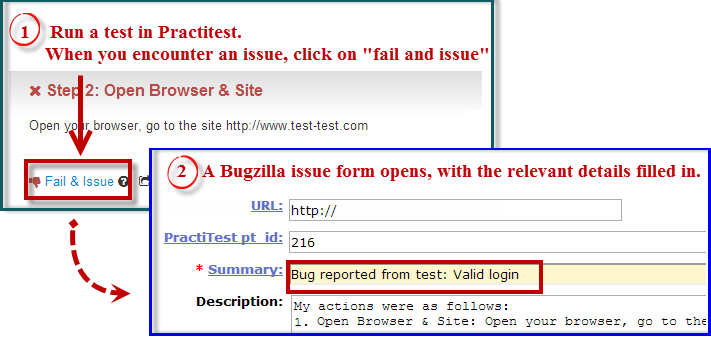
- Fill out the relevant information for your bug report.
- Save the Issue. The plugin will then synchronize bugs and tests.
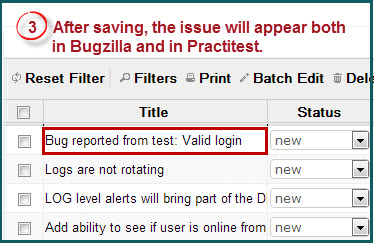
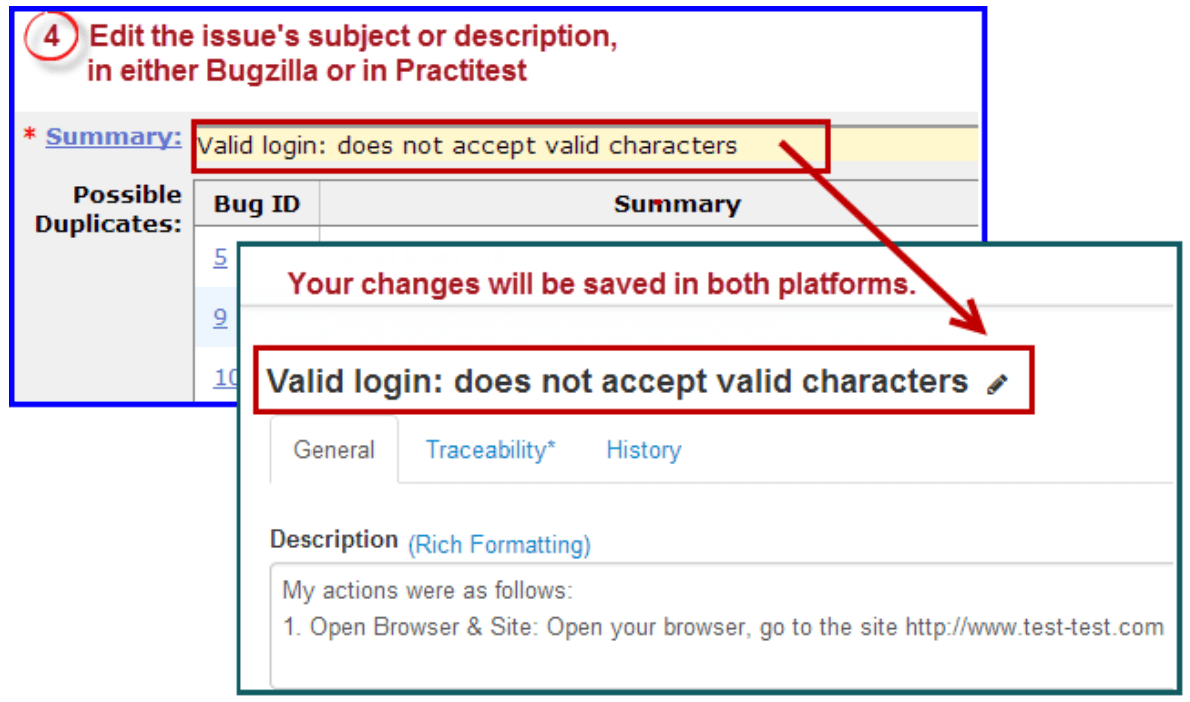
Using the two-way integration, you can edit the issue in either platform and your changes will be saved in both Bugzilla and PractiTest.
Configuring a One-Way Integration
Follow the instructions below to configure the PractiTest - Bugzilla integration.
-
In PractiTest, go to Project Settings > Integrations, and activate the Issue Integration by clicking on the ‘Activate’ link.
-
Select Bugzilla from the Bugtracker dropdown list.
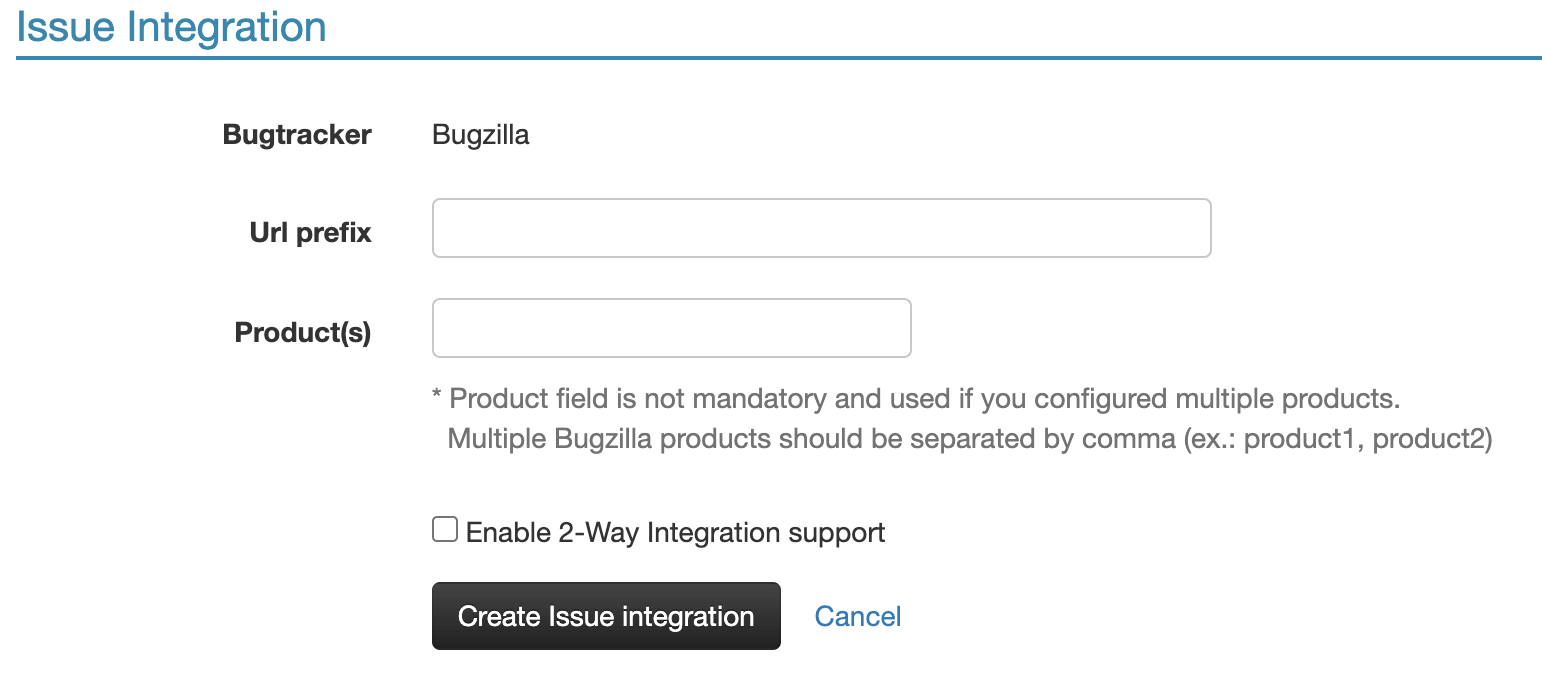
Enter the URL Prefix that will be used by PractiTest to connect to your Bugzilla installation. This URL will have access to create bugs in Bugzilla and will look like this: http://your_server’s_name/
Click the ‘Create issue integration’ button to activate the changes.
Working With Bugzilla One-Way Integration
Start by running your tests normally. When encountering an issue, click the Fail & Issue link.
A new browser tab or window (based on your browser’s configuration) will open, displaying your Bugzilla new bug page. If you have configured your browser to remember your username and password, it will log directly into the screen where you can report your issue.
After reporting the new issue, take note of the new Bugzilla ID. Return to the test run in PractiTest and click on the ‘Link existing issue’ link. Enter the ID on the Issue ID field, and click the ‘Link existing issue’ button. You can enter multiple issues at once by separating them with commas or spaces.
The Bugzilla Issue will be linked to the test step. Clicking the issue ID will open it in a new window on your Bugzilla Instance.