Custom Fields allow you to customize your entities (Requirements, Tests, Test Sets, Instances, and Issues) to match your project and process.
You can either create new custom fields from the ‘Fields’ section of settings, or you can create fields directly from entities.
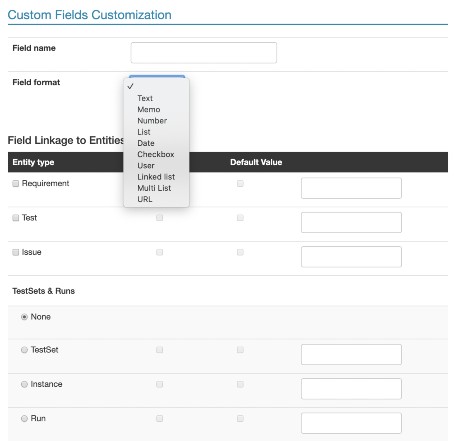
Custom Field Types
There are 9 types of custom fields:
- Text: Regular text field
- List: The most common type. See below for details.
- Linked List: See below for details
- Memo: Large text area
- Number: Field for number values
- Checkbox: Check box field
- Date: Field that accepts dates only
- User: Project user field.
- Multi List: Allows you to select several values simultaneously
- URL: - Adding a website link
To create or edit a custom field, go to Settings → Fields.
List Field
This is the most commonly used custom field, offering the user a predefined list of values to choose from. For each list field you can choose to set a default value, and whether the custom field is mandatory or not.
For example, if you are working with several browsers, you can add a custom list field that will allow you to choose from a list of browsers you support.
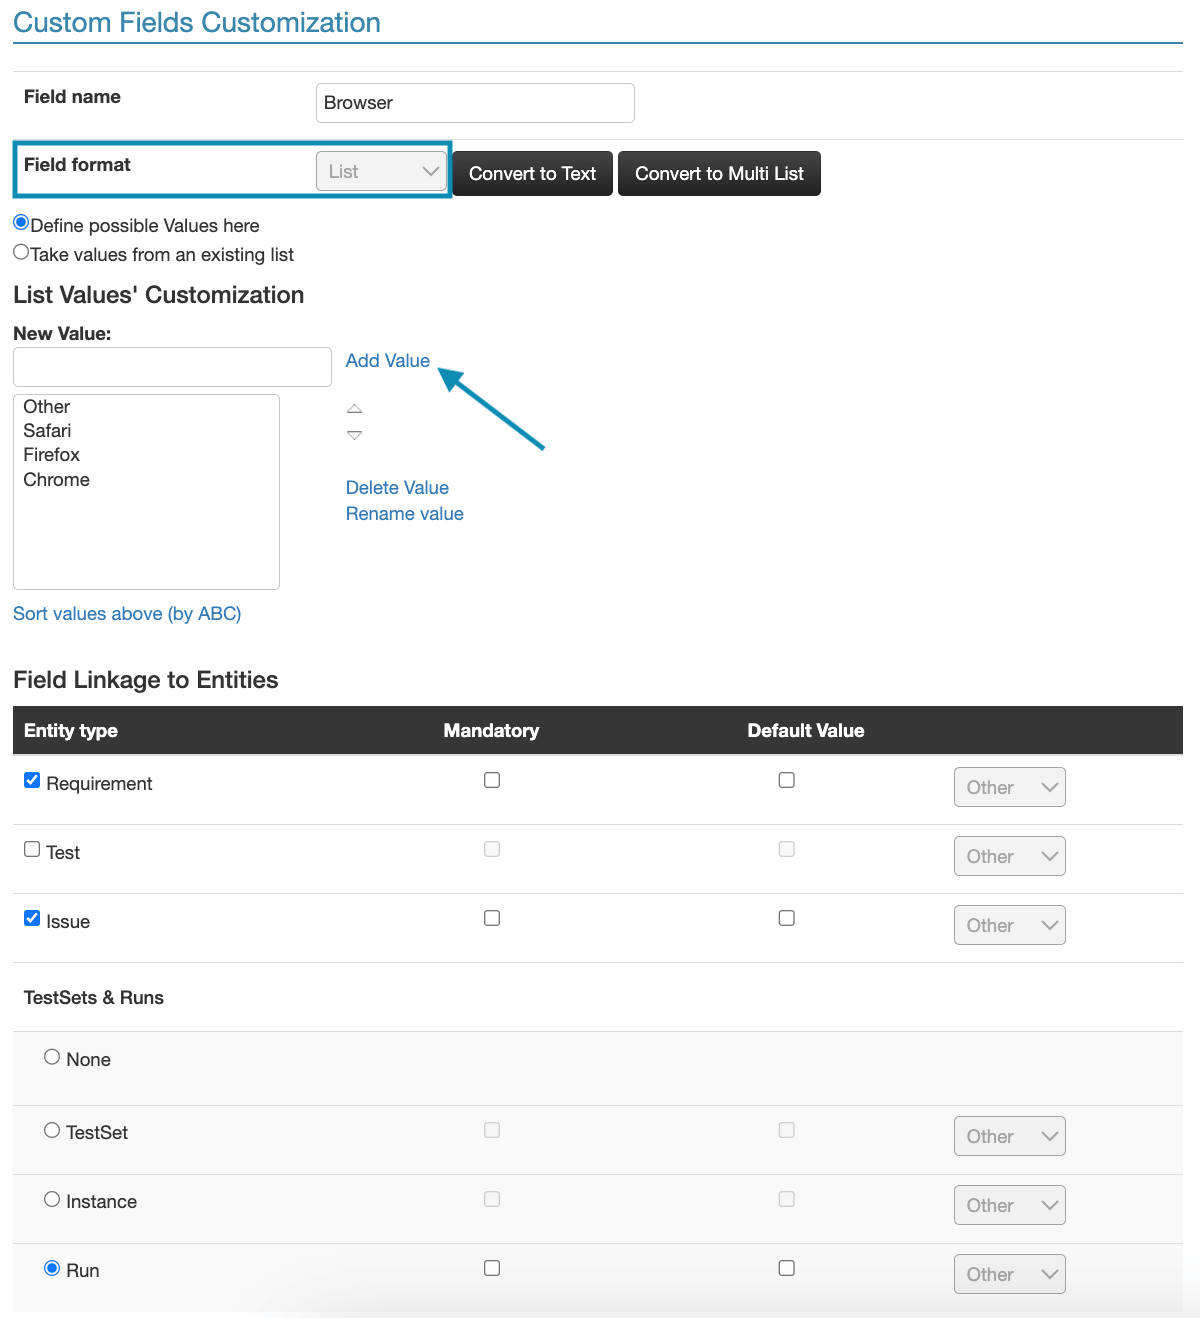
Once you add the relevant list values (in this example, Chrome, Firefox, Safari, and Other), select the entities where you would like this field to be available for use. We have chosen to make this field visible in Requirements, Issues, and Runs. You can only choose one of the Test Sets & Runs entities in order to avoid confusion and misuse of the fields.
*Note: You can add new values to your list fields directly from the entities.
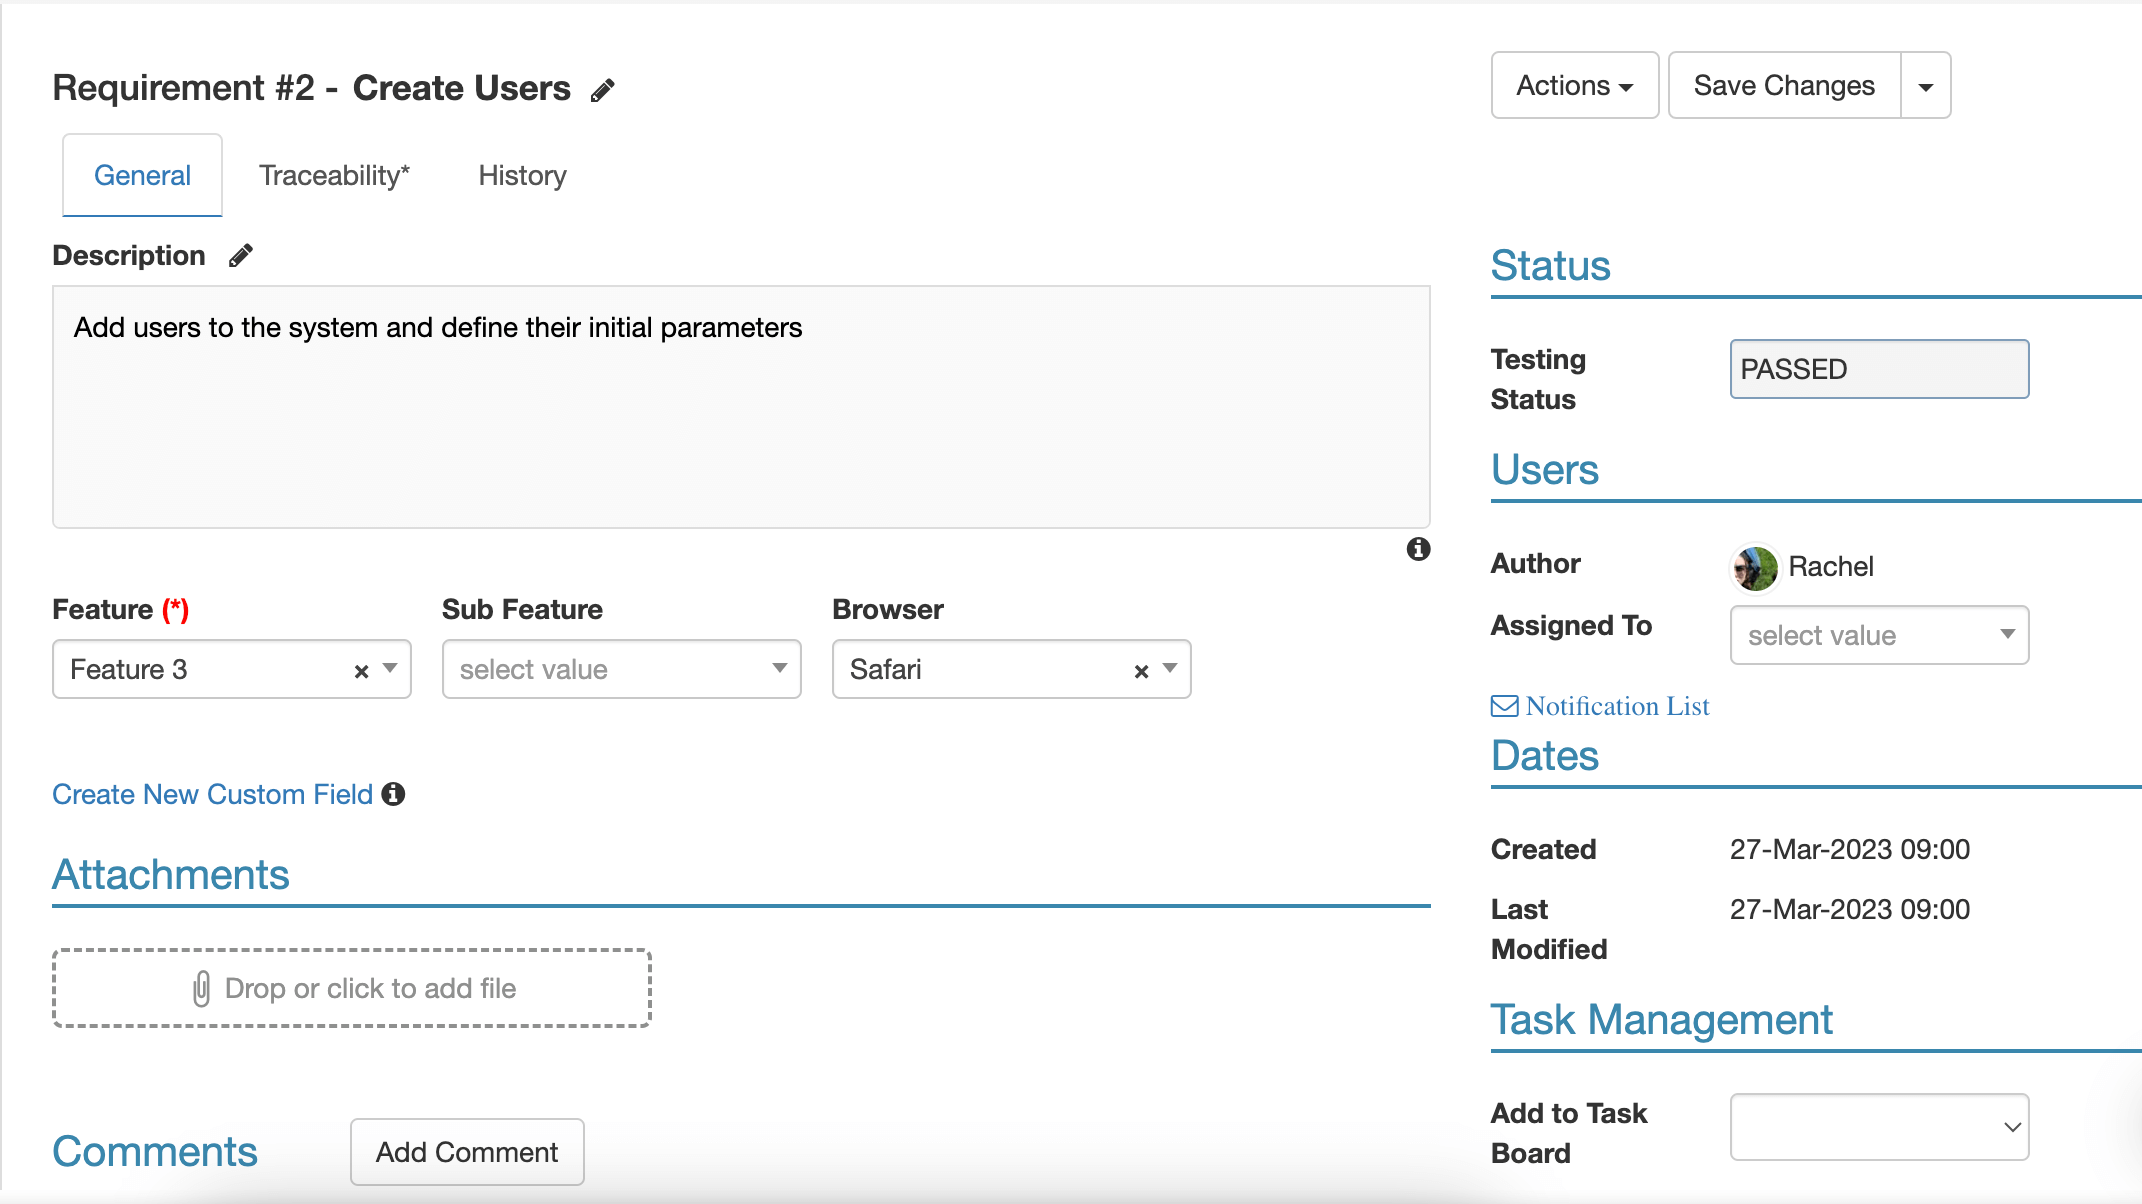
Below you see how this custom field is displayed inside the issue. A mandatory field will be marked by a red asterisk (*).
Linked List Field
The Linked List Field enables you to specify a set of “child-lists” with different sets of values for another list defined in the system.
For example, if you test on different browsers, you may want to define list of browsers, such as Chrome, Firefox and Safari, as we did in the List Field example. Then, for each browser type, you can define a list of available versions. Chrome will have versions 28, 29, 30, Firefox will have versions 31, 32, etc.
Here we create the linked-list field for the Browser field we created earlier. Each browser type has its relevant versions.

Later, when you choose a browser from the browsers list, the “Browser Version” linked-list will show you the relevant values only.
Changing the Fields’ Display Order
At the bottom of the custom fields settings screen, under the title “Custom Fields Display Order Customization”, you can modify the order of the fields shown when viewing details for an issue, test, or requirement, as well as for test runs and test instances. To reorder the fields, click on the relevant module (for example, issues) then simply drag and drop the fields in the desired order.